
How to Remove WordPress Default Image Sizes
When you upload an image to a WordPress site, the server automatically converts it to different image sizes. By default, WordPress is configured with three custom image dimensions. This means that after uploading an image, WordPress automatically creates copies of it in different sizes. However, this isn’t always necessary and takes up space in your server. So, in this guide, we’ll show you 2 methods to remove WordPress default image sizes from your site.
Why remove default image sizes in WordPress?
By default, when you upload images to WordPress, the server generates copies of them in 3 different sizes:
- Thumbnail – 150 x 150 pixels
- Medium – 300 x 300 pixels
- Large – 1024 x 1024 pixels
Even though this can be useful, it also takes up space in your server. So, if you don’t need so many image sizes, it’s a good idea to disable them on your site. For example, if you aren’t going to use the medium size image on your site, you can remove it and stop generating image copies of that size.
How to disable WordPress default image sizes
Here, we are going to show you 2 beginner-friendly methods to disable default image sizes in WordPress.
- Manually via WP-Admin
- Programmatically via coding
They’re both simple and effective so choose the one that best suits your skills.
NOTE: Before removing the default image sizes, make sure that you are not using the sizes you’re going to disable on your site. Remember to check blog posts, featured images, and so on.
1) Manually via WP-Admin
This is the simplest way to remove default image sizes from WordPress. With a few mouse clicks, you will be able to disable the image sizes you don’t need from your site.
The first thing you need to do is log in to your website and go to the Media Settings.
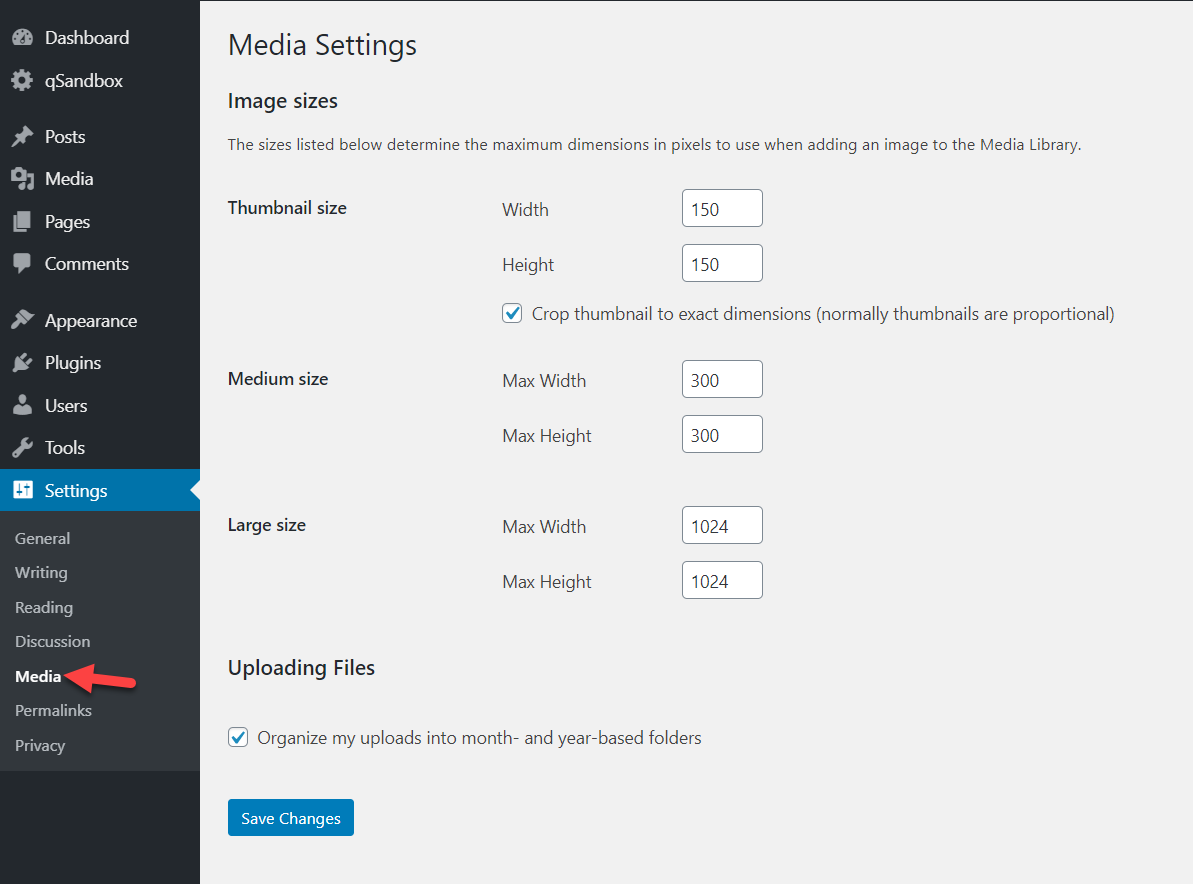
There, you will see the three default sizes we mentioned above (thumbnail, medium, large) and their dimensions. So, to remove them, simply change the values to 0 and update the settings.
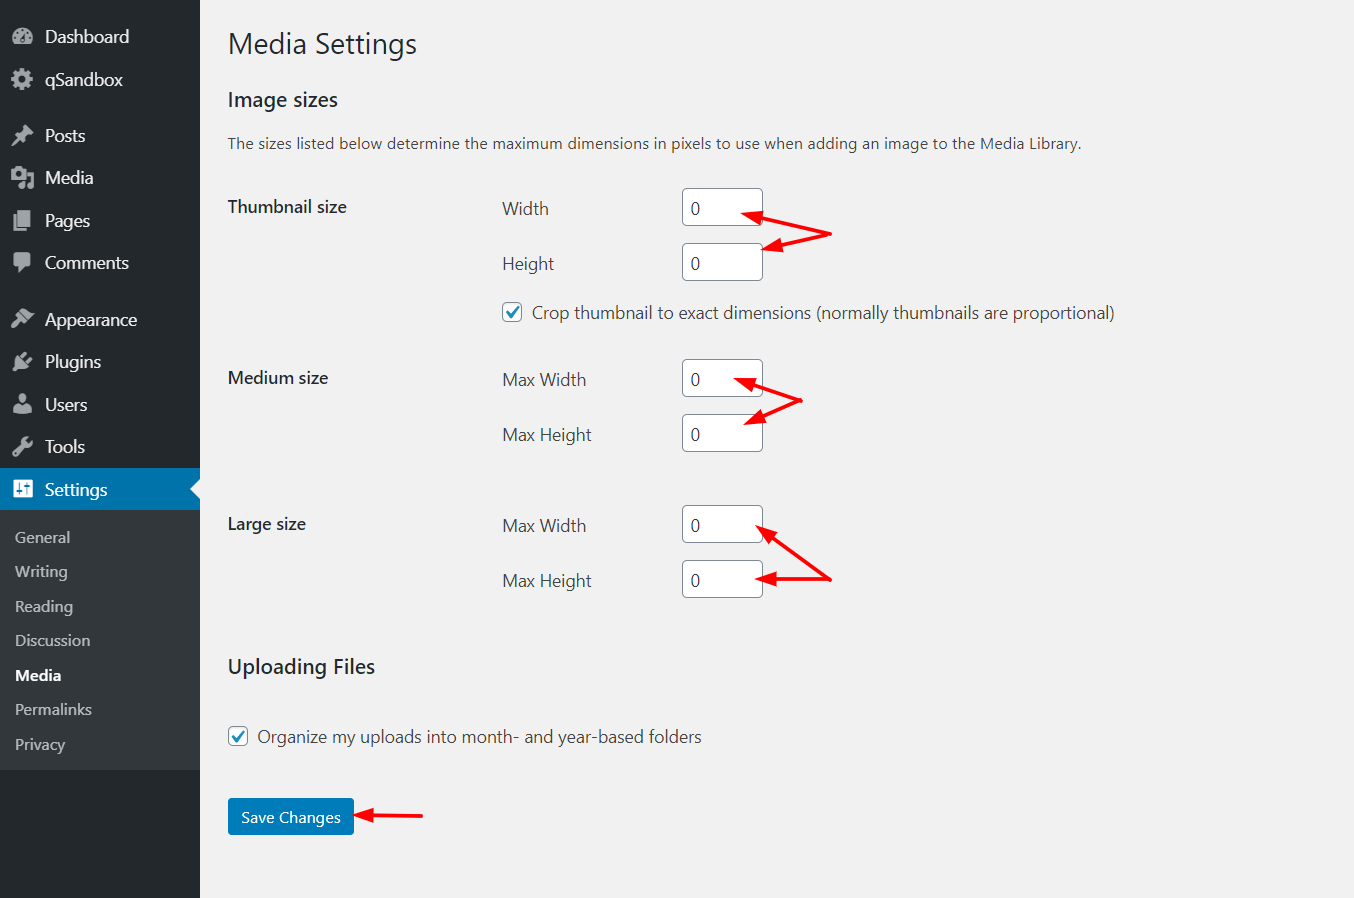
Once you hit the Save button, you are good to go. From now on, when you upload new images to your server, it won’t create copies of those image sizes that you have just disabled.
You can do this for all three default sizes or specific ones. Keep in mind that if you set all the values to 0, you will only save the original image.
2) Programmatically (Coding)
If you have coding skills, we have got another solution for you. In this section, we are going to show you a snippet that will allow you to remove the default image sizes from WordPress.
As you will need to edit your theme’s functions.php file, we recommend you use a child theme. If you don’t have one, you can either create one following this step-by-step guide or use a plugin to generate a child theme in a couple of clicks. Additionally, we recommend you generate a complete backup of your site for security reasons.
To edit the functions.php, you can use the Theme Editor in your WordPress dashboard or a plugin. For this demo, we are going to use a free plugin called Code Snippets. This tool works as a site-specific plugin and allows you to add custom PHP, HTML, JavaScript, and CSS codes to your site without editing the theme’s files.
Remove all default image sizes
To remove all WordPress default image sizes via coding, first, install and activate the Code Snippets plugin. After that, go to Settings.
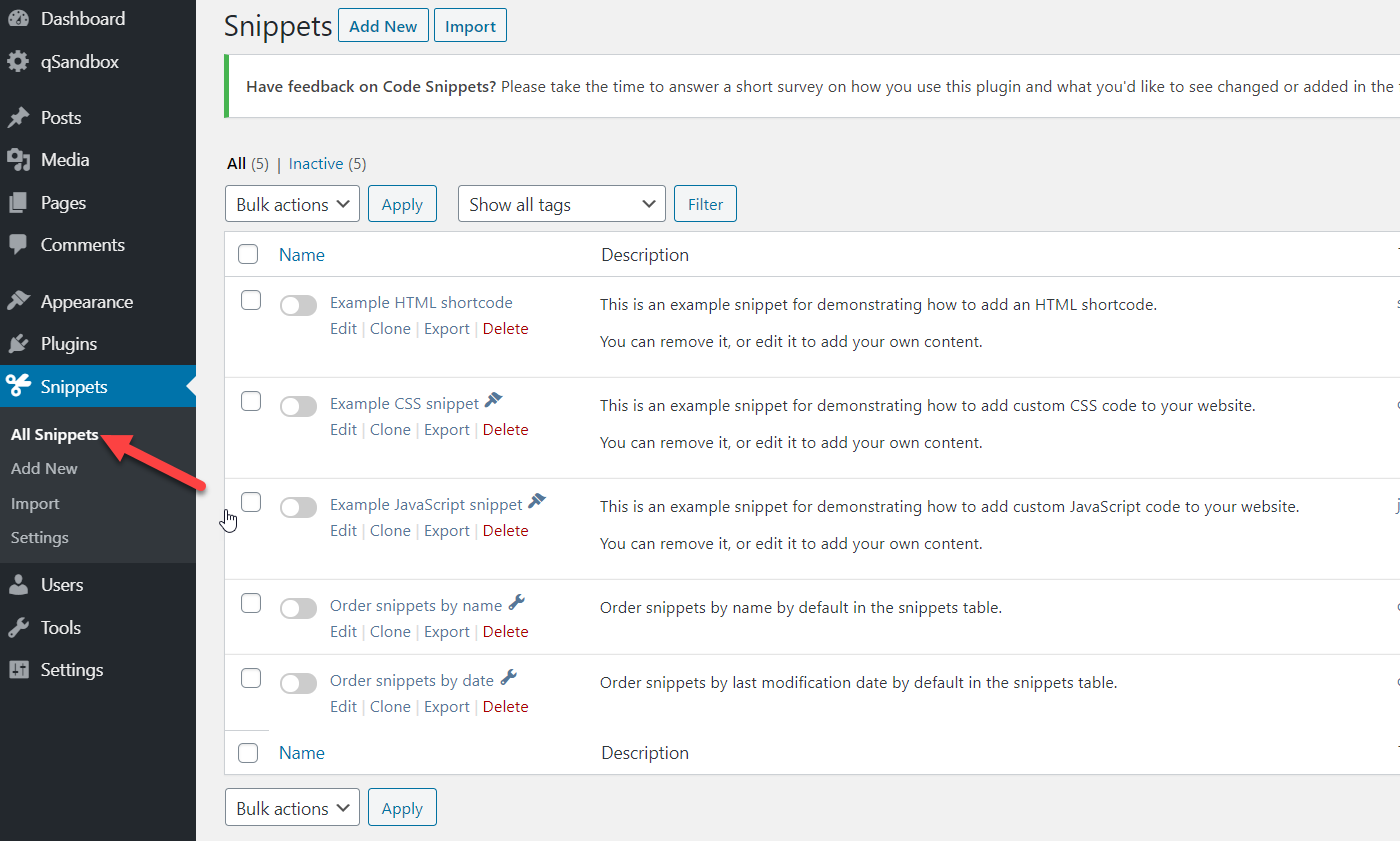
Click the Add New button and you will see an editor where you can add custom codes.
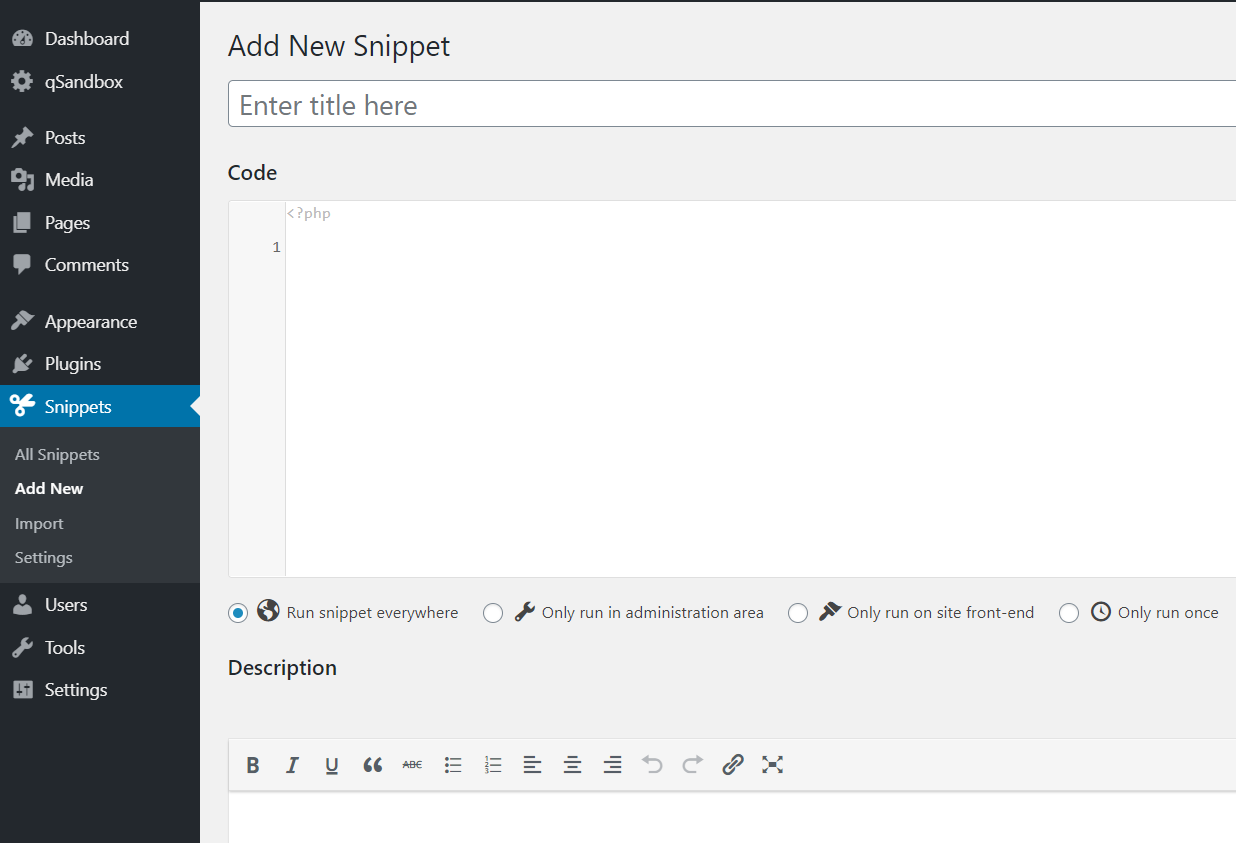
To do this, first name your snippet. Then, copy the code from below and paste it into the editor.
add_filter( 'intermediate_image_sizes_advanced', 'prefix_remove_default_images' );
// This will remove the default image sizes and the medium_large size.
function prefix_remove_default_images( $sizes ) {
 unset( $sizes['small']); // 150px
 unset( $sizes['medium']); // 300px
 unset( $sizes['large']); // 1024px
 unset( $sizes['medium_large']); // 768px
 return $sizes;
}
After that, press Save and activate.
You have successfully removed all the image sizes mentioned in the code from your server. If you take a closer look at the snippet, you have disabled 4 image sizes.
- Small
- Medium
- Large
- Medium_large
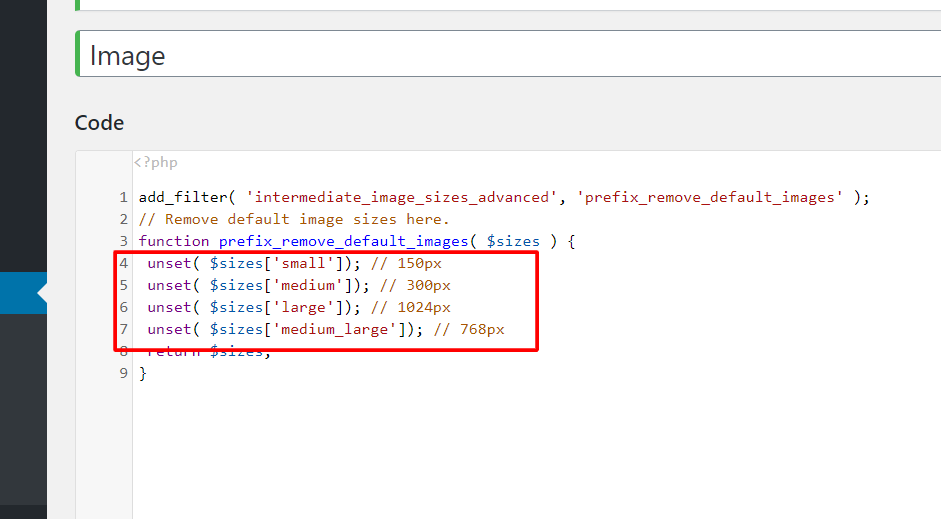
The first three are the default image sizes in WordPress. However, some themes and plugins will also register custom images so in this example we’ve also disabled the medium_large images.
Remove specific default image sizes
Now, let’s say that instead of removing all the default image sizes, you only want to disable the medium and large sizes. The code would be something like this:
add_filter( 'intermediate_image_sizes_advanced', 'prefix_remove_default_images' );
// This will remove the default image sizes medium and large.
function prefix_remove_default_images( $sizes ) {
 unset( $sizes['medium']); // 300px
 unset( $sizes['large']); // 1024px
 return $sizes;
}
As you can see, the code is very easy to edit so you can customize it and remove the default image sizes you need.
How to remove WordPress default image sizes from existing images
It’s important to note that when you disable the default image sizes in WordPress either from the WP-admin or via coding, the old images aren’t removed from your server. You’re not deleting those image sizes but preventing WordPress from generating copies of the images in those sizes.
However, you can remove the default image sizes from existing files manually. To do this, check out our guide on removing thumbnails from WordPress.
Bonus: Add and change custom image sizes in WordPress
What if you want to add or change customized image sizes on your site instead of removing them? You can do that manually or with plugins. For more information about this, check out our guide on how to add and change image sizes in WordPress.
Conclusion
All in all, keeping image sizes you don’t need isn’t a good idea because they take up space on your server. We recommend you remove default image sizes in WordPress to optimize your media library.
There are two ways to do that:
- From the WP-Admin
- Via coding
Both methods are easy and effective. If you don’t have coding skills, you can edit the default image sizes from the Media Settings page and disable the ones you don’t need in a few clicks. On the other hand, if you prefer to build your solution, you can use and adapt the PHP script. Finally, before changing the functions.php file, remember to use a child theme or a site-specific WordPress plugin.
We hope you have enjoyed this article and found it useful. If you did, please share it on social media!
Which method do you prefer to disable the default image sizes? Do you know of any others? Let us know in the comments below.

Hello, I got to learn many new things from this article about wordpress image sizes. I got all the beneficial information which I was looking for. Thank for presenting enlightening article.
Thanks Priya 🙂
This really helped me. Thanks For this article.
Thanks Zain
No way, I can’t remove the images automatically generated from media library uploads. I also set as 0 all the values into the Settings > Media > Image sizes but they’re still generating…
Hello Angelo.
Have you tried the plugin method?
The code doesn’t do anything. I added it in function.php, all sizes still exist.
add_filter(‘intermediate_image_sizes_advanced’, ‘prefix_remove_default_images’);
function prefix_remove_default_images($sizes)
{
unset($sizes[‘1536×1536’]);
unset($sizes[‘2048×2048’]);
unset($sizes[‘medium_large’]); // 768px
unset($sizes[‘woocommerce_single’]); //500
unset($sizes[‘woocommerce_gallery_thumbnail’]); //100
unset($sizes[‘woocommerce_thumbnail’]); //300
return $sizes;
}
The code doesn’t do anything, all sizes still exsist.
Please try cleaning the cache, Fredrik.
If the code is not helping you, try the plugin method.