
Do you want to customize your site and tweak the typography? In this article, we will show you how to change the font in WordPress to give your site a professional and stylish look.
Website typography matters. Not only does it give your site a certain style, but also can make or break the user experience. If your font isn’t user-friendly, visitors are more likely to leave your site.
The typography you use should match what you’re trying to communicate with your site. Does your site sell consulting services or is it a photography website? As you can imagine the themes and fonts these two websites will use are quite different.
You can see several free fonts to use inside the Google Fonts library. If you are looking for premium fonts like Proxima-Nova, you have to check out Typekit by Adobe. Both font libraries come with many user-friendly fonts that will suit your business.
How to Change Font in WordPress
There are several methods to change the font in WordPress:
- WordPress default options (Gutenberg/Classic Editor)
- Manually with CSS
- Using a dedicated plugin
- Hosting your own font
- Web font integration
In this guide, we will show you each method step-by-step so you can choose the best one for your site.
1) WordPress Default Options
By default, WordPress offers two options to customize the typography: with Gutenberg or using the Classic editor.
1.1) With Gutenberg
The latest version of WordPress comes with a brand new editor: the Gutenberg editor. It is an advanced tool that comes with several blocks and is very easy to use.
To change the font, open a post or page and select the text you want to modify.
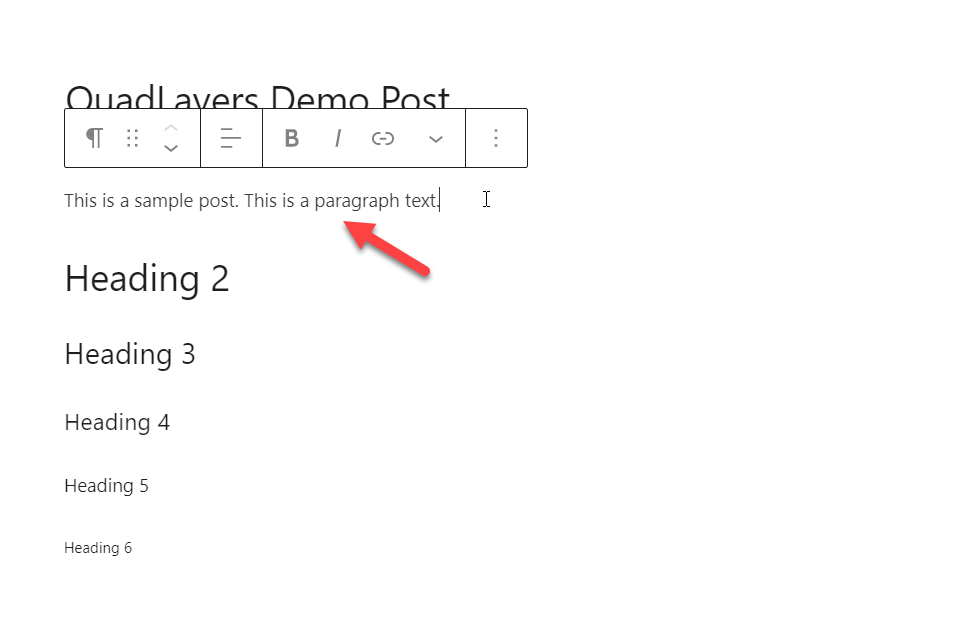
On the right-hand side, you will see the typography options.
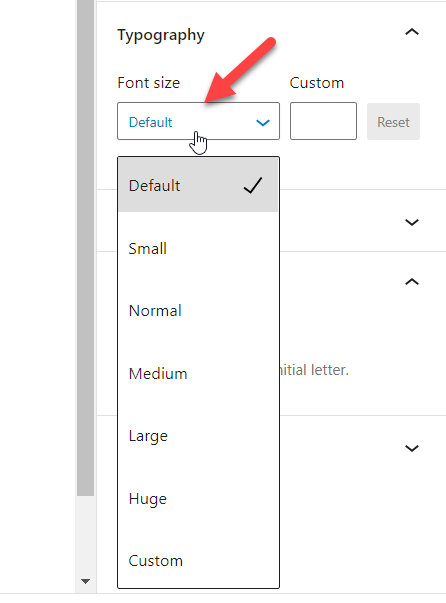
There, you will see several options to change the font size:
- Default
- Small
- Medium
- Large
- Huge
- Custom
You can choose any of these predefined sizes or add a custom one. For example, if we select 20px as the font size, we will see the changes in the editor.
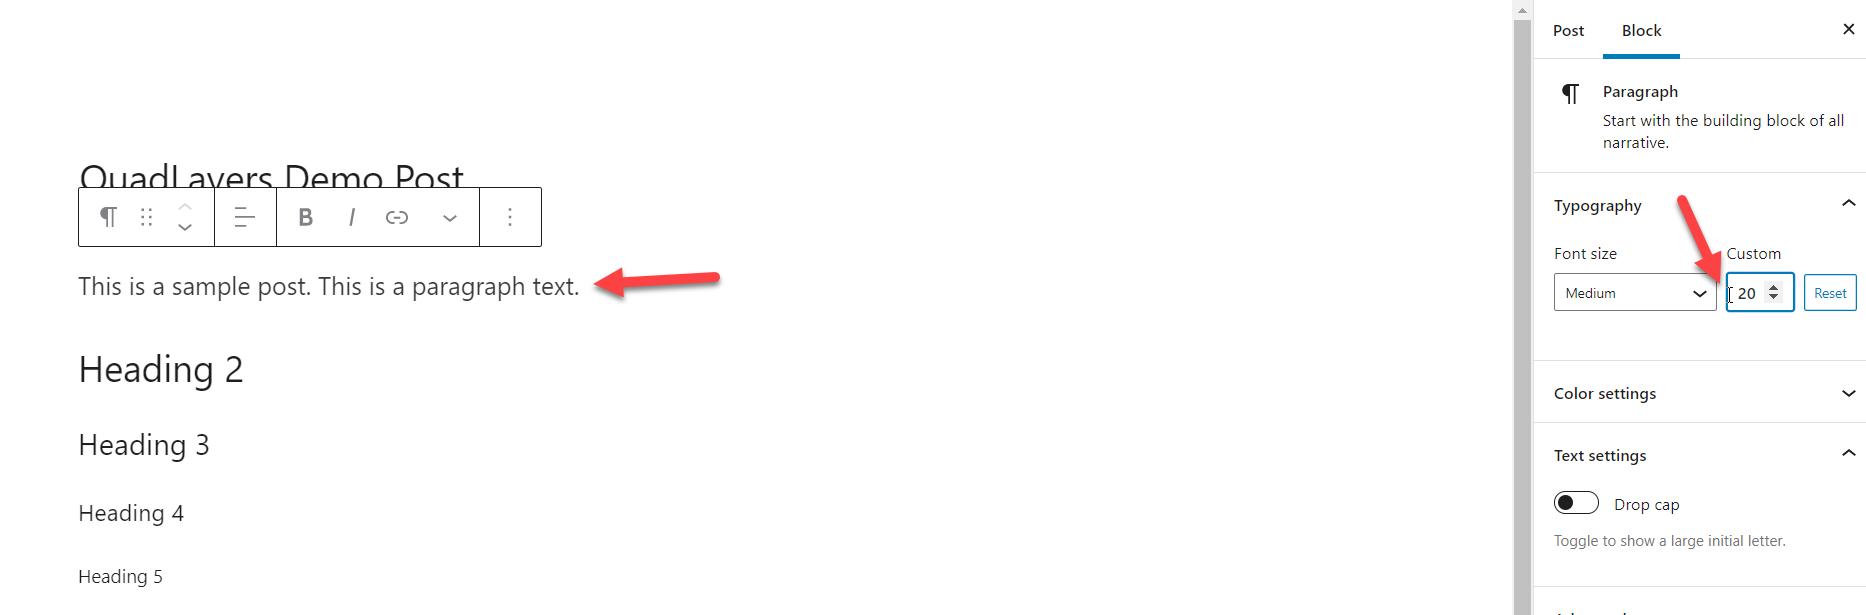
This way, you can easily modify your blocks and assign a custom font size to them.
1.2) Using the Classic Editor
If you prefer to manage your typography via the Classic Editor, you need to install and activate the Advanced Editor Tools (TinyMCE Advanced) plugin.

Once you have activated the plugin, open your content editor and you will notice several additional tools.

From the dropdown, you can change the font type and size. There are several Google Fonts and sizes that you can choose from to customize your site.
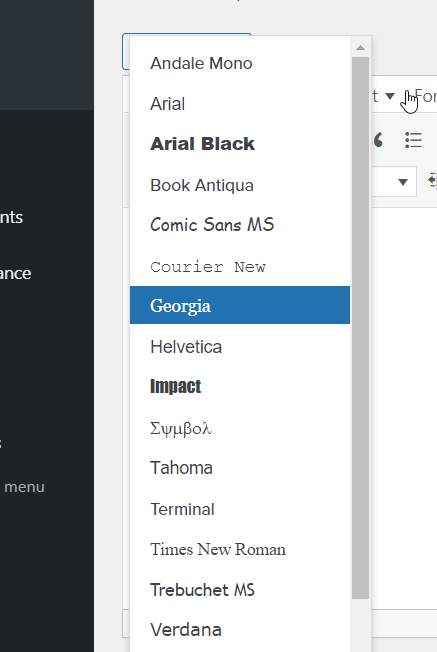
With these options, you can select any paragraph and choose any font and size from the dropdown.
2) Manually with Custom CSS Code
Another way to change your font in WordPress is by using custom CSS code. By default, themes come with a certain font size that applies sitewide. However, sometimes you may want to customize them to give your site a different style.
To do this, first, in your WordPress dashboard go to Appearance > Customize > Additional CSS. In this section, you can add custom code and edit your site.
Change body font
For example, to change your body font size site-wide to 16 px, you need to use this CSS code:
body {
 font-size: 16px;
}
Change paragraph font
Similarly, if you are looking for a way to adjust the paragraph font size to 16 px, you should use this CSS code:
p {
font-size: 16px;

}
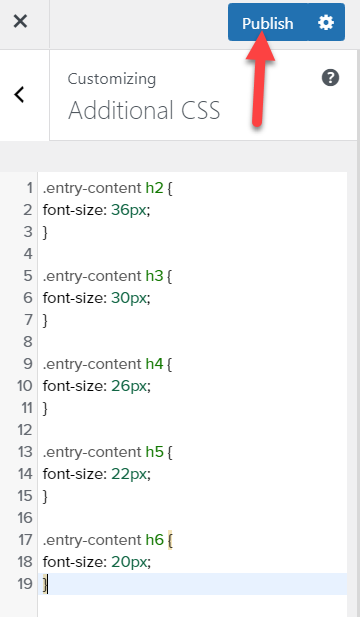
Customize headings font
On top of that, if you need to modify your headings’ font sizes, you can use the below code:
.entry-content h2 {
font-size: 36px;

}
.entry-content h3 {
font-size: 30px;

}
.entry-content h4 {
font-size: 26px;

}
.entry-content h5 {
font-size: 22px;

}
.entry-content h6 {
font-size: 20px;

}
These are just examples so make sure that you adjust the font size according to your needs. As we use the customizer to make these changes, you can see the changes live on the right-hand side.
Once you are happy with the customizations, save the changes and press Publish.
Change font family
Additionally, to change the font family site-wide, you can use this code:
* {font-family:"Verdana", Verdana, sans-serif}
The asterisk (*) will apply the change to the whole site, so if you just want to apply the changes to certain pages or posts, remove it from the code. For more information about CSS fonts, check out this site.
On top of that, you can also change the font style. For example, if you want to make the headings 2 and 3 italics, use this code:
h2, h3 {
 font-style: italics;
}
If you want to apply similar changes to your theme, you can write your code directly on the style.css file of your child theme. Keep in mind that this will apply changes site-wide so make sure that you create a full backup of your site before proceeding.
3) With a Plugin
You can also change the font in WordPress with a dedicated plugin. In this section, we will show you how to integrate Google Fonts with your site. The first thing you need to do is install and activate the Easy Google Fonts plugin.
After that, you can change your website’s font. Go to Appearance > Customize and from the Customizer, you will be able to take control of your website’s typography. On the left-hand side, you will see a new customization option called Typography.

Select it and you will see a screen with several options to change the whole typography for paragraphs and headings.
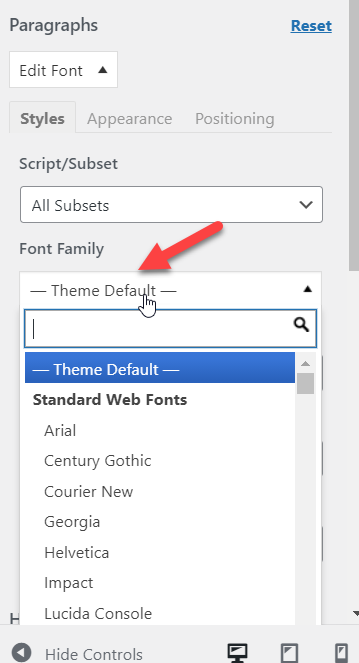
Let’s say you want to change your paragraph font, so open the Edit Font option.
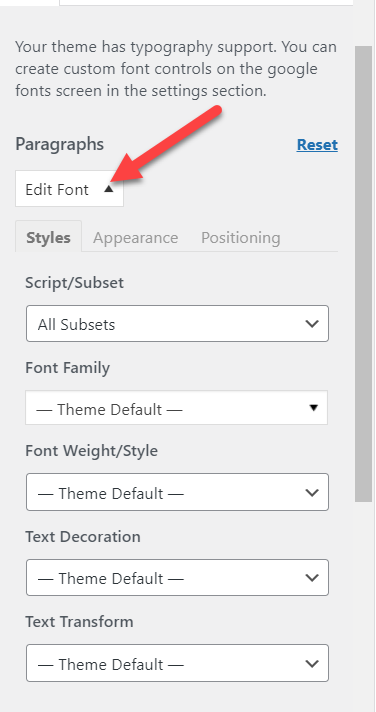
From there, you can change:
- Script/Subset
- Font family
- Font weight
- Text decoration
- Text transformation
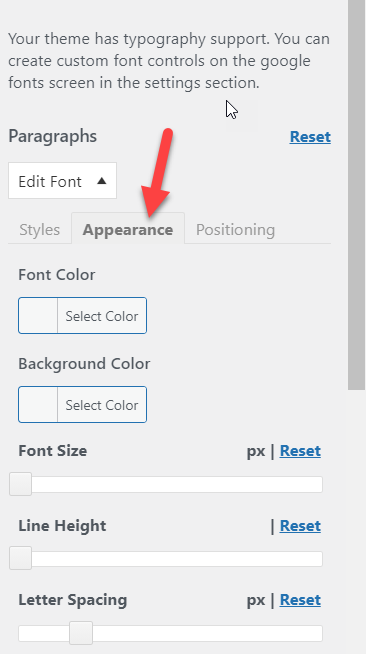
If you need to change your font appearance, go to the next tab where you can change:
- Font color
- Background color
- Font size
- Line height
- Letter spacing
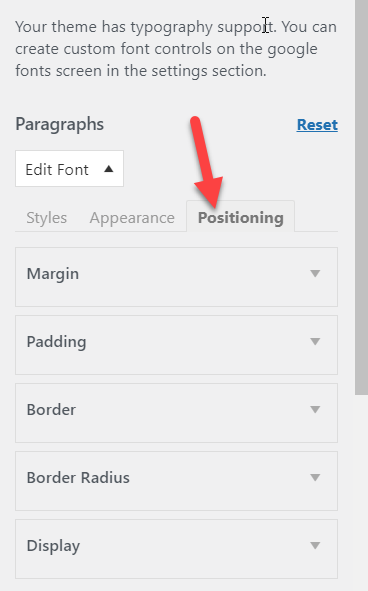
Finally, from the Positioning tab, you can customize:
- Margin
- Padding
- Border
- Border Radius
- Display
Changing the font
These customization options are great to take your typography to the next level. For example, let’s say you want to change the font family on your WordPress site. From the Styles tab, choose the font you would like to use.
If you have a specific font family in mind, you can use the search feature. For this demo, we will use the Work Sans font.
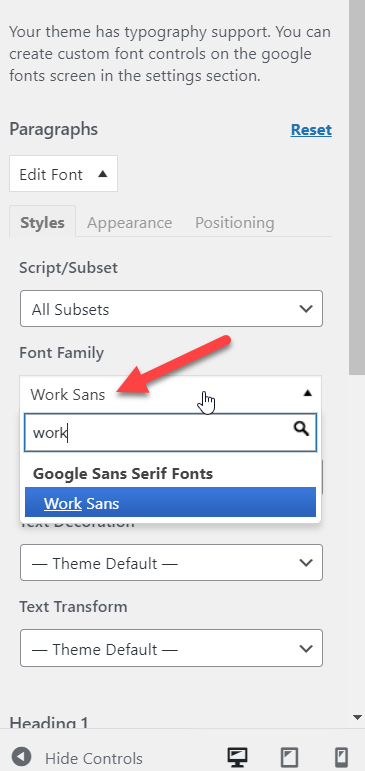
Since we use the WordPress Customizer to make these changes, every update will be visible in the live preview. For example, when we change the default theme font to Work Sans, we can see the changes in real-time.
Similarly, you can also modify the font-weight, text-decoration, and transformation, as well as your headings.
Once you are done with the paragraph font customization, move to the Heading 1 font options. You can choose any heading from the list but for this tutorial, we will focus on Heading 1.
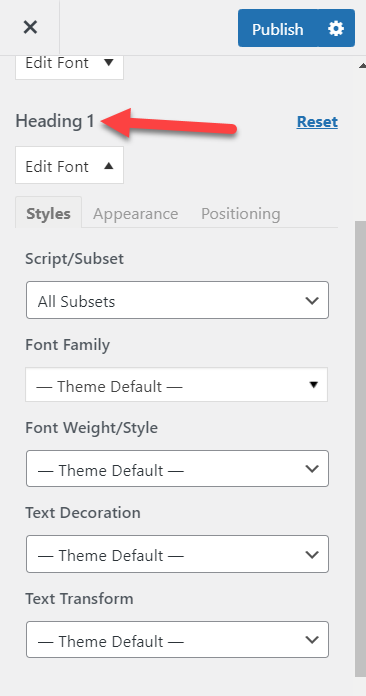
Just like we did before, we’ll change the font family. In this case, we’ll select Roboto Slab.

By following this simple method, you can change your paragraph and heading fonts. As this plugin comes with most Google Fonts integrated, you have plenty of options to choose from. On top of that, the styling customization options are extremely easy to use making the whole process accessible for every user.
4) Hosting Your Own Font
If you have some custom fonts on your local computer, you can host them on your web server. In this section, we’ll show you how you can host your own font and change your typography in WordPress.
To do this, you will need to access your web server’s file manager to create custom folders and upload the fonts. If you are using any of the most popular WordPress hosting companies, you probably have access to an easy-to-use cPanel. Alternatively, if you are using a managed hosting service like Kinsta or WP Engine, you will have to use an FTP client such as FileZilla or a dedicated file manager plugin.
For this demo, we will use a staging environment, so changing the core files and uploading custom files will be quite easy.
Before uploading your fonts directly to your theme folder, to make things easier to manage, you should create a new folder called fonts. Then you can upload all your custom fonts to this folder for easy accessibility.
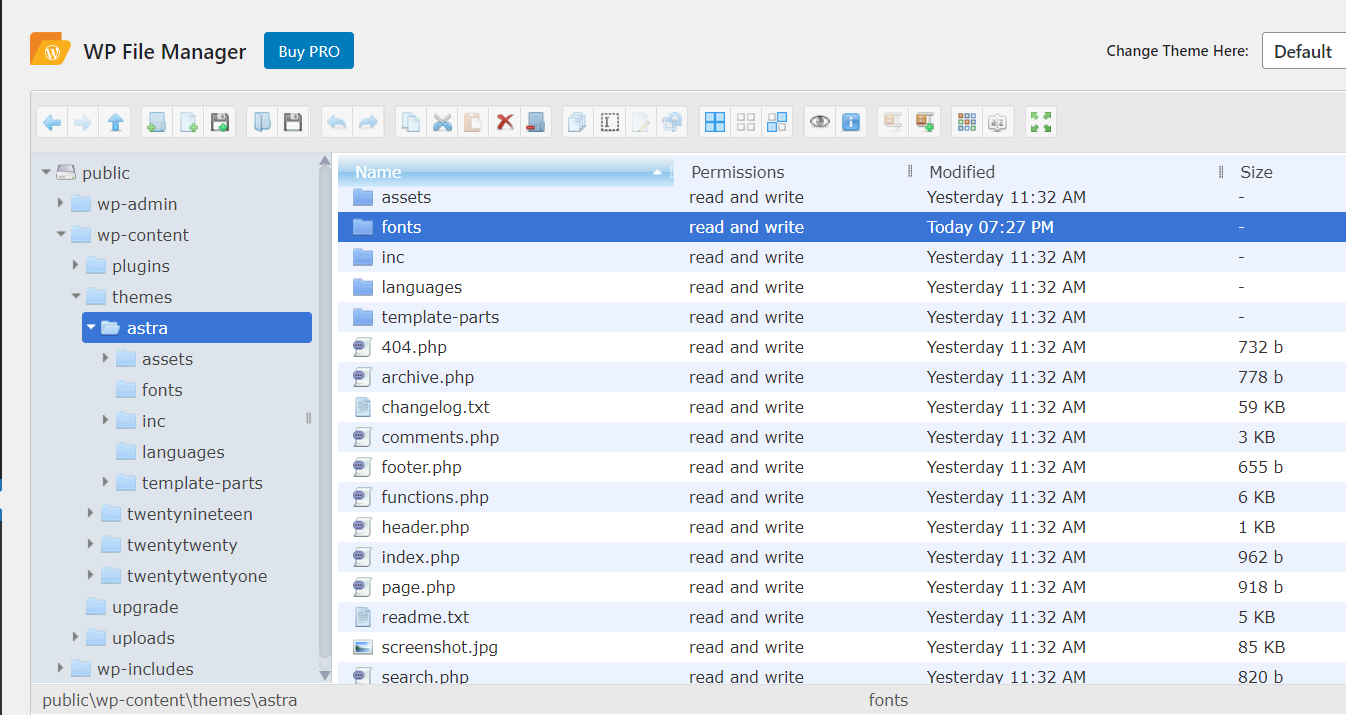
Once you have created the folder, open it. Here is where you are going to upload your custom font files.
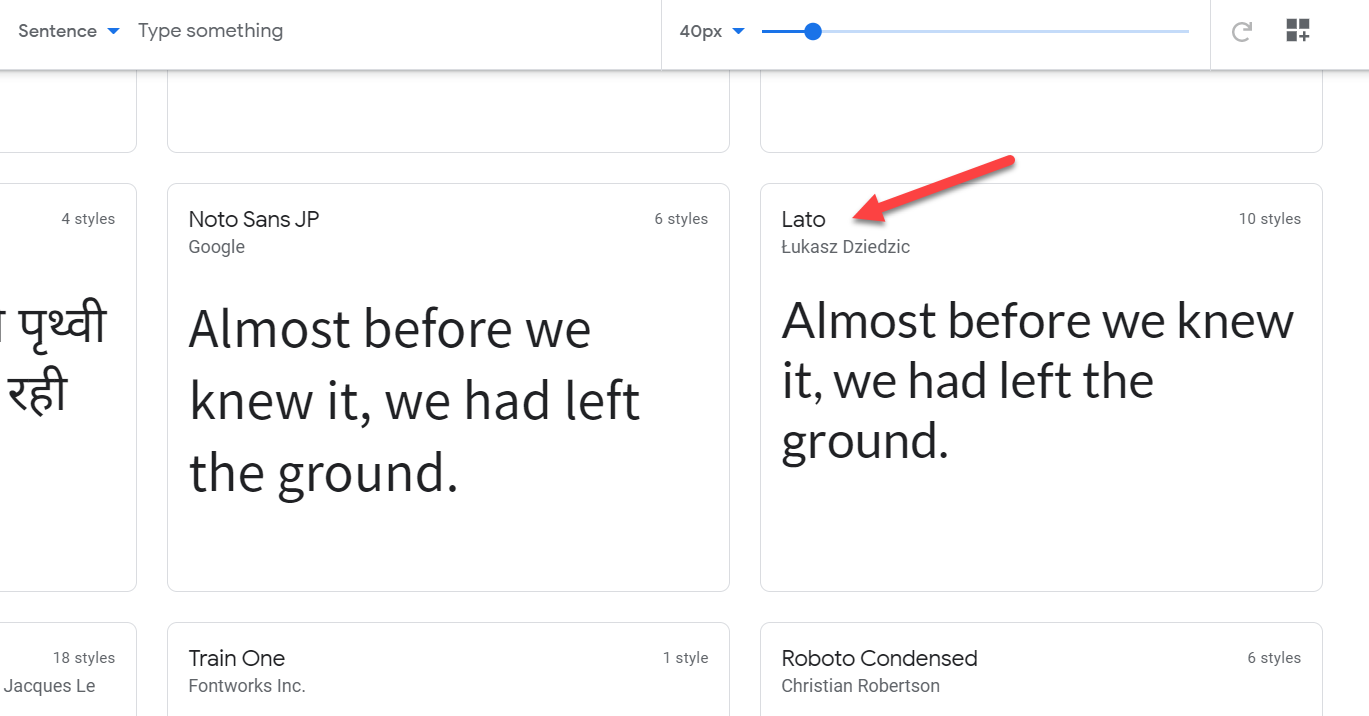
Now, you need to find the fonts you are planning to use. For this demonstration, we will use Lato, a font file from Google Fonts, but you can choose any font you like.
Once you have selected a font, you will be redirected to its dedicated page and you will see a Download family button there.
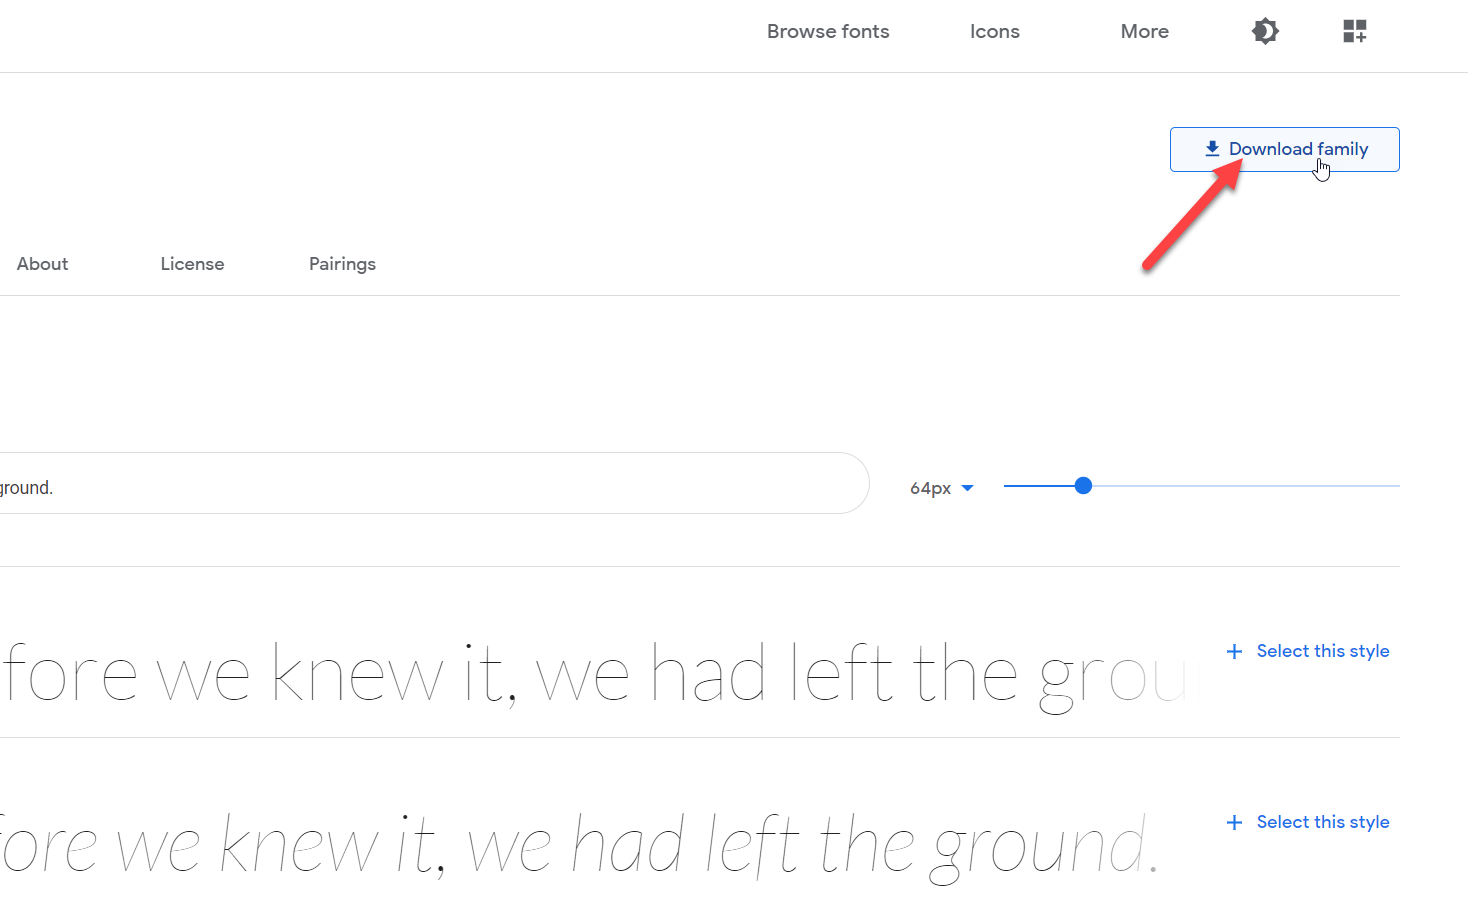
After you press that button, the font family will be downloaded to your computer as a .zip file. Unzip it and upload the files to your fonts folder.
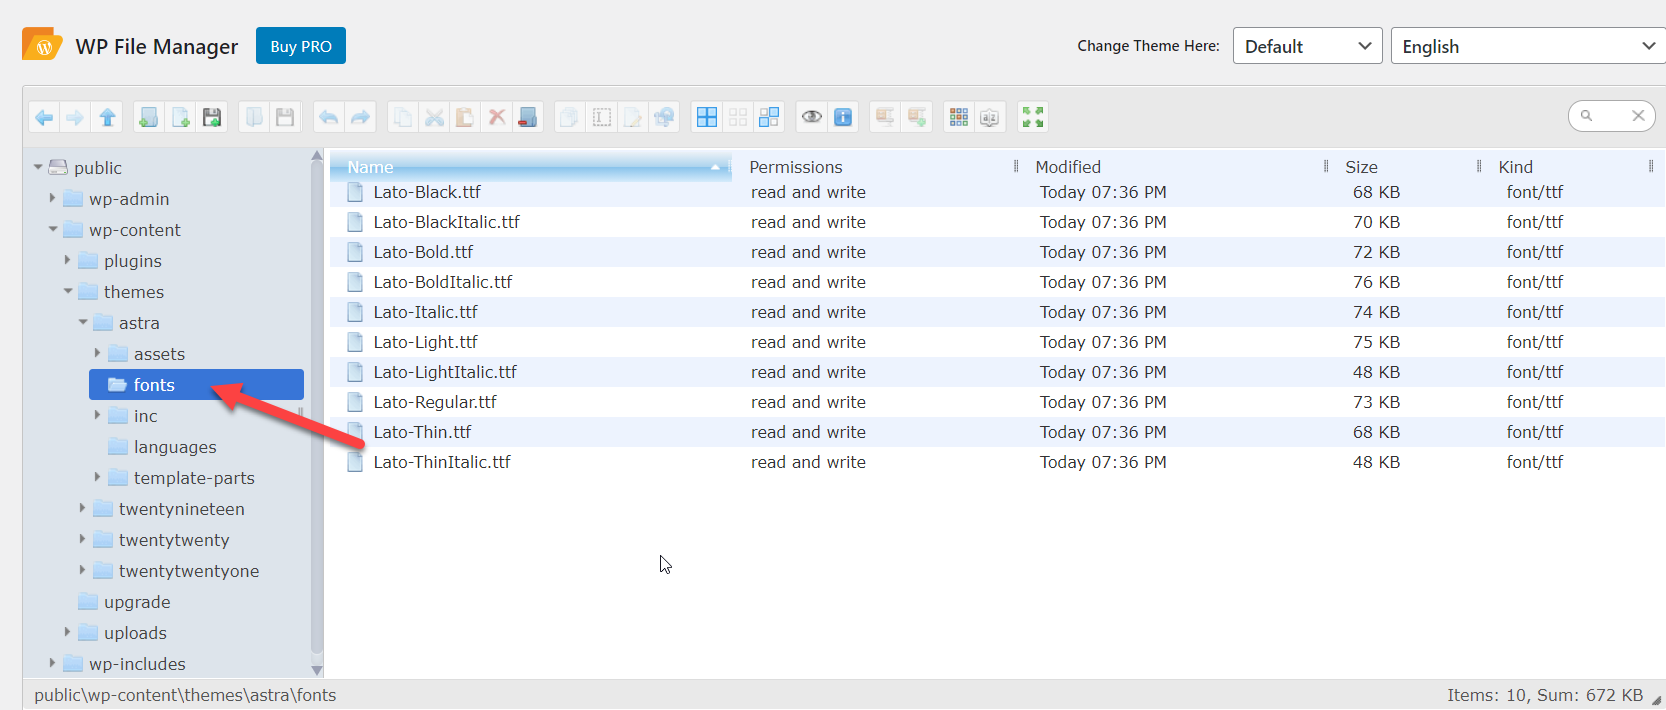
That’s the first step. Now let’s see how to take it a step further and integrate your font with your theme.
Integrate your font with CSS
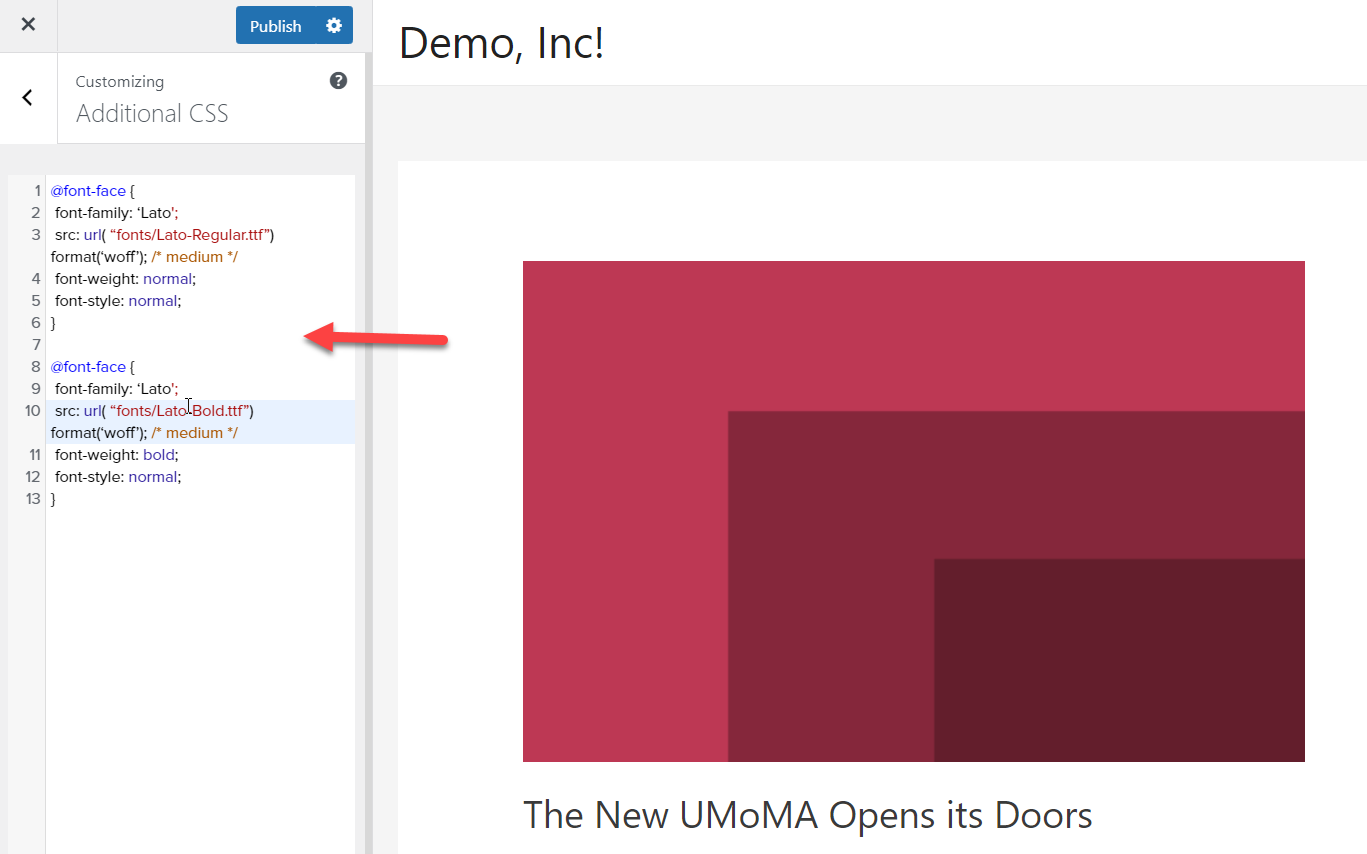
Now, you can start integrating this font with your theme with a little bit of custom CSS. Open the WordPress Customizer, go to the Additional CSS section, and copy the CSS code from below.
@font-face {
 font-family: ‘Lato';
 src: url( “fonts/Lato-Medium.ttf”) format(‘woff’); /* medium */
 font-weight: normal;
 font-style: normal;
}

@font-face {
 font-family: ‘Lato';
 src: url( “fonts/Lato-Bold.ttf”) format(‘woff’); /* medium */
 font-weight: bold;
 font-style: normal;
}
If you take a look at the CSS code, you’ll see that it mentions three main things.
- The font family
- Source URL
- Font weight
When you paste this CSS code to your Customizer, you will need to update some sections depending on the font you chose. First, you need to update the font family. In our code, Lato is the font family, so you need to replace it with your chosen font. You can find the font family in the header.
After that, you need to adjust the path to the font. If you have followed the steps described above, you have uploaded the font files inside a folder called fonts. So simply change the line src: url( “fonts/Lato-Bold.ttf” with fonts/your-font-name.ttf, and you are good to go.
Additionally, you can change the font-weight according to your needs. If you are using the font for paragraphs, a normal font weight will do the job but you can also change the values.
On top of that, you can change your heading font with the following CSS code:
h1 {
 font-family: 'Lato', Georgia, serif;
}
And if you want to change your paragraph font, use this CSS code:
p {font-family: 'Lato', Georgia, serif;
}
On the other hand, if you need to change your whole website font, use this CSS code:
body {font-family: 'Lato', Georgia, serif;
}
This way, you can easily change the font in WordPress. As you can see, it’s a beginner-friendly method that’s easy to apply regardless of your coding knowledge.
5) Web Font Integration
Integrating web fonts is another easy way to customize the font in WordPress. Instead of hosting the fonts on our server, we will call third-party fonts through a unique link, serving the font. The good thing about web font integration is that you don’t need to manually host any fonts and rely on any FTP software.
For the web font integration, first, go to Google Fonts and select a font and style that you like.

On your right-hand side, you will see a code to embed the font. Copy it.

In our case, the font code is:
<link rel="preconnect" href="https://fonts.gstatic.com">
<link href="https://fonts.googleapis.com/css2?family=Spartan&display=swap" rel="stylesheet">
Then, you need to edit your themes’ functions.php file to call the font. But before that, you will have to adjust the code. All you need is the font family URL which in our case is:
https://fonts.googleapis.com/css2?family=Spartan
Once you get the URL, open your theme’s functions.php file. You can either use a child theme or a plugin to modify the theme core files. Then, paste the following code.
function quadlayers_add_google_fonts() {
wp_register_style( 'googleFonts', 'https://fonts.googleapis.com/css2?family=Spartan');
wp_enqueue_style( 'googleFonts');
}
add_action( 'wp_enqueue_scripts', 'quadlayers_add_google_fonts' );NOTE: Make sure to change the URL with the font you chose.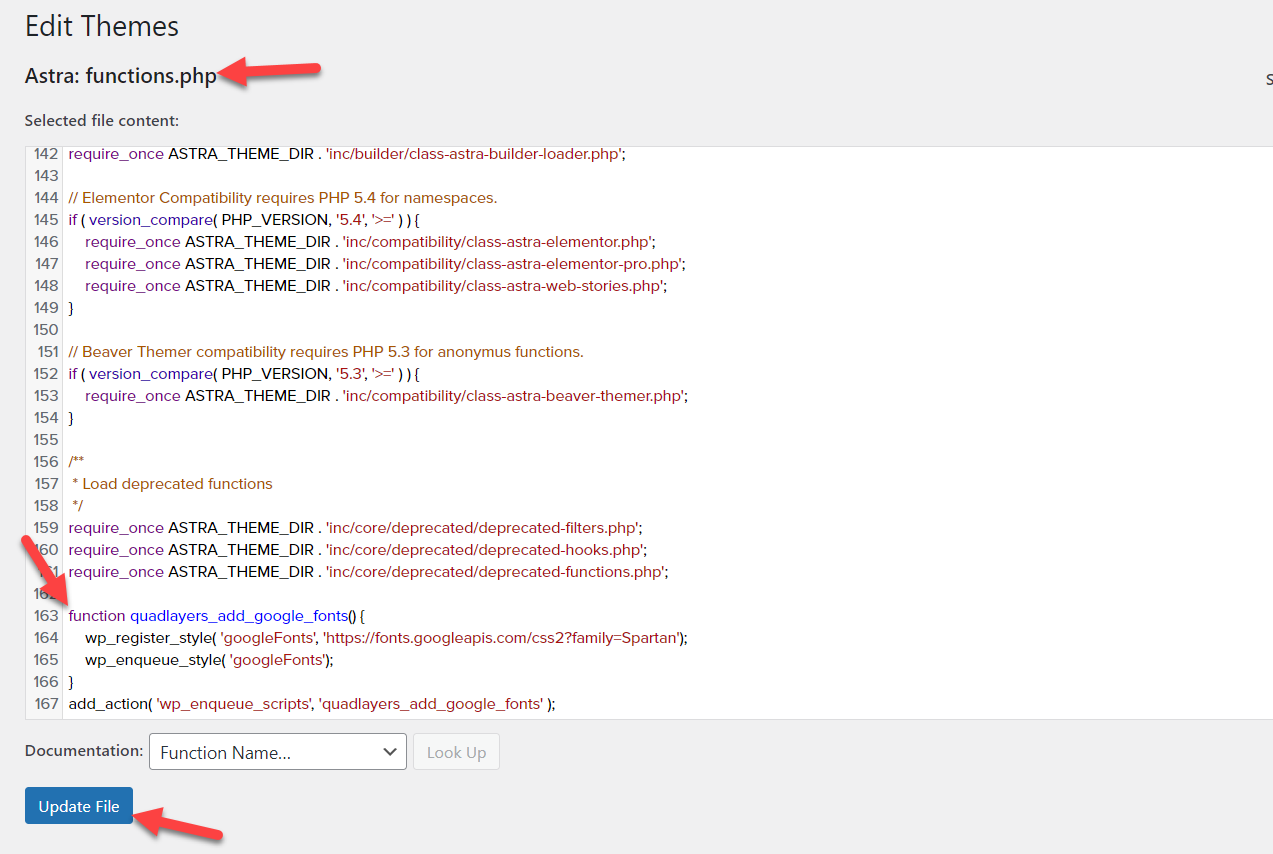
After updating the file, you will have successfully integrated the font with your website. Now, you can use CSS code to specify the font. As we did before, to change the body font, you can use this code:
body {font-family: 'Spartan', Georgia, serif;
}
After that, update the font family according to your Google Font and you are done.
We have seen different methods to change the font in WordPress. But that’s not all. You can also take it a step further and customize the fonts even more.
How to Add Custom Fonts to WordPress
Changing the fonts is a good start but if you want to stand out from your competitors and create a unique website, you may want to add custom fonts to your site. There are four ways to integrate Google Fonts with a WordPress installation.
- With a dedicated font plugin
- Modifying the functions.php file
- Editing the header.php file
- Via the style.css file
For more information on how to add custom fonts to your site using each of those methods, check out our complete guide.
Bonus: How to Change the Theme Font in Certain Areas
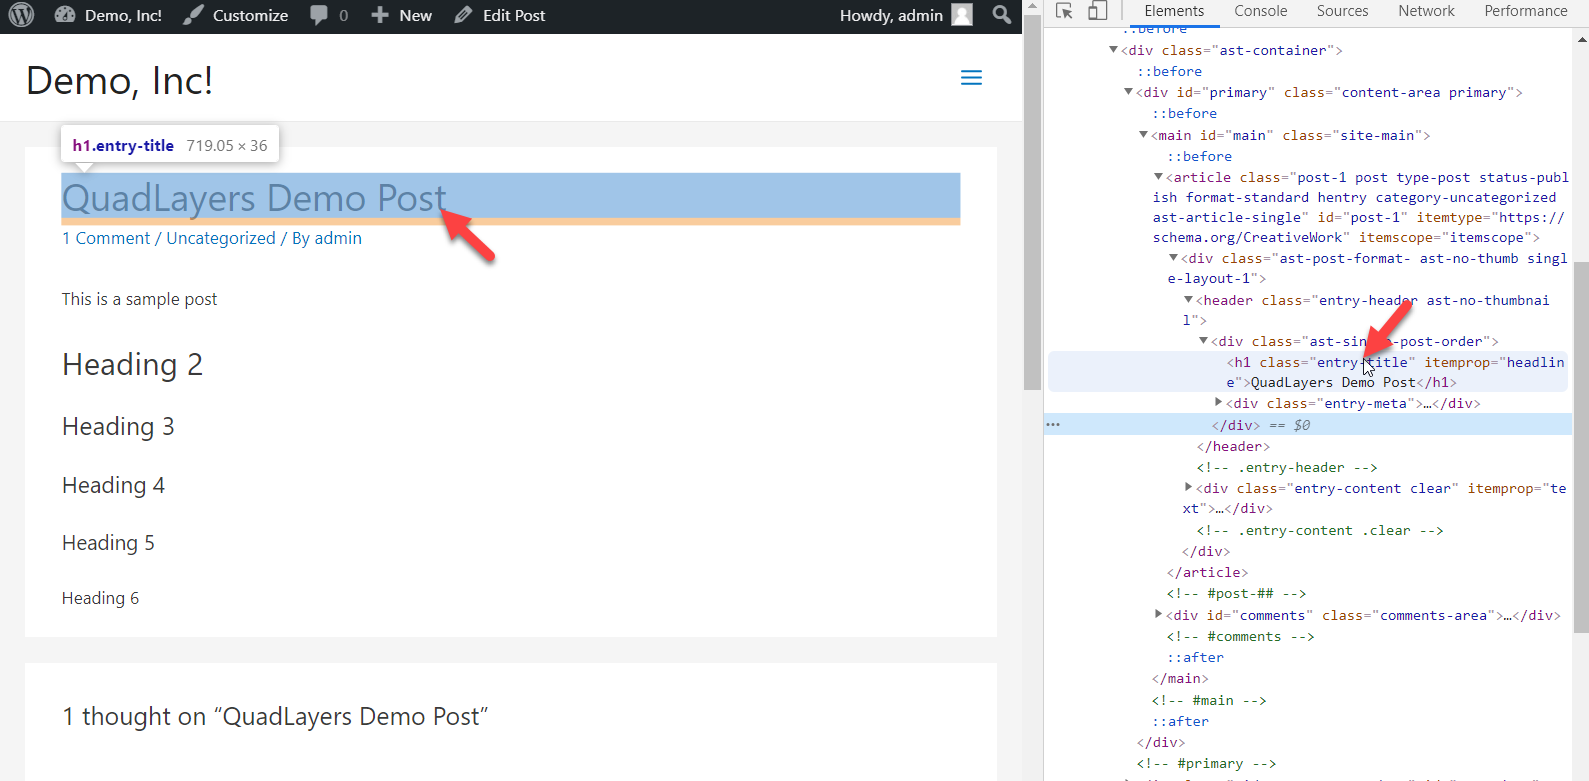
Instead of changing the font site-wide, you can apply the changes to certain areas. To do this, right-click on the page you want to change the font and select Inspect.
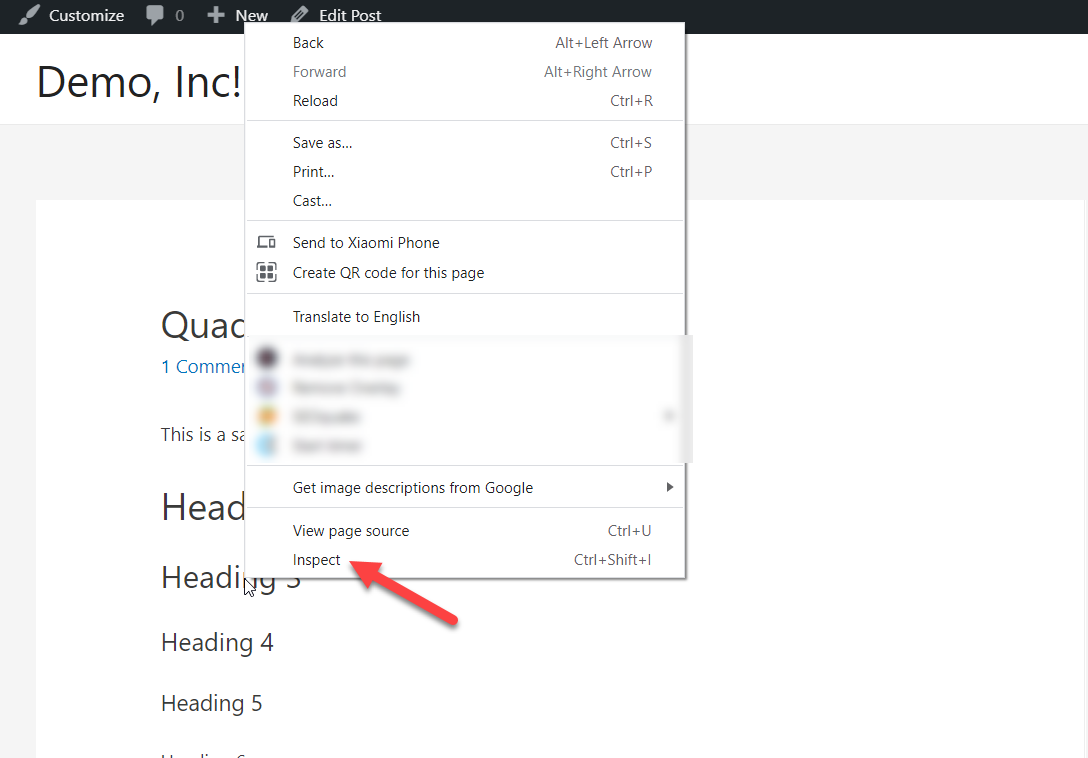
It will open up a new console on your right-hand side.
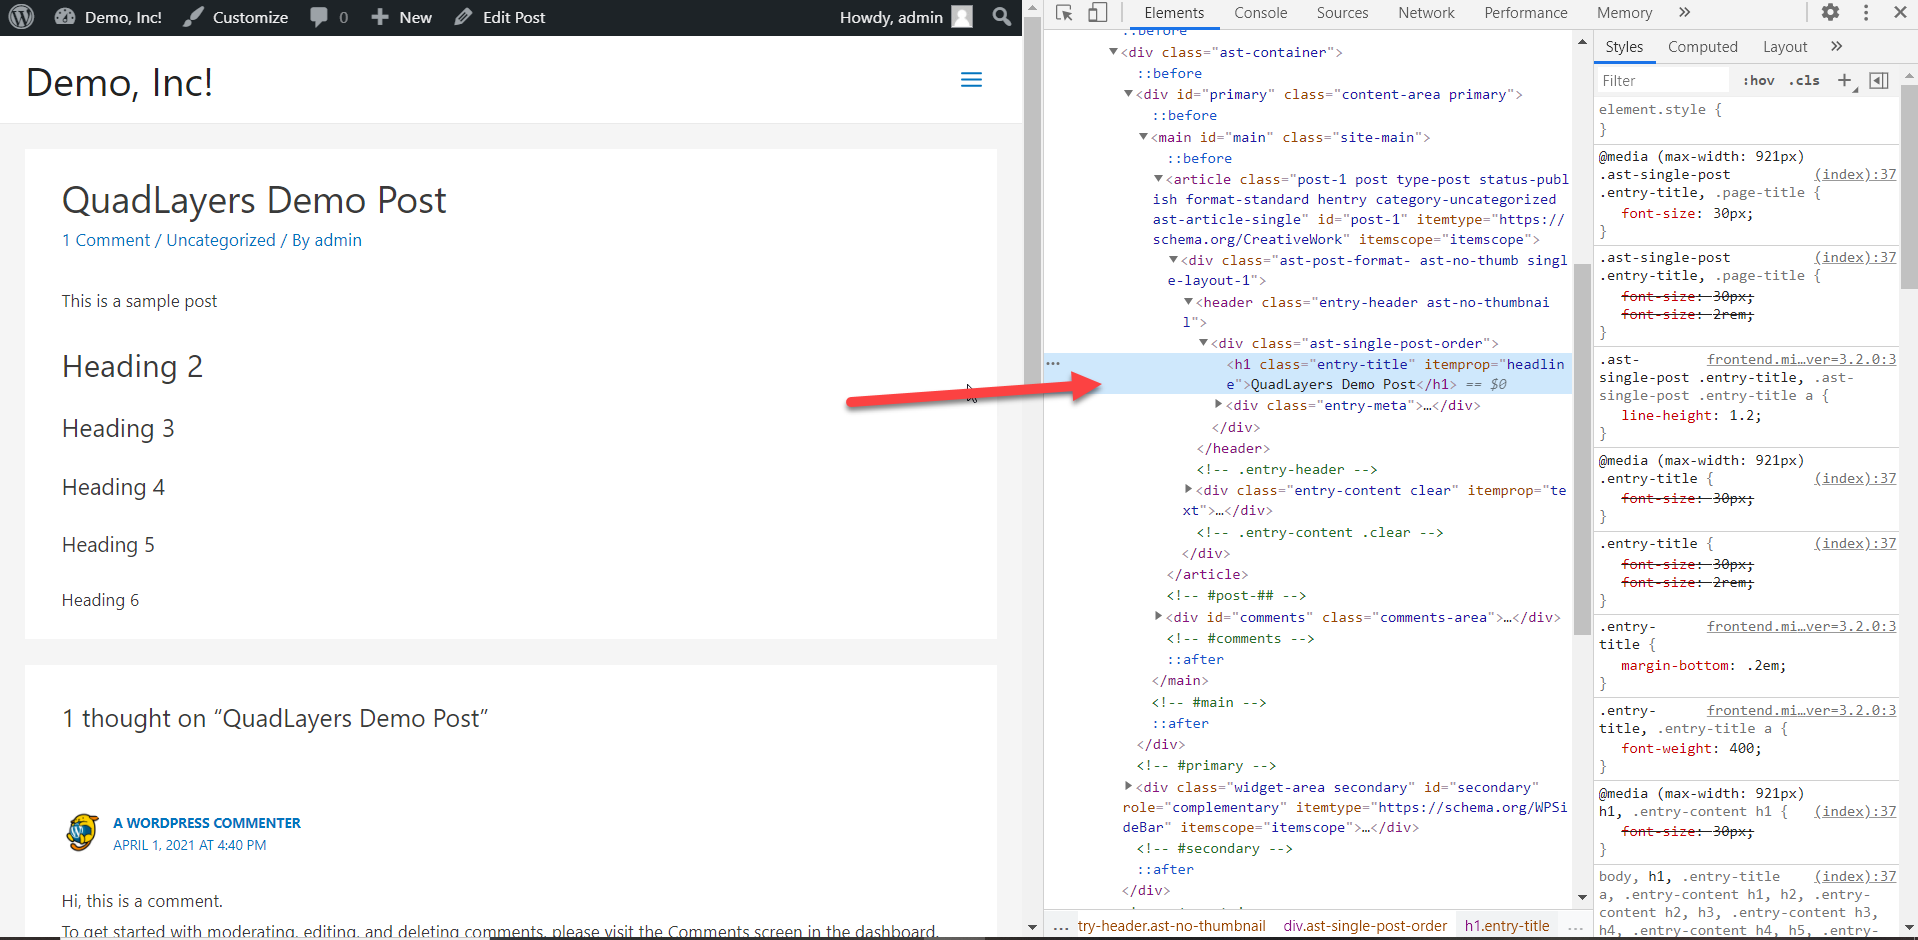
You can hover your mouse over the elements to see the exact CSS value of each one.
In this case, we will change the title font (h1), so the CSS class is entry-title.
Then, in your WordPress dashboard go to Appearance > Customize > Additional CSS and paste the following CSS code to change the post title font.
NOTE: The font you want to use should already be integrated with your site.
.entry-title {
font-family: 'Lato', Georgia, serif;


}Simply adjust the code with the font you want to use on your website.
That’s it! This way, you can easily change the font in certain areas. Make sure you use the correct CSS class for it, otherwise it won’t work.
How to Change the Font Colors
Apart from changing fonts, you may also want to change the font colors to create a unique site and provide visitors with a better user experience. The good news is that you can achieve that without using any plugins.
Let’s have a look at how you can change the font colors on your site using a simple CSS code.
Let’s say you have a page with several headings like this:
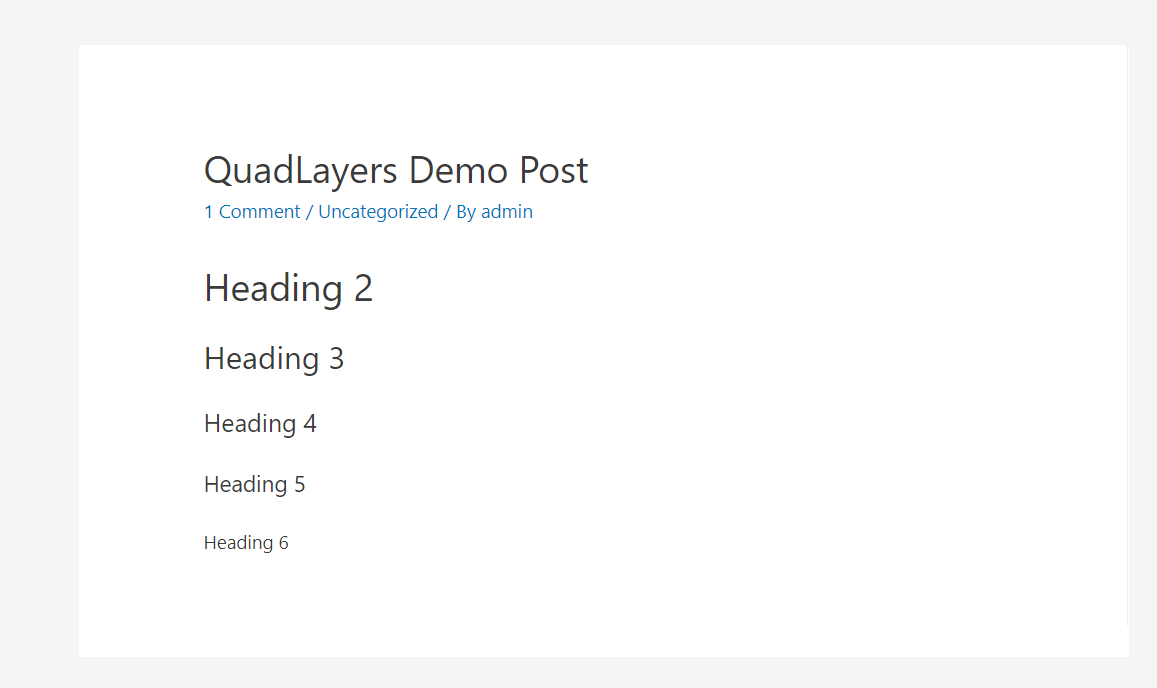
To change the color of the headings, first, you need to find the appropriate CSS class. For example, to modify the h2 font color, you have to find its class by right-clicking on it and pressing Inspect.
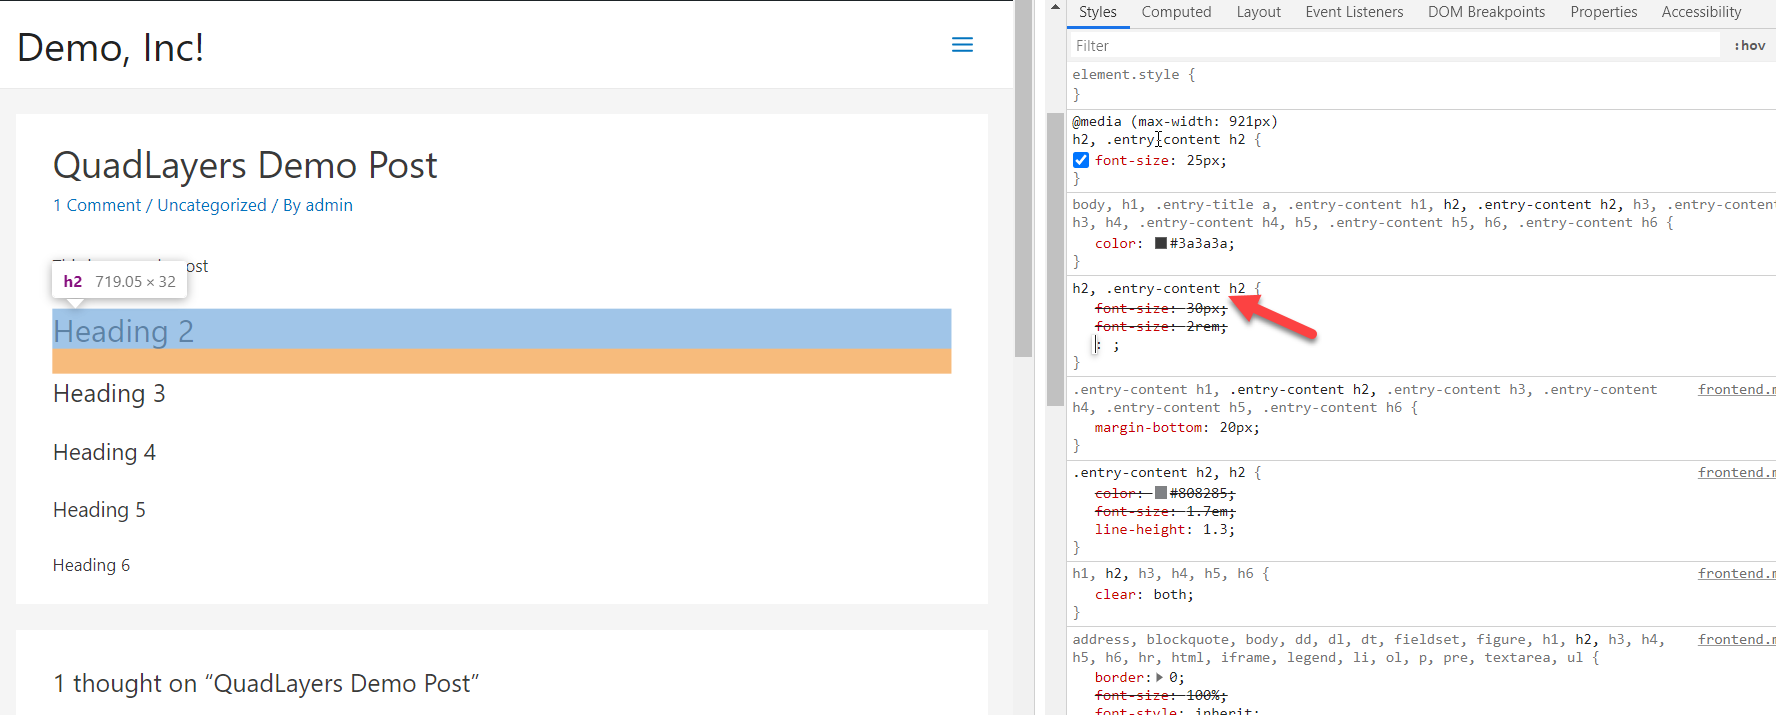
In this case, the CSS class is .entry-content h2.
After that, open the WordPress Customizer, go to the Additional CSS section and paste the following CSS code:
.entry-content h2 {
 color: #f542f5;
}
As you can see, the color of heading 2 changes to red.
This way, you can also modify all your headings. All you need to do is, replace h2 with your preferred heading tag.
Alternatively, if you want to change your paragraph font, use this CSS code:
.entry-content p {
 color: blue;
}
Use the code as a base and choose the colors you want for each section of your site.
That’s it! That’s how you can easily change the font colors.
How to identify fonts from websites and images
Another interesting option when you’re browsing the web is to be able to identify fonts from both websites and images.
There are different ways to know what typography a site uses. The easiest way is to use the browser’s inspect tool. Once you find a font that you like, simply right-click on the text that contains the font and go to Inspect (in some browsers you may need to go to Web Developer > Developer Tool). You will see that the element will be highlighted and you will be able to see the styles and layouts on the inspector.
After that, go to the Computed tab and find the Font-Family field where you will see the website’s font.
Additionally, you can identify fonts from images using a tool called WhatTheFont. For more information about how to get information about fonts from both websites and images, we recommend you check out our guide on how to identify fonts.
Conclusion
All in all, by customizing the typography on your site you can give your site a different style and improve user experience on your site to stand out from your competition.
In this guide, we’ve seen different methods to change the font in WordPress:
- Default Editor (Gutenberg and Classic Editor)
- Custom CSS code
- With a plugin
- Hosting your own font
- Web font integration
The simplest method in the list is to use the Gutenberg or Classic Editor. It allows you to modify the fonts in a few clicks and see the changes in real-time. Alternatively, if you want to customize the font size, style, and color, you can use CSS code.
Another great solution is to use a dedicated plugin. Without writing any code, you can change your website font through the customizer and take full control of your site typography.
Hosting your own web fonts is also a good option if you have the font files. If you prefer not to host the fonts on your server, on the other hand, integrating web fonts is an easy way to customize your fonts. The main advantage of this method is that you have to host the fonts or rely on FTP software. However, keep in mind that calling web fonts may increase the HTTP requests on your site, so you will need to optimize the requests to avoid performance and speed issues.
We hope you enjoyed this guide and found it useful. If you did, please share it on social media. For more tutorials and guides, check out our blog.
Which method did you use to change the fonts on your site? Do you know of any other methods that we should add? Let us know in the comments section below!
