How to Enable GZIP Compression in WordPress
A slow website can harm your reputation and user experience and drive away potential visitors. There are different methods to boost your page loading speed. One of them is GZIP compression. In this article, we will discuss GZIP compression and how to enable GZIP compression in WordPress.
What Is GZIP Compression and Why Use It?
GZIP compression reduces the size of the files, such as web pages and files transmitted over the Internet. It uses the GZIP algorithm to compress and decompress files. Moreover, the primary purpose of GZIP compression is to improve data transfer efficiency and reduce the time it takes to load web pages or transfer files over a network.
Here’s how GZIP compression works:
- Compression: When a server wants to send a file to a client (typically a web browser), it can compress the file using the GZIP algorithm before sending it. Compression reduces the file size by replacing repetitive or redundant data with shorter representations.
- Transmission: The compressed file is sent to the client over the network. Because it is smaller, it takes less time to transmit and requires less bandwidth.
- Decompression: Upon receiving the compressed file, the client (browser or other software) decompresses it using the GZIP algorithm. The decompressed file is then used as the original, uncompressed file.
Here are some benefits of using GZIP compression.
- Time Efficiency: Smaller file sizes lead to faster downloads and reduced page load times. This is particularly important for websites, where shorter loading times improve search engine rankings and user experience.
- Data Saving: GZIP compression reduces the data transmitted over the network, lowering bandwidth usage. This is beneficial for websites with a large number of visitors or for applications with limited bandwidth.
- Better Performance: Reduced file sizes mean quicker rendering times and improved overall performance. It is essential for mobile devices and users with slower internet connections.
- SEO Benefits: Above all, search engines like Google, Microsoft Bing, and Yahoo consider page speed a ranking factor. Faster-loading pages, facilitated by GZIP compression, can positively impact a website’s search engine optimization (SEO).
How to Enable GZIP Compression in WordPress?
Google policies have shown that they are very concerned about website user experience. If you want your website to rank high, you need to improve its page speed and loading time. Consequently, enabling GZIP compression is one of the best ways to achieve this goal.
All the WP Engine websites now use GZIP compression by default. Subsequently, all static files, including images, text files, JavaScript, and CSS, are automatically compressed for best website performance.
This minimizes the need for GZIP compression. However, all the websites do not use WP Engine for hosting and do not have GZIP compression features by default. As a result, your site will need GZIP compression manually if you use other hosting providers. Here are some of the methods to enable GZIP compression in WordPress.
- Using Plugins
- WP Rocket
- WP Super Cache
- W3 Total Cache
- Editing .htaccess file
Let’s start with the plugin method.
1. Using plugins to enable GZIP Compression in WordPress
We will use three different plugins to enable GZIP compression in WordPress.
1.1 With WP Rocket
WP Rocket is one of the best plugins to enable GZIP compression in WordPress. It is easy to use and offers all essential optimization features, including GZIP compression. First, install and activate the plugin. It’s a premium plugin, so you must buy it before installation.
Now go to Settings » WP Rocket. You will see a message that WP Rocket has been activated and is already working for you.
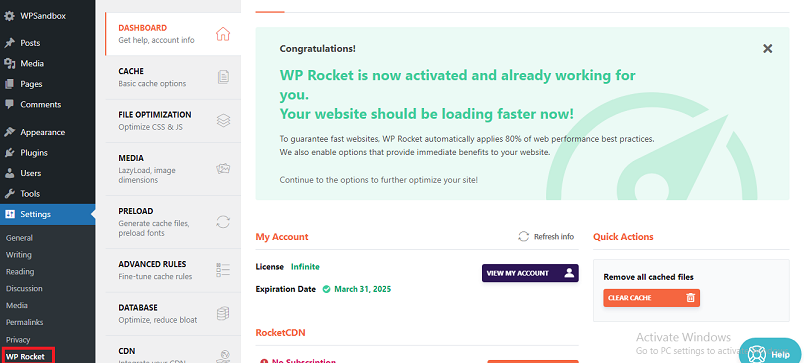
For Apache server users, WP Rocket will enable GZIP compression automatically. So, you do not need to allow any options to manually.
1.2 WP Super Cache
Follow the steps to enable GZIP Compression in WordPress using WP Super Cache.
- Firstly, Go to Admin Dashboard » Plugin » Add New
- Search for WP Super Cache
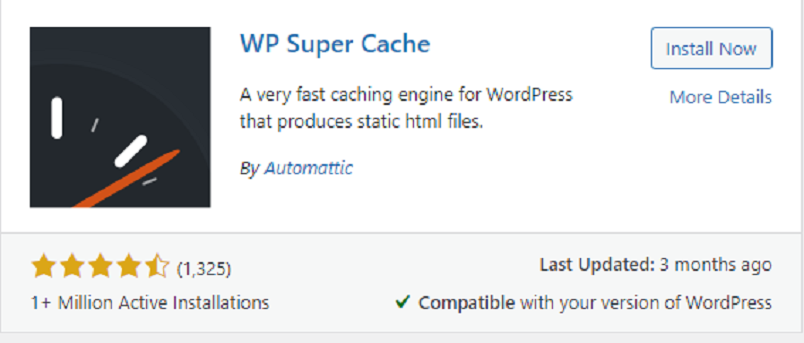
- Now, Install and activate the plugin.
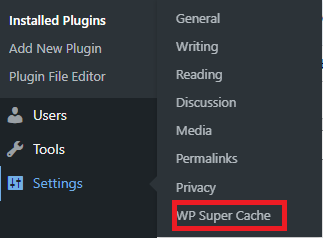
After the activation, you can find this plugin under the “Settings” section.
- Now click on the “Advanced” tab.

- Look for “Compress pages so they’re served more quickly to visitors” and check it.
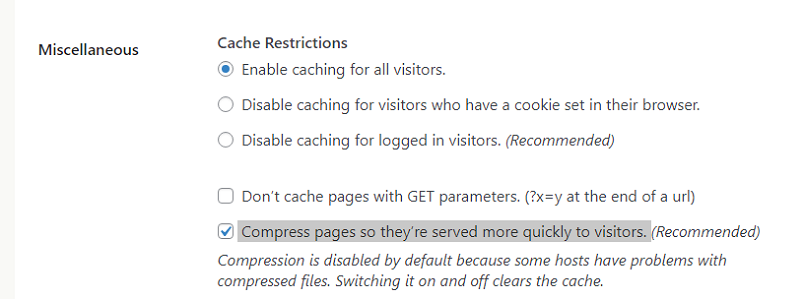
- Click the “Update Status” button to save the changes.
After that, compression is enabled on your website. You should need to clear your cache first.
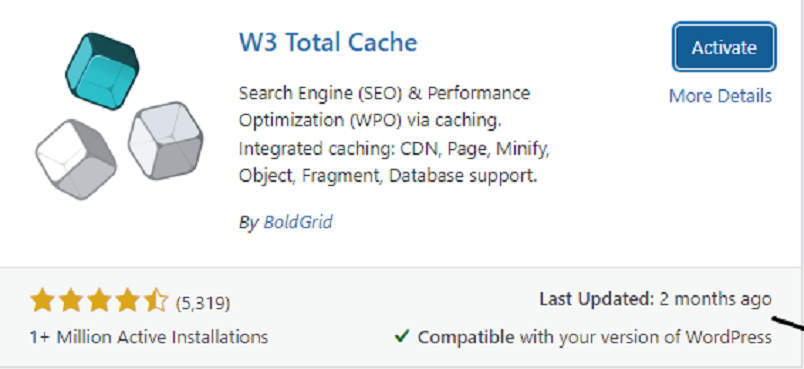
1.3 W3 Total Cache
W3 Total Cache is another good plugin to enable GZIP compression in WordPress. First, install and activate the plugin like the previous one.
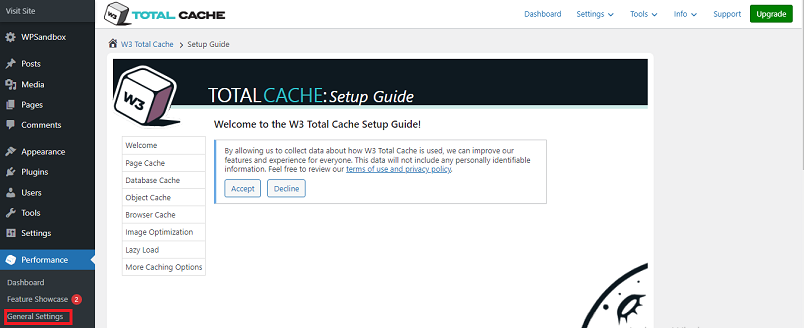
Now go to the Performance » General Settings page in your WordPress dashboard.
Now scroll down and check the Browser Cache Enable box.
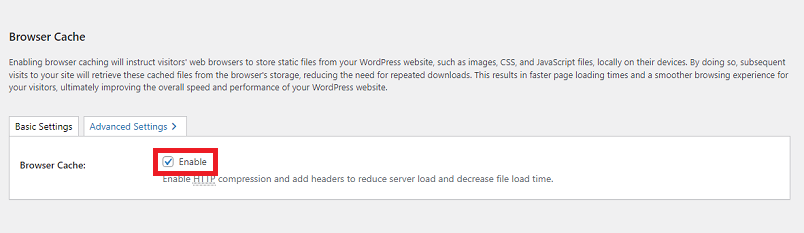
Click the “Save Settings” button after making the changes.
2. Editing .htaccess file to enable GZIP compression in WordPress
If you use Apache as your web host and want to enable GZIP compression, you must edit the .htaccess file. You can find this file in the root directory of your WordPress installation via FTP (File Transfer Protocol). Follow the steps to enable GZIP compression in WordPress by editing the .htaccess file.
- Firstly, navigate to the WordPress root directory, where you’ll find the .htaccess file.
- However, before the GZIP compression process, backup your .htaccess file to your computer or download it through your FTP client. This will save your data if anything terrible happens.
- Now open the .htaccess file in a text editor. You can further use two Apache mods to enable GZIP compression. But mod_deflate is widely used and the best option.
- To enable mod_deflate, add the following code to the end of your .htaccess file:
<IfModule mod_deflate.c>
AddOutputFilterByType DEFLATE text/plain
AddOutputFilterByType DEFLATE text/html
AddOutputFilterByType DEFLATE text/xml
AddOutputFilterByType DEFLATE text/css
AddOutputFilterByType DEFLATE application/xml
AddOutputFilterByType DEFLATE application/xhtml+xml
AddOutputFilterByType DEFLATE application/rss+xml
AddOutputFilterByType DEFLATE application/javascript
AddOutputFilterByType DEFLATE application/x-javascript
</IfModule>
- To enable mod_gzip instead, add the following code.
<ifModule mod_gzip.c>
mod_gzip_on Yes
mod_gzip_dechunk Yes
mod_gzip_item_include file \.(html?|txt|css|js|php|pl)$
mod_gzip_item_include handler ^cgi-script$ mod_gzip_item_include mime ^text/.*
mod_gzip_item_include mime ^application/x-javascript.*
mod_gzip_item_exclude mime ^image/.*
mod_gzip_item_exclude rspheader ^Content-Encoding:.*gzip.*
</ifModule>


<ifModule mod_deflate.c>
<filesMatch "\.(js|css)$"> SetOutputFilter DEFLATE </filesMatch>
</ifModule>
- Use GZIP compression test tools to test if GZIP compression is enabled.
If you use any caching plugin, you must clear the cache before testing.
Enable GZIP Compression for Nginx
There is a code snippet to enable GZIP compression for the website that uses Nginx. Generally, you must add a code snippet in the site’s nginx.conf file in the “http” section.
server {
gzip on;
gzip_types text/plain application/xml;
gzip_proxied no-cache no-store private expired auth;
gzip_min_length 1000;
...
}
Restart NGNIX once you have modified the code.
How to check GZIP Compression?
GZIP file transfers require two things. Web browsers tell servers they accept GZIP-compressed files by including an Accept-Encoding HTTP header in the browser’s request. Most browsers use this header by default:
Accept-Encoding: gzip, deflate
Second, the web server examines this header and decides whether or not to compress the requested files. If the files are GZIP compressed, the server adds the following header to its response.
Content-Encoding: gzip
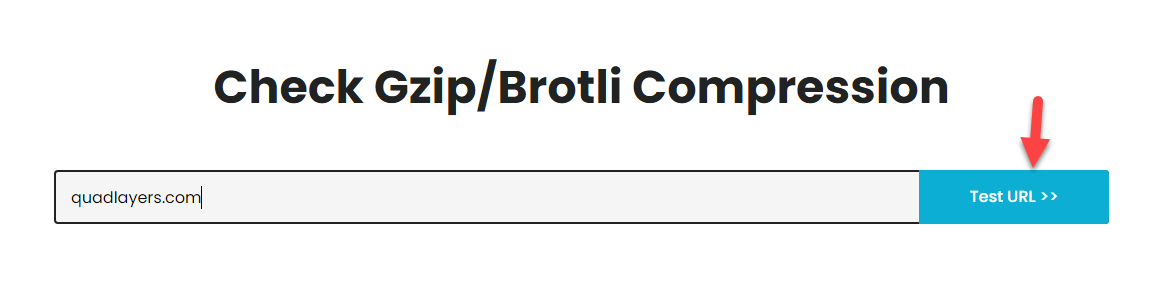
Online GZIP Compression Test
Many websites are available to confirm whether GZIP compression is enabled. Some of the popular websites are:
For this tutorial, we will use Gift of Speed. First, enter the website URL in the field and start the test.
The platform will show you the final result within a few seconds.
‘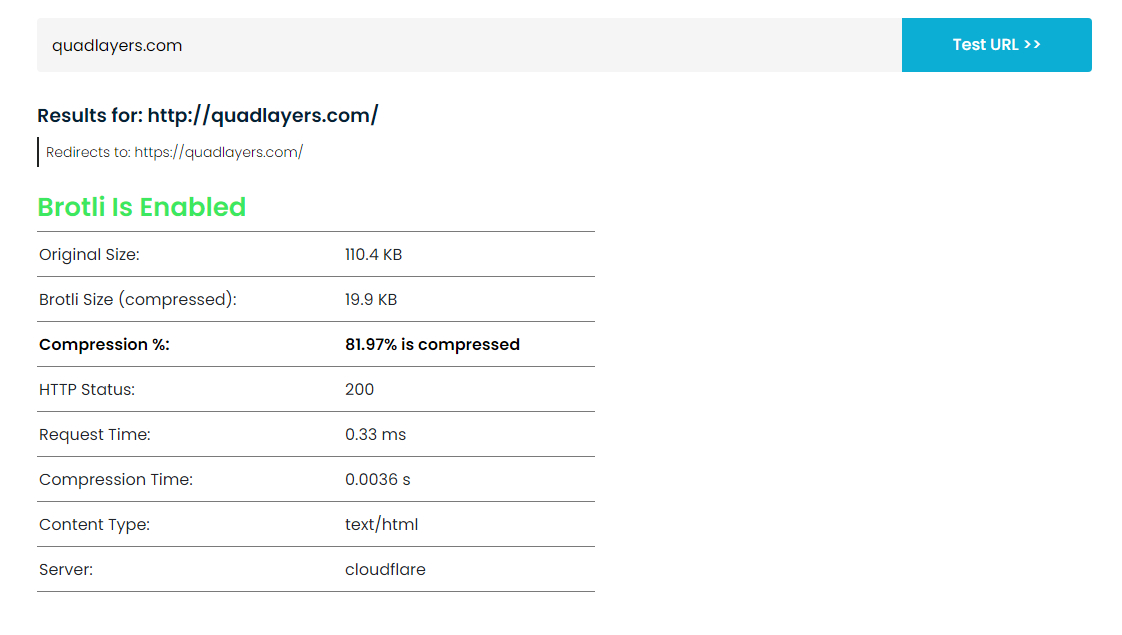
As you can see, we have passed the test. You can use any tool you like to validate GZIP compression.
Conclusion
We have tried different methods to optimize WordPress websites and speed up page load times. WordPress GZIP compression is one of the best and easiest methods to optimize your website. In this article, we have used three different plugins and manual processes to enable GZIP compression in WordPress. However, the plugins are the easiest way to enable GZIP compression with a single click.
Do you use any of these methods to enable GZIP compression in WordPress?
If so, which method do you use?
Tell us in the comment section below.
Several other methods exist to optimize, speed up, and rank your website. We have covered them for you in the following articles.
