
How to Disable Directory Browsing in WordPress
Do you want to disable directory browsing in WordPress? This article will show you the exact steps required to disable them.
Several users often miss out on disabling directory browsing, which may lead to further privacy, security, and even SEO issues. This can even result in a poor user experience for your website visitors. So it is essential to disable directory browsing.
But before you disable directory browsing, let’s understand what it is and why you must disable it briefly.
What is Directory Browsing
Directory browsing is a feature provided by web servers that allow users to view all the contents of a directory or a folder when no default index file is found within the directory. Hence, directory browsing is also known as folder browsing or folder listing.
When directory browsing is enabled, the web server will generate a listing of files and subdirectories within the directory if a user accesses a directory that does not have a default index file. The index file may include files such as index.html or index.php.
This listing typically includes the files and folders names, sizes, and modification dates. But it may also include additional information, such as file permissions or file types. It can also be presented in a simple text format or rendered as an HTML page with clickable links to navigate the directory structure.
Why Disable Directory Browsing in WordPress
There are several reasons why you should disable directory browsing on WordPress:
- Privacy and security: Directory browsing can expose sensitive information about a website’s file structure, including file names, directories, and contents. Attackers can exploit this information to gain insights into the website’s architecture. As a result, they may be able to find potential vulnerabilities or sensitive files that should not be accessible publicly.
- Unauthorized access: Directory browsing can unintentionally provide access to files that are not intended to be directly accessed by users. These files may include configuration files or backup files containing sensitive information. So they may be exposed if directory browsing is enabled.
- Search Engine Optimization (SEO): Enabling directory browsing can result in duplicate content issues from of perspective of the search engines. Search engines may index multiple URLs pointing to the same content, diluting the relevance of individual pages and affecting the website’s search engine rankings.
- Better user experience: Directory browsing can create a poor user experience by presenting users with a list of files instead of a meaningful webpage. It can be misleading and make it difficult for visitors to navigate the website effectively.
But before we move on to disabling directory browsing on your WordPress website, you should check if it’s enabled.
How to Check Whether the Directory Browsing is Enabled or Not
The easiest way to check whether directory browsing is enabled on your WordPress website is by adding the path “/wp-includes” at the end of your website domain. For example, enter the URL “https://yourdomainname.com/wp-includes” on your web browser.
Directory browsing is enabled on your website if you see a list of files and folders.

On the other hand, if you see a 403 error or something similar, the directory browsing is already disabled on your website.

How to Disable Directory Browsing in WordPress
You can easily disable directory browsing in WordPress. Here are the main methods you can follow:
- cPanel
- FTP
- Using a Plugin
We’ll go through each of these methods in detail, through which you can select the approach which suits you best.
1) Disable Directory Browsing in WordPress from cPanel
If you have access to cPanel and are familiar with its interface, you can quickly disable directory browsing on WordPress. First, log in to your cPanel account by entering the credentials provided by your hosting service. Then, scroll down to the Files section and click on File Manager.

Here, you can see all the files and folders of your WordPress website. Open the “public_html” folder and find the .htaccess file in this directory.

Note: If you can’t see the .htaccess file, go to your settings and check the Show Hidden Files option. Make sure you Save the changes.

After you find the .htaccess file, download it to your computer and edit it using a plain text editor like Notepad++.
But before you make any further changes to it, we recommend you make a copy of the .htaccess file and name it something like .htaccessbackup.
After you make a copy of the .htaccess file, add the following line of code at the end of the file.
Options -Indexes
Your file may look something like this:
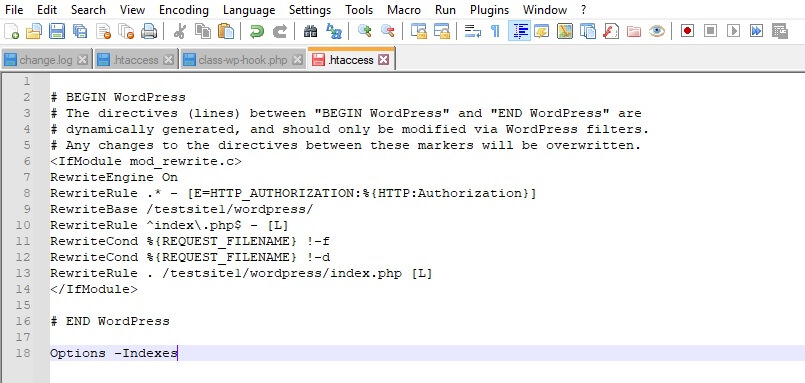
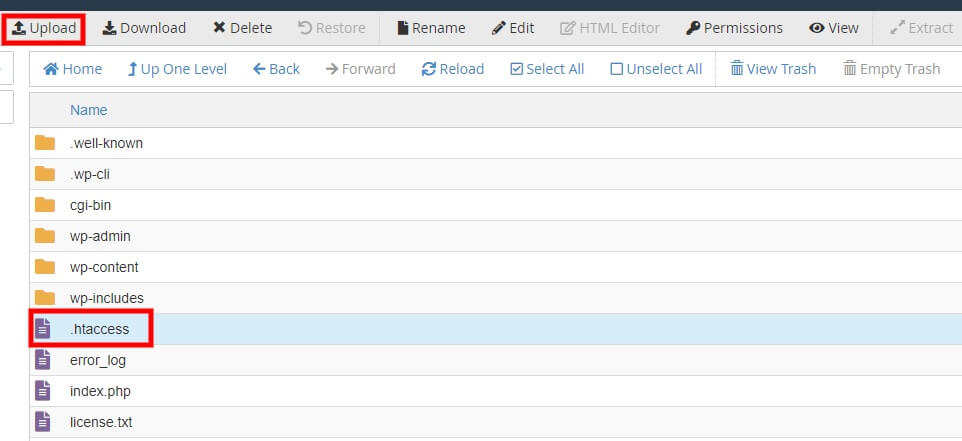
Finally, save the .htaccess file after adding the code and upload it to the file manager of the cPanel. Since the .htaccess file already exists in your WordPress file directory, you’ll have to replace it with the new file when you upload it.
Now, check if the directory browsing is disabled by adding the path “/wp-includes” at the end of your domain once again. You can see that it’s disabled now.
2) Disable Directory Browsing in WordPress with FTP
Using the FTP is a great alternative to edit the files of your WordPress website if you don’t have access to cPanel. Disabling directory browsing using FTP is quite similar to disabling it in WordPress using the cPanel. You will have to manually edit the .htaccess file of your WordPress website and upload it using an FTP client. So let’s start with connecting your website with an FTP client
2.1) Connect your Website with an FTP Client
Several FTP clients like FileZilla and Cyberduck can connect to your website for file transfer. They’re all similar to use, but we will use FileZilla for this demonstration. You can download and install it from its official website.
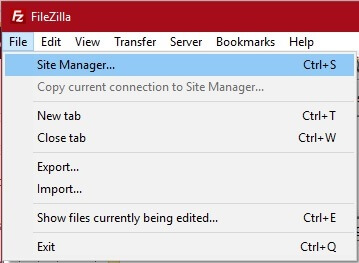
After installing FileZilla on your computer, open the application and go to File > Site Manager. You can also use the keyboard shortcut Ctrl+S for it.
Now, click on New Site in the site manager and enter the name of your site on the left side of the dialogue box.

Then, enter the credentials provided by your hosting services on the right side of your screen under the General tab, and finally, click on Connect.

You should be able to access your website files now in the remote site section. If you have any issues, feel free to look at our detailed guide on accessing FTP for WordPress websites.
2.2) Edit and Replace .htaccess File
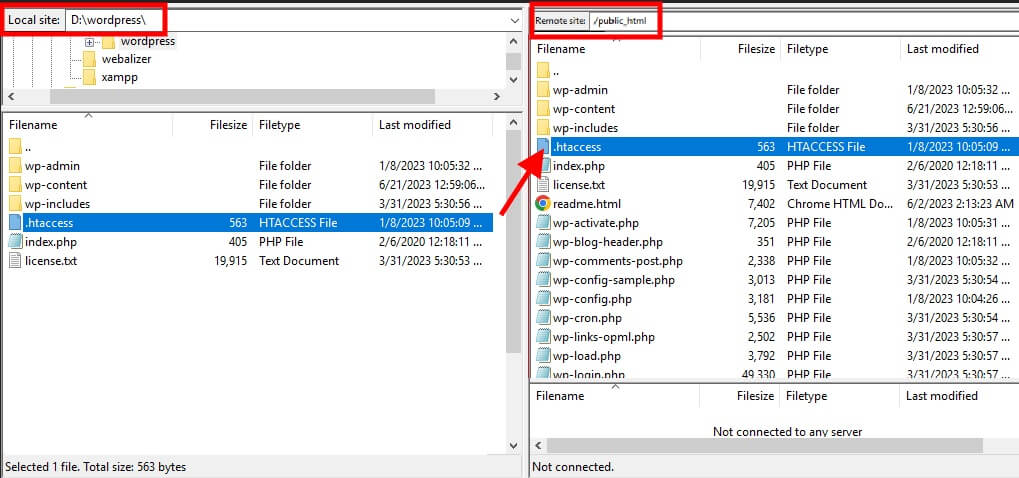
If you look at the remote site section, you can see all the file directories of your website. Here, you need to open the public_html folder, where the .htaccess file is located.
Just drag and drop it to the Local site section of the application. The local site represents the file directory of your personal computer.

Then, edit the .htaccess file using a plain text editor like Notepad++ and add the following line of code at the bottom.
Options -Indexes
Note: This step is identical to that of the previous approach. But please make sure that you make a backup of the file by making a copy of it, just like mentioned before.
Save the file after you’ve added the code and upload it to the Remote site using drag and drop again.
This should disable directory browsing on your WordPress website. So check it by adding the path “/wp-includes” at the end of your domain name.
3) Disable Directory Browsing in WordPress Using a Plugin
Suppose you don’t have any necessary credentials to access the cPanel or the FTP client and only have access to the WordPress dashboard. In that case, you can still disable directory browsing using a plugin. Plugins help add functionalities to your website not included on WordPress or your default theme.
So it’s the same case with disabling directory browsing.
Many plugins allow you to disable directory browsing in WordPress by editing the .htaccess file. Even several security and SEO plugins will enable you to edit the file if you already use them on your website. Alternatively, you can use a dedicated plugin to disable directory browsing automatically.
We will use the plugin WP safely disable directory browsing for this tutorial. It is a straightforward plugin that allows you to disable directory browsing on your website with just a single click.

But to start using the plugin, you must install and activate it first.
3.1) Install and Activate the Plugin
To install the plugin, go to Plugins > Add New from your WordPress dashboard and search for the keywords of the plugin. After you see the plugin in the search results, click Install Now.

The installation will take a few seconds. As soon as it’s complete, click on Activate to activate the plugin.
3.2) Disable Directory Browsing from Plugin Settings
You can start using the plugin settings by going to Settings > Safe Directory from your WordPress dashboard after the plugin is activated. You will see only one option here.
So check the Disable Directory Browsing of the directory here and click on Save & Write to save your changes.

That’s it! The Directory browsing is disabled on your WordPress website. You can check it by adding the “/wp-includes” path at the end of your domain.
Bonus: Disable Directory Browsing using Rank Math
The plugin WP safely disable directory browsing hasn’t been updated for quite a while, even though it works perfectly. So we will also show you an example using an alternate plugin.
As mentioned earlier in this article, you can disable using an SEO or a security plugin to disable directory browsing by editing the .htaccess file. Plugins like the Hide My WP Ghost and WP Encryption have a reliable option to disable directory browsing automatically.
But we will use the Rank Math SEO plugin in this section, as it is a viral SEO plugin that allows you to edit the .htaccess file in the free version. So let’s start by installing and activating the plugin once again.
![]()
Install and Activate Rank Math
Go to Plugins > Add New from your WordPress dashboard and enter the keywords of the plugin just like the previously mentioned steps. Then, click on Install Now to install the plugin.
![]()
After the installation is complete, Activate the plugin. You can start using the plugin now.
If you want to use any premium plugins, you must upload and install them manually. We have a detailed guide on installing a WordPress plugin manually if you need further assistance.
Edit .htaccess File Using Plugin Editor
To edit the .htaccess file, go to Rank Math > General Settings from your WordPress dashboard and open the Edit .htaccess tab. The plugin has a dedicated text editor that allows you to edit the .htaccess file.
So enter the following code line at the file’s very end.
Options -Indexes
Once you add it, click on Save Changes.
![]()
Lastly, check if directory browsing is disabled on your website by adding the path “/wp-includes” in your domain name.
Conclusion
These are the various ways you can disable directory browsing on your WordPress website. It is essential to disable it if you don’t want any security and privacy issues.
To summarize, there are three major ways to disable directory browsing:
- cPanel
- FTP
- Using a plugin
The most common way to disable directory browsing is by editing the .htaccess file using cPanel or an FTP client. But you can also edit the file using SEO, security, and text editor plugins. However, a dedicated plugin is also a good option.
So we hope you can disable directory browsing on your website without any issues now. We’d love to know about your experience in the comments.
In the meantime, here are some more articles that might help optimize your WordPress website:
