How to use WebP Images in WordPress
Do you want to use WebP images in WordPress? If you are looking for a feasible method that you can use to create WebP images and use it in WordPress, keep reading this article.
Are you tired of slow-loading images on your WordPress website?
Do you want to improve your site’s speed and performance without sacrificing image quality?
Look no further than WebP images! This innovative image format is designed specifically for the web, providing smaller file sizes and faster load times. In this blog post, we will discuss WebP images, their pros and cons, and how to use WebP images in WordPress using a simple plugin.
First, let’s see what WebP images are and the difference between a WebP image and a normal one.
What are WebP Images?
WebP is an image format that was developed by Google in 2010. It is an open-source, modern image format designed to compress and display high-quality images on the web efficiently.
WebP uses advanced compression techniques such as predictive coding, spatially varying chroma subsampling, and lossless or lossy compression to produce smaller file sizes without compromising quality. And also, because WebP images were designed specifically for use on the web, it makes them ideal for websites and digital publications.
Since WebP is a newer format than older options like JPEG or PNG, it benefits from modern image compression algorithms, enhancing its performance.
If you’re looking to optimize your website’s speed and improve overall performance while maintaining great visual quality for your media files, switching to the WebP image format could be a smart move!
Pros and Cons of WebP Images
While WebP images offer many benefits compared to formats like JPEG and PNG, there are drawbacks to using WebP images on your website. This section will show you the main advantages and disadvantages of WebP images.
Pros of WebP Images
- Load faster on websites because of the small size
- Take up less storage on servers and devices
- Supports transparency and lossless compression
- Improve page loading speed
Cons of WebP Images
- Lack of support across all web browsers
- Converting existing files into the WebP format requires different tools or plugins
- Compatibility issues with other web browsers
While there are clear benefits to using WebP images in WordPress, website owners and developers need to weigh these pros against any potential cons before making the switch.
How to use WebP Images in WordPress using a Plugin
In this section, we’ll show you how to use WebP images in WordPress using a plugin. There are several plugins available in the marketplace for this purpose.
But for today’s demonstration, we’ll use the EWWW Image Optimizer that supports converting your uploaded images into WebP format.
Step 1: Installation and Activation
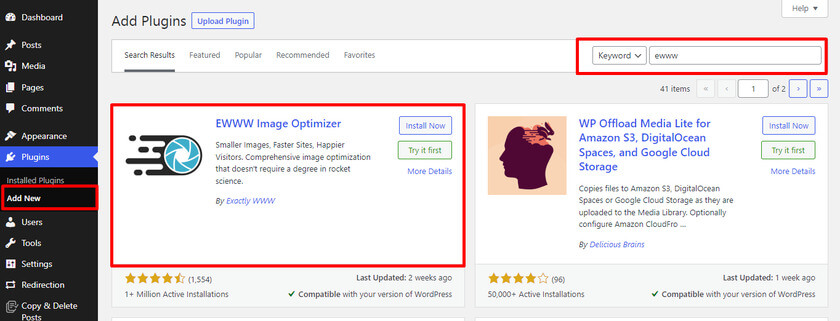
First, log into the WordPress back end and go to Plugins » Add New.
Next, search for the EWWW Image Optimizer. Once you have found the right tool, please install and activate it on your website. You can also manually install and activate the plugin if you prefer.
Step 2: Configuration
Once the plugin is activated, you can configure it through the setting page.
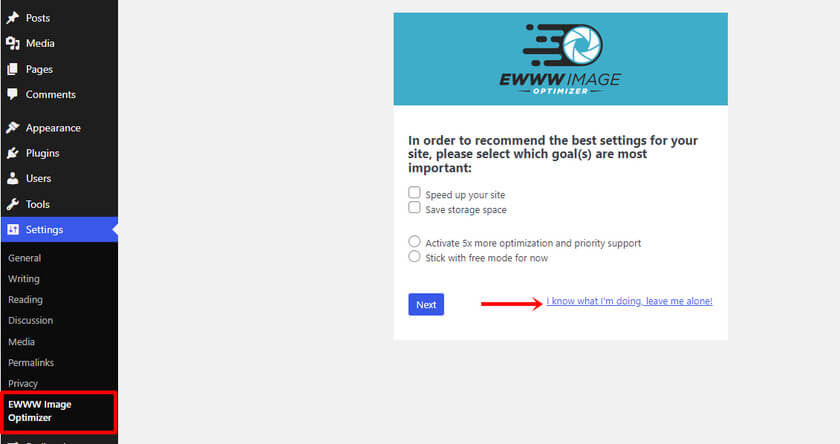
For that, go to Settings » EWWW Image Optimizer. A setup wizard will appear, but you can leave it by clicking the option that says, “I know what I’m doing.”
Next, you can see a screen full of different plugin settings. All you have to do is scroll down and look for “WebP Conversion.” Once you have found the right option, check the box next to it.
Upon checking the box, other settings related to WebP conversion will expand.

Likewise, check JS WebP Rewriting and Picture WebP Rewriting and click the Save Changes button. Now, you are good to move forward.
Step 3: Optimize Images to WebP Format
After configuring the plugin setting, all future image uploads will be automatically converted to WebP format.
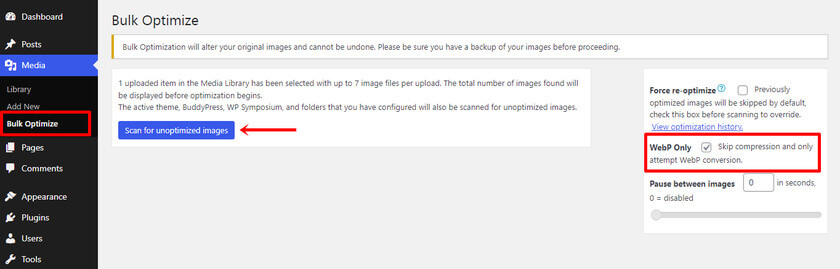
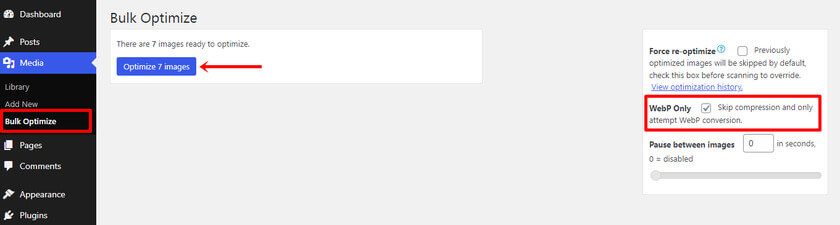
But the existing images won’t be optimized. That’s why in that case, we have to convert them manually. To do that, navigate to Media » Bulk Optimize and click on Scan for unoptimized images. Also, make sure to check the box of WebP Only to skip compression and only convert the images.
Next, you’ll see the number of images that needs to optimize.
Click the “Optimize X images” button.
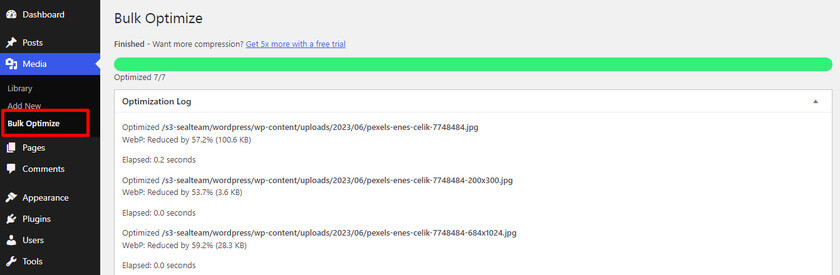
Once the converting process is done, you’ll get a log indicating the bulk optimization is completed.
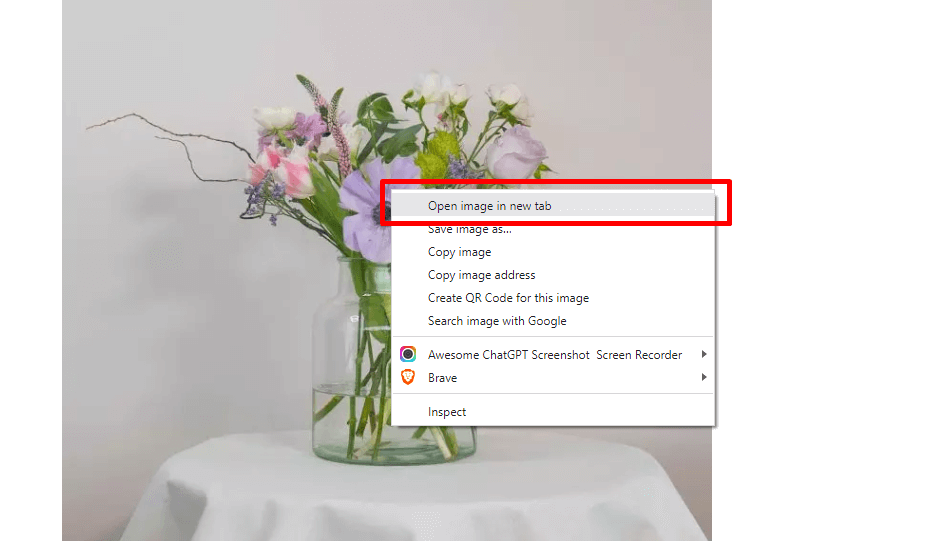
Step 4: Test WebP Format
Next, we need to ensure the images are properly converted to WebP. To verify the changes, go to any blog post and open an image in a new tab.
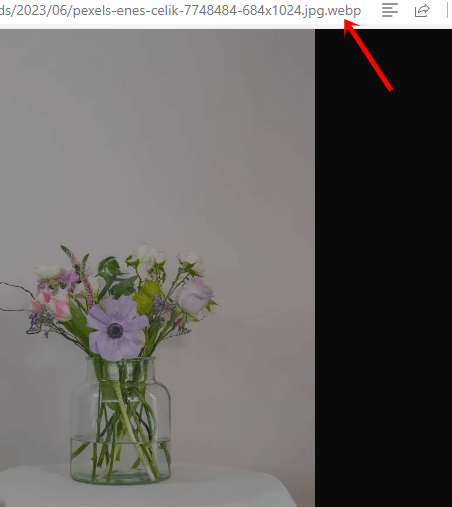
If you can see the .webp extension in the address bar, the plugin has successfully converted the image into WebP format.
And that’s it.
With these steps, you can easily use WebP images in WordPress using a plugin. As you can see in this tutorial, you do not need to do any coming stuff to convert your PNG/JPEG images to WebP format.
A simple plugin like EWWW Optimizer will do the job for you.
Bonus: Best Plugins to Convert Images into WebP Format
If you want to use plugins to convert your existing or new images into WebP format, check out these options:
- Imagify
- Optimole
- ShortPixel
Each tool comes with unique features. Below, we will take a closer look at the plugins.
1) Imagify
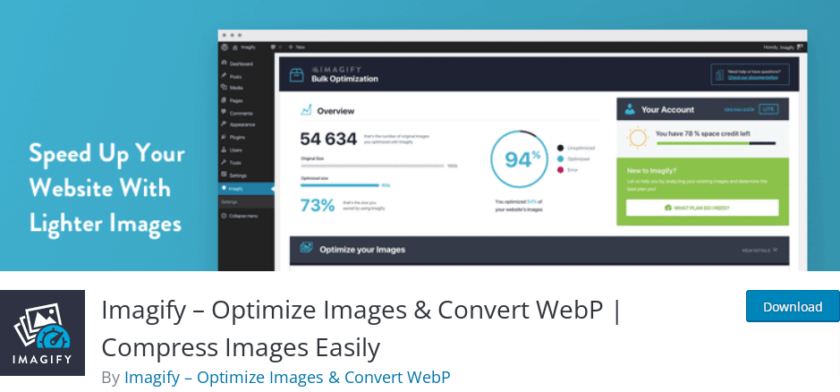
If you need to convert your images into WebP format and optimize them, you should opt for Imagify. This plugin is known for its ease of use and high-quality image compression. The WebP optimization feature is included in all of its paid plans, and the plugin also offers a fallback feature for unsupported browsers.
Once you have added the images to your WordPress website, Imagify uploads them to its server for compression. They can compress data at three levels: lossless, smart, and both. The plugin allows you to switch back and forth between the compression modes.
Features
- Easy to use
- Lightweight plugin
- Multiple methods to compress the images
- Automatic WebP conversion
Pricing
The plugin is a freemium tool; you can find the free version in the WordPress plugin repository. The premium version will cost you $9.99 monthly and can be downloaded from their official website.
2) Optimole
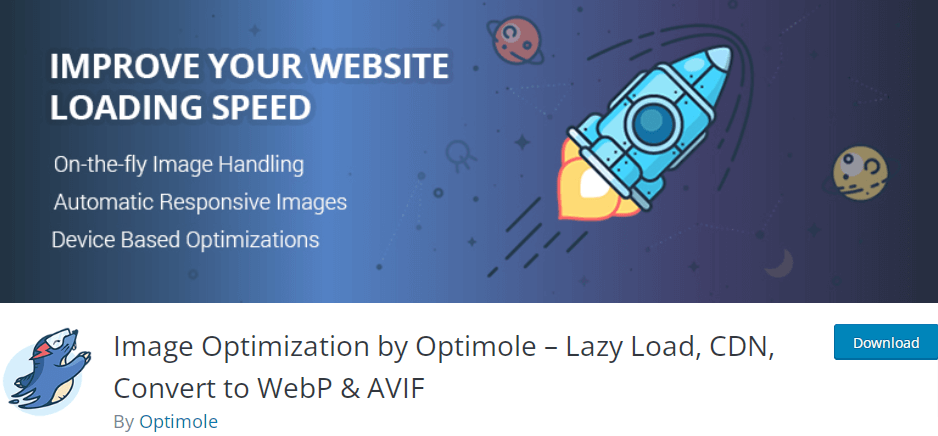
Another plugin on this list is Optimole, which has a fully automated WebP and WebM optimization feature. All you need to do is install the plugin, which will handle everything in the background, optimizing your images and ensuring they are served in the most efficient format possible.
One of the highlighted features of Optimole is that it automatically compresses the image’s size, handles responsive images through a CDN with locations all over the world, takes image replacements, rewrites image URLs, and carries out lazy load.
Features
- CDN integration
- Image compression
- Rewrite image URLs
- Won’t slow down the website
Pricing
Similar to Imagify, this plugin also has both free and premium versions. You can download the free version of Optimole from the repository. On the other hand, you can download the premium version, which costs you $22.99/mo.
3. ShortPixel
![]()
ShortPixel is one of the most popular plugins that provides a simple and effective way to optimize your images for WebP. It also comes with a handy image compression feature, which can help further reduce file sizes. To convert your images to WebP format, all you have to do is install the plugin and check the box to deliver a WebP version of your image in the settings.
You can easily optimize images on your WordPress website by connecting the ShortPixel service through the WordPress plugin. Additionally, ShortPixel provides a SaaS (Software as a Service) platform with image optimization services on its website.
It is a lightweight plugin with an easy-to-use UI that gets regular updates. With the help of this plugin, you can directly optimize your photos on the server or utilize a CDN to store and send images from a distance.
Features
- User-friendly design
- Hassle-free configuration
- Can use on multiple websites
- CDN integration
Pricing
ShortPixel is also a freemium tool, and the pricing is reasonable and flexible, making it a great choice for businesses of all sizes. You can download the free version of ShortPixel from the plugins repository. The premium version of ShortPixel will cost you $8.25 a month and can be downloaded from their official website.
Conclusion
WebP is a revolutionary image format that can help you dramatically reduce the size of your images without sacrificing quality. This helps to speed up page loading times and improve user experience on your website.
By using WebP, you can easily optimize all of your images for the web with minimal effort, giving you more time to focus on other aspects of running an effective website. If you are looking for a way to improve the performance of your WordPress site, then implementing WebP should be one of the first steps in achieving this goal.
As you can see in this article, using any image optimization plugin like EWWW optimizer, ShortPixel, or Imagify, you can create WebP formats of your pictures. While you upload many images to your website, this could be a great addition. You can also convert your existing images to WebP format with the plugin.
Since Google is using page speed as one of the ranking factors, we highly recommend optimizing your images for better performance.
So what’s stopping you?
Try to convert your images to WebP format and improve the website’s overall speed.
We hope this article has provided valuable insights and guidance on using WebP images in WordPress. If yes, then make sure to share it with your friends.
Here are a couple more articles you might find useful:
