
How to Set Up WP Fastest Cache (Beginner’s Guide)
Do you want to set up WP Fastest Cache plugin on your website? Configuring the plugin correctly will help you improve the website’s speed. We have got you covered if you are looking for a step-by-step guide to configuring WP Fastest Cache. This article will show you how to complete the task without any hassle.
But before we move forward, let’s see why and when we need to use a WordPress caching plugin.
Why and When Do You Need a Caching Plugin?
Using a caching plugin on your website will greatly help you optimize the overall performance. By default, when someone lands on one of your blog posts, the web server will fetch contents from the MySQL database every time. When you have a few visitors, there won’t be any issues with the performance.
But when you start getting more website visitors, calling MySQL database content every time could cause performance issues. As you know, a website’s speed and performance are crucial in ranking and user experience.
This is where caching plugins come in.
The plugins will create a cached copy of your website. And when someone requests a page or post, the plugin will serve the content from the cached copy. This way, you can reduce the requests to the MySQL database. Hence, you can improve the speed and performance of the website.
Personal blogs, business websites, and eCommerce stores can use caching plugins.
Now you know what caching plugins are and why you need them. The next section will explain what to look for in a caching plugin.
What to Look for In a Caching Plugin?
When you are looking for a WordPress caching plugin, check out these options:
- Ease of use: A caching plugin with a simple configuration method would be a good fit. It helps users to tweak the plugin without any hassle.
- Optimization methods: This is the main thing you should check. The optimization methods help you speed up the website. So, visit the features page of the caching plugin to understand more about the optimization methods available.
- Integrations: Connecting the caching plugin with a CDN provider, Analytics, could help you optimize your website further. Hence, checking the integration options available in the plugin is mandatory.
- Updates: The selected plugin needs to get updates from the developer with the latest optimization methods. So, how often the plugin gets updated needs to be considered.
- Compatibility: if you run an online store with plugins like WooCommerce, or Easy Digital Downloads, you must ensure the selected caching plugin is compatible with your WordPress configuration.
Now you know how to choose the best caching plugin for your website. Next, let’s look at a quick introduction to WP Fastest Cache.
WP Fastest Cache: An Introduction
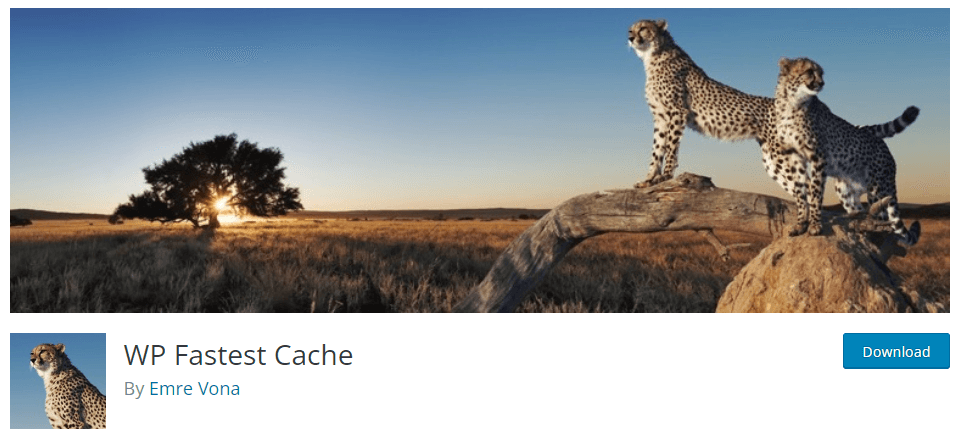
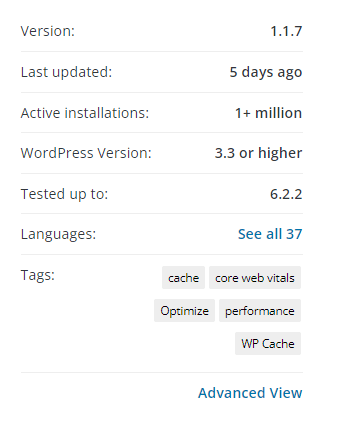
WP Fastest Cache is one of the popular WordPress speed optimization plugins. It is a freemium plugin. The free version can be downloaded from the WordPress plugins repository. As you can see in the screenshot, more than 1 million websites are using this plugin.
Plus, they have more than 3,700 5-star ratings.
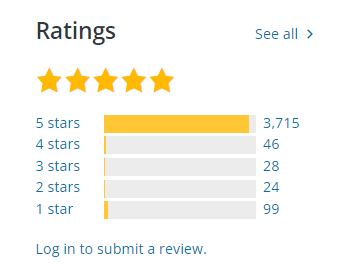
It tells that WP Fastest Cache is a good plugin for optimizing the website’s speed. The free version plugin comes with every basic optimization. Invest in the premium version plugin if you need to take things further.
The premium version plugin will cost you $49 (one-time fee) for a single domain license. It is a good investment if you need to optimize your website for speed.
Some of the popular features of the WP Fastest Cache plugin are:
- Desktop caching
- Mobile caching
- Widget caching
- Minification
- Image optimization
- GZIP compression
- Database optimization
And so on.
Now you know what WP Fastest Cache is. Next, let’s see how to set up WP Fastest Cache properly.
How to Set Up WP Fastest Cache
the first thing you need to do is install and activate WP Fastest Cache on your website. In this case, we will be using the free version plugin. Since the free version plugin is available in the WordPress plugins repository, you can install it directly from the dashboard.
On the other hand, if you have purchased the premium version plugin, you need to download it from the official website and install it manually.
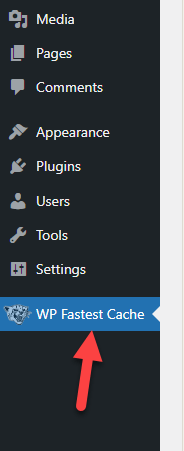
After activation, you can see the plugin’s settings on the left-hand side of the WordPress admin area.
The plugin comes with an easy-to-understand panel.

They have categorized the sections into
- Settings
- Delete cache
- Image optimization
- Exclude
- CDN
- DB
Let’s look at each section and understand which configuration will help us improve the website’s speed.
1) WP Fastest Cache Settings
This is the main configuration page. The options available on the page are:
1.1) Global Options
Caching System: Enable the caching system to set up WP Fastest Cache as your caching plugin.
Widget Caching (Premium): You can reduce the number of SQL queries by enabling this option.
Preload: You can create a cached website version automatically by allowing the preload option.
Logged-in Users: Do not show the cached version to logged-in users. You should enable this option.
New Post: Clear cache when a new post is published. You do not need to enable this option if you publish a few articles a week. Otherwise, if you are publishing multiple articles a day, enable this.
Update Post: You can also clear the cache after updating a post. If you are running a news website, enable this option. Otherwise, not mandatory.
1.2) Mobile Optimization
Mobile: You do not need to show the desktop’s cached website version to mobile visitors. Enable it.
Mobile Theme (Premium): Create a cache for mobile users. Enable this option if you have a premium subscription to WP Fastest Cache.
1.3) Static File Optimization
Minify HTML: Minify every HTML file. Enable this option.
Minify CSS: Minify CSS files too. It will help you speed up the website. Enable it.
Combine CSS: Combining CSS will remove extra white space available in the file. Sometimes, it can break your website. Only enable this option if your website is working properly after combining.
Combine JS: You can also combine JS to improve the speed. We will not recommend enabling it. It can cause conflicts on your website.
Minify JS: Enabling this option is highly recommended.
1.4) Extra Optimization
GZIP: The GZIP file compression will reduce the size of files sent from your web server. It is a good option to enable.
Browser Caching: Reduce age loading time for repeated visitors. You must enable this.
Disable Emojis (Premium): Disabling emojis will help you optimize the speed. Enable this option if you are not using emojis in your post’s content.
Render Blocking JS (Premium): Eliminating render-blocking JS files is a great practice. Enable this option.
Google Fonts (Premium): You can enable this option to load Google Fonts asynchronously.
Lazy Load (Premium): Lazy Loading is a technology that optimizes image and iframe serving. The media will be loaded only when they enter the browser’s viewport. If you are using the premium version of WP Fastest Cache, enable this option.
Next, let’s move to the delete cache settings.
2) Delete Cache Settings
From this page, you can decide which cache files must be removed from the website.
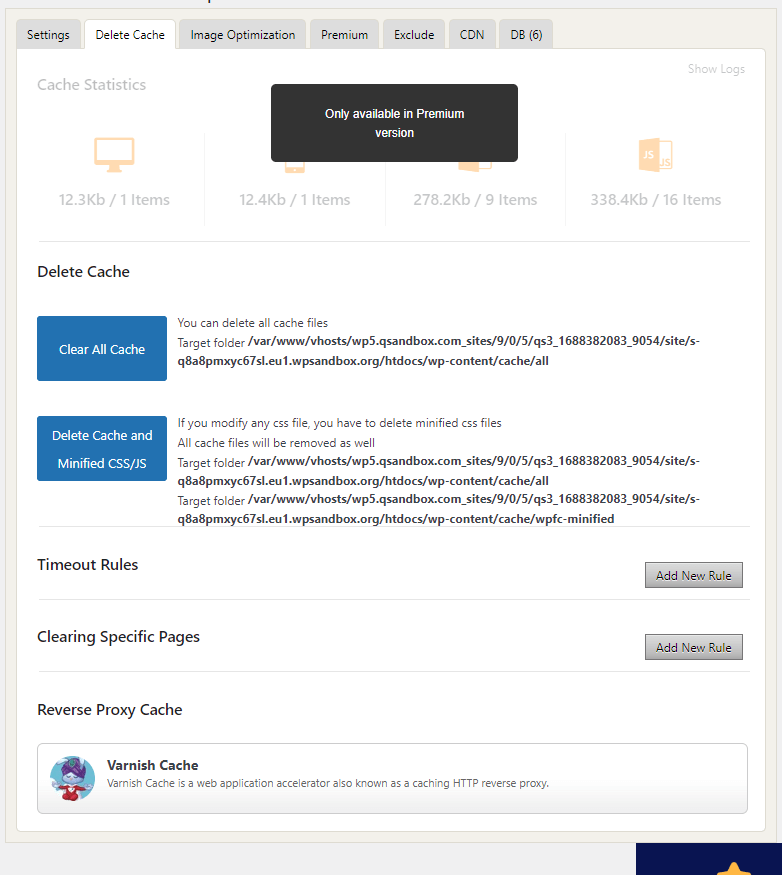
You can delete the
- Entire cache
- Cache with minified CSS and JS
You can manually clear the cache from this page. Clearing your cache is mandatory after making major changes to your website’s design or content. Apart from cleaning the cache manually, you can also automate the process. Use the timeout rule to clear the cache after a specific interval.
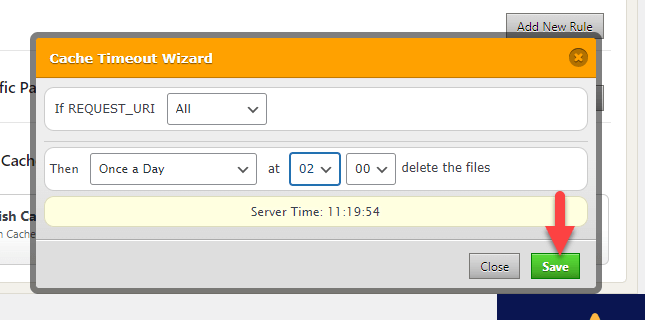
Suppose you are running a website actively publishing content; setting up a once-every-day rule is good. Otherwise, you could increase the period.
The next section will explain the image optimization options available in WP Fastest Cache.
3) Image Optimization Options
Image optimization is a premium feature of WP Fastest Cache. The speed will be affected when you add too many images to your blog posts. But with the right image optimization method, you can solve this issue.
You can optimize the available images with the WP Fastest Cache’s image optimization feature.
4) Exclude
You can exclude certain pages, user agents, cookies, CSS, and JS from caching. The exclude section is the right place you can configure for these tasks.

By default, the WordPress login and admin pages are excluded from caching. If running an online store, you should exclude the cart and checkout pages from caching. To exclude pages from caching, click the Add New Rule button.
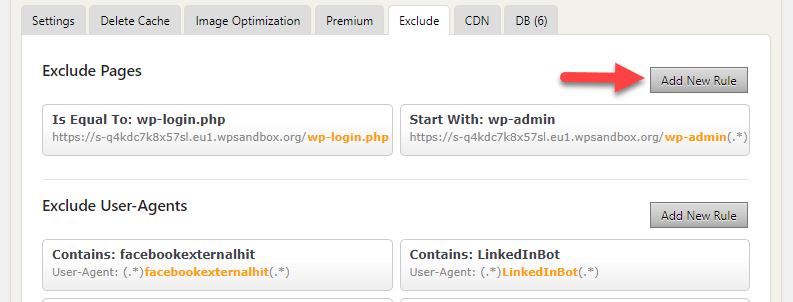
Similarly, you can also exclude
- User-Agents
- Cookies
- CSS
- JS
from caching. It is a good way to improve the speed of a website. The next section will show you the CDN configuration options available on WP Fastest Cache.
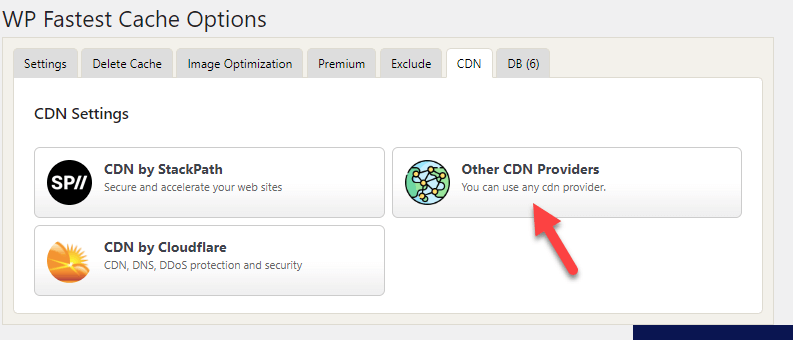
5) CDN Options
CDN stands for Content Delivery Network. Using a CDN will help you secure your website and make it faster. Since CDN providers come with more data centers around the globe, website visitors will get the site’s contents served instantly.
WP Fastest Cache comes with a dedicated CDN section.

The platform supports direct integration with CDN providers like
- StackPath
- Cloudflare
If you use any of those CDN providers, you can connect WP Fastest Cache with your account and start speeding up the website. On the other hand, if you use any third-party CDN providers, use the third option available.
Now, enter the CDN URL and Origin URL.
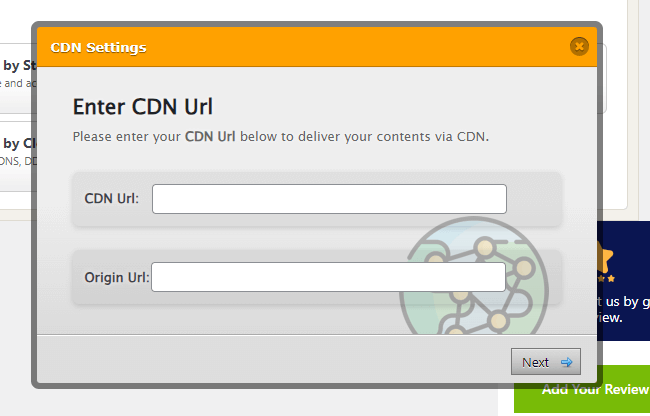
After entering the URLs, you can complete the CDN integration.
If you have connected your CDN with the website, let’s move to the next section, where you can clean your website’s database directly through WP Fastest Cache.
6) Database Optimization
Having a bulky MySQL database is not feasible. Since the website completely relies on the database for information, we need to ensure that the database is clean and well-optimized.
With WP Fastest Cache’s database optimization tools, you can clean the DB. This is a premium feature and not available in the free version plugin.
With the DB optimization feature, you can
- Remove trashed content
- Clean post revisions
- Get rid of trackbacks
- Eliminate pingbacks
- Clear transients
When you handle a multi-author blog, the database must be optimized well. When authors work on multiple posts, they will save a decent amount of revisions in the database. Hence, database optimization is no more optional.
Check out this article if you are looking for a dedicated guide on optimizing the MySQL database. We have added several methods and tools you can use to clean your WordPress database.
That’s it!
This is how you can set up WP Fastest Cache on your WordPress website. You can always tweak the options to match it with your liking.
How to Check the Website’s Speed
To check the website’s speed, a couple of tools are available. In our case, we highly recommend using the following:
Here, we will show you how to use GTmetrix to test the website’s speed.
First, go to GTmetrix. There, you need to enter the website’s domain name and click on Test your Site.
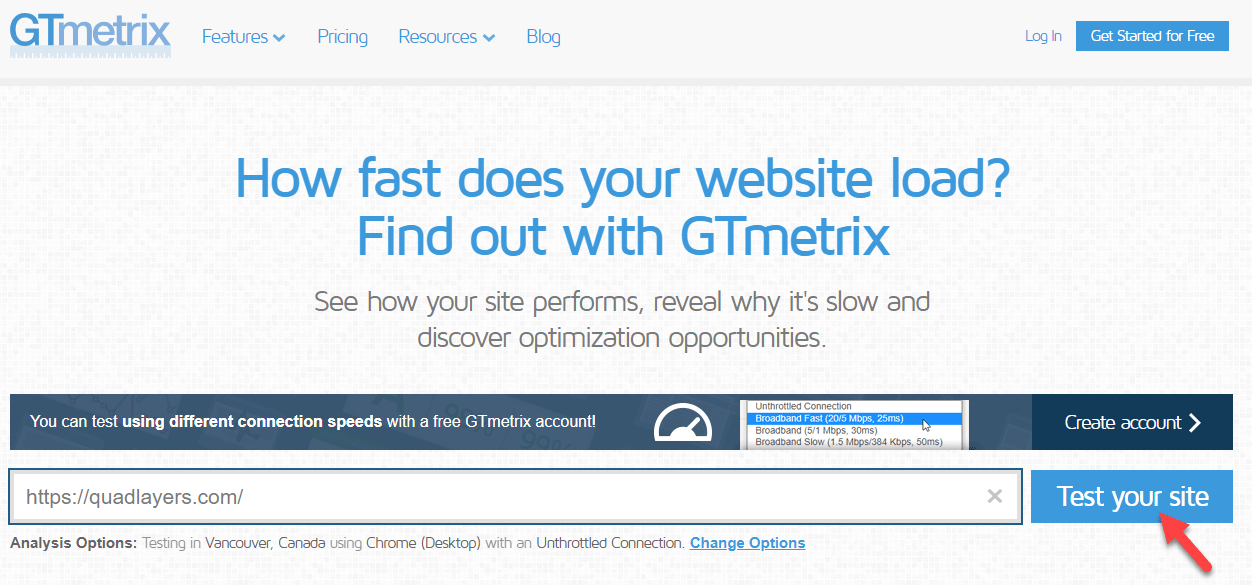
The platform will take a couple of seconds to analyze the website. And once it’s done, you will see the page speed report on the next screen.
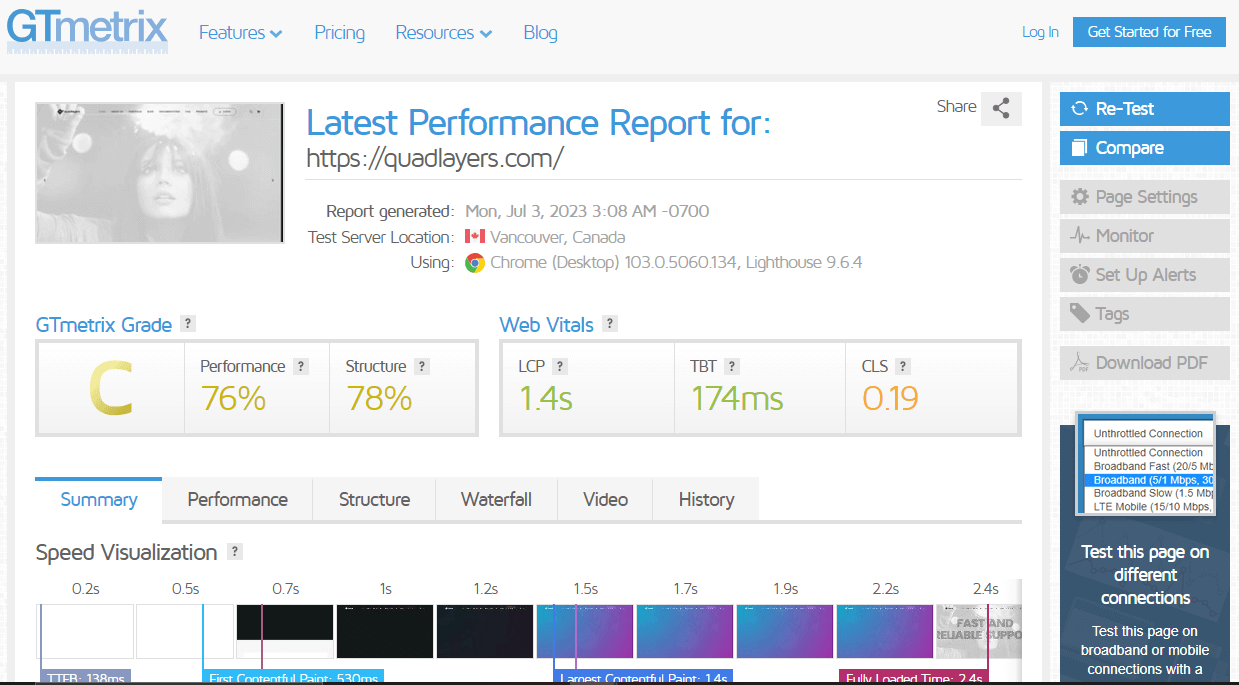
Apart from the speed report, the tool will also show you core web vital results such as
- LCP
- TBT
- CLS
You can also use Google’s Page Speed Insights tool for a detailed analysis. The results would be similar. This way, you can check the speed of a website. We recommend checking the website’s speed before configuring a caching plugin and rechecking it after properly configuring it.
Bonus: Best WordPress Caching Plugins
You can always find more caching plugins other than WP Fastest Cache. Here are three of the popular plugins you should try:
- WP Rocket
- FlyingPress
- Perfmatters
Let’s quickly look at each tool and see what they offer.
1) WP Rocket
WP Rocket is our favorite WordPress plugin when it comes to caching. It offers so many features you can use to boost the performance of your website. The plugin comes with a simple configuration wizard. This helps everyone to customize the plugin according to their preferences.
Also, the dashboard is user-friendly. Finding the right options and tools would be a cakewalk.
The eCommerce optimization feature of WP Rocket could be a useful addition to every online store. When you handle an online store, you must ensure the plugins you use are compatible with the platform.
Otherwise, you will face several unwanted issues affecting the user experience. In this case, WP Rocket is compatible with most eCommerce plugins like WooCommerce, Easy Digital Downloads, etc.
You can also remove certain pages from caching. The checkout and payment pages need to be removed from caching. So, this is an excellent feature. The integration options with CDNs are a notable feature of WP Rocket.
If you use a CDN provider to boost your website’s speed, integrating it with WP Rocket is easy.
Features
- Optimized for eCommerce
- Page caching
- Database optimization
- Lightweight
- Easy to use
- Media optimization
Pricing
WP Rocket is a premium plugin. The premium subscription starts at $59 a year.
2) FlyingPress
FlyingPress is one of the popular speed optimization plugins for WordPress. With the plugin, you can generate a cached version of your website and optimize the speed without adding too much load to your web server. Also, once you have enabled the cache preloading feature, the cached files will get updated whenever you make an update.
You can also get rid of unused CSS by generating critical CSS files. To optimize your links even further, there’s a preloading link feature. Once the visitor land on the page and start hovering the mouse over links, FlyingPress will automatically preload the specific links. This will help you speed up the website without much hassle.
Google fonts optimization is another notable feature of FlyingPress. Using it, you can reduce the HTTP requests sent out from the server.
Features
- Database optimization
- Static file optimization
- Font optimization
- Analytics optimization
- Minification
- Preloading
Pricing
FlyingPress is a premium solution. The plans start at $60/year.
3) Perfmatters
If you need a lightweight plugin to handle speed optimization tasks, check out Perfmatters. Perfmatters comes with several optimization methods to help you speed up the website. The most popular feature of the plugin is the script manager. Using this feature, you can decide where to enable specific scripts.
For example, if you use a contact form plugin, you only need to run the script inside your contact page. Using the scri[pt manager feature, you can turn off the JavaScrip[t execution from the rest of the website. This will help you optimize your website for speed. Another notable feature is database optimization.
You can clear your post revisions, deleted posts, spam comments, etc. This will help you optimize your website’s database for better performance. With lazy loading, you can optimize the image serving too.
Features
- Lightweight
- Easy to configure
- Database optimization
- Modify WordPress heartbeat
- Disable emojis
- Script manager
Pricing
Perfmatters is a premium plugin. The premium plan starts at $24.95 a month.
Conclusion
You will notice the speed improvement if you start using a WordPress caching plugin on your website. With the right configurations, you can score even better.
This article shows you how you can set up WP Fastest Cache properly. It is one of the finest free WordPress caching plugins you can use to improve your website’s speed. As we mentioned, many professionals and business websites use the same plugin to boost their speed.
We highly recommend trying it and checking the before and after results.
We hope you have enjoyed reading the guide on how to set up WP Fastest Cache properly and learned something new. If you still have questions, feel free to leave a comment.
Here are some related articles you might like:
