
How to Create a WooCommerce Multi vendor Store
Are you planning to start a large-scale eCommerce store that allows several vendors to offer their goods and services in a single storefront? If so then you’ve come to the right place. In this article, we’ll show you how to create a WooCommerce multi-vendor store.
But before we get into it, let’s take a look at why we need to create a multi-vendor store in WooCommerce. What benefits does it bring to the owners as well as sellers? Let’s find it out.
Why create a multi-vendor store in WooCommerce?
You’ll need a solid platform if you want to create a profitable multivendor store like Amazon or eBay. There are numerous platforms to create a multi-vendor store, however, WooCommerce is the perfect solution.
Because WooCommerce lets you add extra add-ons which consist of powerful features required to build a marketplace. It is very easy to create and manage a multi-vendor store with the combination of WooCommerce and third-party tools. Such stores are growing in popularity because it benefits vendors, customers as well as marketplace owners.
Advantages of a multi-vendor store for marketplace owners
One of the main advantages for marketplace owners is that they get to earn a commission on each sale made by the sellers. They can set a commission rate based on various factors like the number of sold products. Also, the increasing number of sellers and products means you’ll get an increasing audience too. Because your multi-vendor store is filled with all kinds of products ranging from gadgets to simple household items.
Additionally, store owners get full control over the website by choosing and approving the vendors. Besides that, calculating and withdrawing the amount is not complex at all. Owners can set up automated payments and schedule the amount withdrawal weekly or monthly through various means of options such as PayPal and Stripe.
Advantages of a multi-vendor store for sellers
There are lots of advantages for sellers who are interested in multivendor stores. One of the perks for sellers is that they do not have to invest a large sum of money to gain customers. Also gaining an audience is quite easy compared to a traditional online store due to the fact of the huge marketplace and shared audience.
However, vendors have limited to no access to the main dashboard. But they still have their own dashboard from which they can manage and add new products easily. Not only that sellers can also get the full sales report from the same dashboard.
One of the best things about the multi-vendor stores is that sellers can sell any physical and digital goods and can set the shipping charges.
As you can see how a multi-vendor store is beneficial for everyone. If you have decided to create a multivendor marketplace, here are a few things that you need to consider:
- Mobile friendly and user-friendly website
- Easy navigation of the products
- Secured payment gateway
- Consumer data privacy and safety
- One page checkout for all of the product
- Reviews and Rating section
So these are the reasons why you should create a multi-vendor store in WooCommerce. Now let’s go ahead and learn to create a WooCommerce multi-vendor store.
How to create a WooCommerce Multi Vendor Store?
The best, easy and quick way to create a multi-vendor store in WooCommerce is by using a plugin. There are multiple WooCommerce multi-vendor marketplace plugins that you can use for your online store. But for today’s demonstration, we’ll be using the Dokan plugin developed by weDevs.

Dokan is a freemium plugin where all of the essential requirements for a multi-vendor store are covered in the free version. However, if you require more advanced features then you can opt for the premium version which also includes one year of updates and support and starts at 149 USD per year.
Now let’s see how we can use the Dokan plugin to create a multi-vendor store in WooCommerce.
But before we get started, make sure you’ve completed all of the essential steps while setting up the WooCommerce and are using one of the WooCommerce compatible themes. These steps ensure to prevent any theme or plugin conflicts while setting up the Dokan plugin on your WooCommerce website. Now, let’s begin by installing the plugin for now.
Step 1: Install and Activate Dokan Plugin
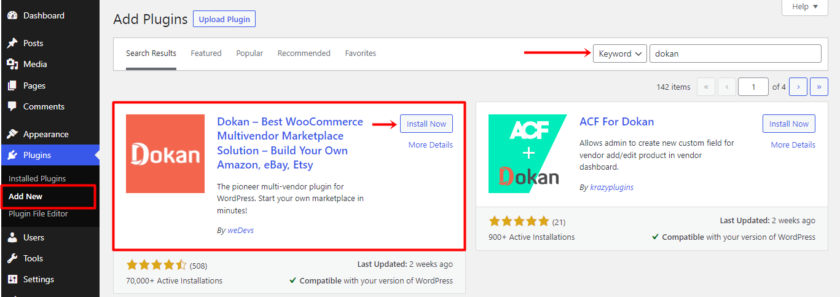
To begin, navigate to Plugins > Add New in your WordPress dashboard. And type the plugin’s keywords (Dokan) into the search bar on the right side of the screen. Then, to install the plugin, click ‘Install Now.’
As soon as the plugin is fully installed, activate it by clicking the ‘Activate’ button.
For additional features, you’ll get extra add-ons and extensions in the premium version. To unlock those features, you’ll have to manually install and activate the premium version of the Dokan plugin. If you need more information, please see our comprehensive article on how to manually install a WordPress plugin.
Step 2: Set Up the Dokan Plugin
If you’re using the plugin for the first time, a setup wizard page will pop up after activation.
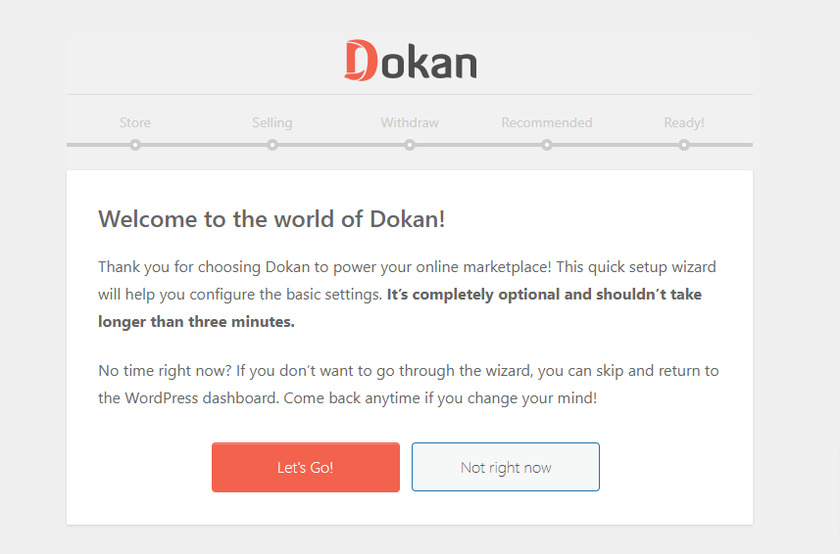
Click on the ‘Let’s Go’ button to access the store’s setup page. Up clicking that, you’ll reach to store’s set up a page where you have to provide some information about the seller’s store. You’ll have to enter the store URL and also select the additional fee recipient for shipment. Furthermore, you can select maps API if your business requires geo-location service. When you’re done, click on the ‘Continue’ button. 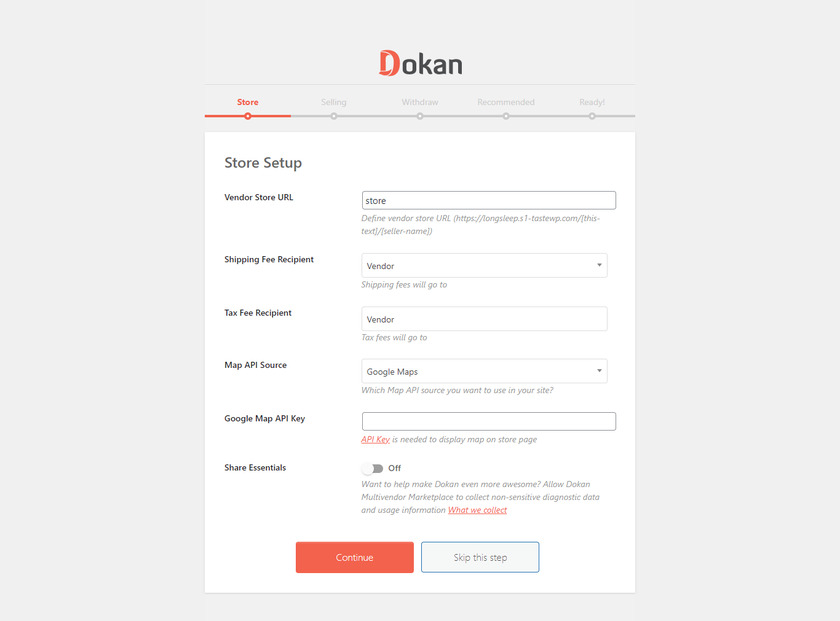
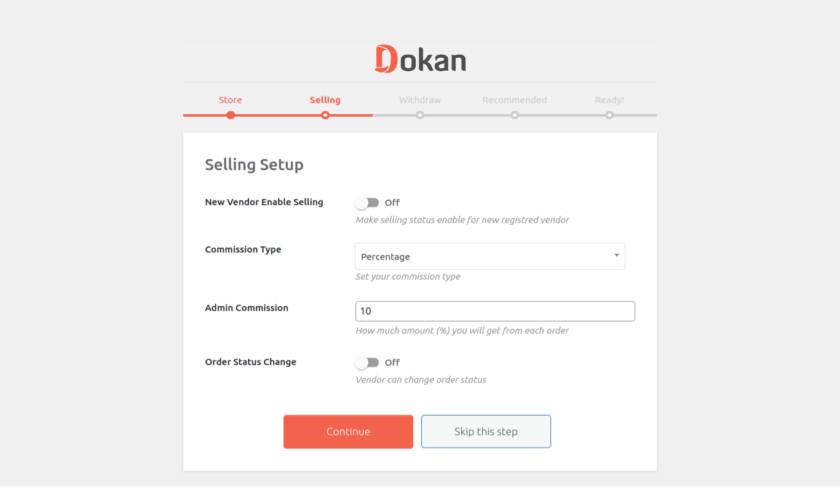
The next option is to configure the selling option which is the most essential phase while setting up the plugin because from here you can enable the selling functions. For sellers who have just registered, you must now enable the selling status to activate the selling functions. You should also fix the percentage of commission for your vendor at this point.
Also, you can allow your vendors to change the order status of the products by simply changing the toggle bar from off to on.
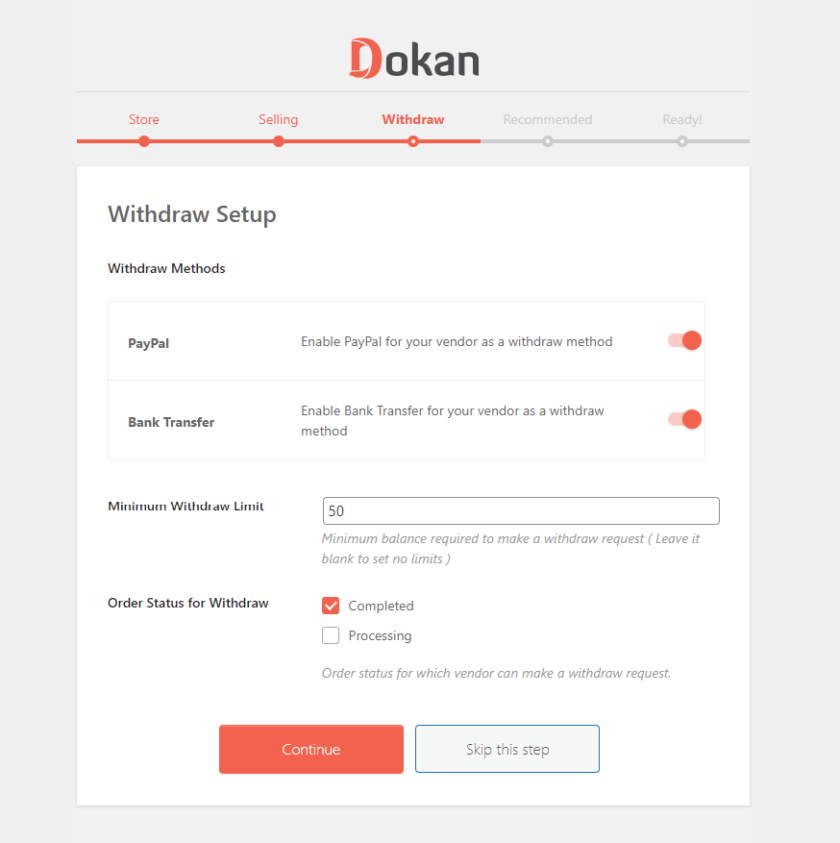
Then you can choose the withdrawal methods for sellers which are Paypal and Bank transfer. You can select the methods that best suit your withdrawal needs from these two options. After that, you can set up a minimum withdrawal amount or leave it blank if you don’t want to set the minimal amount limits. Also, you can let vendors withdraw the amount according to the product order status.
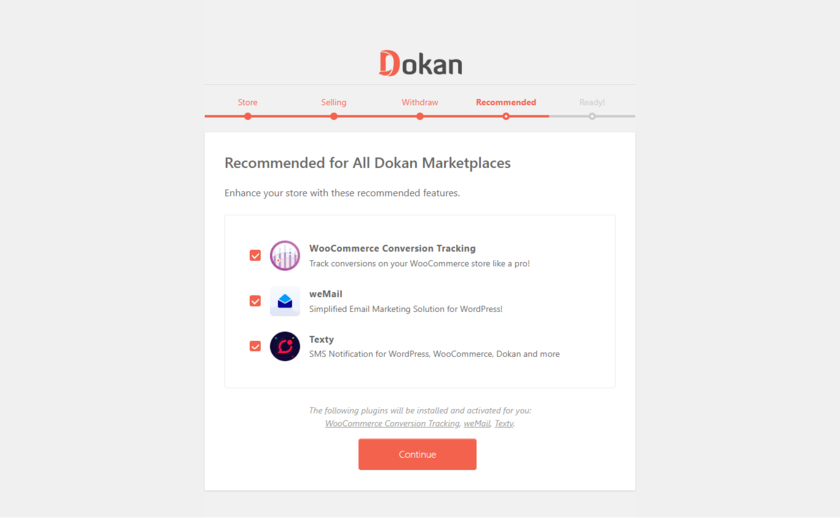
After that, you’ll get the recommendation of three plugins weMail, WooCommerce Conversion Tracking, and Texty which enhances the features of your multi-vendor store. If you click on the ‘Continue’ button, all of the plugins will be installed automatically.
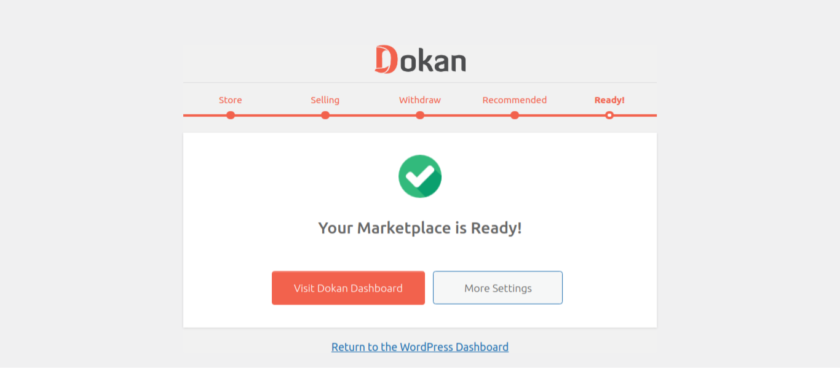
Once you are done setting up the plugin, the last section in the setup wizard is to return to your WordPress dashboard.
If you have missed any steps or want to change the information that you have input during the set up then it can be changed from the plugin settings. You can access the settings from your WordPress Admin Dashboard > Dokan > Settings.
Step 3: Vendor Registration
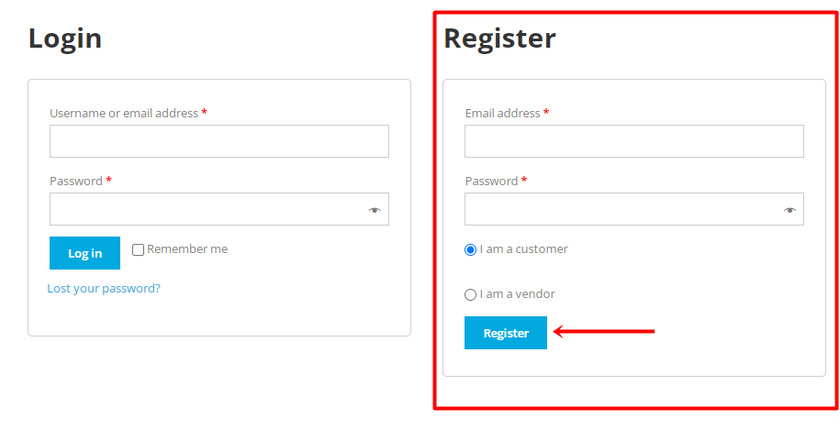
To be a designated vendor one must register via WP User Frontend by filling up the necessary information in the given fields.
After the registration is completed as a vendor, you’ll again find a store setting wizard which consists of very basic customizations.
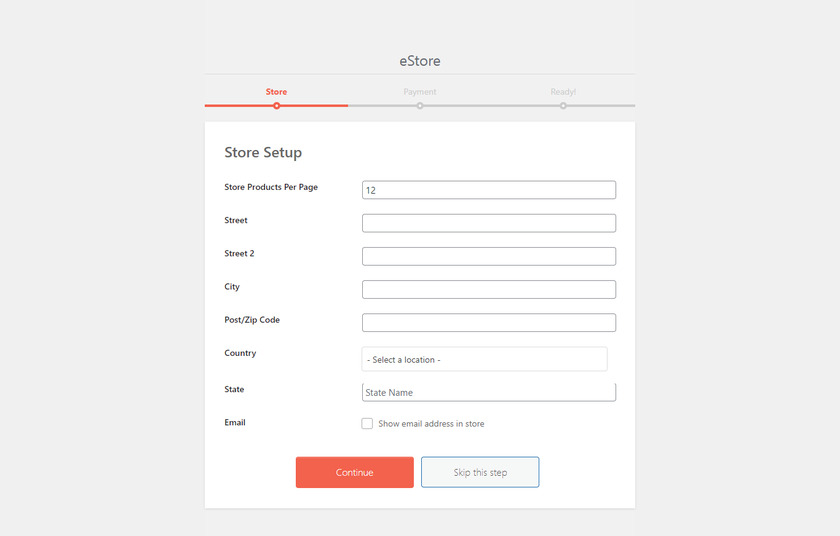
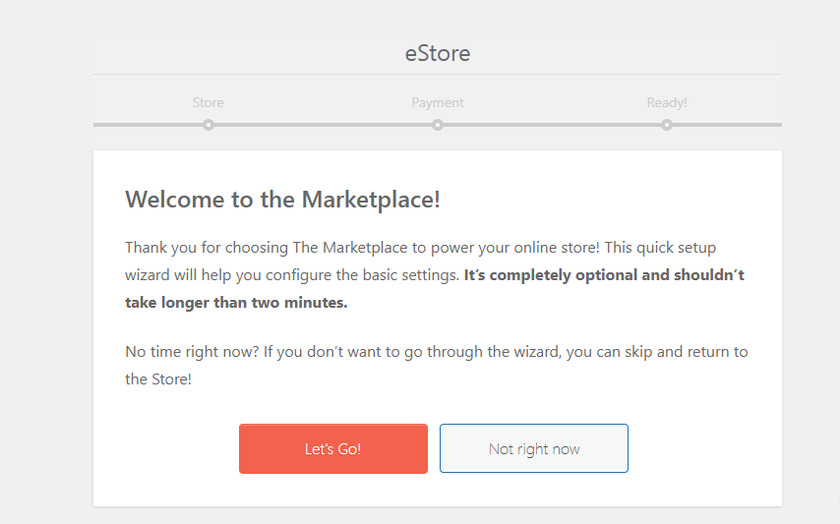 However, these settings are optional so it’s up to you whether to continue or skip the process. If you click on the Let’s Go button you’ll find a store setup page where you can add a number of products in a page along with the full address of your store.
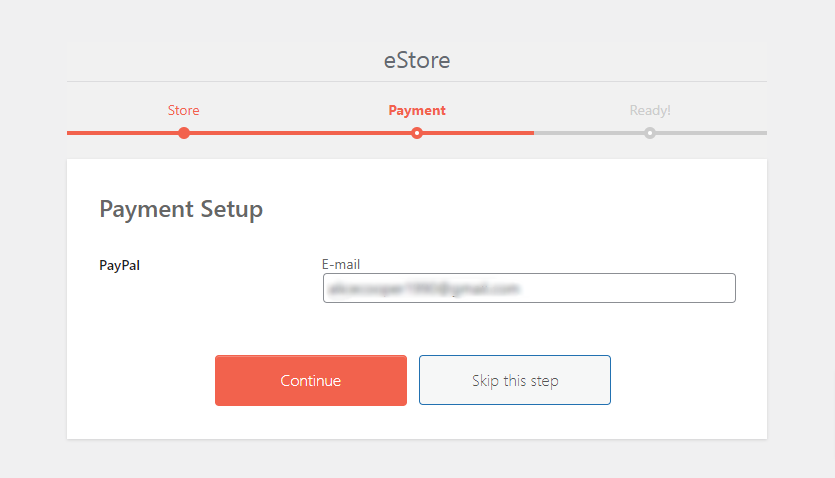
Next is the payment setup option where the vendor can fill up the email address of the payment method they have chosen such as PayPal.
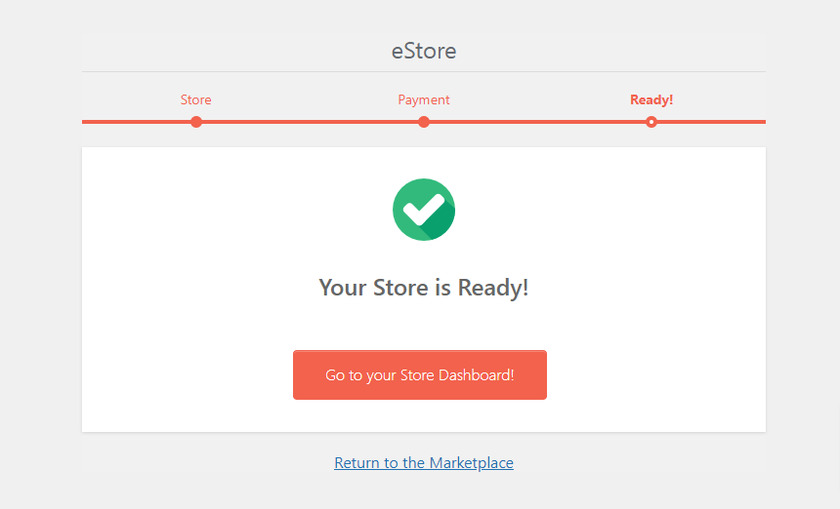
And that’s it. These are the basic customization option for a vendor which just takes a few minutes to complete. After that, the vendor can go to the store dashboard or visit the Marketplace.
Step 4: Add Vendors Manually
Besides vendors registering themselves you can also manually add them to the marketplace from your backend.
To do so, go to your Admin dashboard. From the dashboard, menu select Dokan > Vendors.
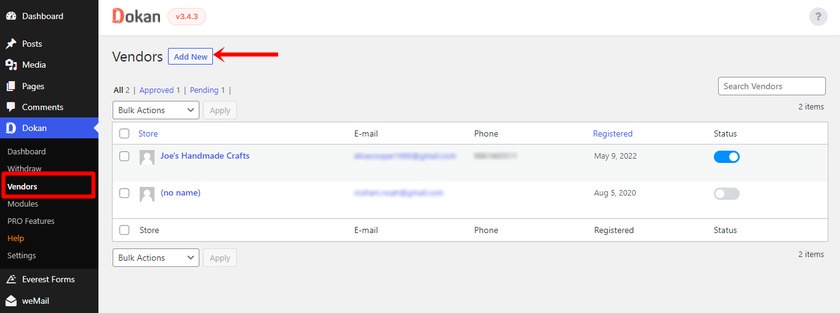
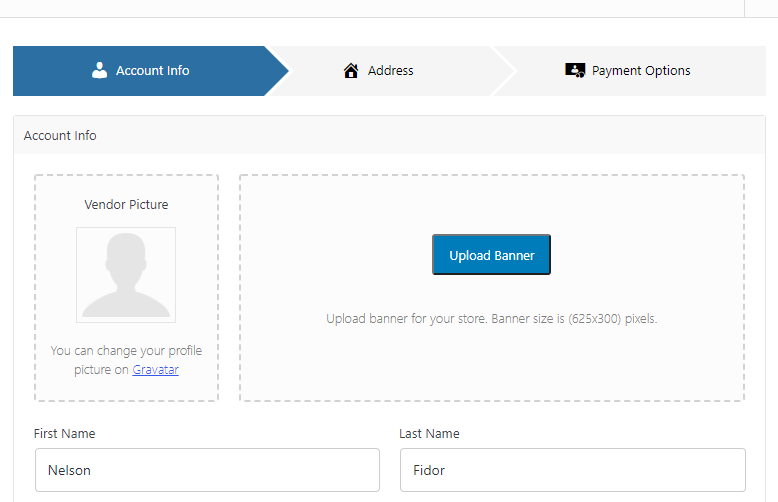
Then click on Add New button. Here, the admin should fill out the form with information like vendor name and contact number along with store name URL. Similarly, vendor images and banners can be added. After filling up the information of the vendor click ‘Next’ to process to another step.
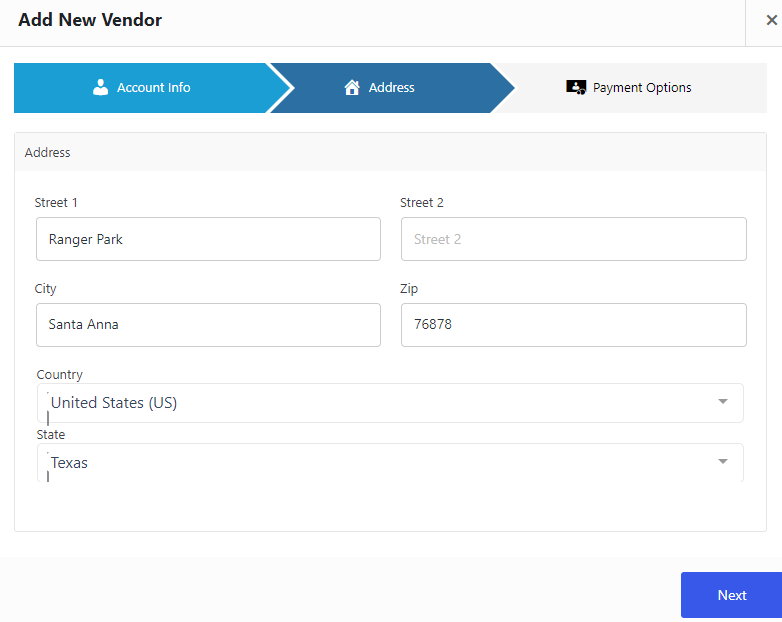
The next step is to fill up the full address of the vendor’s store. And again click on ‘Next’.
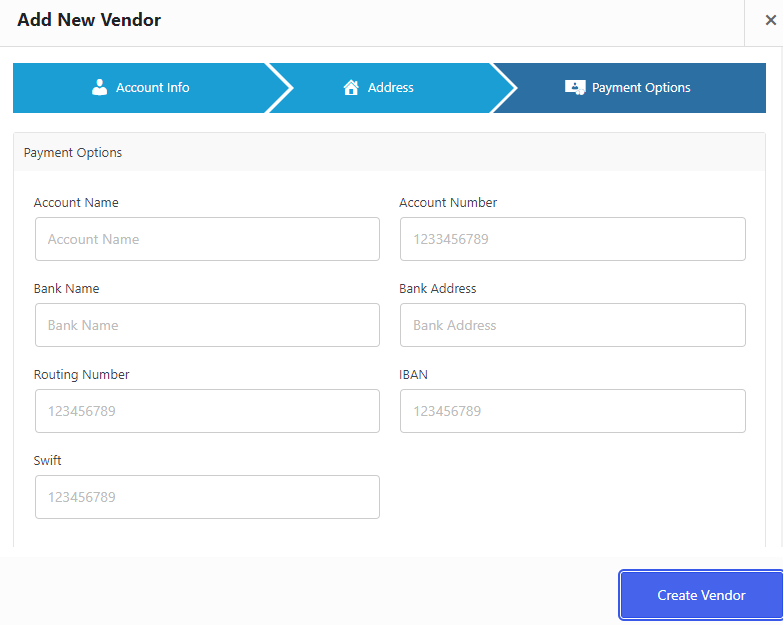
Now, the admin should fill in the vendor’s account details such as account name, account number as well as Paypal account email address, and so on. After filling in all of the account details click on the ‘Create Vendor’ button.
You can find the list of the seller in the WooCommerce marketplace vendor list from where you can edit and manage the vendors.
Step 5: Configure Payment Setting
To withdraw the amount from the commission you can select one payment channel. In terms of payment withdrawal methods, Dokan offers only two options in the free version: PayPal and Bank Transfer. To select the payment methods go to the WP admin menu and select ‘Dokan’. From there go to the ‘Settings’ and navigate to ‘Withdraw Options’.
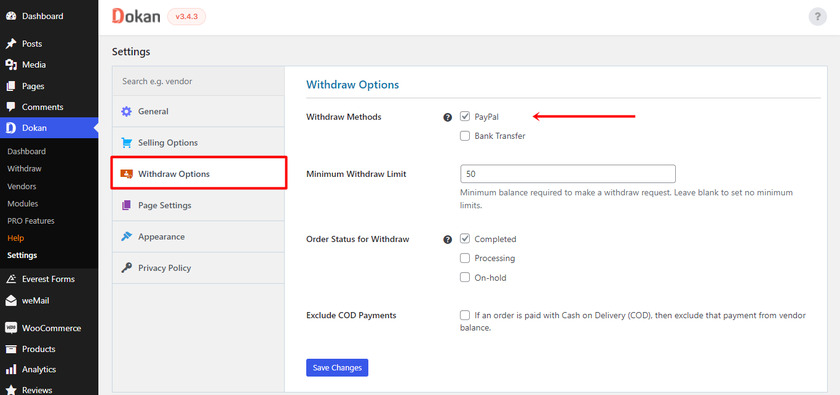
Using different payment channels within your WooCommerce business allows you to keep track of your withdrawals.
And this is how you can build a WooCommerce multi vendor store with the Dokan plugin. These were all of the basic features that you can find in the free version. To unlock other advanced features and functionality, you can switch to the premium version if necessary.
Bonus: How to import products in WooCommerce
We have already presented you with one of the easiest ways to create a multi-vendor store in WooCommerce.
But as a bonus, we’ll also provide this guide to importing products in WooCommerce. If you have lots of products in your online store then importing the products saves lots of time and is also hassle-free.
Even though there are various methods to import products in WooCommerce, we’ll be using the easiest and quickest way which is by using a dedicated plugin.
For this tutorial, we’ll use Product Import Export for WooCommerce.
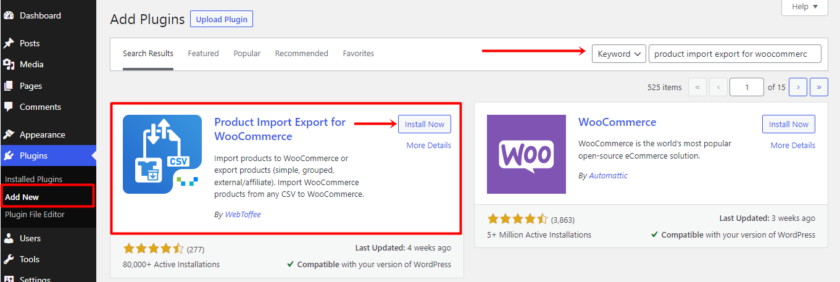
 Let’s start by installing and activating the plugin. Go to your WordPress admin area > Plugins > Add New and search for ‘Product Import Export for WooCommerce‘ in the search box. Click on the ‘Install Now’ button after the plugin is displayed. Following that, click on the ‘Activate‘ button.
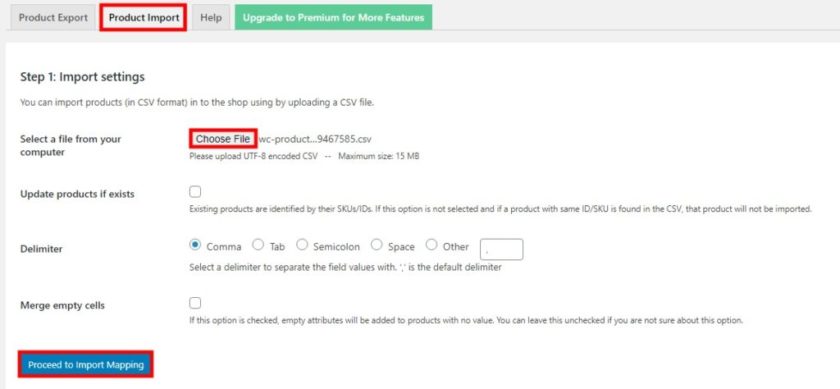
After the installation and activation are completed, go to the Products > Product Im-Ex > Product Import tab. To import the product first of all you must export the product. If you haven’t exported the product and are not sure how to do it then check out this article. Then you must upload the CSV file containing all of your items here. For that click on ‘Choose File’ and upload the file containing all of your exported products.
Now next step is to map the columns to the product data fields. The plugin will take care of this for you, but make sure you choose the CSV column header that corresponds to the product fields you wish to import to your WooCommerce store. After that, when you’re done click the ‘Start Import’ button.
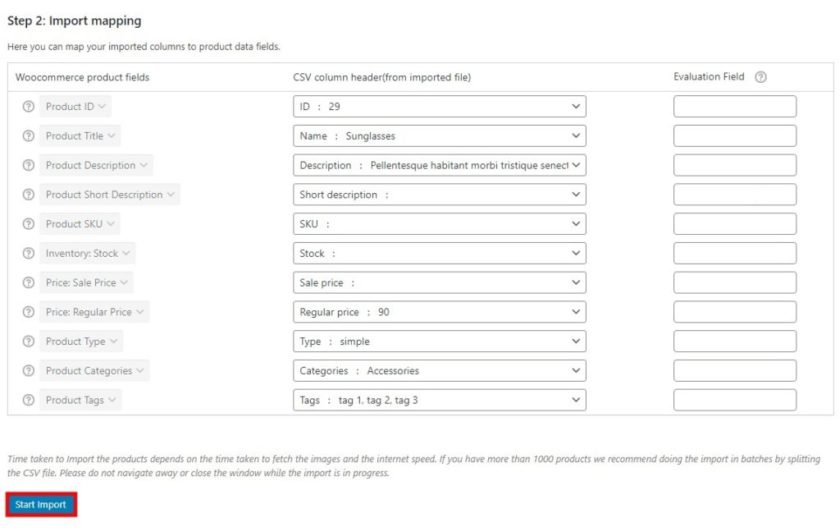
As soon as you click on the button, the importing process will start. If you have a lot of products, this could take a while, so be patient. When the process is complete, navigate to Products > All Products to make sure you’ve imported all of the products into your WooCommerce store.
That’s it! You have successfully learned to import products in WooCommerce with the help of a plugin.
However, if you do not want to install any plugin then you can also import products in WooCommerce using various other methods. If you want to learn how to do so, we recommend checking out this detailed article where you can use a built-in importer to import the products.
Conclusion
This brings us to the end of our guide on how to create a WooCommerce multi-vendor store. We’ve shown you one of the easy ways to create a marketplace store with the help of WooCommerce and a dedicated multivendor plugin.
With the help of such extensions, you do not need to spend lots of time and money to create a store like Amazon. All you need to do is deal with a few basic customization and configuration. Creating multivendor store lets you earn a reasonable commission without worrying about inventory, logistics, product dispatch, and so on.
Not only marketplace owners but vendors also do not need to invest much because they’ll profit from the traffic of the multi-vendor store traffic and brand value. Also managing the product and keeping the track of data of the products is very easy with the help of a Vendor Dashboard.
We hope you can now easily create a multi-vendor store in WooCommerce. If you have any confusion while following the guide let us know in the comment section. We’ll be glad to help you.
For now, if you are interested you can check out other WooCommerce related blogs:
- How to enable shipping address in WooCommerce
- Best WooCommerce Shopping Cart Plugins
- How to make WooCommerce checkout like Shopify
