How to create WooCommerce one page checkout
Do you want to reduce cart abandonment and increase your conversion rates? In this guide, you’ll learn how to create a WooCommerce one-page checkout both with and without plugins to help you boost your sales.
It’s no secret that the checkout is one of the most important pages for an online store. It’s also, however, the step where many users abandon their carts. According to recent research, nearly 70% of shoppers abandon their cart at some point and 21% of them do so at the checkout. Why? Usually, because the purchase process is too long or complicated.
Even though there isn’t a single solution that works for every single eCommerce site, one-page checkout pages work better for most businesses. That’s why creating a one-page checkout for your WooCommerce store can help you reduce cart abandonment and boost your sales.
What is a WooCommerce one-page checkout?
A one-page checkout displays all the fields of the checkout on a single page. It can include the cart content, payment details, billing and shipping addresses, shipping options, and other information such as images, text, or additional contact forms.
The main goal behind a one-page checkout is to shorten the purchase process and reduce cart abandonment. As customers fill in all the information to place their order on a single page, they’re more likely to finish the process.
Benefits of one-page checkouts
Some of the benefits of a one-page checkout are:
- It helps reduce cart abandonment
- Shortens the checkout process
- Increases conversion rates
- Easy to understand because shoppers can see all the information they need to fill in on one page
For more information about one and multi-page checkouts, have a look at this full guide.
How to create a WooCommerce one-page-checkout
There are different ways to create a WooCommerce one-page checkout:
- Using a plugin
- Programmatically
- With a page builder
- From the WordPress dashboard
In this section, we’ll have a look at each option so you can choose the one that best suits your skills and needs.
1) Create a one-page checkout with a plugin
The first option to create a one-page checkout in WooCommerce is to use a plugin. There are many one-page checkout plugins out there, both free and premium. For this demonstration, we’ll use WooCommerce Direct Checkout. This plugin will help you shorten the checkout process and increase your conversion rates. Not only can you create a one-page checkout but also remove unnecessary checkout fields, add a quick buy button, and more.
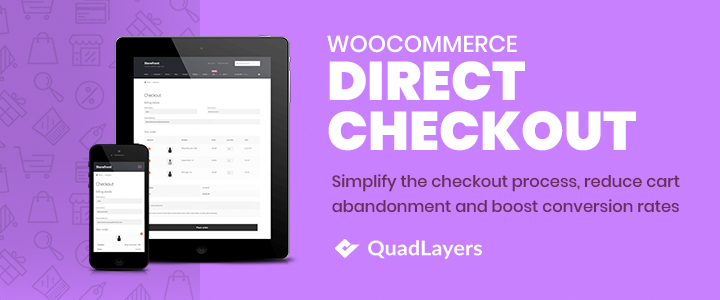
One-page checkout with Direct Checkout
Direct Checkout has a free version with basic features and 3 premium plans with more functionalities that start at 19 USD (one-time payment).
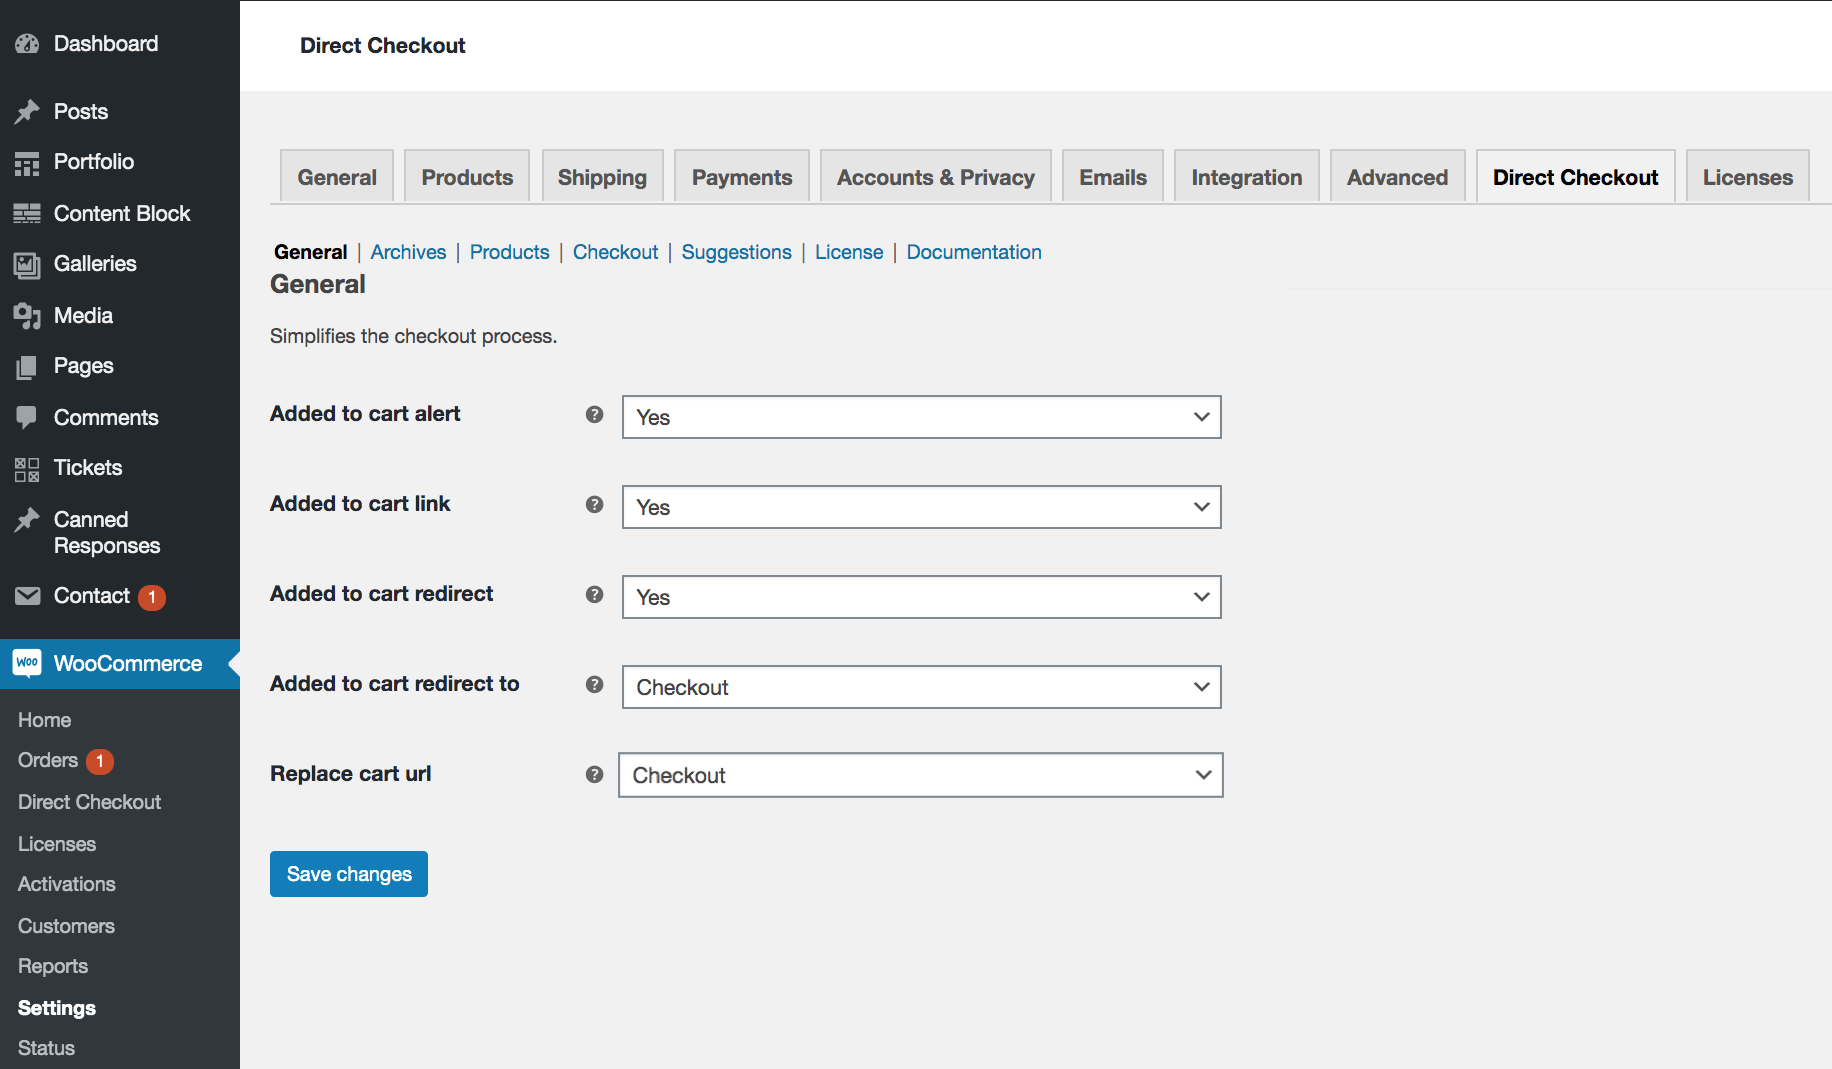
First, download the plugin. You can do it from this link or your WordPress dashboard. After activating it, go to WooCommerce > Direct Checkout. Here, set it up as follows so it redirects users from the shop and single product pages directly to the checkout page.
- Added to cart alert: It replaces the “View cart” alert with direct checkout
- Added to cart link: It replaces the “View cart” link with direct checkout
- Cart redirect: This allows you to change the behavior of the Add to cart button
- Cart redirect to: You can choose where to redirect users after they add something to their cart. In this case, we’ll redirect them to the checkout
- Replace cart URL: As after shoppers add something to their cart we’ll redirect them to the checkout, we’ll replace the cart URL with the checkout link
Please note that these changes will apply to the shop, single product, and categories pages. Additionally, make sure you don’t have any link that takes users to the cart since we are going to disable it.
That’s it! You’ve just simplified the checkout process by redirecting customers from the product and shop pages directly to the checkout. On top of that, shoppers will be able to edit and confirm their orders on the checkout page.
You can create a one-page checkout with the free version of WooCommerce Direct Checkout, but if you want more features to take your checkout to the next level, you can check out some of the premium plans.
2) Create a one-page checkout programmatically
In this section, we’ll use some PHP scripts and CSS styling to add functionalities to the one-page checkout we’ve created with the plugin. So we recommend you have a look at the first section and install and set up the plugin to create a single page checkout. It will literally take a few minutes.
Once you’ve done that, let’s see how to fully customize your one-page checkout page programmatically.
NOTE: As we’ll edit some core theme files, before you start, make sure you create a backup of your site and have a child theme installed on your site. You can use any of these child theme plugins or create one on your own following this guide.
2.1) Add product metadata to the checkout page
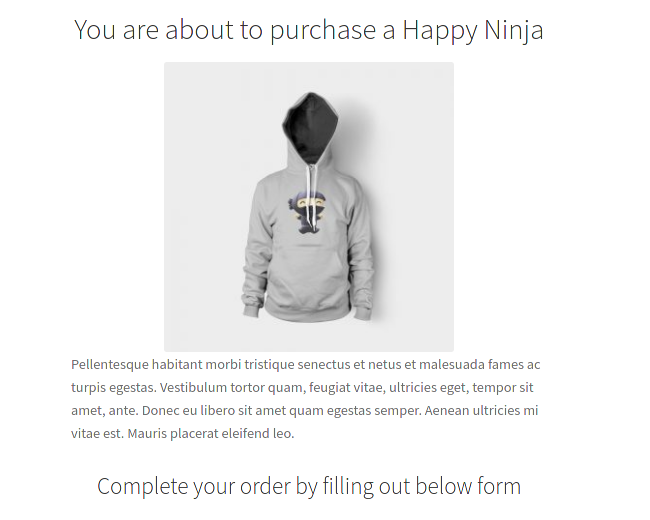
Let’s start by adding some information about the product that the user is purchasing. We’ll display the name, thumbnail image, and description of the product on the checkout page.
As we’ve disabled the cart page, after adding a product to the cart, shoppers will be redirected to the checkout. Even though the cart page is hidden, we can use it to retrieve all the product information from it.
To do that, simply paste the following code in the functions.php file of your child theme:
// hook for displaying product meta data
add_action('woocommerce_checkout_before_customer_details','QuadLayers_product_meta');
  function QuadLayers_product_meta(){
    echo '<div class="custom-product"><h2>You are about to purchase a ';
    $cart = WC()->cart->get_cart();
    foreach( $cart as $cart_item_key => $cart_item ){
      $product = $cart_item['data'];
      echo $product->get_name()."</h2>";
      echo $product->get_image();
      echo "<span>".$product->get_description()."</span>";
   }
  echo "<h3>Complete your order by filling out below form</h3>";
}
To test this, click the purchase button on any product and after being redirected to the checkout page, you’ll see something like this:
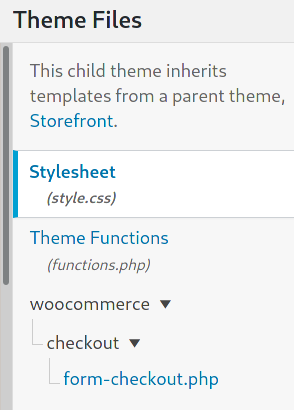
2.2) Overwriting the WooCommerce checkout template file
The file responsible for printing the checkout page is form-checkout-php and it’s located in the WooCommerce plugin in the templates folder: /woocommerce/templates/checkout.
To overwrite this file, copy the original file from the WooCommerce plugin and paste it in the checkout folder, inside the WooCommerce directory of your child theme.
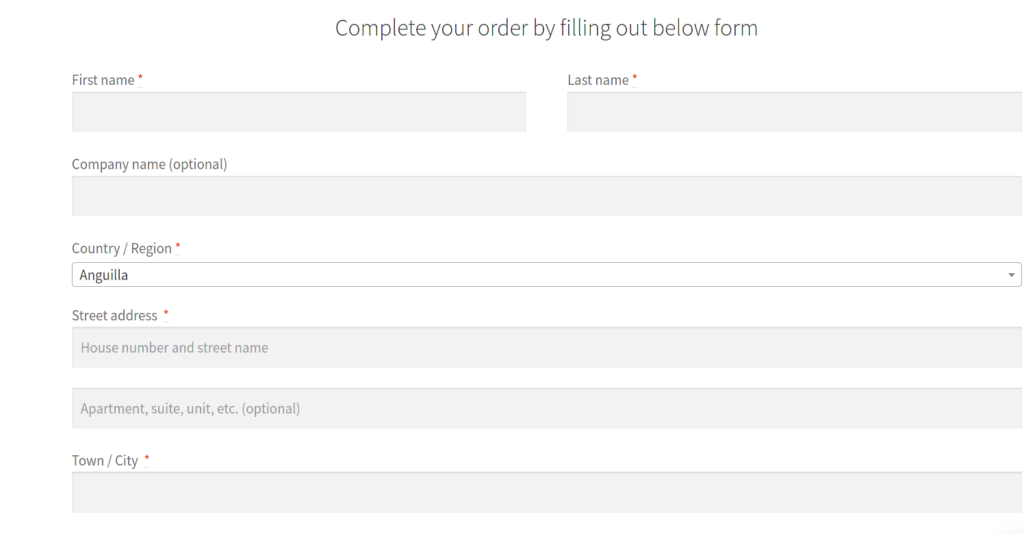
In the default WooCommerce checkout, the layout is set to two columns. The billing, shipping, and additional forms are displayed in the first column and the order details in the other one.
You can change this by editing the HTML class of the <div> element enclosing forms, from col2-set to col1-set as follows:
<div class="col1-set" id="customer_details">
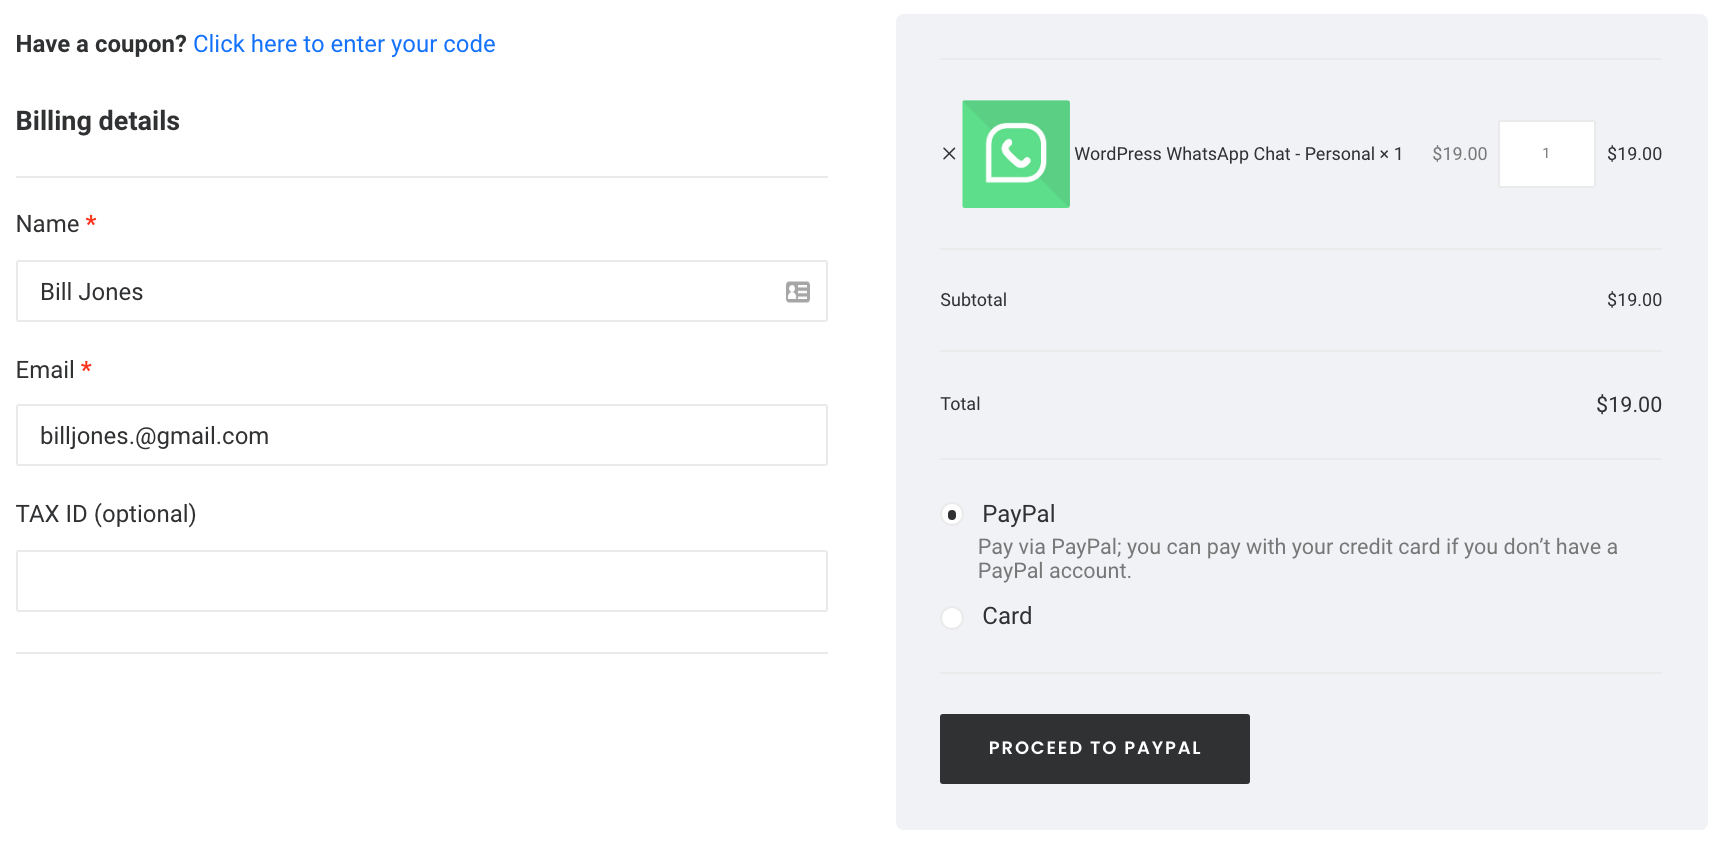
After this simple edition, all the forms will be displayed in a single full-width column like this:
Next, we’ll edit the title of the order details and change it from “Your order” to “Order review” with the following script:
<h3 id="order_review_heading"><?php esc_html_e( 'Order review', 'woocommerce' ); ?></h3>
These are just a few simple examples of what you can do here. Feel free to take it further and make your own customizations. You can use any of the native WordPress functions here. For more information on checkout hooks, you can have a look at this article.
To know more about how to customize WooCommerce templates programmatically, have a look at this full guide.
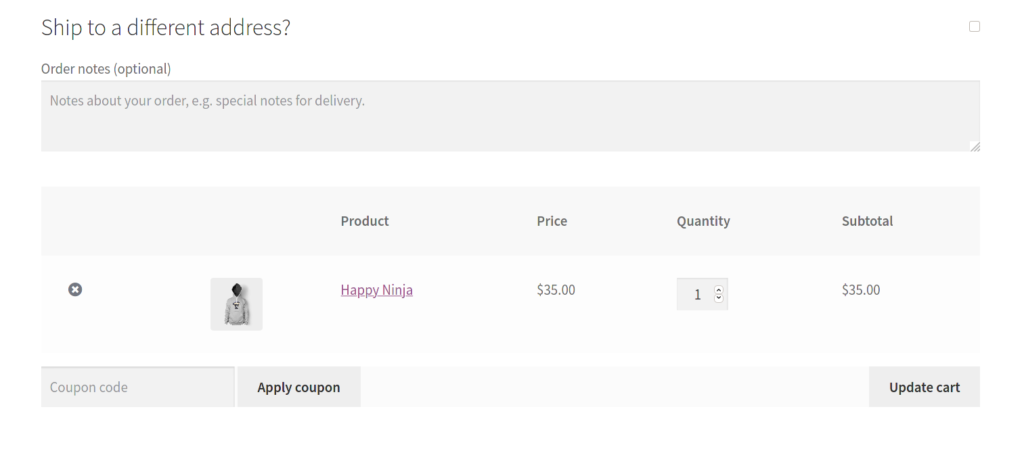
2.3) Add cart to the checkout page
You can use some shortcodes on the checkout page, so if you want to add the cart there, you can use the WooCommerce cart shortcode as follows:
echo do_shortcode('[woocommerce_cart]');
To display the cart right before the order details, paste this PHP script in the functions.php file of your child theme:
add_action('woocommerce_checkout_after_customer_details','QuadLayers_add_cart_checkout');
function QuadLayers_add_cart_checkout(){
       echo do_shortcode('[woocommerce_cart]');
}
You should now see the cart with the products the user has added at the end of the checkout forms:
2.4) Add custom content to the checkout page
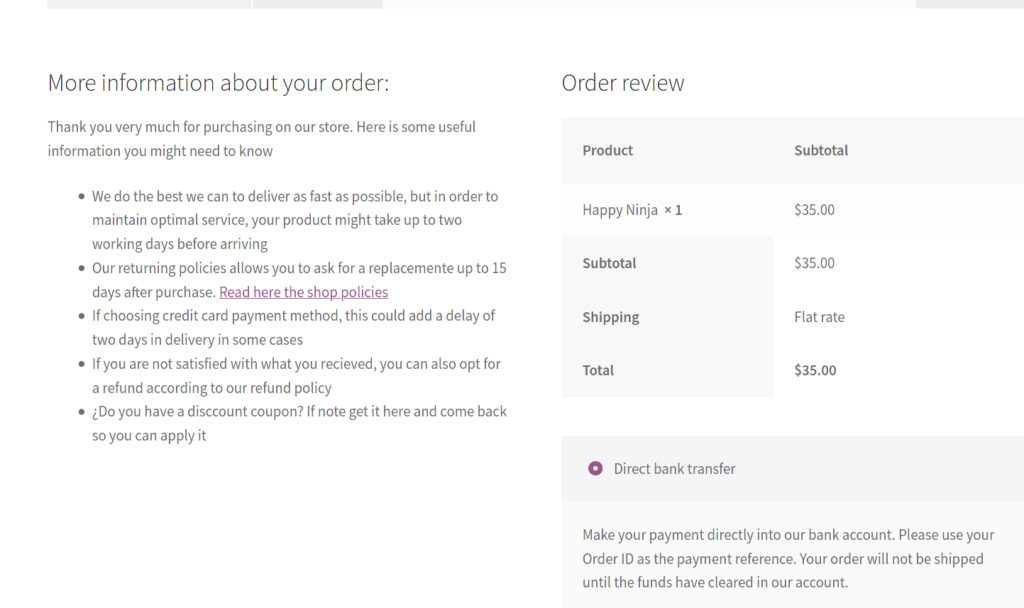
When customers review the order details, they can choose a payment method and click “Place Order” to complete the purchase. Since this block is displayed in a right column, we’ll insert some content on the left side to achieve a balanced design.
This is the custom content function that will paste in the functions.php file where we explain some of the return policies, payment methods, delivery, and so on. Feel free to customize it and adapt it to your store:
add_action('woocommerce_checkout_before_order_review','QuadLayers_add_column_before_order_review');
function QuadLayers_add_column_before_order_review(){
    printf(' <div><h3>More information about your order:</h3>
<p>Thank you very much for purchasing on our store. Here is some useful information you might need to know</p>
<ul>
<li>We do the best we can to deliver as fast as possible, but in order to maintain optimal service, your product might take up to two working days before arriving</li>
<li>Our returning policies allows you to ask for a replacement up to 15 days after purchase. <a href="#">Read here the shop policies</a></li>
<li>If choosing credit card payment method, this could add a delay of two days in delivery in some cases</li>
<li>If you are not satisfied with what you received, you can also opt for a refund according to our refund policy</li>
<li>Do you have a discount coupon? If note get it here and come back so you can apply it</li>
</ul>
</div>','woocommerce');
}
And this is the final result:
2.5) Adding some CSS styling to the checkout page
In the function.php file, you’ll see that we’ve added our own class, which we’ve called custom-product. We are going to use this class to style the content with some CSS scripts. Additionally, we can give the final touches to the design of our new one-page checkout without using our custom class.
This is the full CSS script we’ve used in this tutorial. Simply copy and paste it in the style.css file of your child theme:
/* hide Billing form title */
.woocommerce-billing-fields > h3:nth-child(1){
    display:none;
}
/* your about to purchase... */
.custom-product > h2:nth-child(1){
    text-align: center;
}
/* image */
img.attachment-woocommerce_thumbnail:nth-child(2){
    margin:auto;
}
/* description */
.custom-product > span:nth-child(3){
    margin:auto;
    width:50%;
    display:block;
}
/* Complete your order ...*/
.custom-product > h3:nth-child(4){
    text-align: center;
    margin: 25px 0 25px 0;
}
/* more information.. */
.custom-product > div:nth-child(8){
    float:left;
    width:47%;
}
#customer_details{
    margin-bottom:40px;
}
NOTE: For this demonstration, we’ve used the Storefront theme so you might need to adjust the CSS selectors if you use a different theme or if you have added your own customizations.
After that, if everything went well, you should see the following on your checkout page:
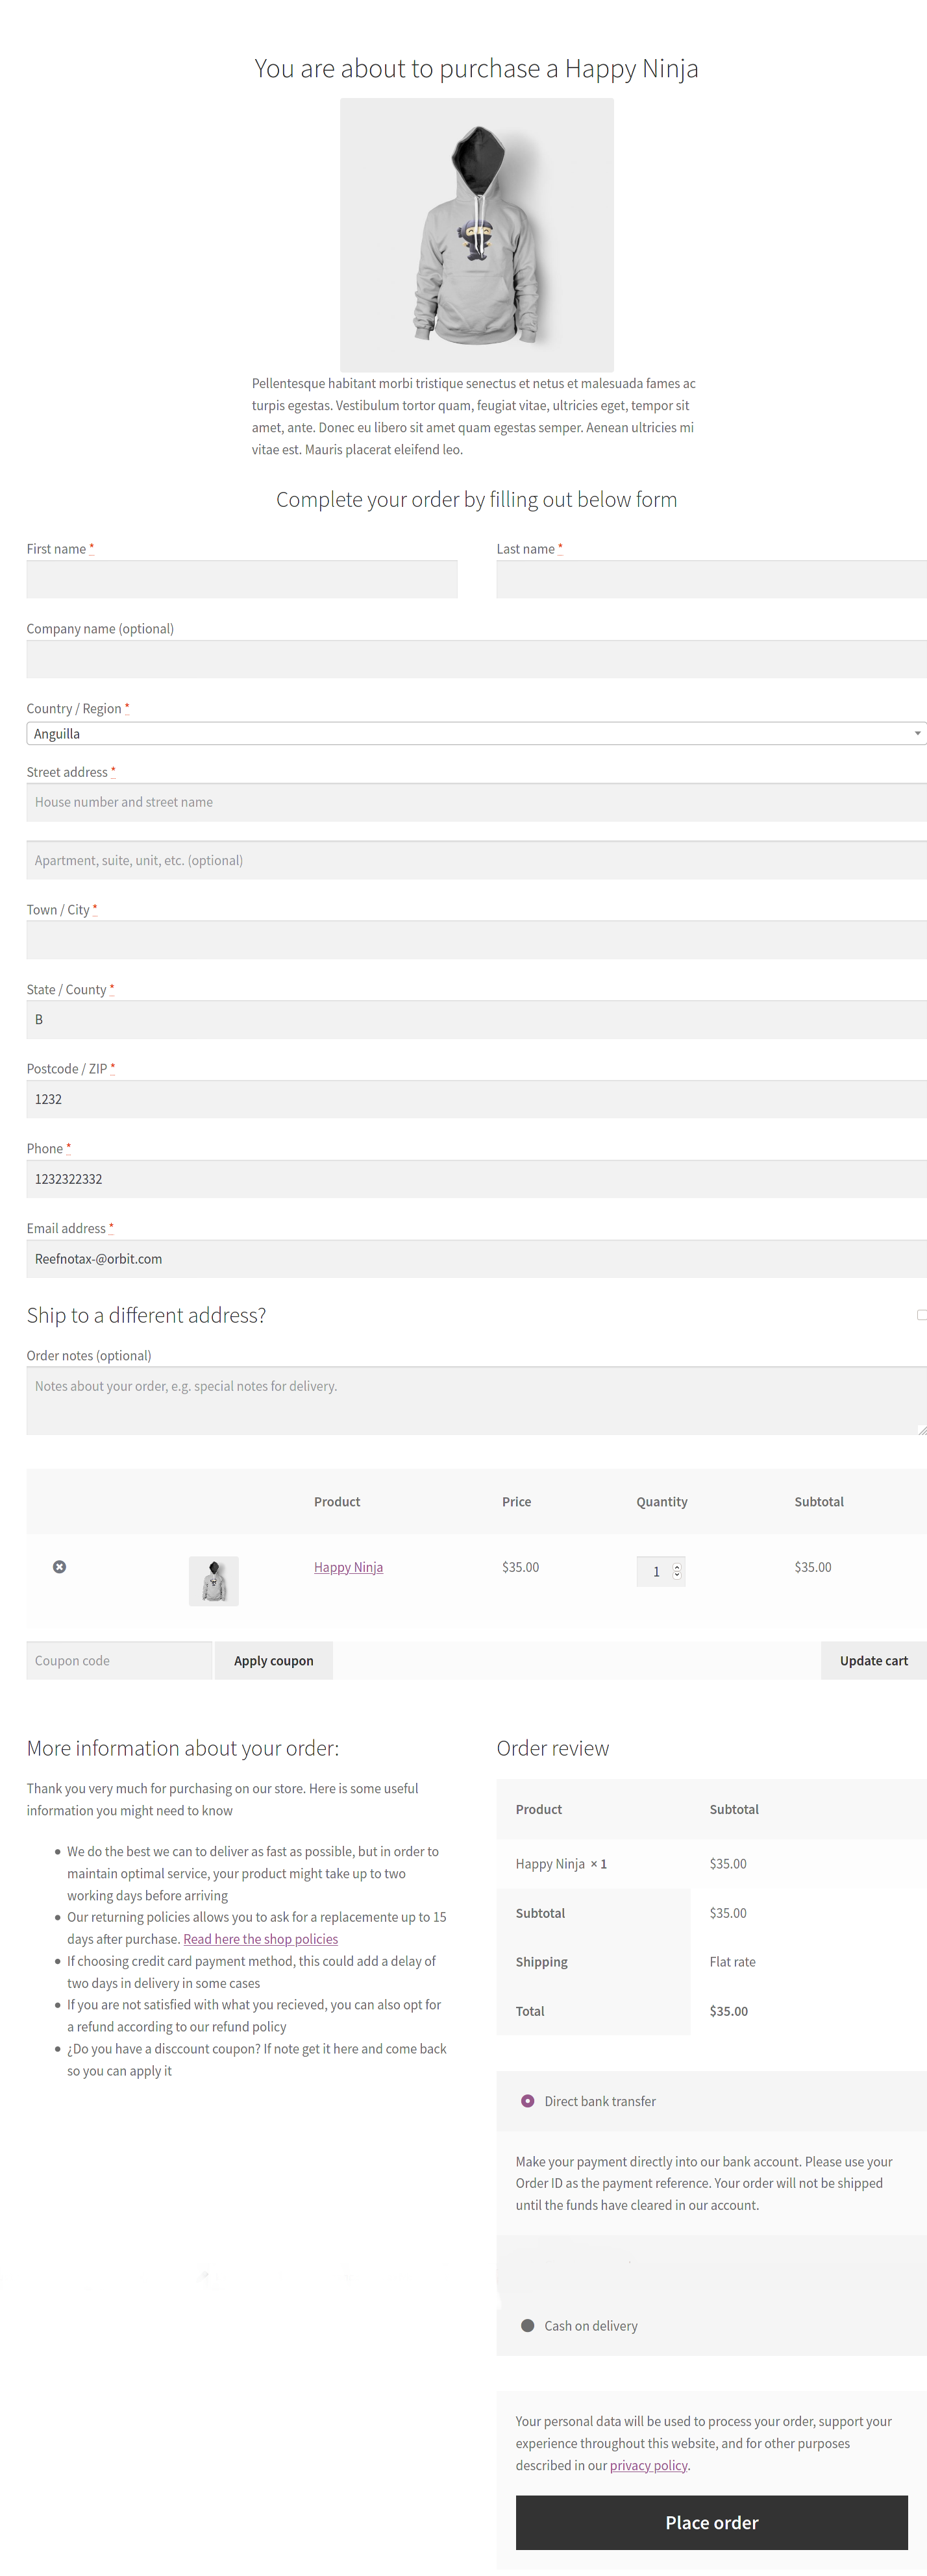
That’s it! You’ve just created a fully customized WooCommerce one-page-checkout programmatically.
3) Create a one-page checkout with a page builder
Another interesting option to create and customize a one-page checkout in WooCommerce is by using a page builder. There are several page builders out there. For this demonstration, we’ll use Site Origin. With more than 1 million active installations, this is one of the most popular page builders because of its simplicity and efficiency.
The process is similar for most page builders, so regardless of the one you use, you should be able to follow the guide without any issues.
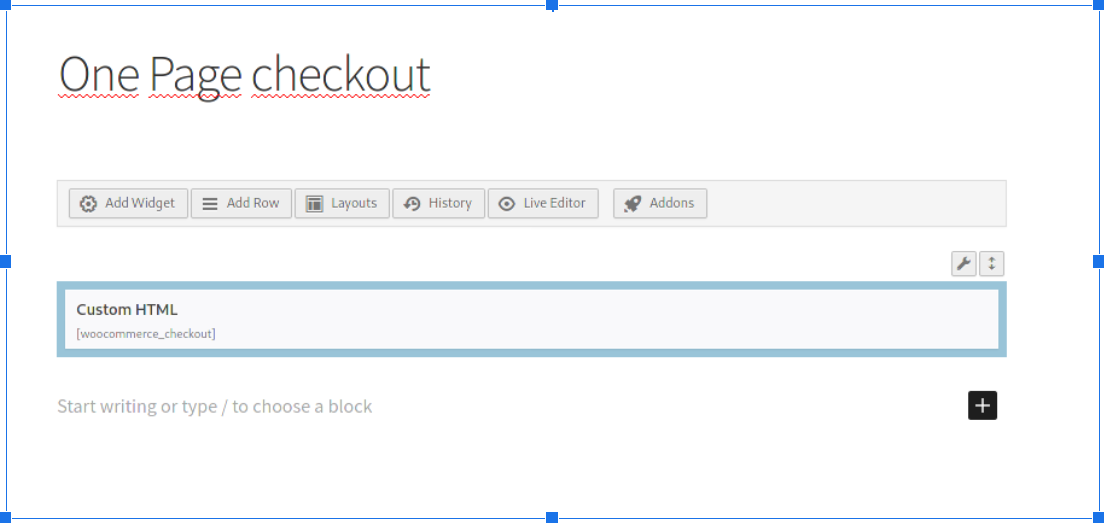
First, download Site Origin from the WordPress repository, install it and activate it on your website. Then, open the checkout page with the editor and add a name to it. We’ll call it One Page checkout.
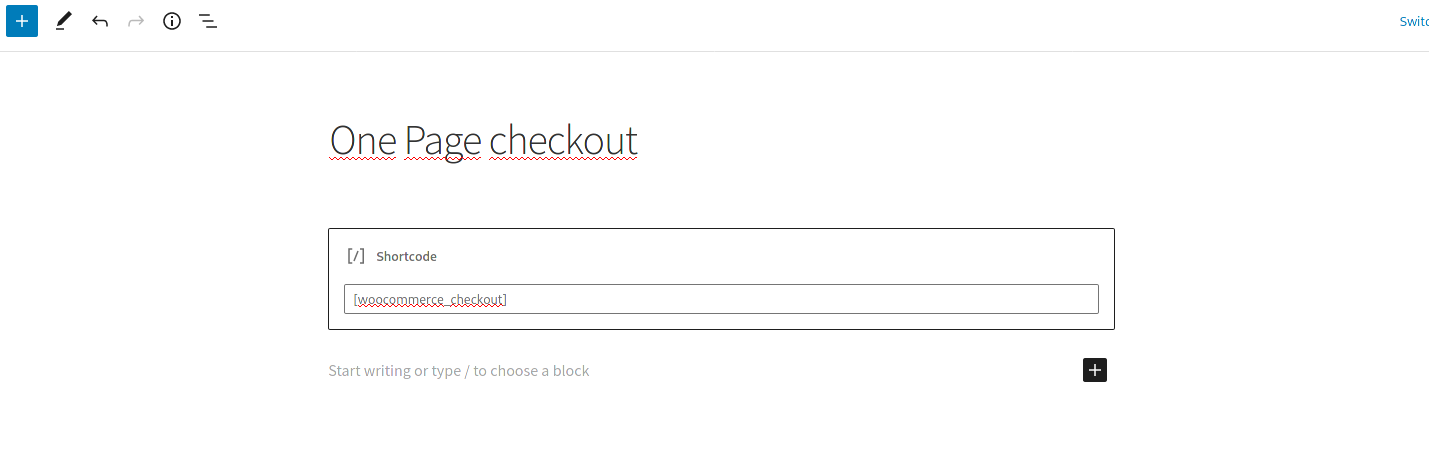
As you can see, the checkout page is just a WooCommerce shortcode placed in a Gutenberg block. If you have disabled the Gutenberg blocks in the backend, you will also see the same shortcode but in the old text editor. Simply delete the shortcode block and add a page builder one.
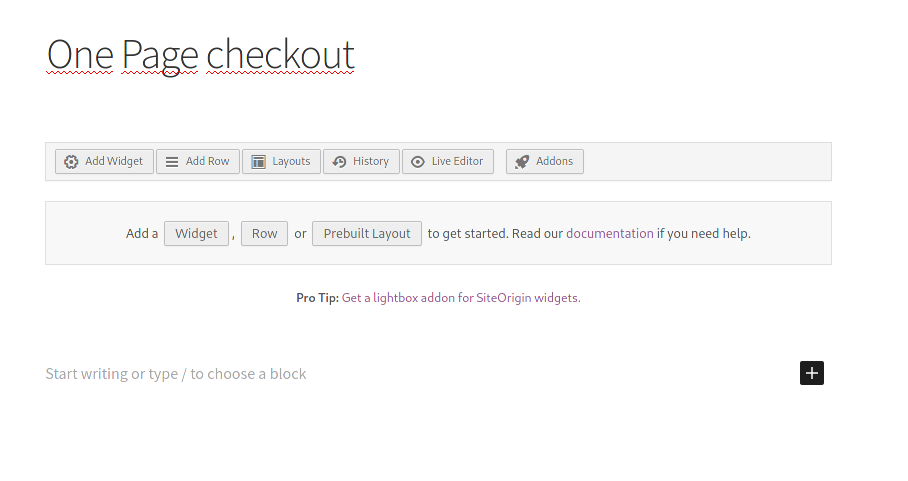
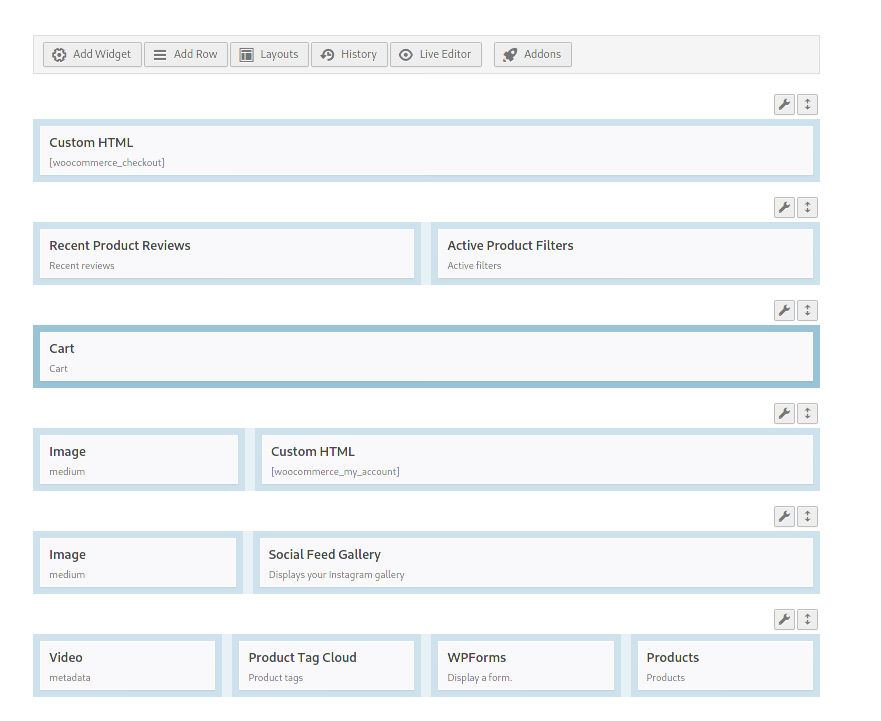
Now we can start creating a fully customized one-page checkout using the page builder. You can add any widget in columns, and set it to the desired layout. Keep in mind that you need to insert the
[woocommerce_checkout]
shortcode again, otherwise it won’t work.
And here comes the best part. You can also use any of the available widgets or modules in the page builder layout. Additionally, you can include other shortcodes. The cart and the “My account” ones are quite common.
This is a basic example, so you’ll need to adjust each widget and customize the checkout page according to your needs. Also, keep in mind that each page builder works differently so even though the process is similar, you may need to adjust some things. As a general recommendation, templates with full width and no sidebar usually work best.
4) Create a one-page checkout using Gutenberg block editor
Similarly, you can customize your WooCommerce one-page checkout using the Gutenberg blocks editor. For this, in your WordPress dashboard, open the checkout page and you’ll see the block with the checkout shortcode. Let’s add more blocks to this page by clicking the add block button (+) and selecting Columns.
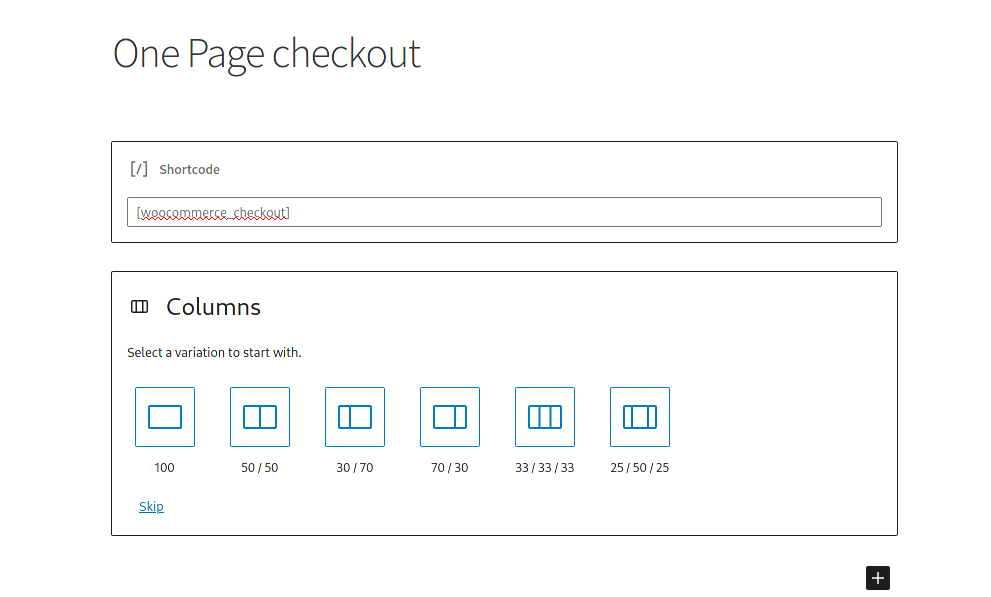
Here you can use any of the available blocks and shortcodes to fully customize your checkout page. Alternatively, if you have coding skills, you could also edit the checkout by inserting your own HTML code with the code block. For this demo, we’ve added the cart and my account shortcodes in 2 columns so it looks like this:

And that’s how you can easily create a one-page checkout in WooCommerce with the Gutenberg block editor.
Final tips
- When creating a one-page checkout, always keep in mind the main goal of the checkout: allowing customers to place their orders as easily as possible. You should avoid any content that distracts users from this objective.
- All the information that users need to review before hitting the “Place order” button should be available on the same page, so they can do everything from the checkout page. Include all necessary information and avoid inserting links that take users to a different URL.
- Users don’t like long content pages when they’re purchasing. Keep things simple and clean and focus on achieving an efficient and professional checkout page
Conclusion
All in all, one-page checkouts will help you shorten the purchase process, reduce cart abandonment, and boost conversion rates. Even though in some cases, multi-page checkouts may be more effective, for most stores, shorter checkouts tend to work better.
In this guide, we’ve seen different ways to create a one-page checkout in WooCommerce:
- With a plugin
- Programmatically
- With a page builder
- Using the Gutenberg block editor
If you want a quick and efficient solution, using Direct Checkout is your best choice. This freemium plugin allows you to build a one-page checkout in a few minutes and it also includes several features to help you improve your checkout and increase your sales. For example, you can remove checkout fields, add quick buy and quick view buttons, and much more. If you don’t want to install an additional plugin and you use a page builder, you can create the checkout page either using the Gutenberg block editor or with your page builder.
On the other hand, if you have coding skills you have more options to edit your checkout page. After creating the checkout with the Direct Checkout plugin, you can add PHP and CSS scripts to fully customize your checkout. In this article, we’ve seen a few examples but there’s a lot more you can do. Feel free to use them as a base and play around to find what works best for you.
Which is your favorite method to create a one-page checkout in WooCommerce? Do you know of any other that we should include? Let us know in the comments section below!

But I want to remove email too, since I sell pizzas, no need for an email U_U
Hi Josh, thanks for passing by
Please check this other post were you can learn how to remove the email field
Your content is so helpful! Thank you.
You’re welcome