
Best CSS Codes to Customize WordPress Websites
Are you looking at some of the best CSS codes to customize WordPress? If so, we will be showing you some of the most used CSS scripts that you can use to edit your WordPress website.
We know that there are lots of options to customize WordPress with plugins, theme options, and default settings. But you can edit various areas of your website using CSS codes too. So let’s see why you might need them to customize your website first.
Why are CSS codes used in WordPress to Customize Websites?
CSS scripts or codes are used in WordPress to change the visual appearance of a website. If you want to make some specific design changes that are not included in the theme options or the default WordPress settings, CSS scripts can be very helpful for you.
You can install a WordPress plugin for customizations but plugins add a certain weight to your website framework that might slow it down. Using a plugin to perform a small change in the appearance of the website is not worth the drop in performance. So if you have basic knowledge in coding, using CSS codes is the best option.
To make sure that you don’t lose the website speed while making the visual modifications, we highly recommend you to use CSS codes to customize your WordPress website. Besides, there may be some unique designs that you want to implement on your website sometimes. And if there are no custom plugins built for it, CSS scripts are your only option.
Best CSS Codes to Customize a WordPress Website
While there are many CSS codes to customize a WordPress website, we will present you with the best CSS scripts that we’ve found. They are some of the most used codes to sort all kinds of issues and achieve outstanding designs when working on the front end of a WordPress website.
However, the following list of scripts are intended for demonstration purposes, they might not work on your website because the selectors used are relative to a sample website. In most cases, you will need to edit the selectors, so that’s why you’ll need a basic knowledge of CSS in order to apply these scripts to your website. Check out this post if you want to learn more about applying CSS scripts to a WP website using the developer’s tool.
Furthermore, you will find an extra section at the end, where you will learn to apply your CSS scripts to WordPress in three different ways. Now, let’s go through the scripts
1. Hide Elements
This is probably the most widely used CSS rule. It’s quite useful when you need to remove any element on the front end or the back end.
1.1. Hide header:
header{
    display:none;
}
1.2. Hide the “add to cart” button
.single_add_to_cart_button.button{
    display:none;
}
1.3. Hide breadcrumbs
.woocommerce-breadcrumb{
    display:none;
}
Note: This is not recommended in some cases as a hidden element can be turned visible with a basic understanding of the browser console. For example, you may need to remove a form so that the users can’t fill it out. Then, you don’t want to do this with a CSS script because anyone with basic knowledge of it can make them visible and send the form anyway.
However, it gives a fast and easy solution for styling or design issues and we still can use it without any problem.
If you want more help on how to hide and remove the add to cart button, we have a detailed guide on it as well. Similarly, you can also find more information on how to edit header and breadcrumbs in WordPress if required in our blogs.
2. Move Elements
If you need to move some element to adjust the design of a page, you can easily move it in any direction using something like this:
#qlwapp{
    bottom:45px;
    left:25px;
    position:relative;
}
You might need to set position:relative in some cases, if the element has been positioned before.
Note: This is useful only for minor adjustments, elements should not be moved outside their containers. You can use top, right, bottom, left and give a value to each.
3. CSS Codes for Mobile Mode
We can also apply CSS only for mobile devices. It can be done so using media queries.
They work like a conditional statement. All the CSS rules within the media query will be applied only if the screen size is below 768px.
The given screen width is taken from the accepted standard for mobile devices, which is 768px. You can edit this value to apply on bigger or smaller screen size devices.
@media only screen and (max-width:768px){
    div.masthead{
        display:inline-block;
        width:50%;
        margin:auto;
    }
}
4. Edit Text
CSS Pseudo selectors are great resources to customize a WordPress website. And with the wise use of them, we can achieve many modifications in your website too. Therefore, we can also use these CSS codes to customize the text of your WordPress website.
The :before and :after pseudo selectors allow us to insert a “pseudo-element” right before or after any other HTML element. In this way, we can hide a text and replace it with any other one:
p.text{
    visibility:hidden;
}
p.text::before{
    visibility:visible;
    content:'new text here';
    display:block;
}
5. Translations using CSS Codes
The :lang() pseudo-class allows us to apply CSS rules depending on-page language. Even if it’s translated with one of the translation plugins like WPML or Polylang, the current lang attribute will always be on the <html> main tag of the website HTML output.

So, if we use the :before pseudo selector like seen on the previous sample script, in combination with the :lang() pseudo-class, we’ll be able to translate any string on a website.
This will also work on multi-language websites.
p.text:lang(en){
    visibility:hidden;
}
p.text:lang(en)::before{
    visibility:visible;
    content:'translated text';
    display:block;
}
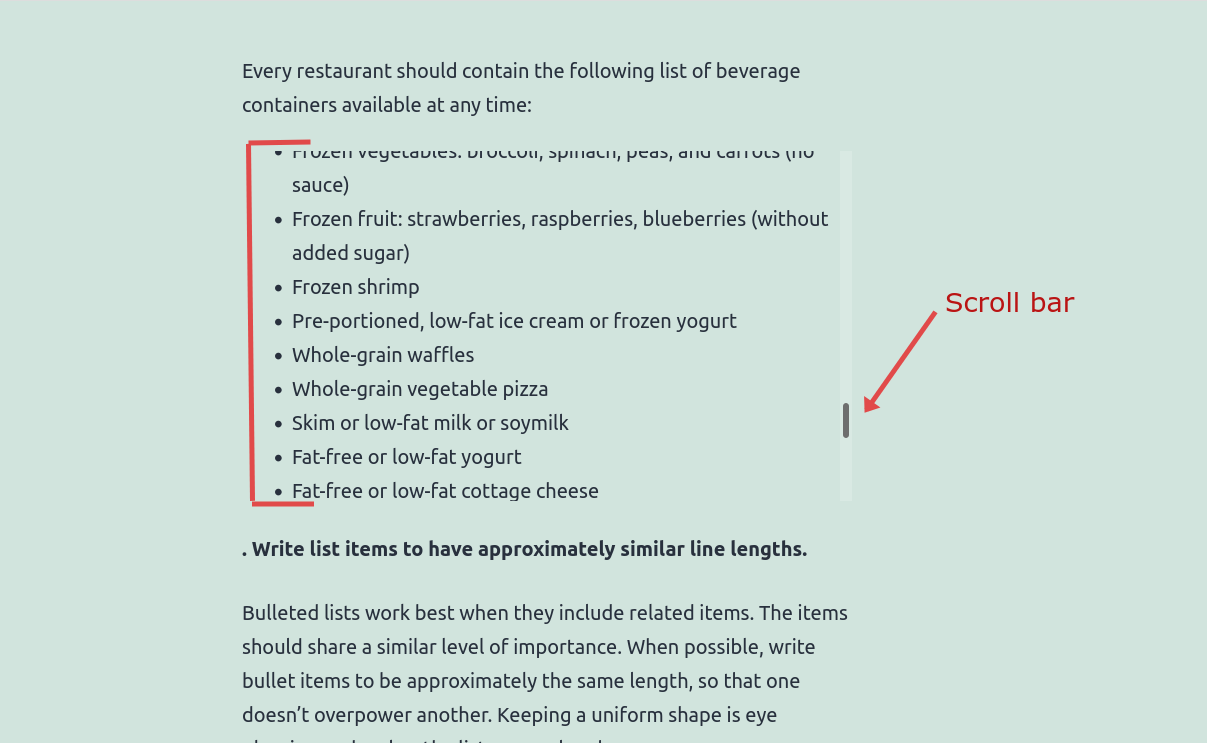
6. Add a Scroll Bar
A scroll bar can enhance the user experience in a website when you have some large content like lists, image galleries, or sections. They also help maintain posts and pages without an excessive length.
This is especially useful to use on a sidebar or any other widget area. Also, it can help fix missing or chopped widgets issues when the height exceeds the available size too.
We can also insert a scroll bar within posts and pages:
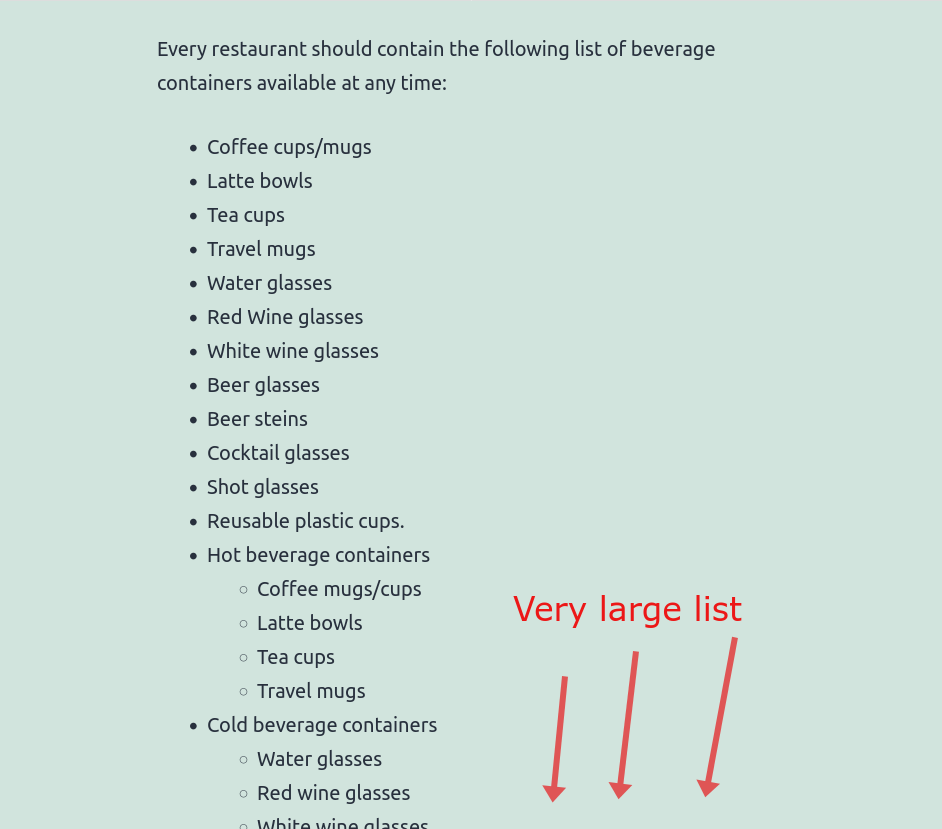
This script will add a scroll bar to the list, making all the documents much shorter.
ul {
    height:370px;
    overflow-y:scroll;
}
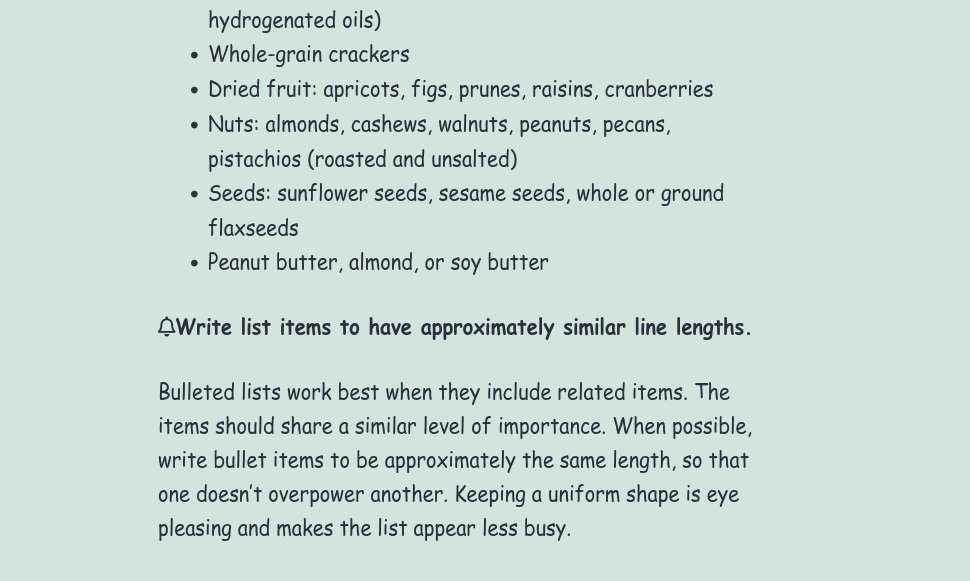
7. CSS codes to Use Images as Icons
You can add any type of image with a CSS script and it can be achieved in a few ways. But using the pseudo selector :before, we can add an image and make it look like an icon too.
Be sure to upload an image to the media library and use the permalink of the image as the url('image-link-here')
.entry-content > p:nth-child(3)::before{
    content:url('http://localhost/Sampler/wp-content/uploads/2022/03/fish-icon.png');
}
Or we can use real icons, also using the same selector:
.entry-content > p:nth-child(3)::before{
	font-family: "Font Awesome 5 Free";
        font-weight: 400;
        content: "\f0f3";
}
In order to use real icons, the link HTML tag of the icon is set to font awesome 5 Free on our example. It must be loaded on the <head> section of the webpage.

8. Change Fonts
You can customize the fonts of a WordPress website with CSS codes too. Similar to the icons, the fonts also must be loaded into the theme header so we can use them. We can verify if the font set is available by taking a look at the <head> section of the page.
Here, the Google Fonts link has been already added with the help of a PHP script.
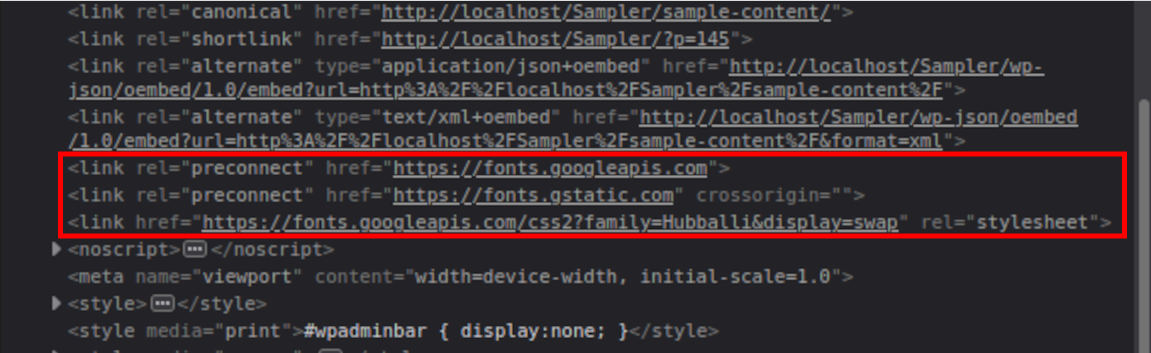
After you confirm that the icon or font set you want to use is already loaded on the <head> HTML section, you can freely use it on the overall website
h1,h2,h3,p,a,li{
    font-family: 'Hubballi', cursive;
}
Bonus: 3 ways to apply CSS to a WordPress website
We’ve provided you with some of the most used CSS codes to customize your WordPress website. But you also need to know how to add them to your website too. For that, we’ll also show you a brief tutorial as a bonus in this article.
So, here are the 3 common ways to apply CSS to a WordPress website.
1. Theme customizer
To add the CSS script through the theme customizer, all you have to do is Paste your CSS scripts on the theme customizer. It can be generally applied for small customization or fixes.
Go to Appearance > Customize > Additional CSS to open the style editor. Then paste your CSS scripts here.
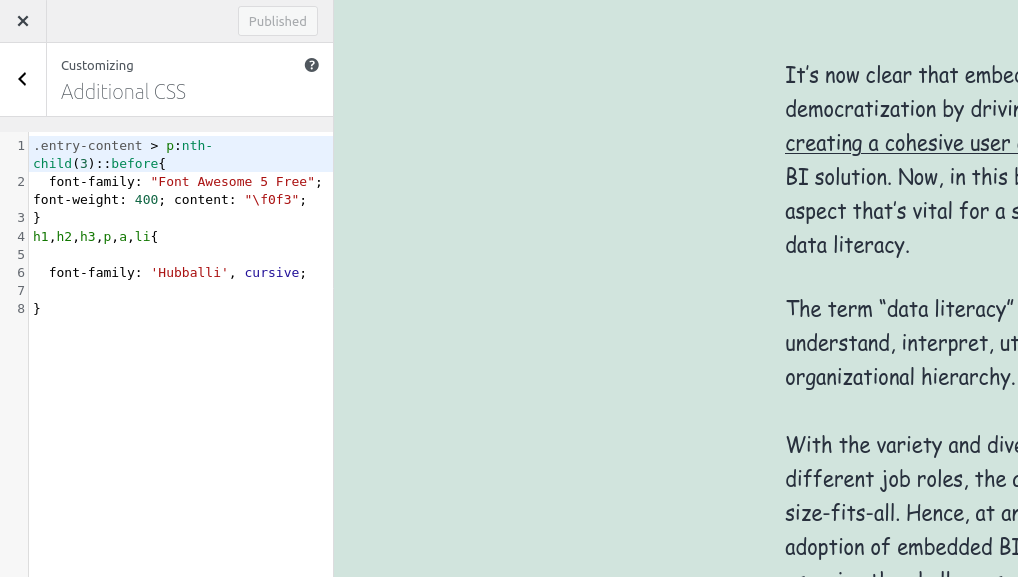
Scripts here will be saved on the database after hitting the “Publish” button. You’ll be able to see the changes in your website after you preview it.
2. Child theme CSS file
For this step, you’ll have to create a child theme for your website programmatically or by using one of the child theme plugins before we begin. Then, make sure that your website has an active child theme and add the CSS codes in the style.css file. It’s better if you back up your entire website too since we will be modifying the delicate core files of your website.
Open your code editor to paste your scripts there, or use the WP inbuilt editor on Appearance > Theme Files Editor. Now, open the Stylesheet or the style.css file of the child theme.
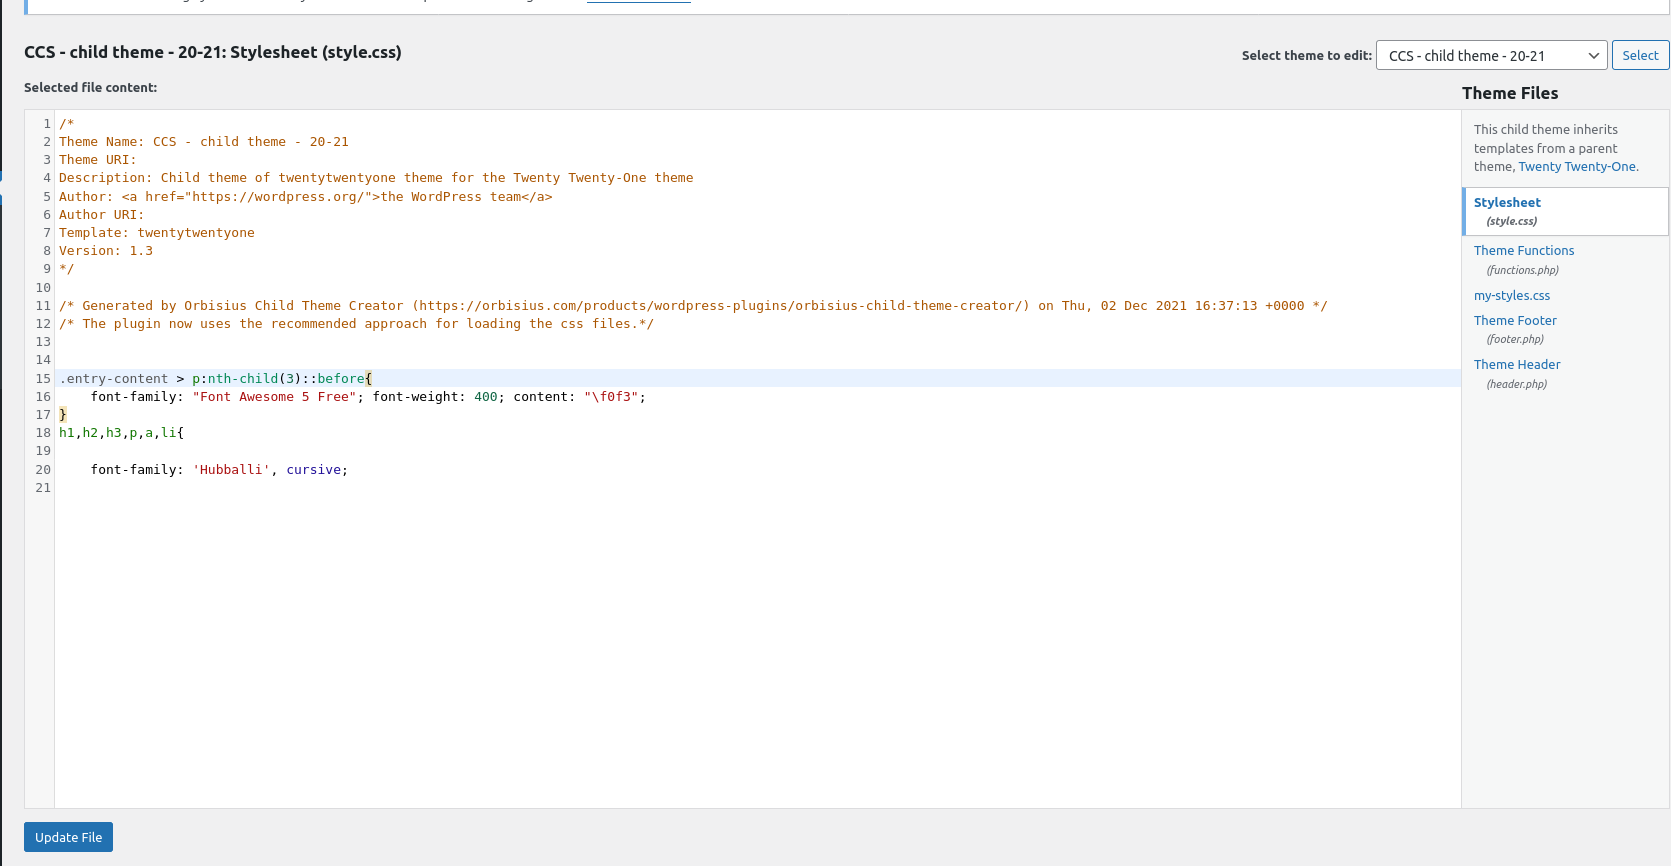
This is the place where you should paste all your custom scripts. After you have added the CSS codes, click on Update File. But if it turns into a large file, it might be a good idea to create a new file or several ones.
3. functions.php file of a Child Theme
You can also insert CSS styles using a PHP function. All styles applied in this way will be inserted as inline styles on the front.
Just like the previous approach, make sure that the child theme is active for your website. Then, open the functions.php file from the theme editor and paste the following codes here.
add_action('wp_head','QuadLayers_headlink');
function QuadLayers_headlink(){
	echo '<style>
    .entry-content > p:nth-child(3)::before{
	    font-family: "Font Awesome 5 Free";
	    font-weight: 400;
	    content: "\f0f3";
    }
    h1,h2,h3,p,a,li{
	    font-family: "Hubballi", cursive;
    }</style>';
}
The big advantage of using this way is that you can apply PHP conditionals, taking advantage of the full power of WP hooks and functions.
If you want to learn more about applying CSS to your website, please have a look at our guide on how to apply CSS to WordPress as well.
Conclusion
These are all the most commonly used CSS codes to customize a WordPress website. We have shown you all the popular scripts with which you can change the visual appearance of your website and add unique designs to it. To summarize, we have covered the following modifications using CSS scripts:
- Hide elements
- Move elements
- CSS for mobile devices
- Edit text
- Translations
- Add a scroll bar
- Use images as icons
- Change fonts
You can easily use CSS codes to customize these elements of your WordPress website. To help you with it, we have even shown you a few ways to apply CSS in WordPress.
Furthermore, if you want to learn about CSS in WordPress, we have also covered applying CSS on specific pages or posts. Similarly, CSS scripts can even be used with page builders. One of the most common examples is to customize Divi menu with CSS.
So what do you think about the CSS to edit a WP website? Have you ever used them? Were they helpful? Please let us know in the comments.
In the meantime, here are some more articles that you might be interested in:

Thank you for information..