
How to Add Auction Products in WooCommerce
Are you looking for an easy way to add auction products in WooCommerce? If yes then we’ve got you covered. In today’s article, we’ll show you the exact required steps to set and edit your products for auction on your WooCommerce website.
Why add an auction in WooCommerce?
There are many popular auction sites like eBay, Aution.com, and Copart that sell products with auctions and earn money digitally. You can in fact promote and sell your products through them. But usually, such sites charge a commission after the items are sold and a fee for posting your ad.
If you don’t want to spend money on listing commissions, seller fees, gallery fees, and any other type of additional charges for auctioning your products, then it’s best to host the auction on your own WooCommerce website.
Having an auction on your own website offers multiple opportunities for buyers who are looking for good deals and profits. Not only that, hosting auctions in WooCommerce sites is an awesome marketing technique where you can see how much revenue your potential customers are willing to spend on your products.
Most importantly, only you’ll have full control and access over the auction products. Therefore, you can manage the auction products solely and set the bidding price and time as you prefer. You can either auction the rare or limited edition items or any other products where people can bid to raise extra dollars.
Now let’s have a look at how to add auction products in WooCommerce.
How to add auction products in WooCommerce?
The easiest way to add auction products in WooCommerce is by using a dedicated auction plugin. You can find both free and premium plugins in the marketplace to add the products to your website for an auction without any technical or programming knowledge.
So let’s take a look at a couple of popular auction plugins and how we can use them for your website.
Ultimate WordPress Auction Plugin
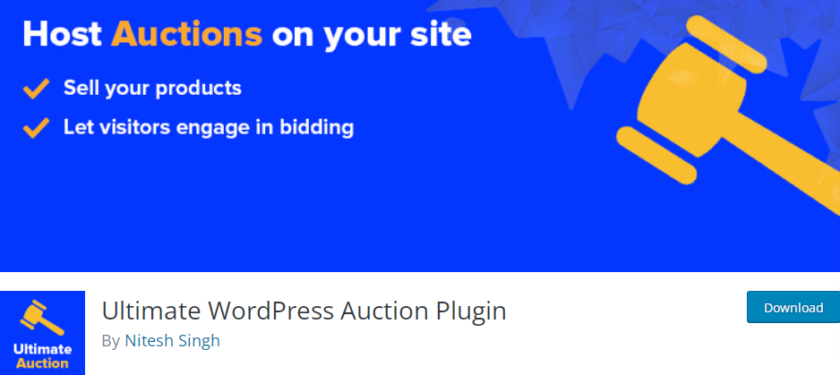
Ultimate WordPress Auction Plugin is a flexible and easy-to-use plugin that allows you to set up and display your products as auctions on your site. It comes with a front-end dashboard that can be used by your users to register themselves as vendors. Then, even your users can add auction products to your website and the entire auction can be hosted by you.
The plugin also allows you to display auctions in your timezone, send admin email notifications for all auction product activity, manage all auctions and reactivate the expired auction products. In addition, you can gain access to many useful shortcodes and filters to host auctions on your website.
Key Features
- Unblock automated or proxy bidding
- Live bidding without page refreshes
- Support virtual products
- Ability to allow registered users to place bids
Pricing
This is a freemium plugin. The premium version starts at 79 USD per year with 1 year of support and updates for 1 site and a 14-day money-back guarantee.
WooCommerce Simple Auctions
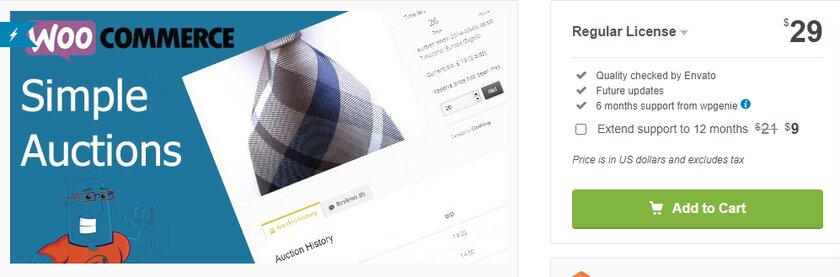
WooCommerce Simple Auctions allows you to set up a fully functional auction website using different types of auctions such as regular, proxy, silent, and reverse auctions. You can easily auction your regular WooCommerce products too and start bidding them in just a few minutes.
The plugin seamlessly integrates into WooCommerce hooks, allowing you to use a new WooCommerce product type called “auction”. You can customize to display the auction according to your preference and even add auction sorting options for the product list.
Key Features
- Multiple payment gateway support
- Ability to set the start and end time of your auctions
- Extend the auction time before the deadline
- Verify payment details before bidding
Price
WooCommerce Simple Auctions is a premium plugin that starts at 29 USD per year and offers 6 months of free support.
How to use a plugin to add auction products in WooCommerce:
If you’re looking for a free option to add auction products to your WooCommerce website, we recommend Ultimate WordPress Auction Plugin as a starter. We’ll be using this plugin for today’s demonstration as well.
But before moving ahead, please make sure to set up WooCommerce properly and use the compatible WooCommerce theme to ensure no conflicts with the theme or plugins. Now let’s start the tutorial by installing and activation the plugin.
1. Install the Ultimate WordPress Auction Plugin
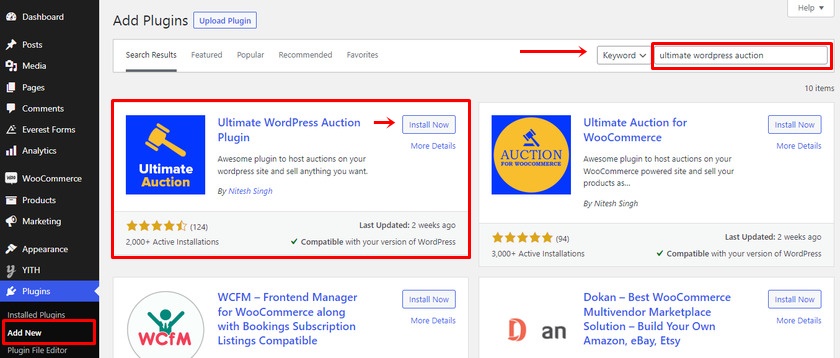
First, go to Plugins > Add New page from your WordPress admin area. Then, search for the keyword ‘Ultimate WordPress Auction Plugin’ in the search bar.
You can see the plugin displayed in the search results from the WordPress plugin directory. After that, click on Install Now button and Activate it.
In case you need additional features and functionality, you can always upgrade or purchase the pro version of this plugin. For that, you have set up the plugin with the manual process. If you want to learn more on the topic, check our detailed guide on how to install a WordPress plugin manually.
2. Add Product Auction
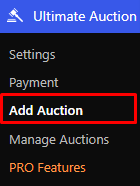
After the plugin is activated, you can add auction products right away from the Ultimate Auction from your WordPress dashboard. Click on Ultimate Auction > Add Auction. You’ll be redirected to the plugin dashboard where you can add and manage the product as well as configure the settings.
Upon clicking the Add Auction tab, several fields are displayed where you need to add some product details for the auction product.
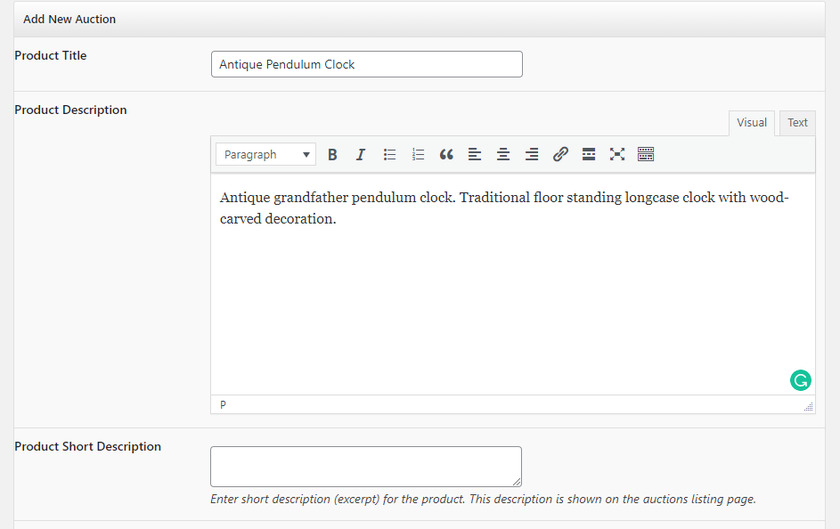
First of all, you can see a field where you can add the product title and product description of the auction product.
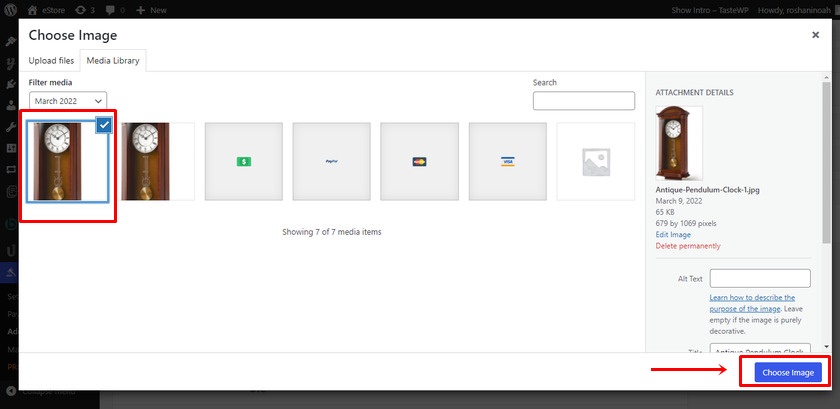
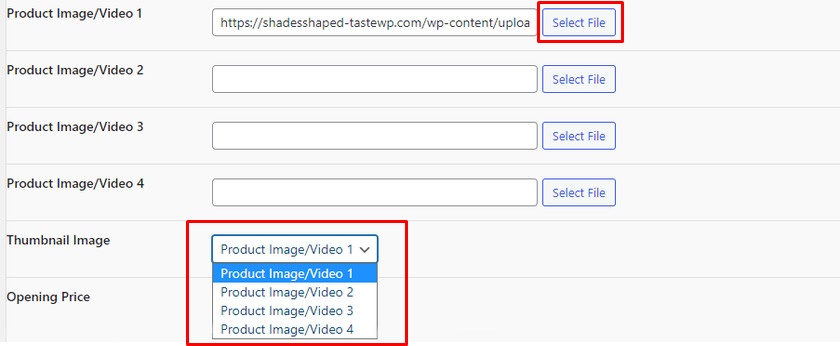
Then, you can add product images or videos of the item you are setting up for auction. To do so, click of Select File button next to the field. You can upload the image file from your computer or select the image from the media library.
After that, you can select a thumbnail from any of the uploaded images or videos.
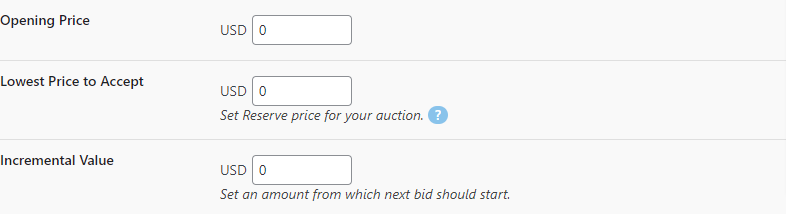
Next, you’ll see a field where you can set an opening price for the bidding. You can also set the lowest price or reserve price for the product. Even though the reserve price is not displayed to the bidders, they’ll be able to see that your auction has a reserve price and whether the reserve price has been met or not.
The incremental value for the bidding price can also be added from here. If the bidders raise the amount then the current highest bid is surpassed by the incremental value.
After that, you can set the date to end the auction by adding the date and time in the given field. Once you have set the date and time click on Done.
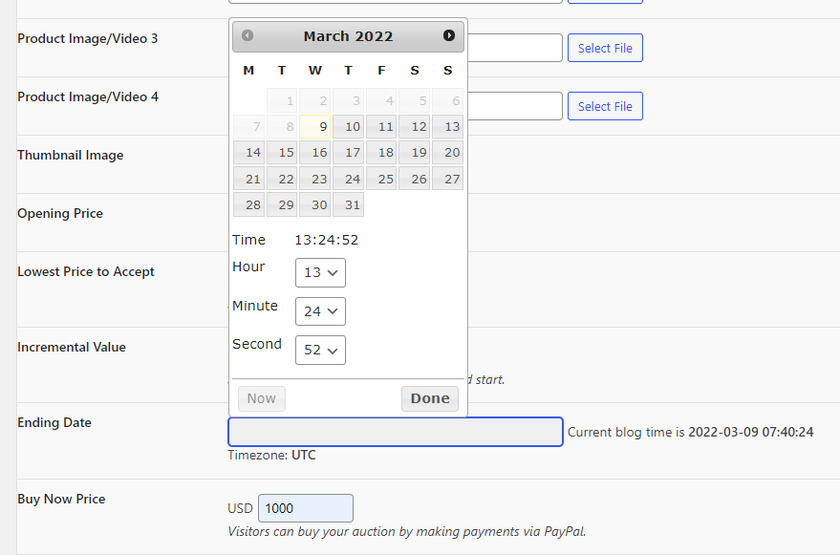
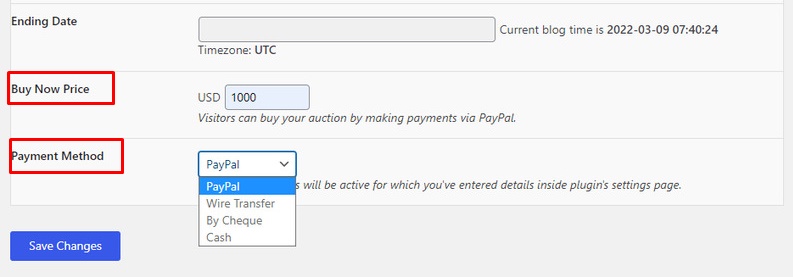
Likewise, on the ‘Buy Now Price‘ option, you can set a price for the auction products. The bidders can buy the product just like regular products without the need of bidding on the item.
Finally, select the payment method for the auction transactions and after you have added all the details for the auction product, click on Save Changes.
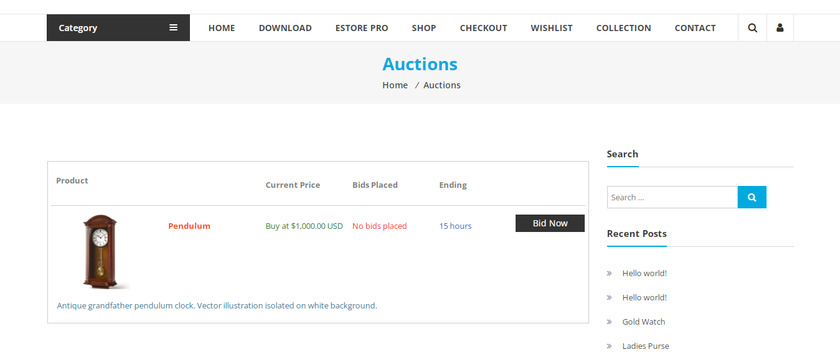
If you preview the page you can find the auction product on the auction page.
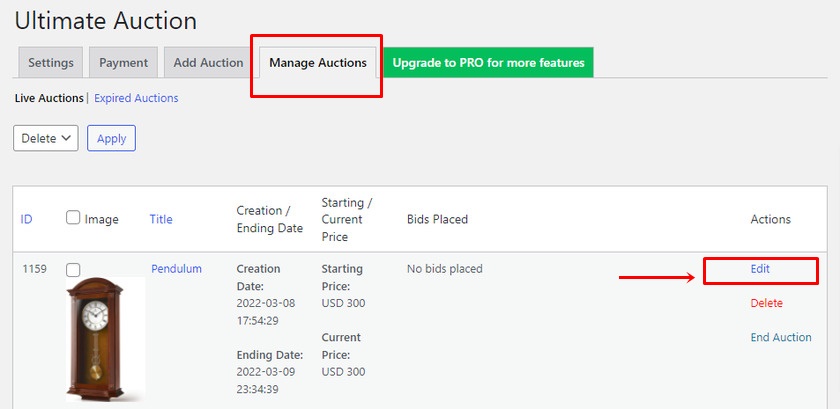
On the other hand, if you have multiple auction products then you can manage them by clicking on the Manage Auctions tab from the Ultimate Auction plugin dashboard. All of the auction products will be displayed here. Now you just need to click on the Edit and you’ll be redirected to the product edit page from where you can manage the auction products.
3. Plugin Settings
As mentioned earlier, we can add, manage and edit the auction product from the plugin dashboard. So to edit the auction products, it provides you with 4 different sections. First of all, let’s see the Settings section.

There are 3 settings options through which you can tweak the products according to your needs and requirement. They include payment, auction, and email settings. Let’s see how we can use these settings for our WooCommerce auction product.
3.1) Payment Settings
The first setting is the Payment setting where you can select a currency for the bidding. Below that you can enable your preferred payment option. There are altogether 4 different payment options available in the free version. They are PayPal, Wire Transfer, Cheque, and Cash.
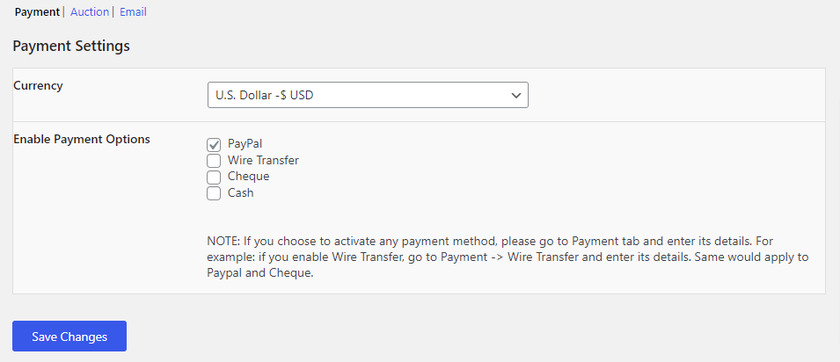
Once you have selected the currency for bidding and mode of payment, click on Save Changes.
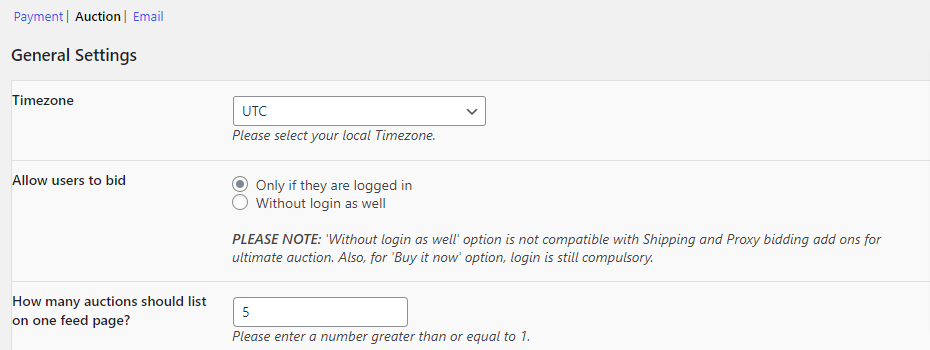
3.2) Auction Setting
Next, we have the Auction setting which is also the general setting of the plugin. Here you can select a particular timezone or your local timezone, allow users to bid with or without login, and display the number of auctions on a page.
By default, the plugin adds a new auction product on a new page rather than a product. But you can display the auction products list on any page by using the shortcode [wdm_auction_listing]. Make sure to enter the URL of the page where you want to display the auction product.
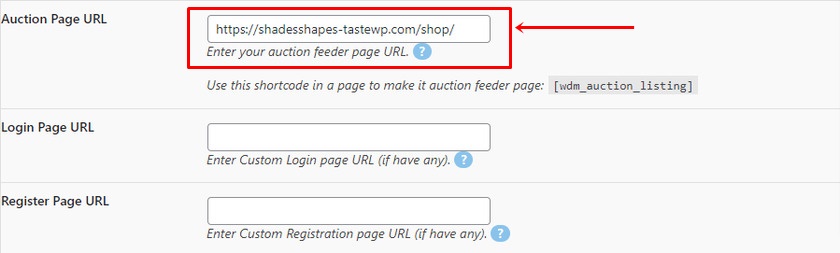
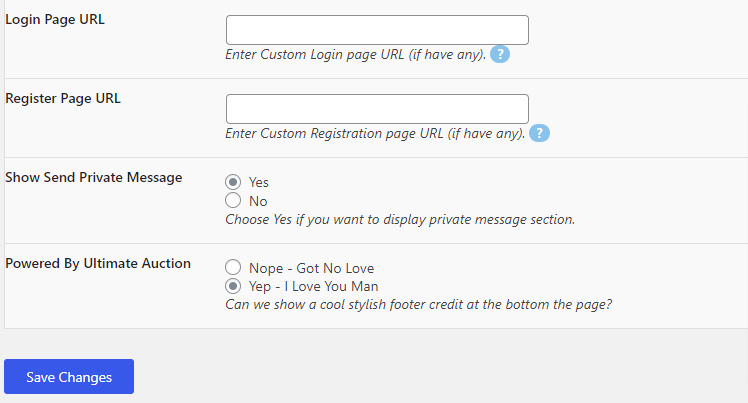
The next step involves setting up the Login Page URL. If your site uses the default WordPress login page then you can skip this section. But if you have a custom login page then you can add the login page URL in the field so that the bidders can log in through the login page and place their bid.
Similarly, you can also set Register Page URL where new bidders can register themselves through the custom Register Page.
Then we have an option where we can choose whether to display the private message section or not. At last, we can enable or disable the footer provided by the plugin which displays “Powered By Ultimate Auction”
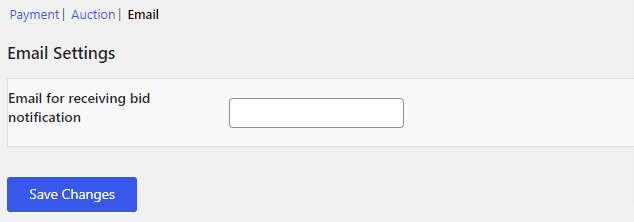
3.3) Email Settings
Finally, we have Email settings where you can add an email address to get notified about the bid.
4. Payment Settings
As we saw that there are 4 different modes of payment in the free version of this plugin. In the Payment setting, all we need to do is add the details and it will be later sent to the highest bidder where they will receive the details and they can do the payment based on the details
First, we can see PayPal where we need to add the PayPal email address. But remember to select or enable PayPal as a payment option for this setting to work. Then you can select the PayPal Account Type as Live or Sandbox if you are testing the PayPal email address with your Sandbox.
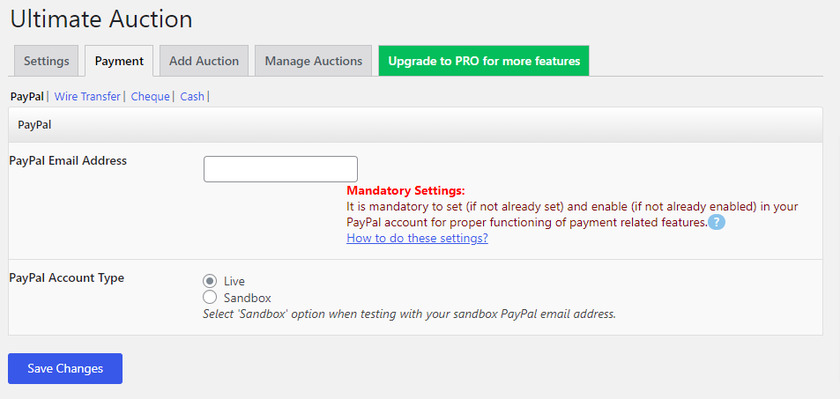
Once you have added and selected the PayPal account type, click on Save Changes.
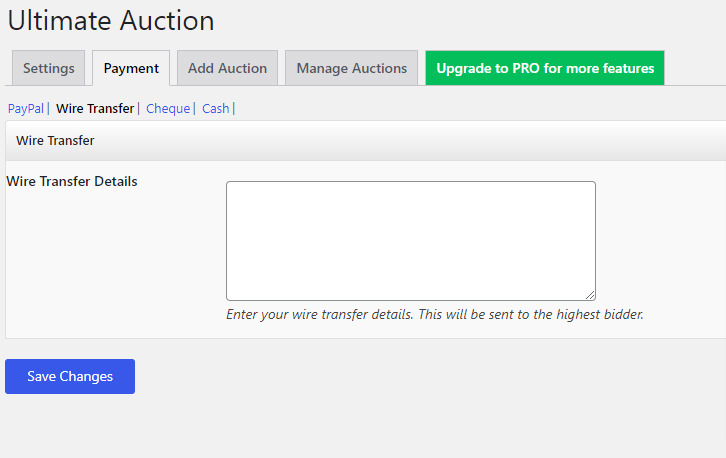
Next, we have Wire Transfer. You can add your wire transfer details. It will be later sent to the highest bidder.
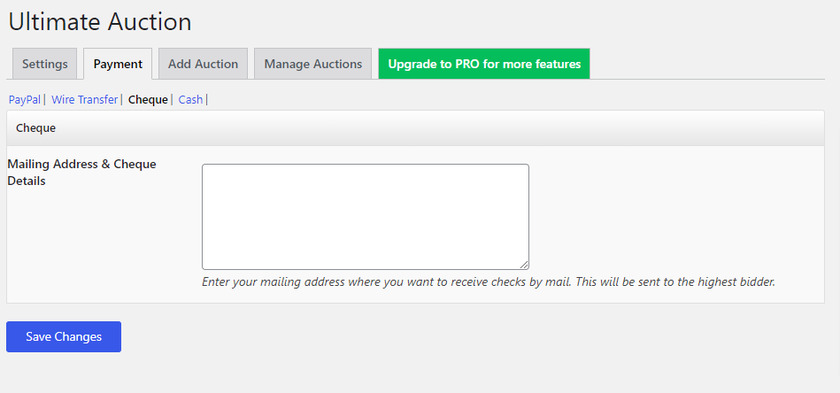
Now, let’s move ahead to the Cheque option. You can receive the transaction amount through a cheque at your mailing address. But any alternate cheque details can also be added here. Similar to the other payment options, they will be sent to the highest bidder.
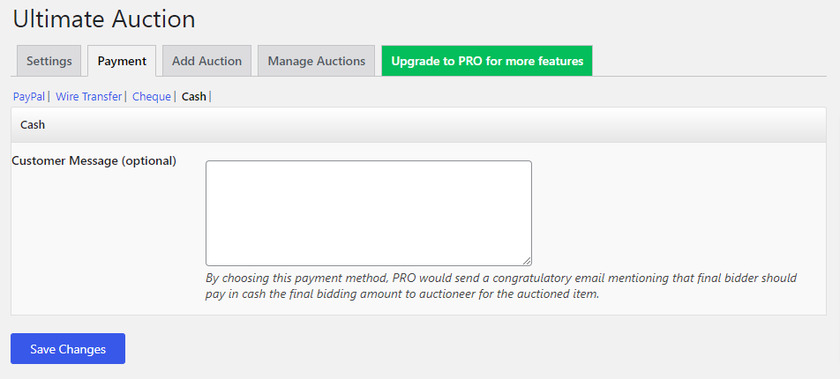
Lastly, we have Cash as a payment option. It doesn’t need any configuration. But you can add an optional message for your customers here. The message will be sent as an email to the highest bidder informing them to pay the final bidding amount as cash to the auctioneer once the auctioned item is sold.
Bonus: Skip cart page in WooCommerce
We have already presented you with one of the easiest ways to add auction products in WooCommerce.
But as a bonus, we’ll also provide this guide to skip the cart page in WooCommerce. This makes the checkout process simpler and quicker which can be convenient for your customers purchasing the auction products.
The easiest and the quickest way to skip a cart in WooCommerce is by using a dedicated plugin.
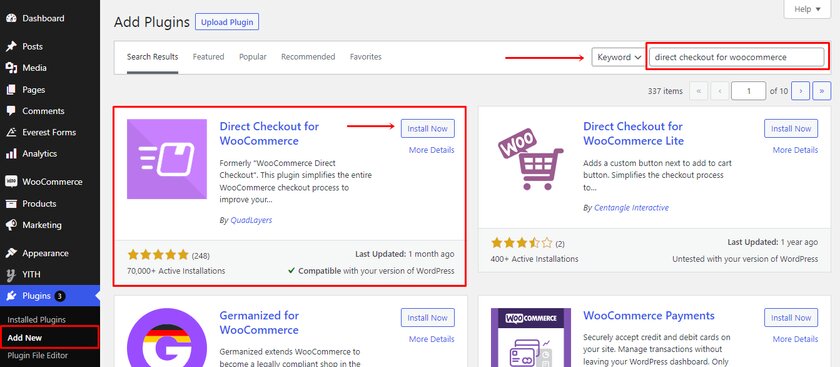
We’ll be using Direct Checkout for WooCommerce for this guide. Let’s begin by installing and activating the plugin. Go to your WordPress admin area > Plugins > Add New and search for ‘Direct Checkout for WooCommerce’ in the search bar. Once you see the result, click on the ‘Install Now‘ and Activate button.
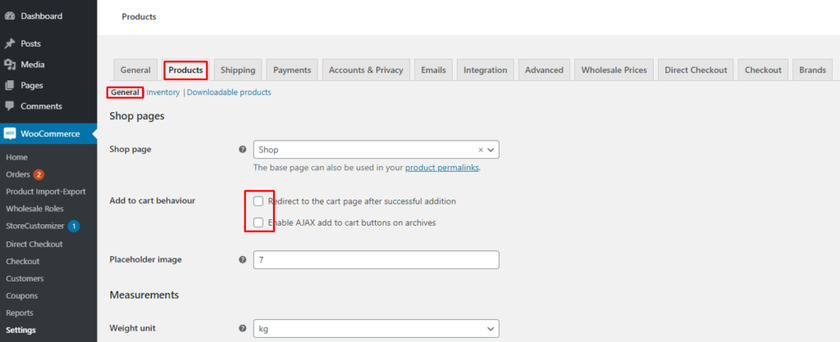
After the installation and activation go to the WooCommerce settings from the WordPress dashboard. Then open the Products tab, where you can all the product options. Click on the ‘General‘ and make sure that both options of Add to cart behaviour remain unchecked. This ensures no conflicts with the plugin settings.
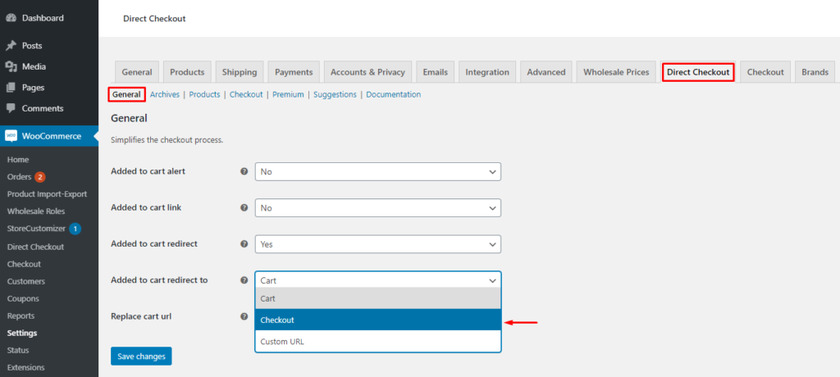
Next click on the Direct Checkout tab from the same page and select General settings. Now all you need to do is select checkout from the dropdown menu of ‘Added to cart redirect to‘ and save the changes.
That’s it! You have successfully learned to skip the cart page by using the Direct Checkout for WooCommerce plugin.
Similarly, you can also skip the cart page using various other methods. If you want to learn how to do so, we recommend checking out this detailed article here. Moreover, you can also further optimize your WooCommerce checkout and the checkout page by using Checkout Manager for WooCommerce.
Conclusion
In conclusion, adding auction products in WooCommerce helps to increase the revenue of a product while providing good deals for the buyers. In this tutorial, we saw an easy way to add auction products to any WooCommerce website.
This guide is perfect for beginners who are not comfortable with using codes. Ultimate WordPress Auction Plugin is an excellent freemium tool that includes all the necessary features to manage an auction in the free version. But you can always opt for the pro version for extra features.
We have also provided you with some basic steps to skip the cart page in WooCommerce. Cart pages can be a barrier for the customers because of the tedious process. Skipping the cart page helps to drive your customer to purchase therefore improving the conversion rate and also saves the time to complete the order transaction.
If you’re looking for more guides to boost the sales of your WooCommerce and improve the user experience, check out the following post:
- Tips to Optimize WooCommerce Conversion Rate
- Best Plugins to Customize WooCommerce Cart Page
- How to Create a WooCommerce Mini Cart: 3 Methods
Have you added auction products to the WooCommerce site? What are your thoughts on this plugin? Make sure to let us know about your experience in the comment section.
