How to Increase the Maximum Upload File Size in WordPress
Do you want to increase the WP max upload file size in your site but you’re not sure how? We’ve got you covered. In this guide, you will learn different methods to change the maximum file upload limit in WordPress.
Why Increase the Maximum Upload File Size?
If you have a site or an eCommerce store, you’re probably familiar with the process of uploading media. Normally, you do it via the library and you can upload images, GIFs, ZIP files, and more. The problem comes when your file size is too big. What’s too big? If your file size is bigger than the maximum file upload size configured in the server, you will experience issues.
For example, if you try to upload a 20MB file through the media library but your maximum file upload size is 10MB, it won’t work. You’ll get an alert saying that the file size limit was exceeded. And unless you increase the maximum upload file size on your WordPress site, you won’t be able to upload that file. This can be a headache for websites that need to upload videos and high-resolution images.
The good news is that there are several ways to fix this problem. In this guide, we’ll show you how to increase the upload limit in WordPress. But before that, let’s see how to check what the current maximum upload file size is on your site.
How to Check the Max Upload File Size
Before raising the upload limit, check what your current limit is. In your WordPress dashboard, go to Media > Add New. There, you will see the maximum file size that you can currently upload.
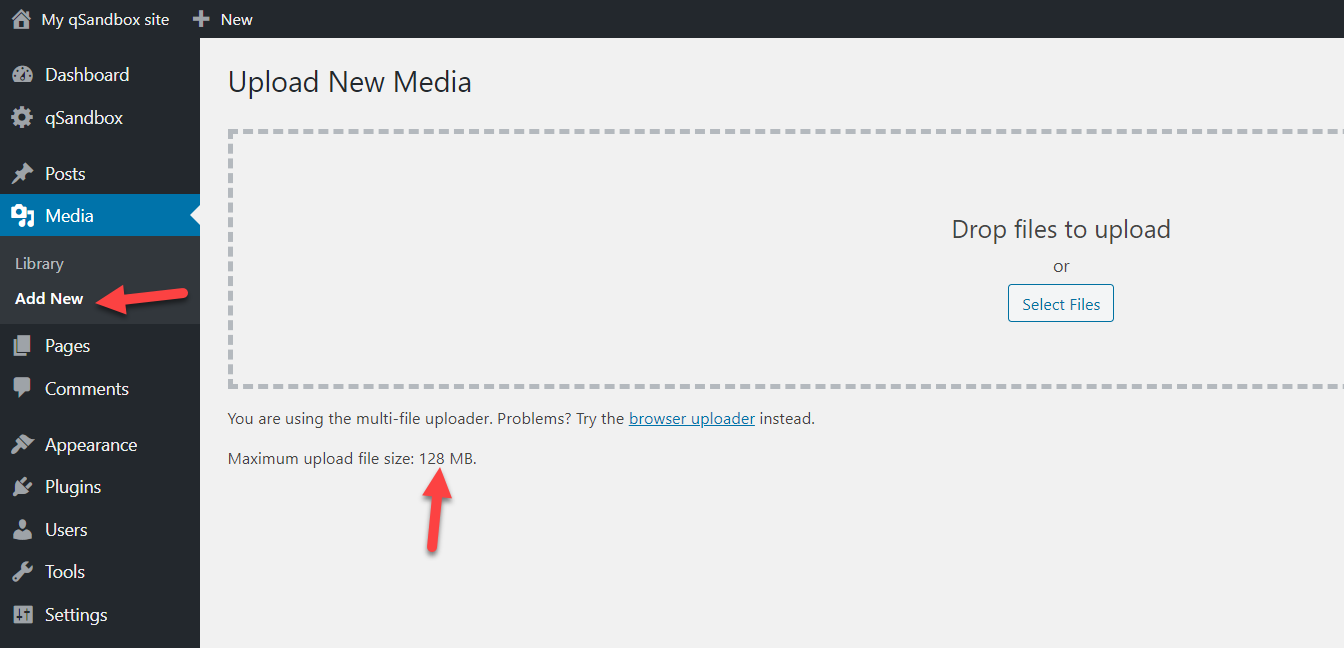
In most cases, the maximum upload limit is set by your hosting provider. For example, for us, the file size is 128MB but some WordPress hosting companies set this value to 2MB by default.
How to Increase the Maximum Upload File Size in WordPress
There are several ways to increase the maximum upload file size limit in WordPress:
- .htaccess File
- Functions.php File
- PHP.Ini File
- WP-Config.php File
- Increase Size in Multisite
- With Plugins
- From the Hosting Platform
- Upload_Size_Limit Filter
- Contact your Hosting Provider
In this section, we’ll explain each method step-by-step so you can choose the one that best suits your needs.
NOTE: Some methods require editing the theme files or WordPress core files, so before you start, we recommend you generate a complete backup of your site. If you’re not sure how to do it, check out this step-by-step guide.
1) .htaccess file
By editing the .htaccess file, you will be able to increase the maximum file upload limit. To do this, you need to use an FTP client like FileZilla, so first install FileZilla on your local computer. After that, connect FileZilla with your web server.
You will need to create an FTP account using your website’s cPanel (control panel) and then, you will be redirected to the file manager.
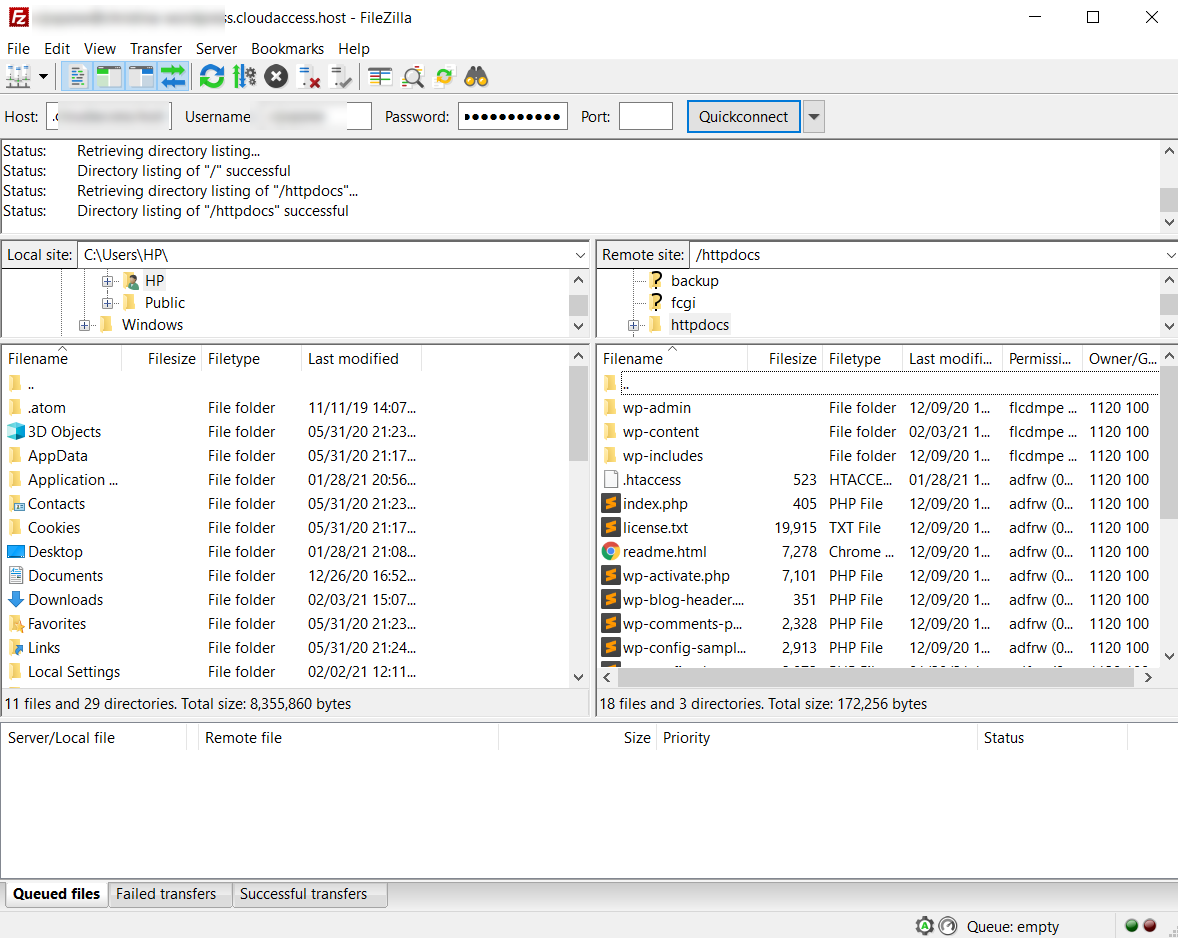
The left side shows you all the local files available and on the right side, you will see the server files, where you should be able to locate the .htaccess file.
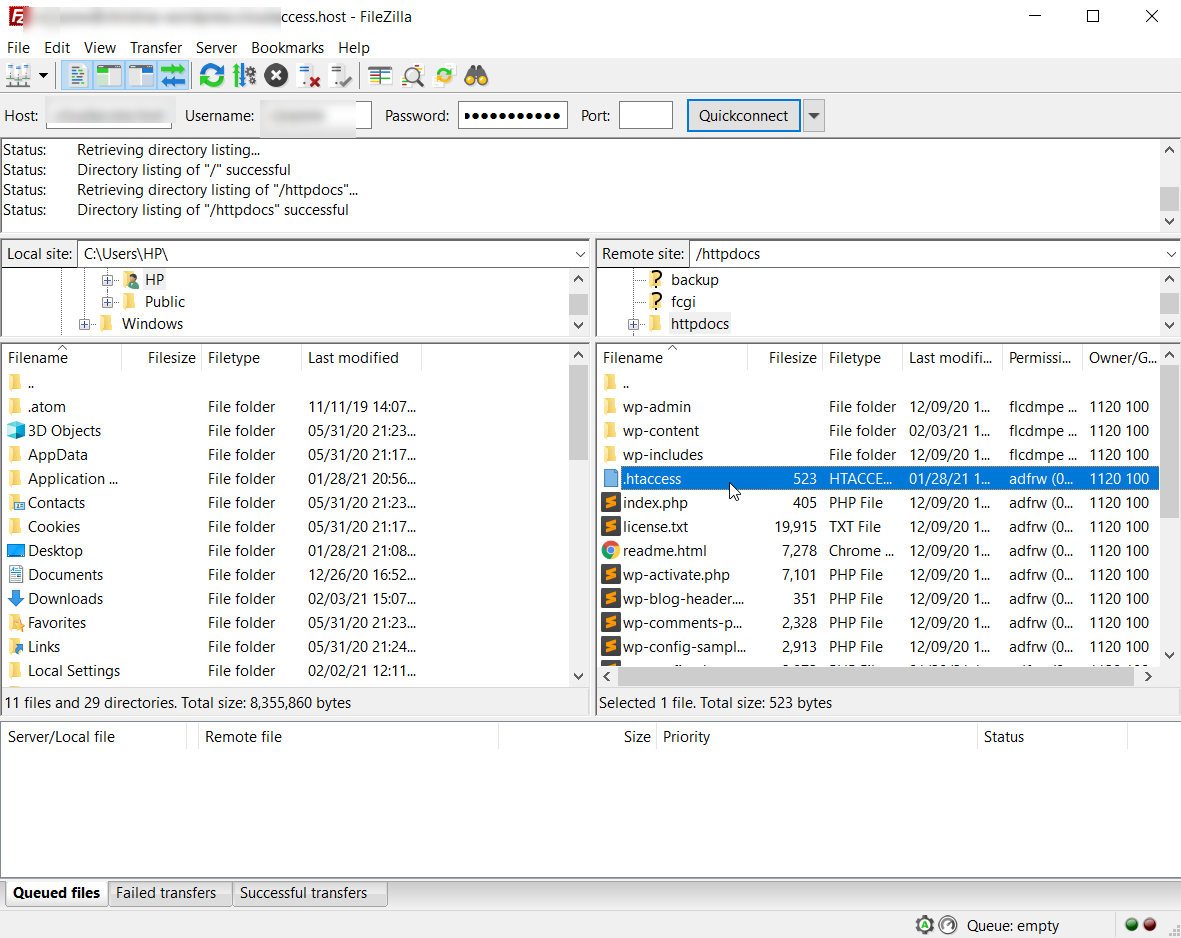
Right-click on it and select View/Edit.
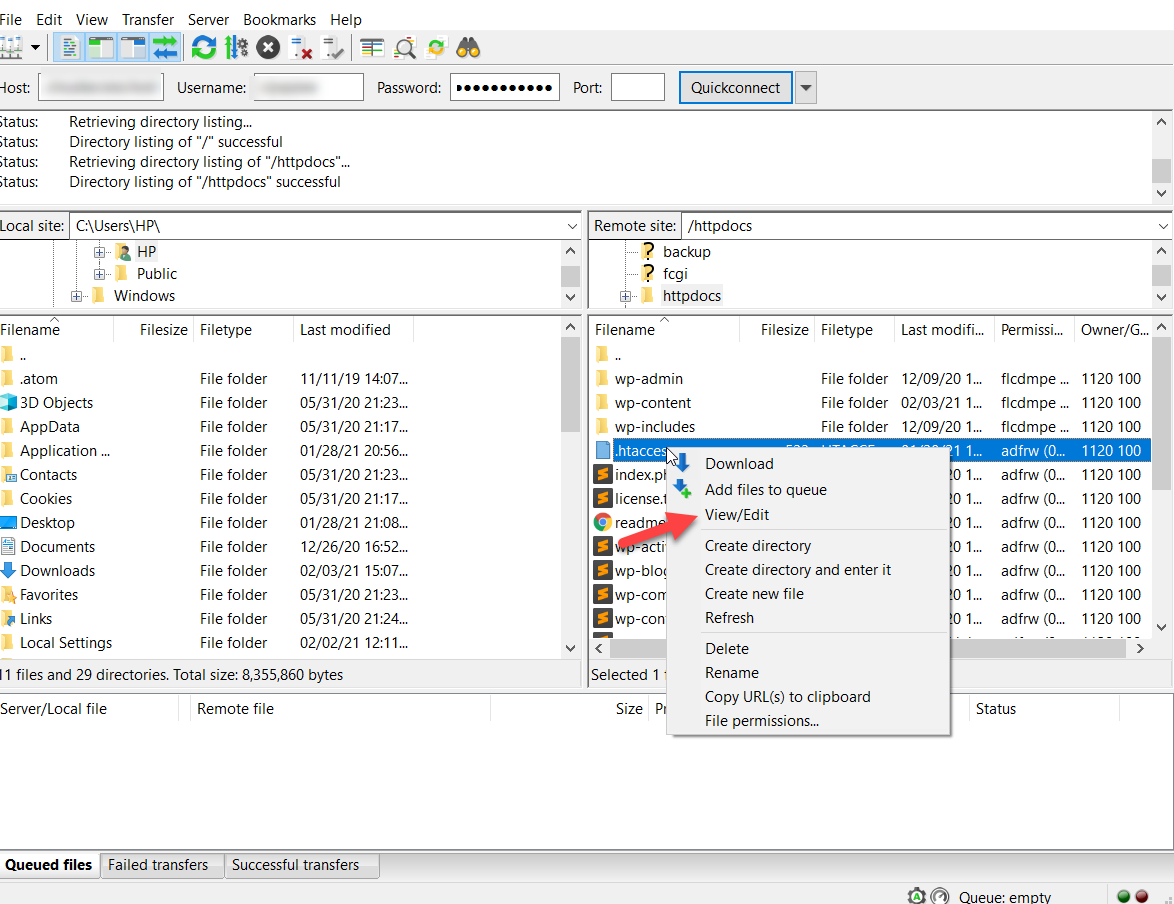
The software will open the file on the text editor you have on your computer. In our case, it’s Notepad.
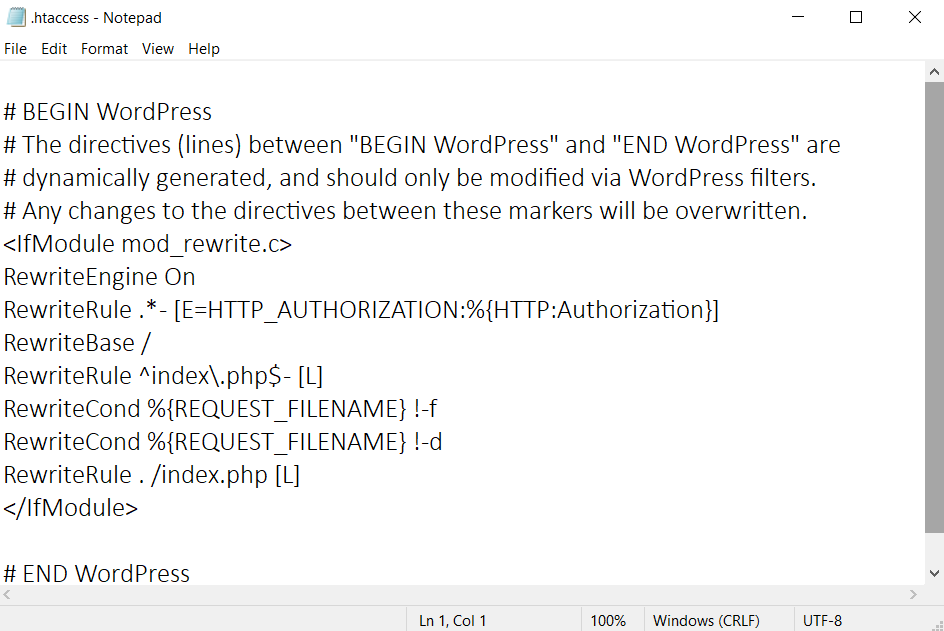
Now copy this code to increase the file size limit to 128 MB.
php_value upload_max_filesize 128M
php_value post_max_size 128M
php_value memory_limit 256M
php_value max_execution_time 300
php_value max_input_time 300
Paste it in the .htaccess file and save it.

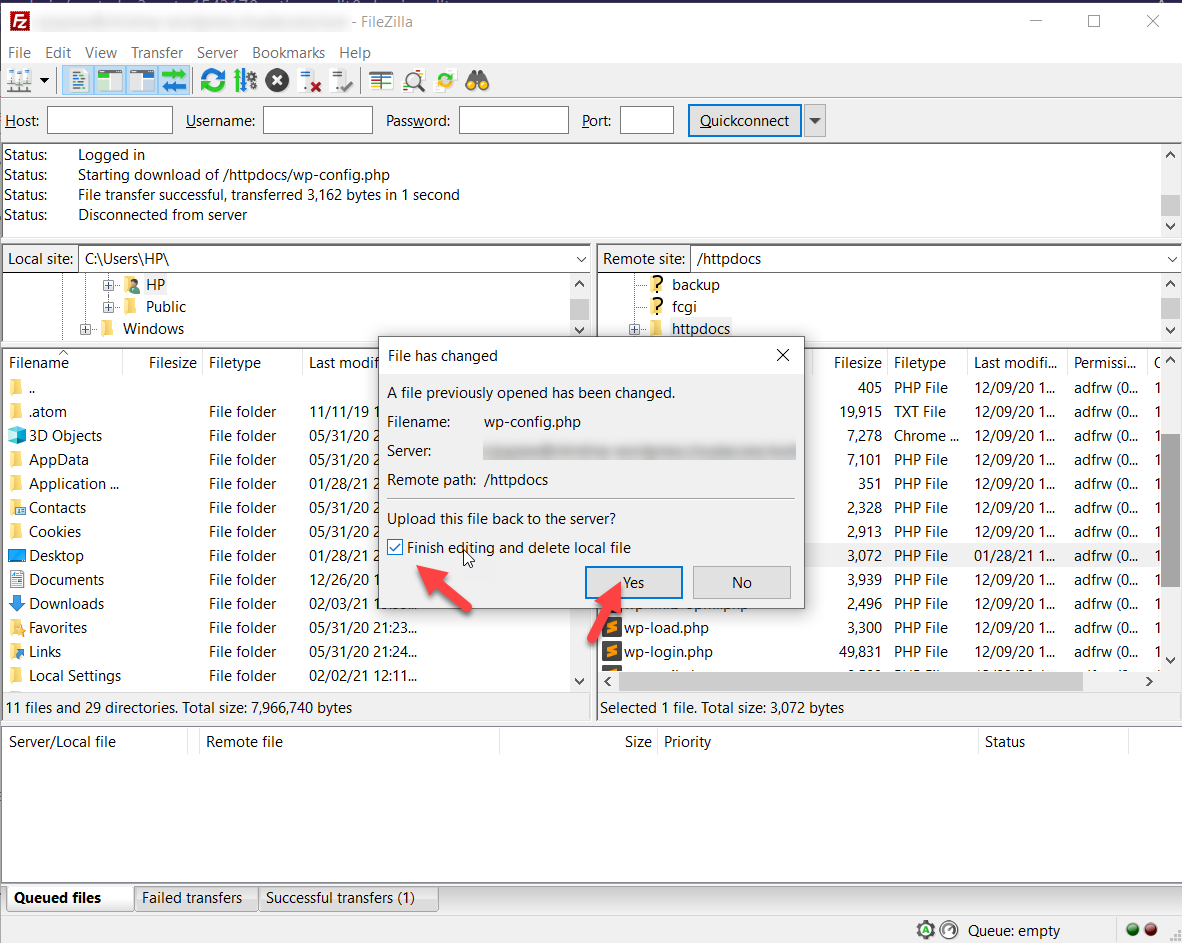
Then, upload the file back to the server. You will see a pop-up where you have to click the option to finish editing and delete the local file and then confirm.
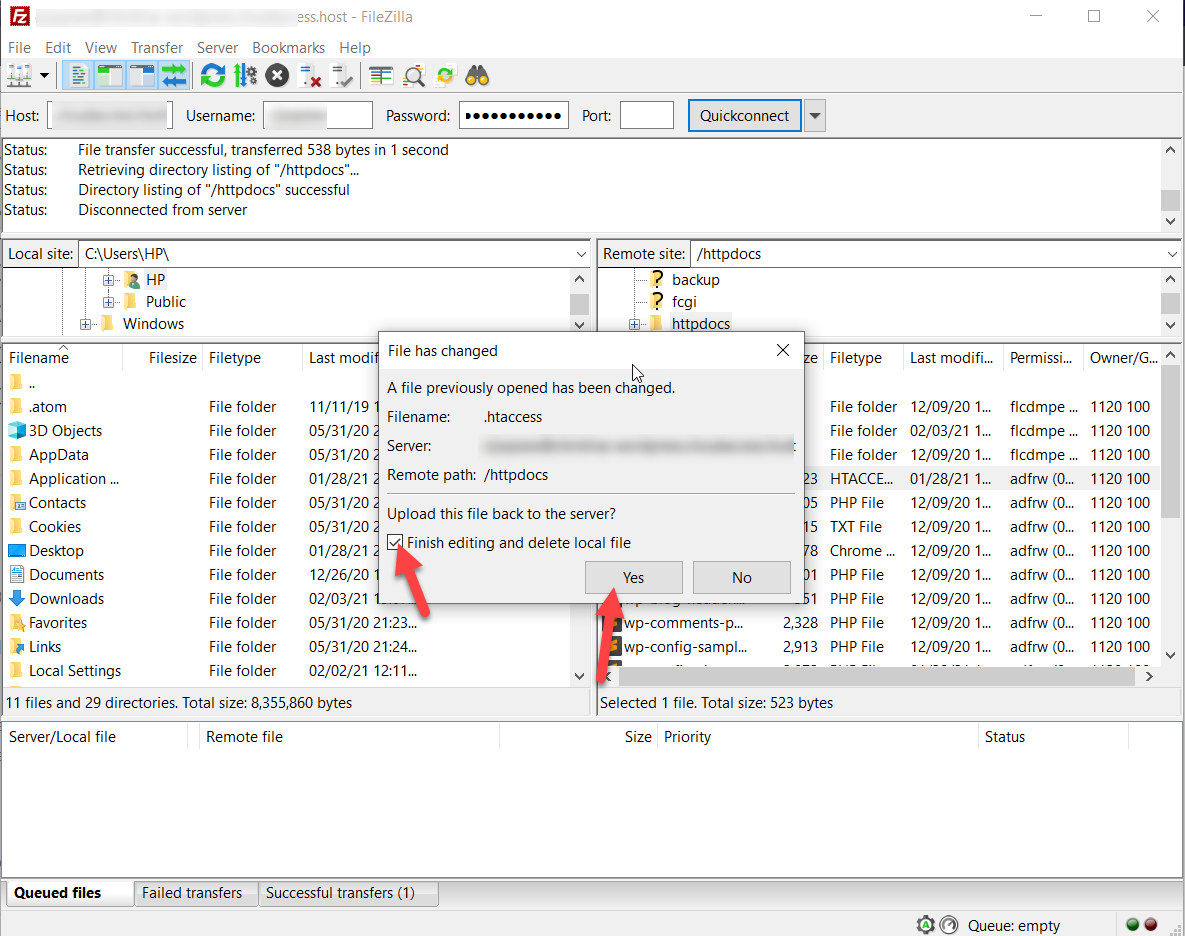
That’s it! From now on, the maximum file upload limit will be 128 MB or any other size that you’ve configured through the code. We chose 128MB as the maximum upload size but you can change it and adjust the value to any size you want.
2) Functions.php file
If you’re not comfortable editing WordPress core files, you can also upgrade the maximum file upload limit by editing the theme files. To do that, you need to edit your child theme’s functions.php file. If you don’t have a child theme, we recommend you create one following this tutorial or use any of these plugins.
There are two options to edit your child theme files:
- Via the WordPress editor
- With plugins
Both methods will get the job done without issues. Here, we’ll explain how to use both so you can choose your favorite one.
Method 1: Edit Functions.php file from WordPress Customizer
First, log in to your WordPress site and go to Appearance > Theme Editor.
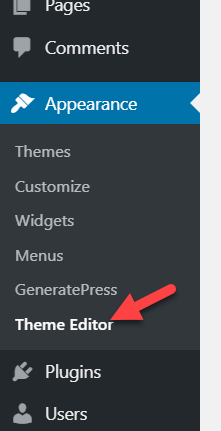
By default, your server will load the style.css file. We’ll edit the functions.php file so look for it on the right-hand side of the screen.

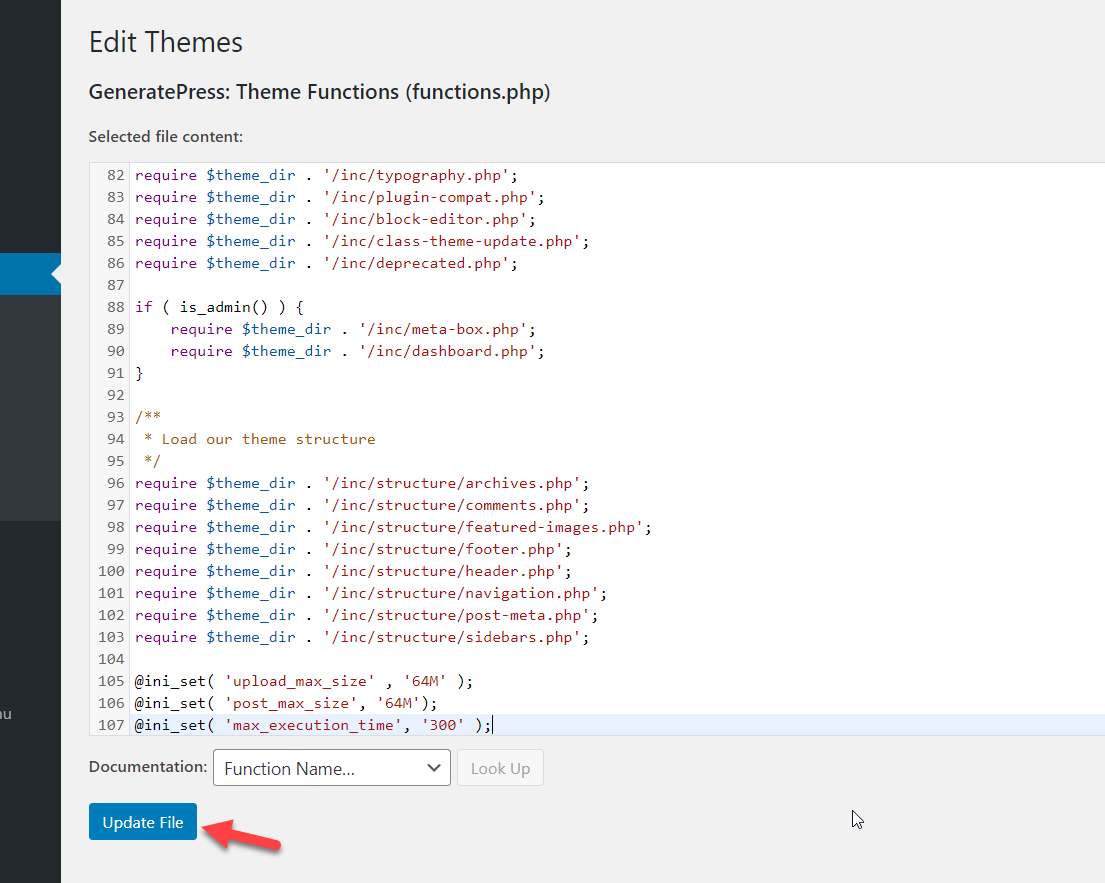
Then, copy this code to increase the file size limit to 64MB.
@ini_set( 'upload_max_size' , '64M' );
@ini_set( 'post_max_size', '64M');
@ini_set( 'max_execution_time', '300' );
Paste it in your functions.php file and update the file.
In this example, we have chosen 64MB as the max upload size but if you want a different file size, just update the code. For example, let’s say you want to be able to upload files up to 100MB. The code will be:
@ini_set( 'upload_max_size' , '100M' );
@ini_set( 'post_max_size', '100M');
@ini_set( 'max_execution_time', '300' );
On the other hand, if you don’t feel comfortable editing the theme files, check out the plugin method below.
Method 2: Code Snippets Plugin
Code Snippets is one of the best plugins to add code for those who don’t like to edit core/theme files directly. To install this tool, in your WordPress Admin, go to Plugins > Add New, look for Code Snippets. Then, install and activate the plugin.
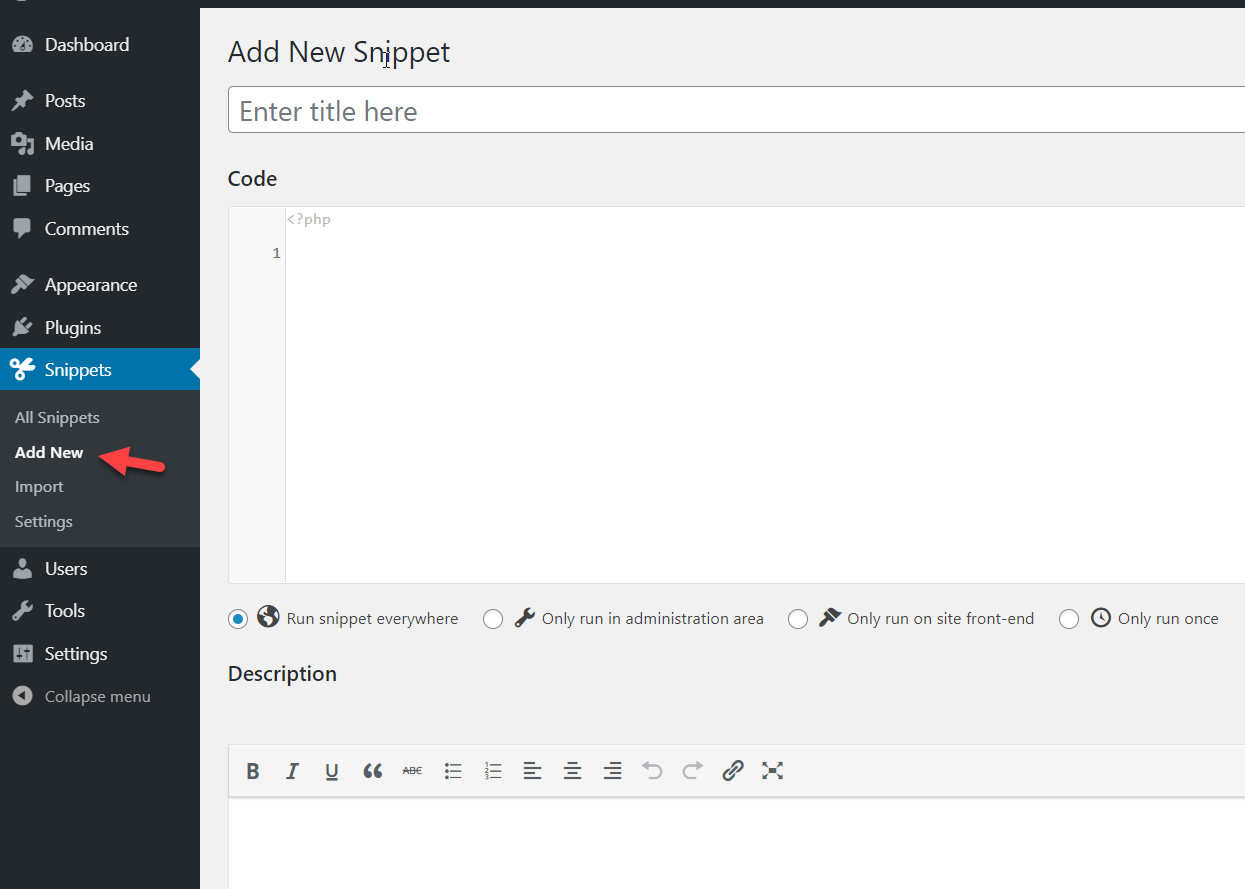
After that, you will be able to add custom PHP/ HTML/ CSS or JavaScript codes through the plugin settings. Simply go to Snippets > Add New on the sidebar.
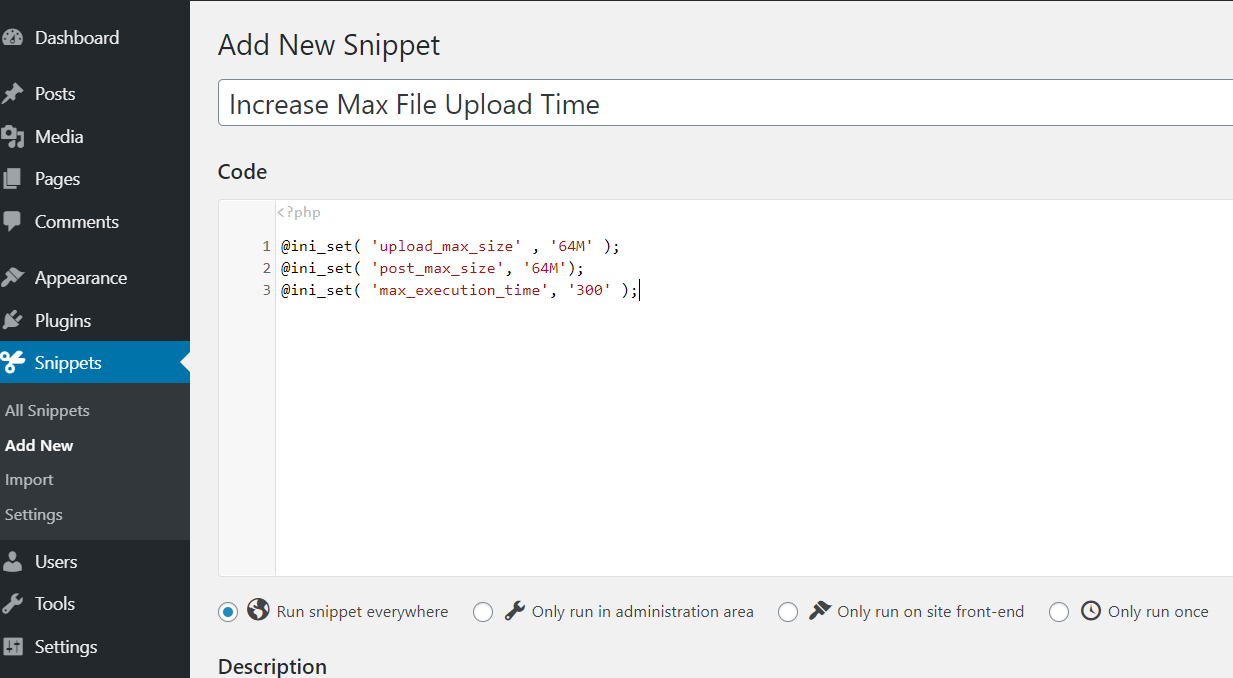
Every time you create a snippet, we recommend you give it a clear name that explains what it does so then it’s easy to identify. For example, we’ll call it “Increase Max File Upload Time“. After that, copy the code from below, paste it in the plugin’s snippet section and save it.
@ini_set( 'upload_max_size' , '64M' );
@ini_set( 'post_max_size', '64M');
@ini_set( 'max_execution_time', '300' );
That’s it! You’ve just increased the maximum file size limit to 64MB.
3) PHP.Ini File
Another alternative to increase the maximum file size limit in WordPress is to create or edit the php.ini file.
First, copy the below code to increase the limit to 128MB.
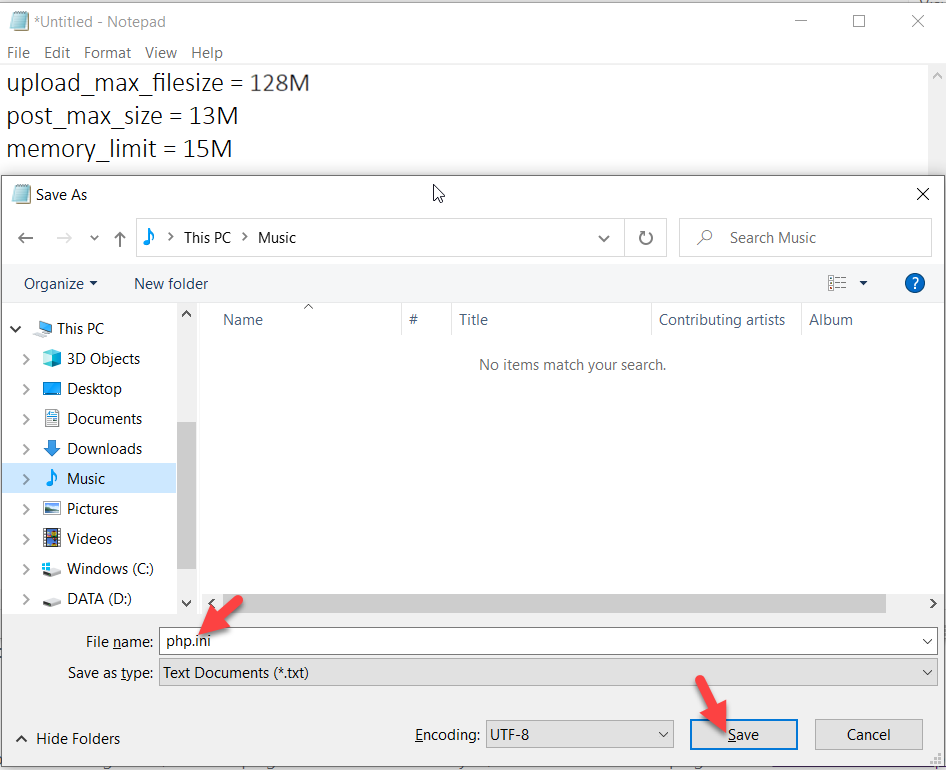
upload_max_filesize = 128M
post_max_size = 13M
memory_limit = 15M
Then, open any text editor (Notepad, Notepad++, Sublime Text, or any other) and paste the code. Then, save it as php.ini (.ini is the extension here) and place it somewhere handy.
Once you have created this file, log in to your website’s file manager through cPanel or FileZilla and upload this php.ini file to your WordPress installation directory. That’s it!
4) WP-Config.php File
The wp-config.php file is a core file that contains essential data such as the MySQL username, hostname, password, and so on. Additionally, it has information regarding the upload size limit, so we can edit it to increase that limit.
To do that, log in to your file manager using FileZilla. In the WordPress installation directory, you will see a file called wp-config.php. Right-click on it and select View/Edit.

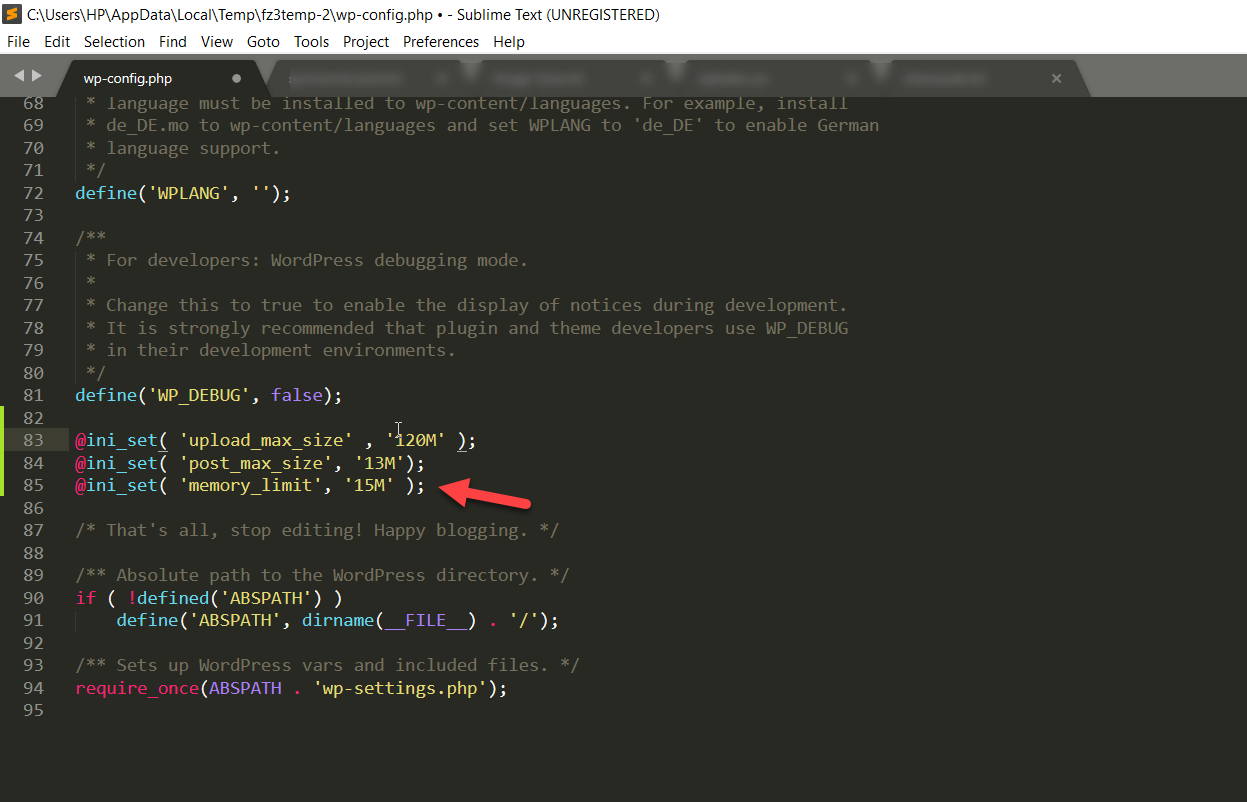
Then, open the file using any text editor and copy the following code to increase the file limit size to 120MB.
@ini_set( 'upload_max_size' , '120M' );
@ini_set( 'post_max_size', '13M');
@ini_set( 'memory_limit', '15M' );
After that, paste the code right before the line That’s all, stop editing! Happy blogging and save the changes.
Then upload the file back to your server and that’s it! You’ve increased the file size limit by editing the wp-config.php.
5) Increase Size in Multisite
If you have a multisite WordPress installation and want to increase the maximum upload file size, follow these steps.
First, in your dashboard, go Network Admin > Settings.
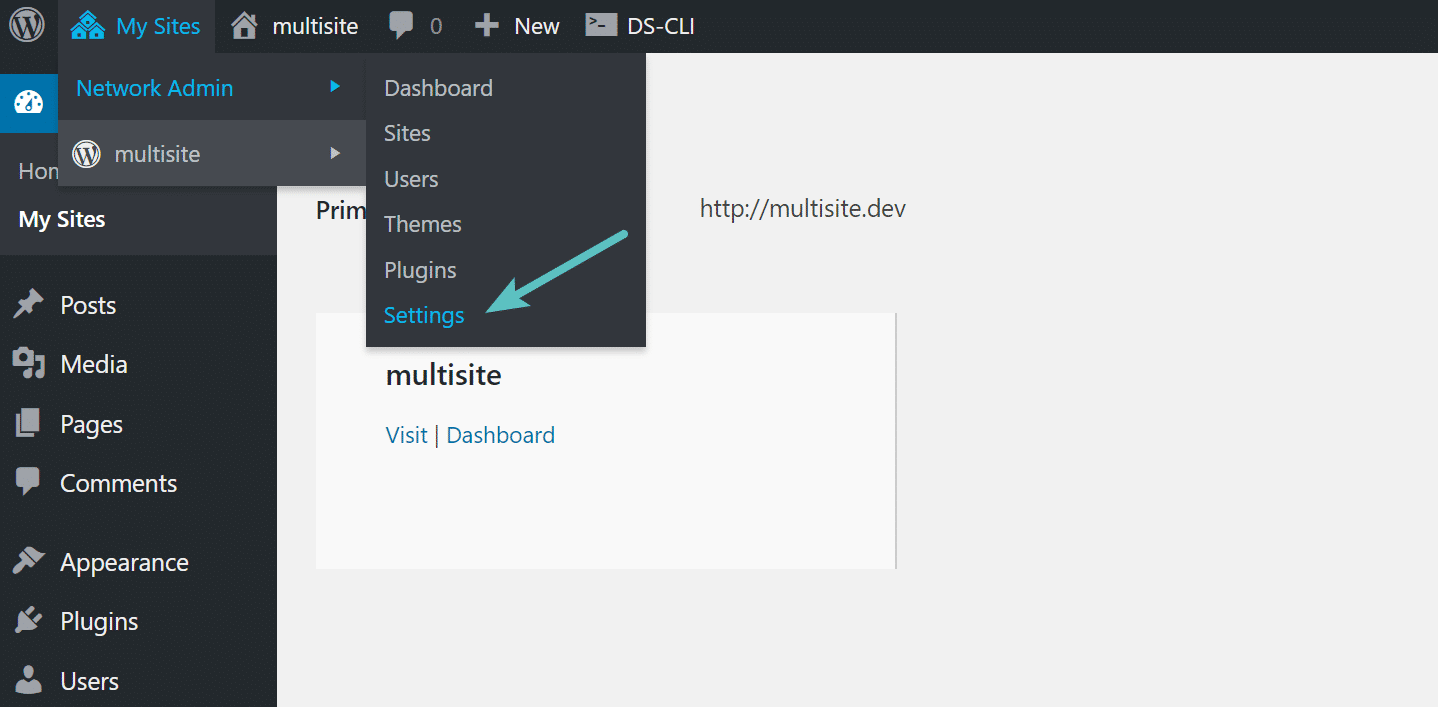
Under the settings, search for the Max upload file size option.
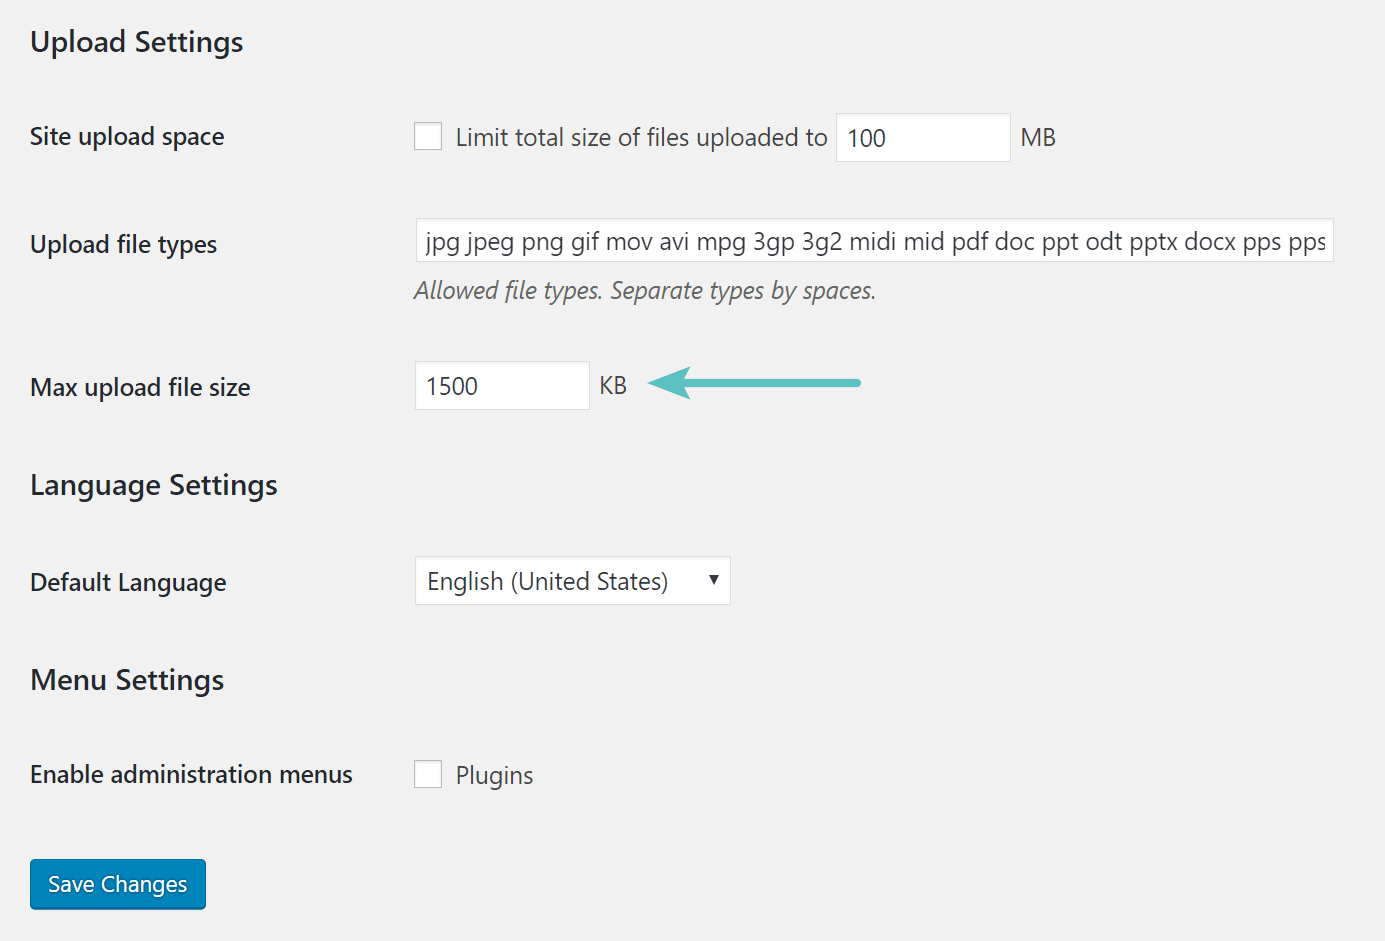
Here, the server is configured with a max 1500 kb (or 1.5MB) file upload limit so we’ll increase it to 64MB (64000 kb).
Finally, save the settings and you are good to go.
6) Increase the maximum file size upload limit with plugins
If you don’t feel comfortable editing files, you can increase the file size limit with a plugin. For this demo, we’ll use a free tool called Increase Maximum Upload File Size.

The first thing you need to do is install and activate the plugin.
Then, go to the plugins’ configuration under the Settings section.
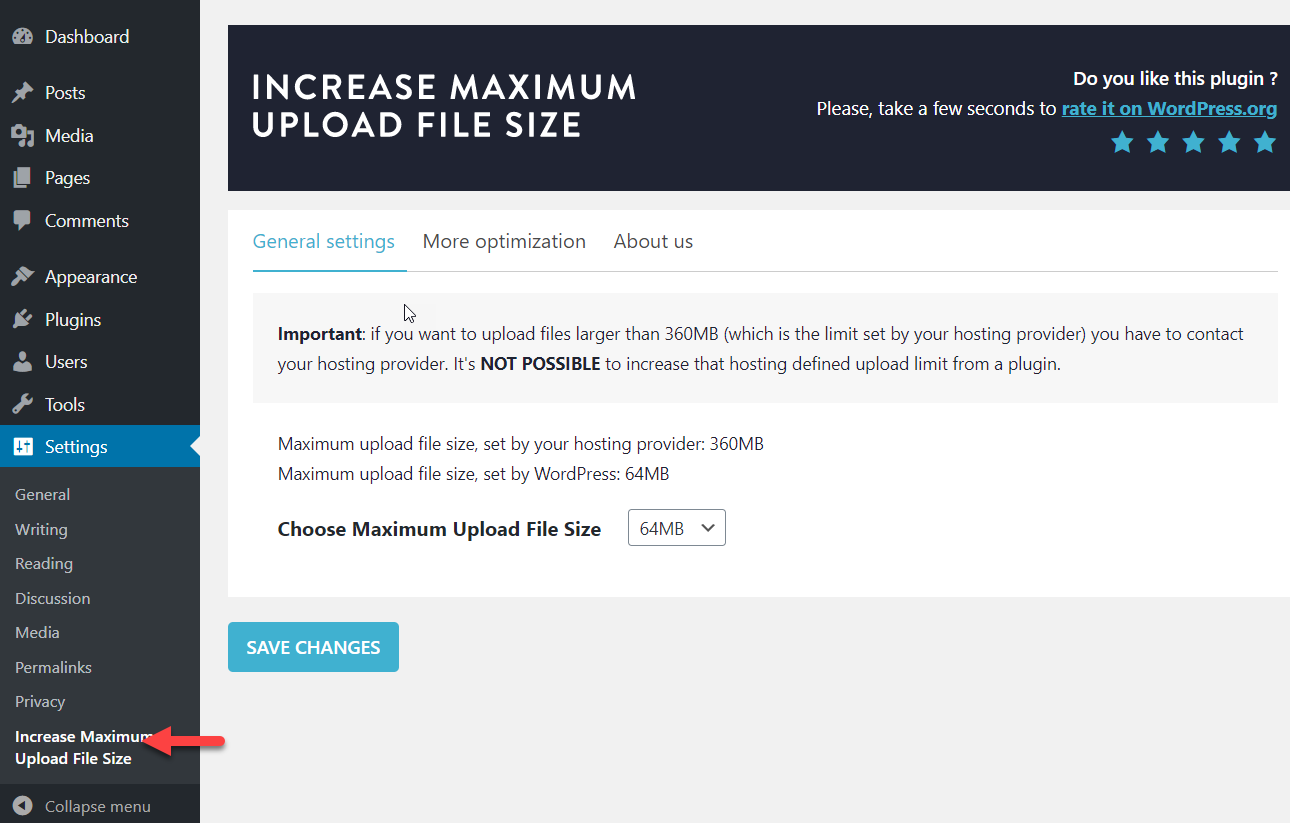
Now, simply select the size you want from the dropdown and save the changes.
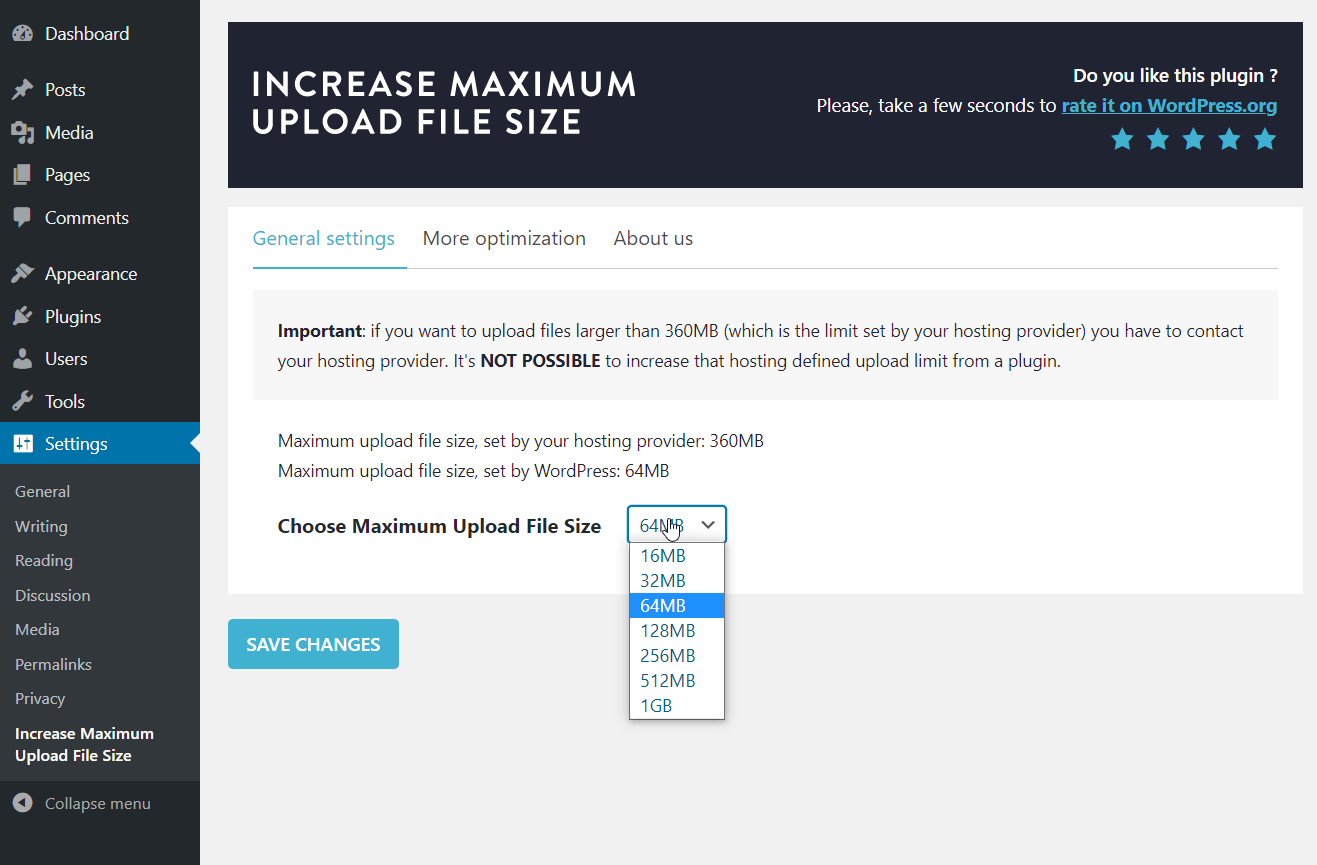
As you can see, the size options are: 16MB, 32MB, 64MB, 128MB, 256MB, 512MB, 1GB. Keep in mind that you can’t select a different file size, so you’ll have to choose one of those options.
Finally, save the changes and you will see the new limit configured. Short and sweet.
7) From the Hosting Platform
Most WordPress hosting companies will give you an option to configure the maximum file upload size through the cPanel or your account dashboard. Let’s see how you can do it.
First, log in to your cPanel and go to Software > Select PHP Version.
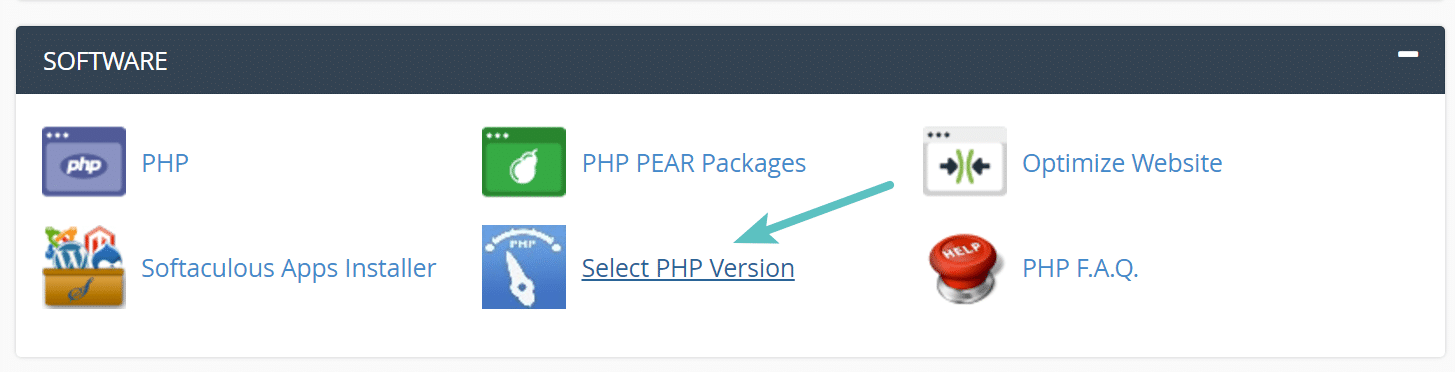
You will be redirected to the PHP extensions page and from there, you will be able to enable or disable custom PHP extensions. We don’t need to change any of this but on the top-right corner, click the link to open the PHP options.
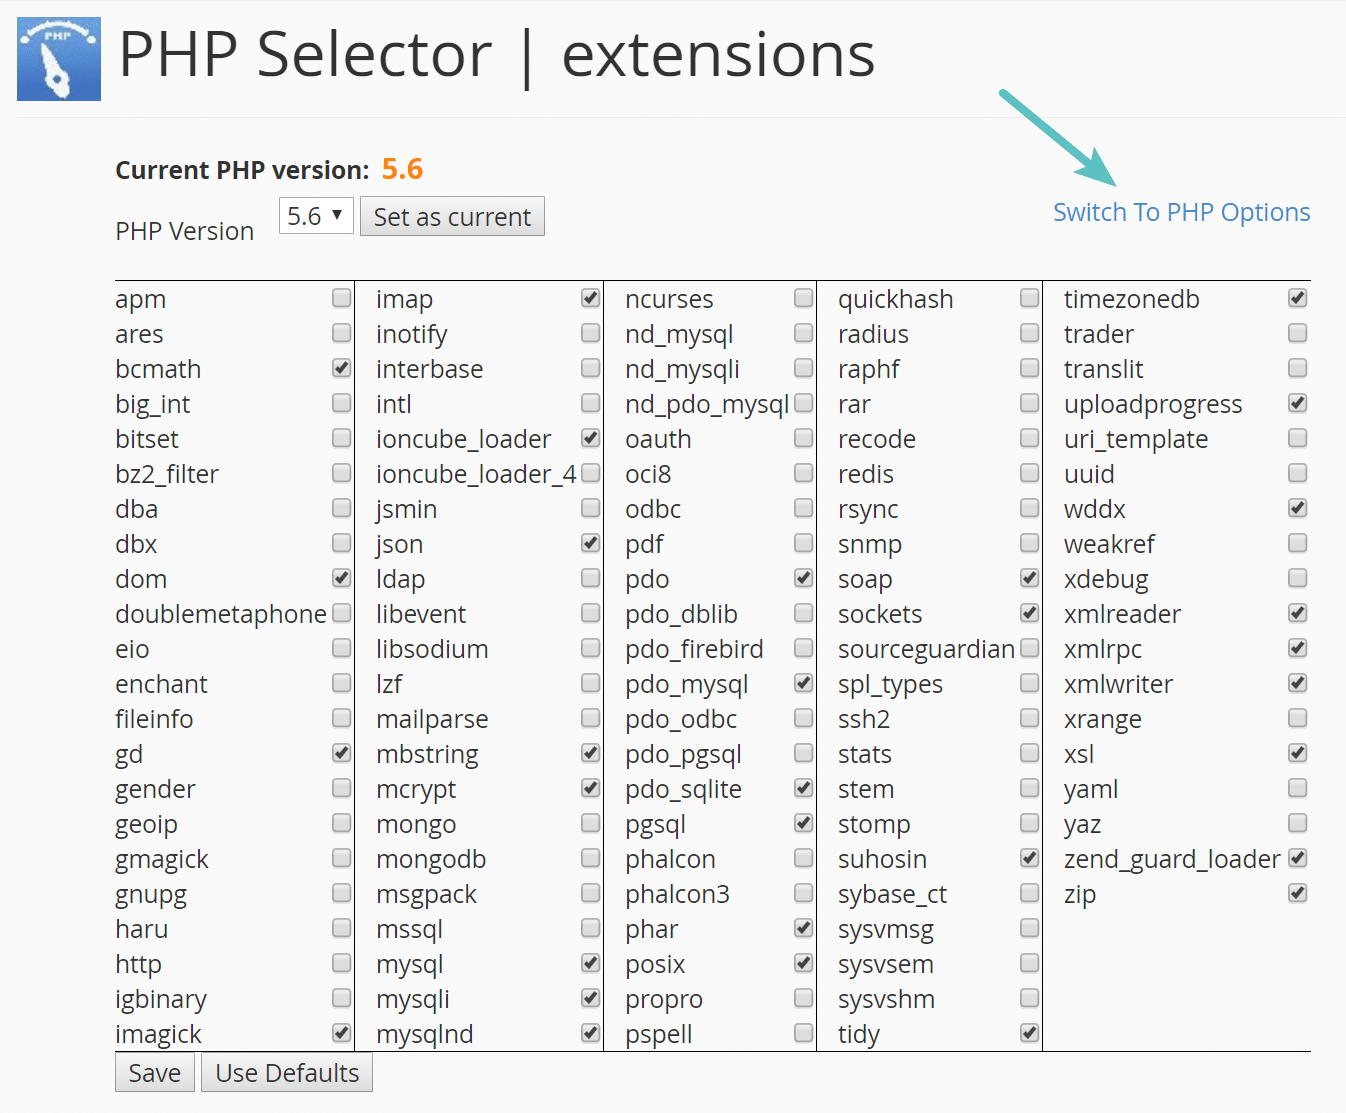
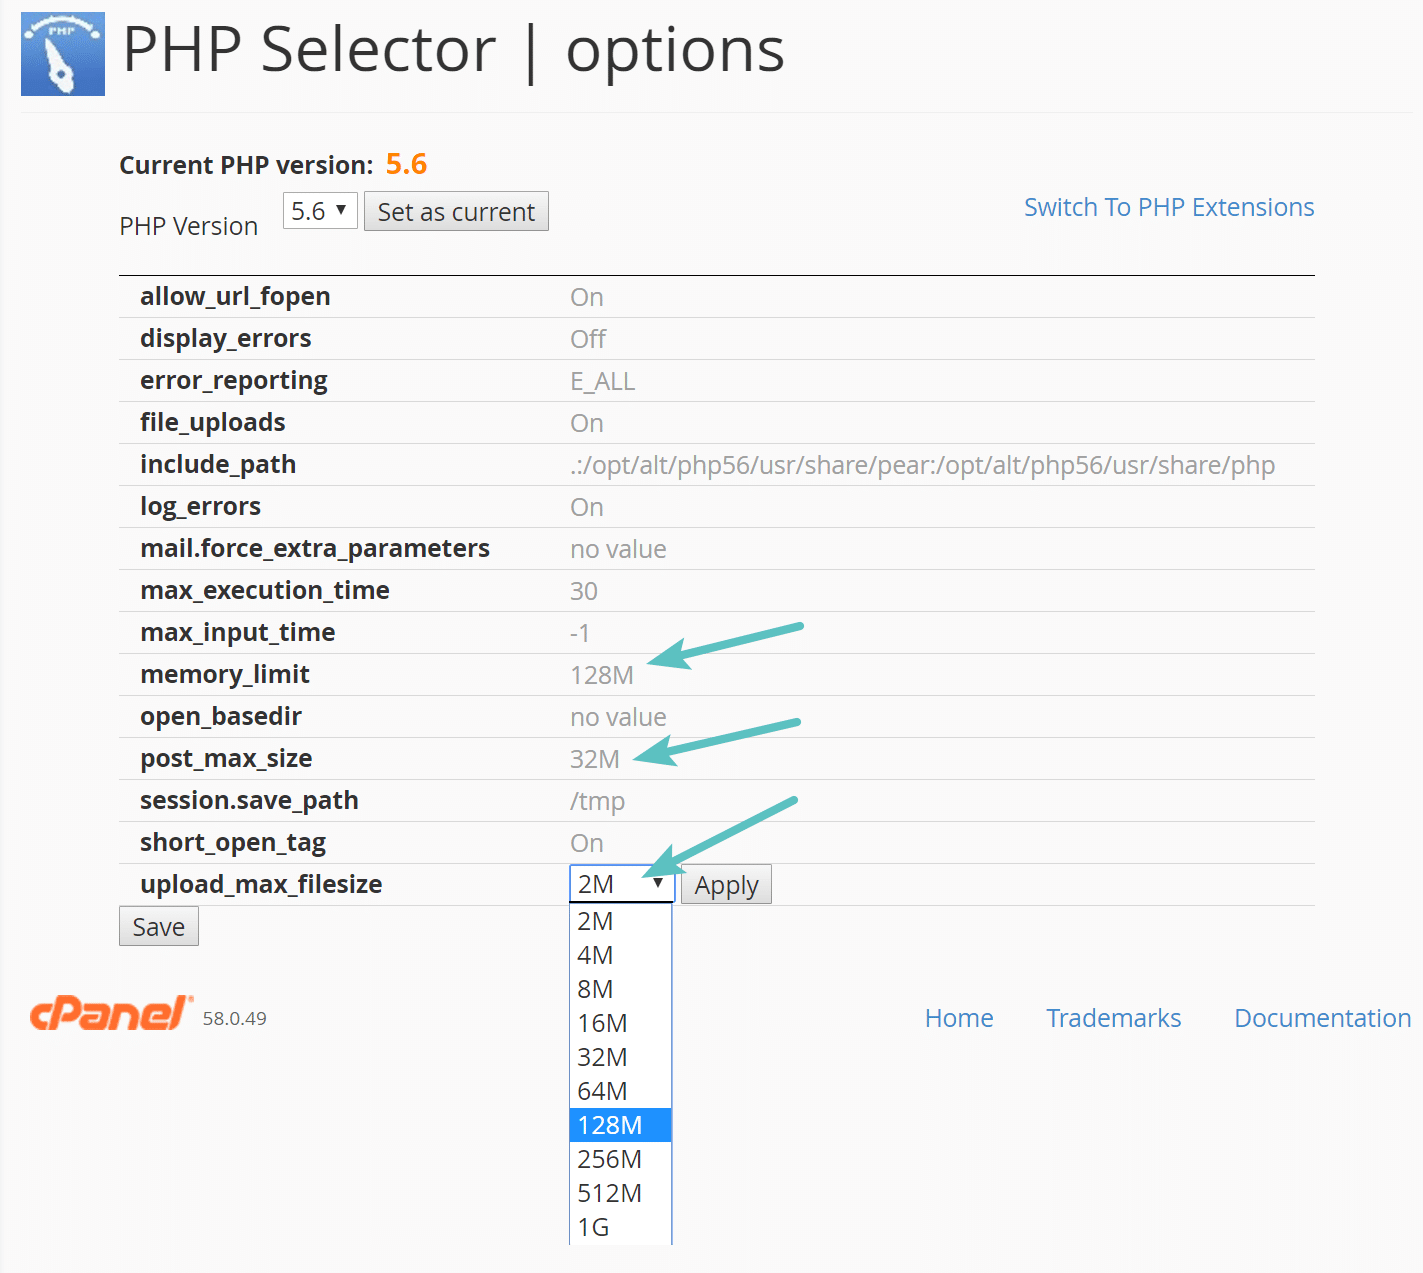
On the next page, you will see the PHP selector options. These are the settings people use to modify the PHP version but we’ll use them to edit the maximum file size.
You need to locate the upload_max_filesize option. That’s the max file upload limit configured by the server or hosting company. Simply click it and select the maximum file size you want to apply from the dropdown. After that, save the settings.
NOTE: Be extra careful when changing this type of thing. Modifying the wrong settings can affect your site’s frontend/backend, so double-check every step and proceed carefully.
8) Upload_Size_Limit Filter
WordPress includes a filter to increase the upload size called Upload_Size_Limit. You can use it to edit your theme’s functions.php and add a filter to customize your maximum upload file size. Let’s see how to do it.
Log in to your WordPress site and go to the Theme Editor. Open the functions.php file and paste the below code at the end of the file.
function filter_site_upload_size_limit( $size ) {
   return 1024 * 1024 * 64;
}
add_filter( 'upload_size_limit', 'filter_site_upload_size_limit', 120 );
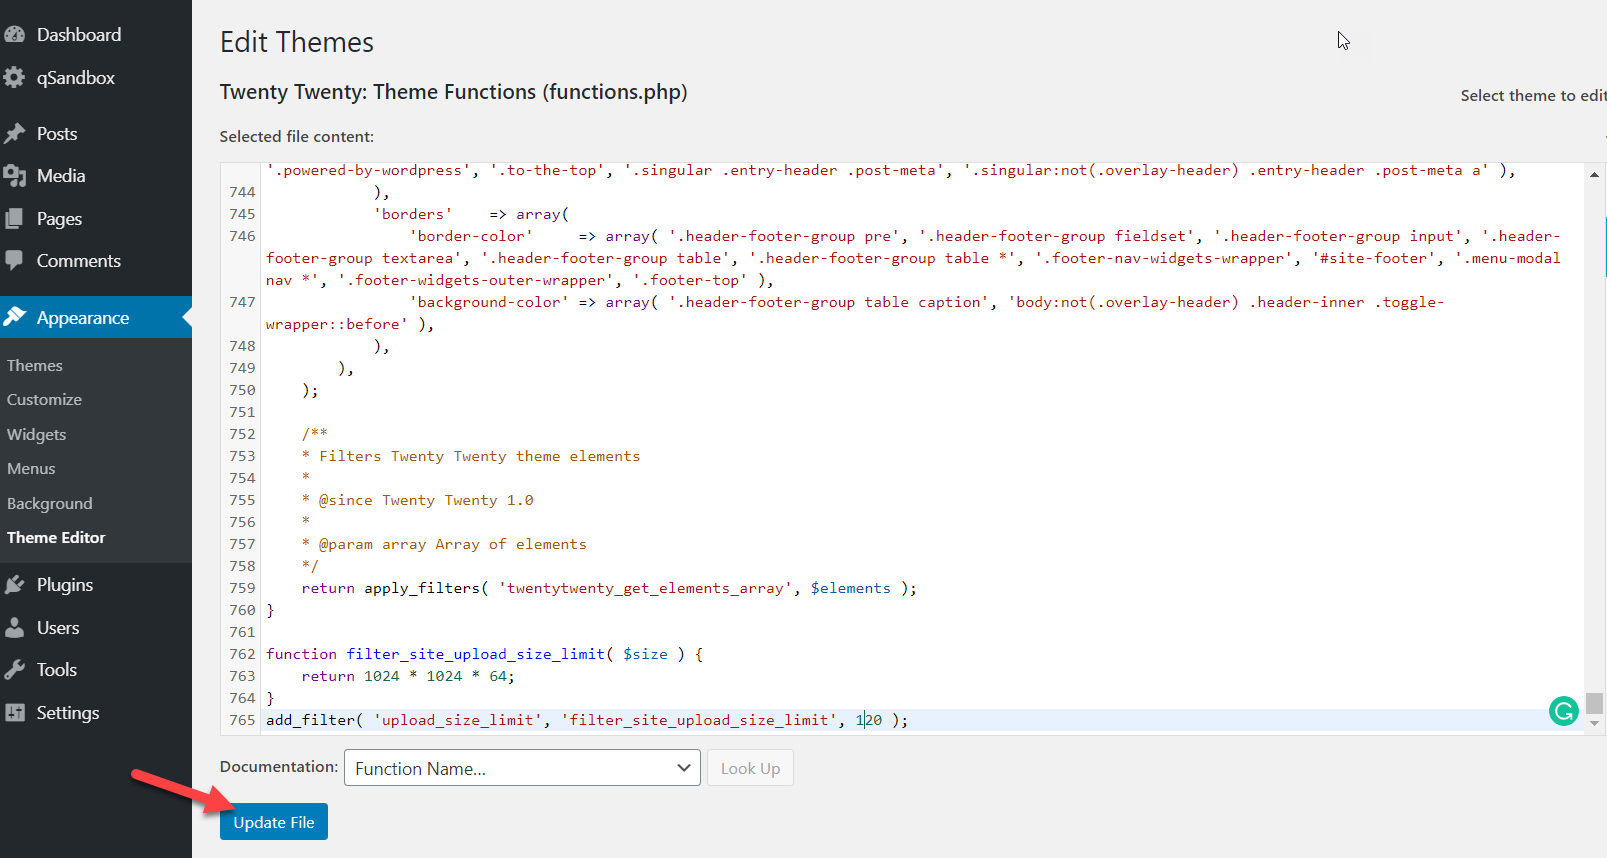
If you check the code, you’ll see that in the last line, we specify a maximum upload size of 120MB. You can edit it and select any size you want for your site.
Finally, remember to update the file after modifying the theme’s functions.php file.
9) Contact your Hosting Provider
It’s worth mentioning that if you use shared hosting, these methods may not work. So if you don’t like any of the previous methods or you use shared hosting, contacting your hosting provider is your best choice. Most hosting companies offer support via live chat, phone, and ticketing systems, so simply tell them what you want to change and they’ll do it for you.
Bonus: Add custom image sizes
Apart from increasing the maximum upload file size, you can also add custom image sizes to make better use of your site’s resources.
First, you can change the default image sizes by going to Settings > Media in your WP dashboard. There, you will see the 3 default sizes with their corresponding width and height. Simply adjust the sizes and save the changes. We also recommend you regenerate the thumbnails.
If apart from changing the default options you want to add your own custom image sizes, you’ll need to do a bit more work. The easiest way is to follow this step-by-step guide that shows you 2 different methods.
Alternatively, you can remove default image sizes that you don’t use. To know more about that, have a look at this guide.
Conclusion
In summary, if you try to upload a file to your site that’s bigger than the limit configured in the server, you will have issues. That’s why learning how to increase that limit is very handy and will help you avoid headaches.
In this guide, we’ve seen several different methods to increase the maximum upload file size in WordPress:
- .htaccess
- Functions.php
- PHP.Ini
- WP-Config.php
- Multisite
- Using plugins
- From the Hosting Platform
- Upload_Size_Limit Filter
- Contact your Hosting Provider
All of these methods get the job done efficiently so choose the one that you like best. The most common solutions are editing the .htaccess file, the wp-config.php, the php.ini file. However, if you use shared hosting or you’re not comfortable using any of the above methods, you can contact your hosting provider and ask them to raise the limit for you. Additionally, some hosting companies even allow you to update the upload size through the account dashboard.
On the other hand, if you don’t feel comfortable directly editing the theme or WordPress core files, you can use Code Snippets.
Have you enjoyed the read? Please share this post on social media and help your friends increase their server’s maximum upload file size!
