
Do you use Divi and want to create a fixed header? You’ve come to the right place. In this guide, we’ll show you two different ways to make the Divi header sticky step-by-step.
Along with Elementor, Divi is one of the most popular WordPress themes out there. Nearly 2 million sites use it to create custom designs for their businesses. If you are also a Divi user, we’ve got something special for you. In this tutorial, we are going to show you how to make a fixed Divi header in some simple steps.
Why Make Divi Header Sticky?
One of the main reasons to make the Divi header sticky is to make navigation easier for the users. The header is what sits at the top of your site so it’s one of the first things that customers see when they come to your site. The header contains very important information and helps users navigate through your content to find what they’re looking for. In the header, you normally place your site’s most important sections, the main categories, links to your products, and so on.
By default, WordPress menus won’t appear when the user scrolls down the page. So, to be a step ahead of your competitors, you can have your header fixed so that users can always access it easily even when they scroll down. This can help you improve your site’s navigation. Additionally, it can help you guide your users and take them where you want them to go. So, if you use it smartly, the header can help you increase conversion rates.
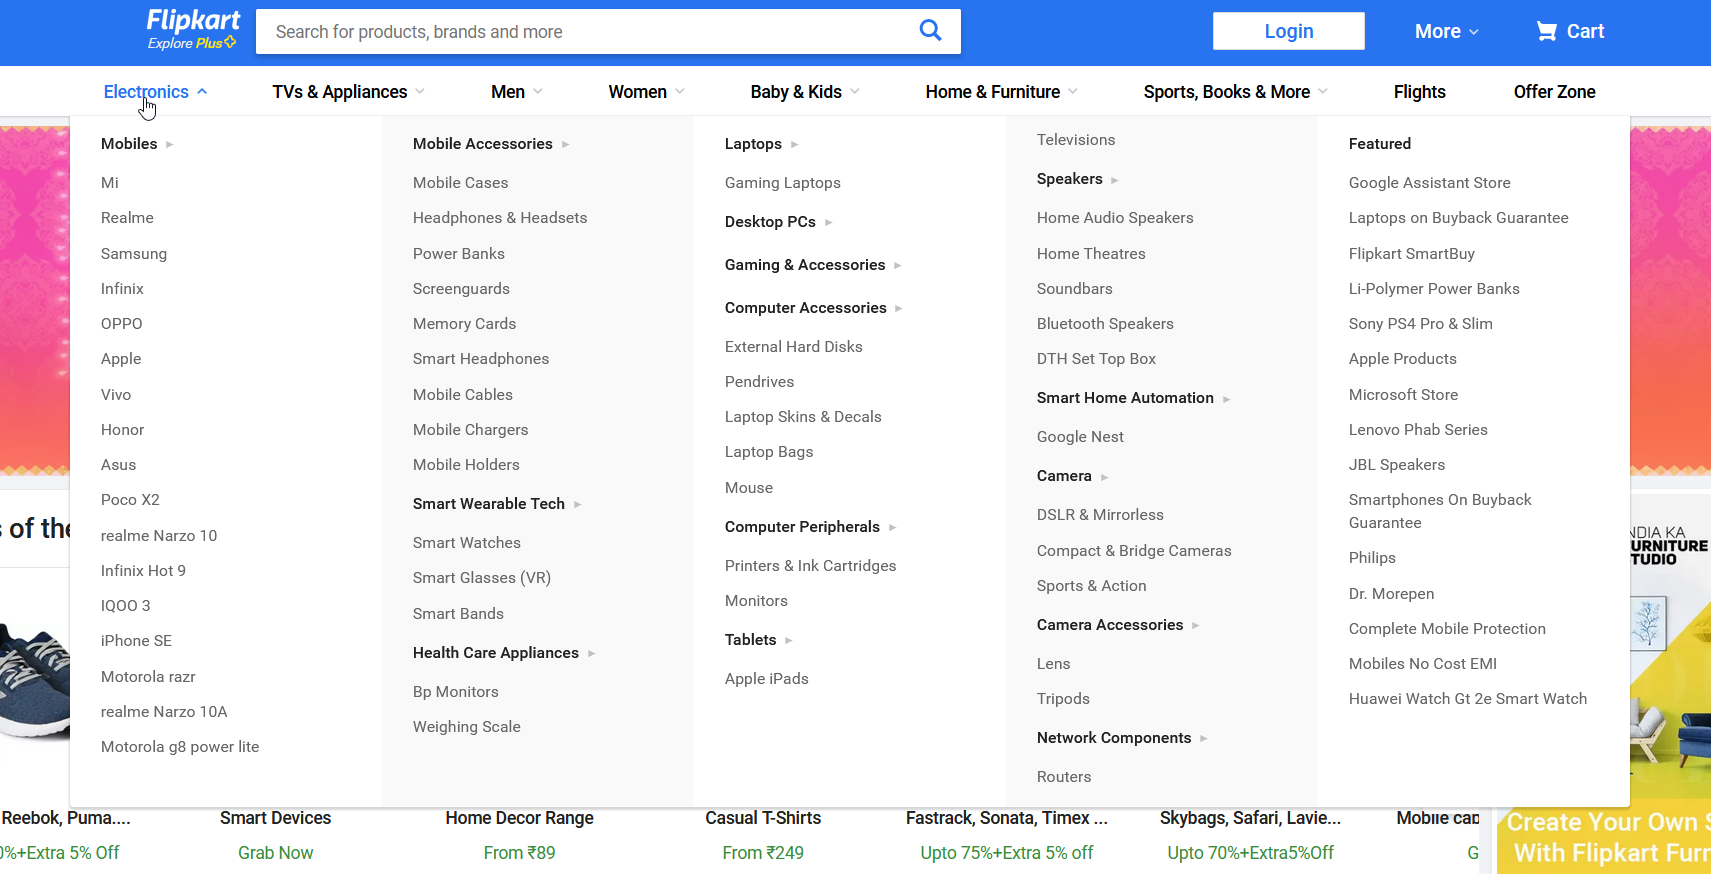
Apart from editing the header and adding social media icons to the WordPress menu, the most popular eCommerce sites use mega menus to display their popular product categories. That way, they make sure that shoppers find the items they’re looking for easily.
The Divi theme comes with 600+ pre-made templates that you can import to use on your site. However, to take your store to the next level you need something else. We’ve already seen how to edit the header in WordPress and today we’ll show you how to make the header sticky using Divi.
Some WordPress themes like Avada and GeneratePress come with tools that make the header sticky through their theme panel. However, doing the same in Divi requires some additional customizations.
How to Make Divi Header Sticky/Fixed?
Here, we’ll show you two beginner-friendly methods to make the Divi header fixed.
- With the Divi Builder plugin
- Via coding
In this section, we’ll have a look at the steps you need to take for each option. Both are pretty effective, so just choose the one that you like best.
1) Make Header sticky using the Divi Builder
Divi theme comes with a Builder integrated. This means that if you have the Divi theme activated, you don’t need to install any additional plugin. For this demonstration, we’ll assume that you’re already using Divi on your site. If you don’t, install and activate Divi before you continue.
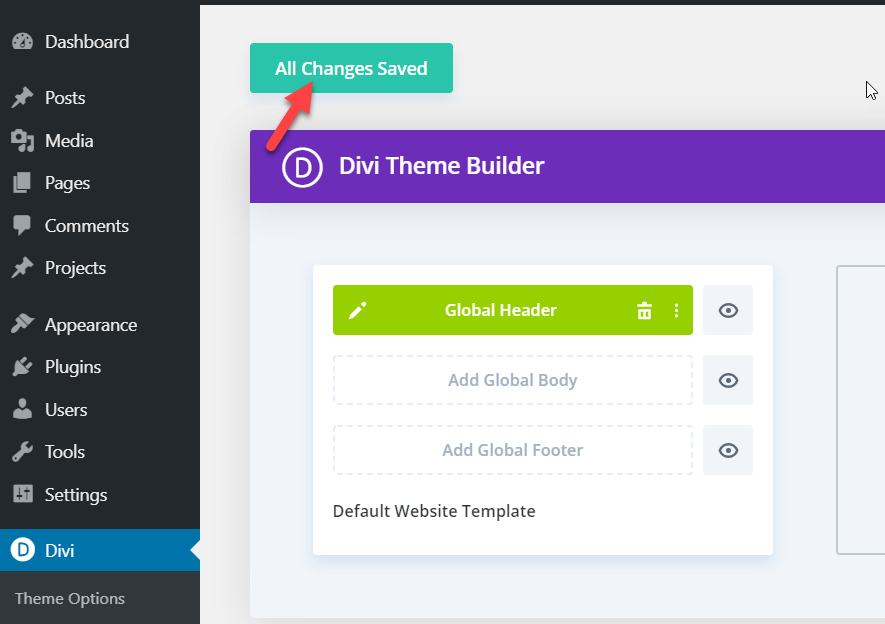
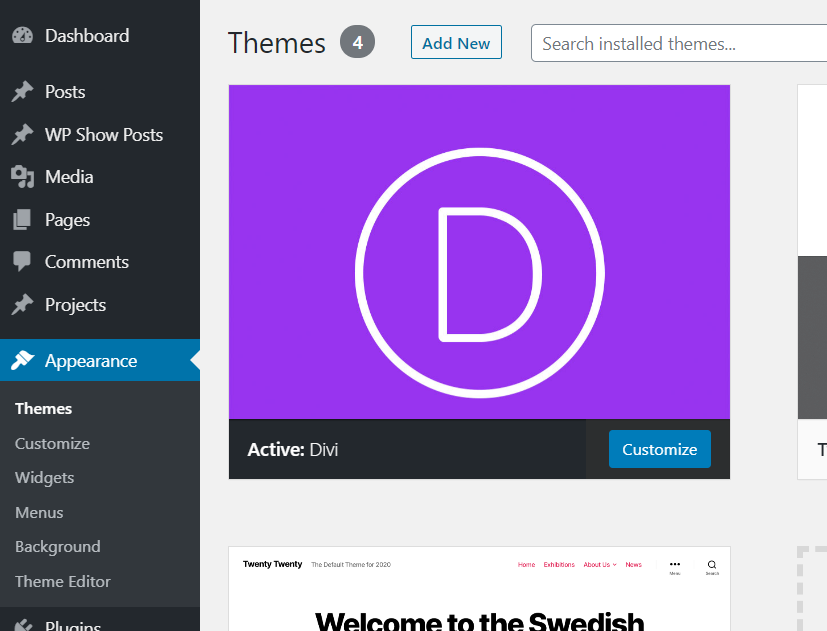 Then, you can import one of the many pre-made templates that Divi offers or create one from scratch. Once you have created or chosen your design, in your WordPress dashboard, go to Divi > Theme Builder.
Here, you will be able to create custom templates for your sites. In any template, there will be three main elements:
- Header
- Body
- Footer
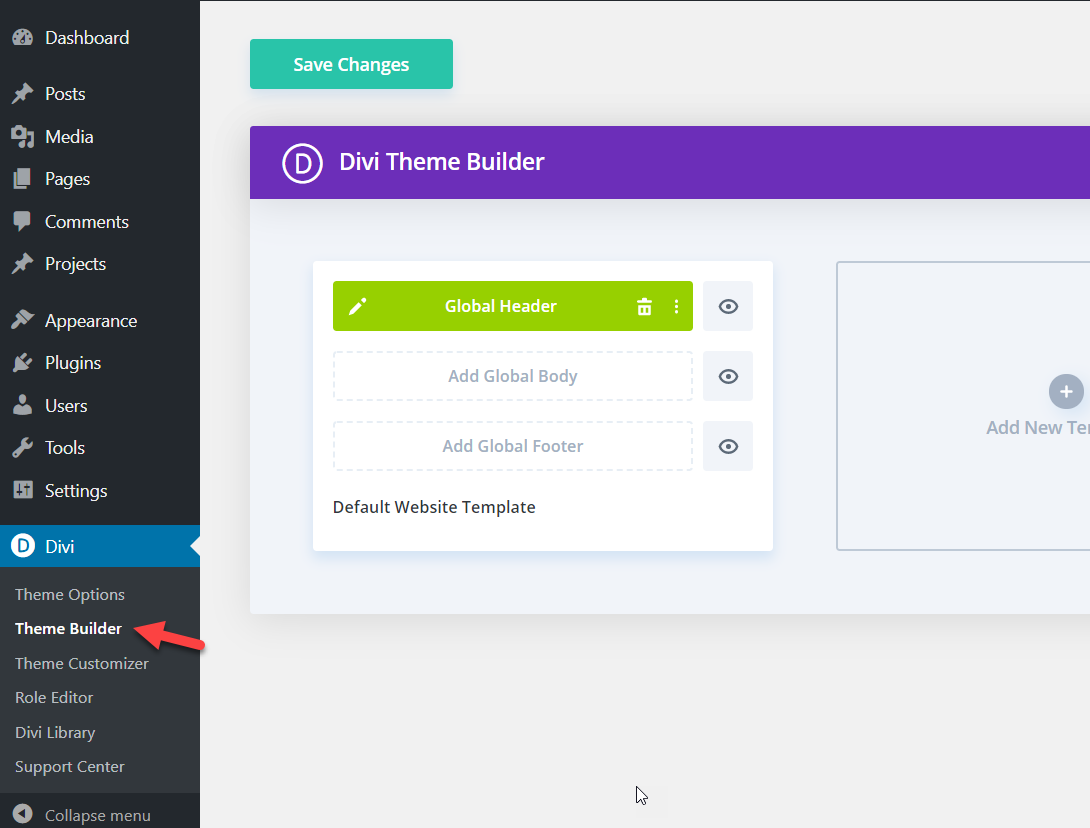
Edit the Global Header
As we want to make our Divi header fixed, select the Global header. To make it sticky, you’ll need to edit the global header. So, hover your mouse over the Global header, and on the left side, you will see a pencil icon. Click on it to start editing.  Then, you’ll see the Divi builder page to edit the header. Here you can add elements like text, images, social icons, menus, and so on. Hover your mouse to the top of the screen and click on the gear icon on the left side.
![]() A new popup box will open with different options.
A new popup box will open with different options. 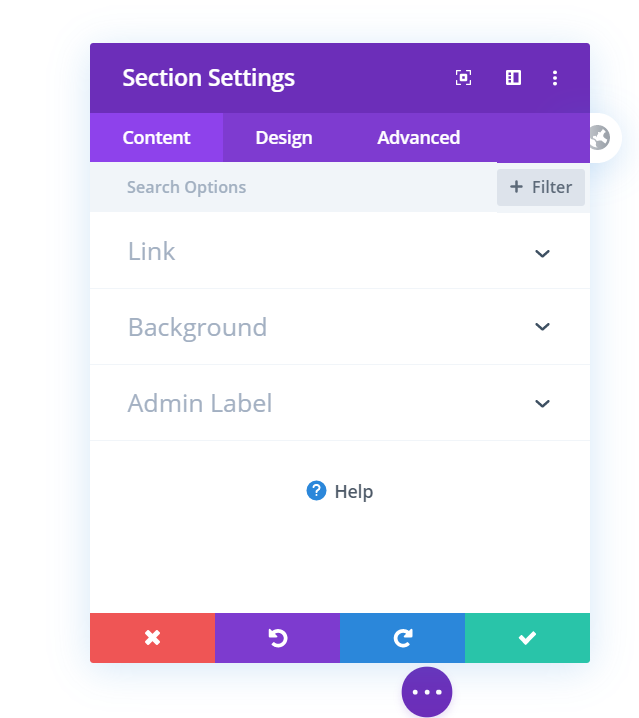 The latest version of the Divi theme comes with a feature called Divi positions. That’s the feature we are going to use to make the header sticky. Under the Advanced tab, you will see the Position option. Open it and choose the Fixed option from the dropdown. Then, update the header.
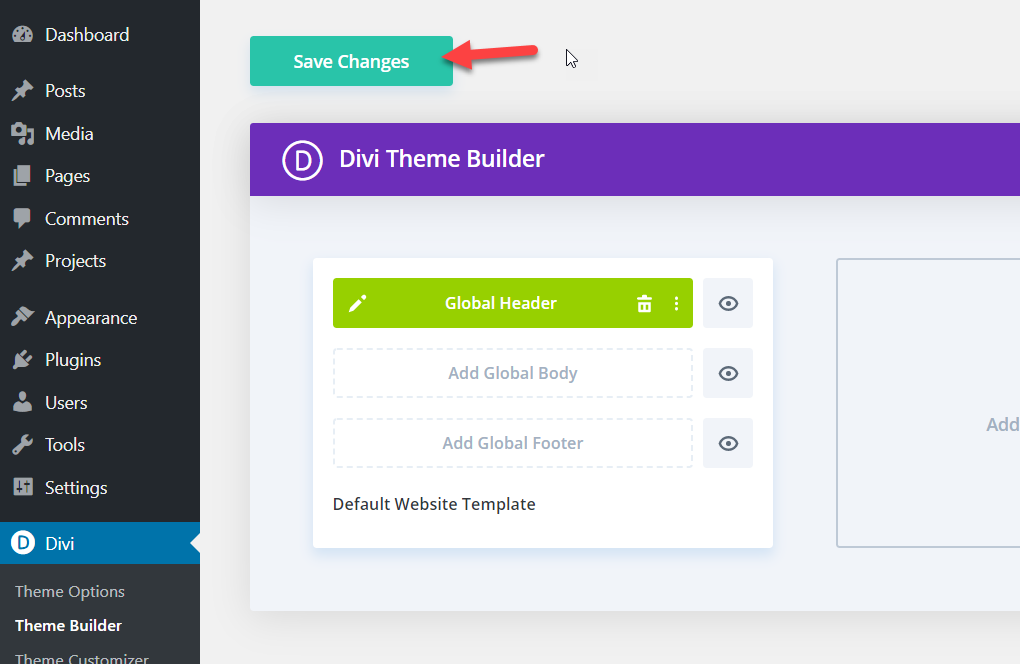
  After that, the popup box will disappear and you’ll need to save the global changes by hitting the Save button on the right corner.
  After updating your header, close this builder. Then, save the Divi builder options.
 Now, it’s time to check the frontend. Open your website in a new tab and scroll to the bottom section. As you can see in the GIF below, the header remains fixed!
 Without writing a single line of code, you have created a fixed header. Whenever you update your header element through the Divi builder, make sure that you save the settings. Otherwise, you won’t be able to see the new changes on the website’s frontend.
2) Make the Divi header fixed by coding
Now, let’s see how to make the Divi header sticky by coding. For this, we will use some CSS code. Don’t worry if you’re not a developer, the lines of code we’ll use are pretty simple.
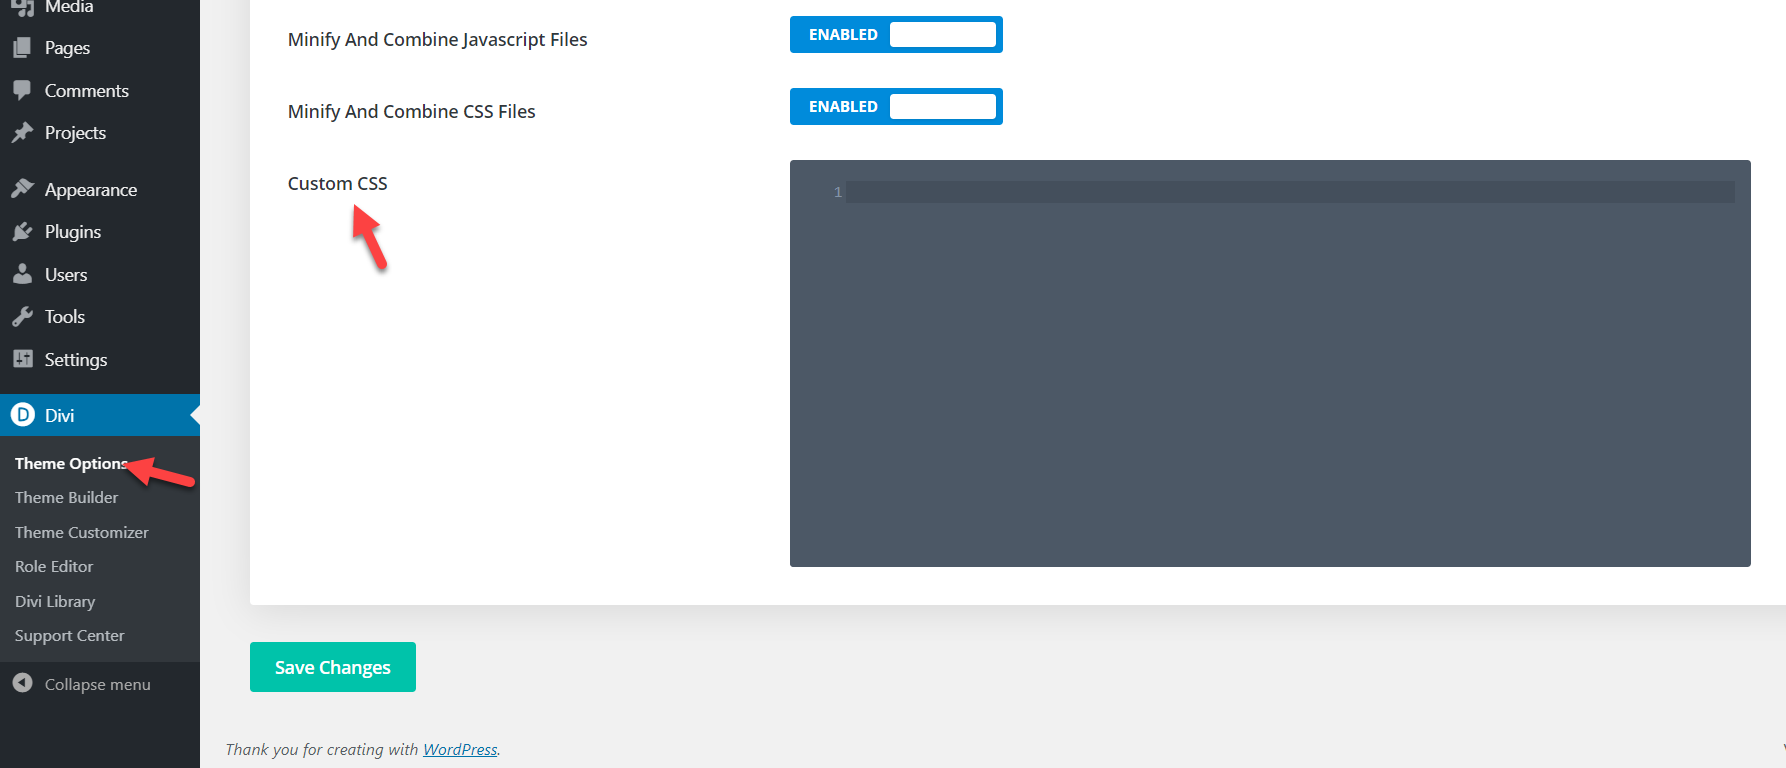
First, in your WordPress dashboard, go to Divi > Theme Builder and open the Header section. Then, click on the gear icon to open the pop-up. Under the Advanced section, you will see the settings to add custom CSS ID and CSS classes. Here, use the following:
- CSS ID: main-header
- CSS Class: et-fixed-header
And then save it.  After that, save the builder and exit. Then, go back to the Divi builder options and save the changes.
The next thing you need to do is add some CSS code to the site. There are two options to do this:
- Through Divi’s Theme Options
- Using the WordPress customizer
Let’s have a look at both methods step by step.
Make header fixed via Theme Options
First, let’s see how to add the CSS code using the Theme Options section. In your WordPress dashboard go to Divi > Theme Options > Custom CSS.
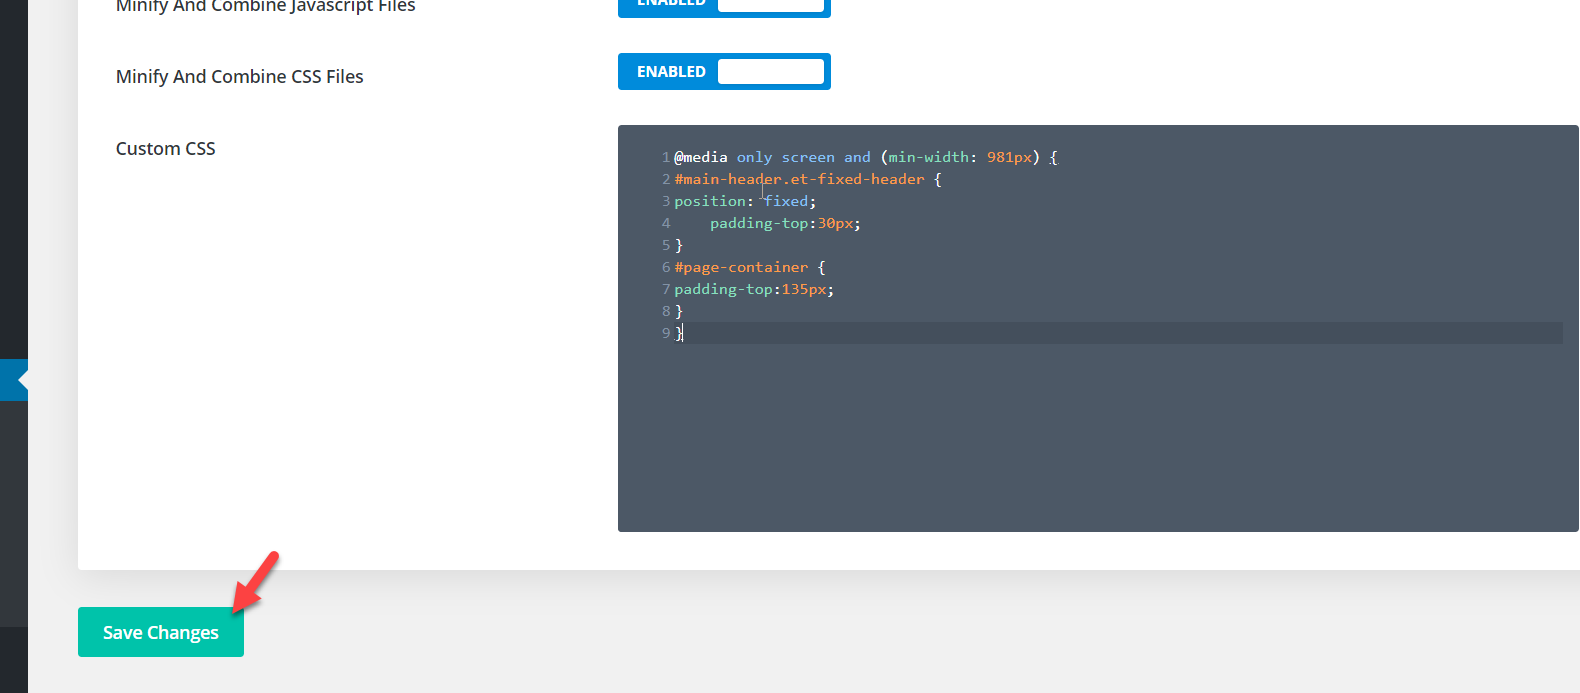
Then, copy the CSS code from below.
@media only screen and (min-width: 981px){
#main-header.et-fixed-header {
position: fixed;
    padding-top:30px;
}
#page-container {
padding-top:135px;
}
}
Paste it on the code editor and save the changes. After that, save the settings and check the website’s frontend to confirm that you’ve made the Divi header on your site sticky!
NOTE: Make sure that you adjust the padding in the CSS code and customize the size for your site.
Make header sticky with WordPress Customizer
Another quick way to make the Divi header sticky is to use the WordPress customizer. To open the customizer, simply go Appearance > Customize and then open the Additional CSS.
Now, simply copy and paste this code:
@media only screen and (min-width: 981px){
#main-header.et-fixed-header {
position: fixed;
    padding-top:30px;
}
#page-container {
padding-top:135px;
}
}
NOTE: This code works for our demo site but we recommend you adjust the padding in the CSS code and customize your site size. 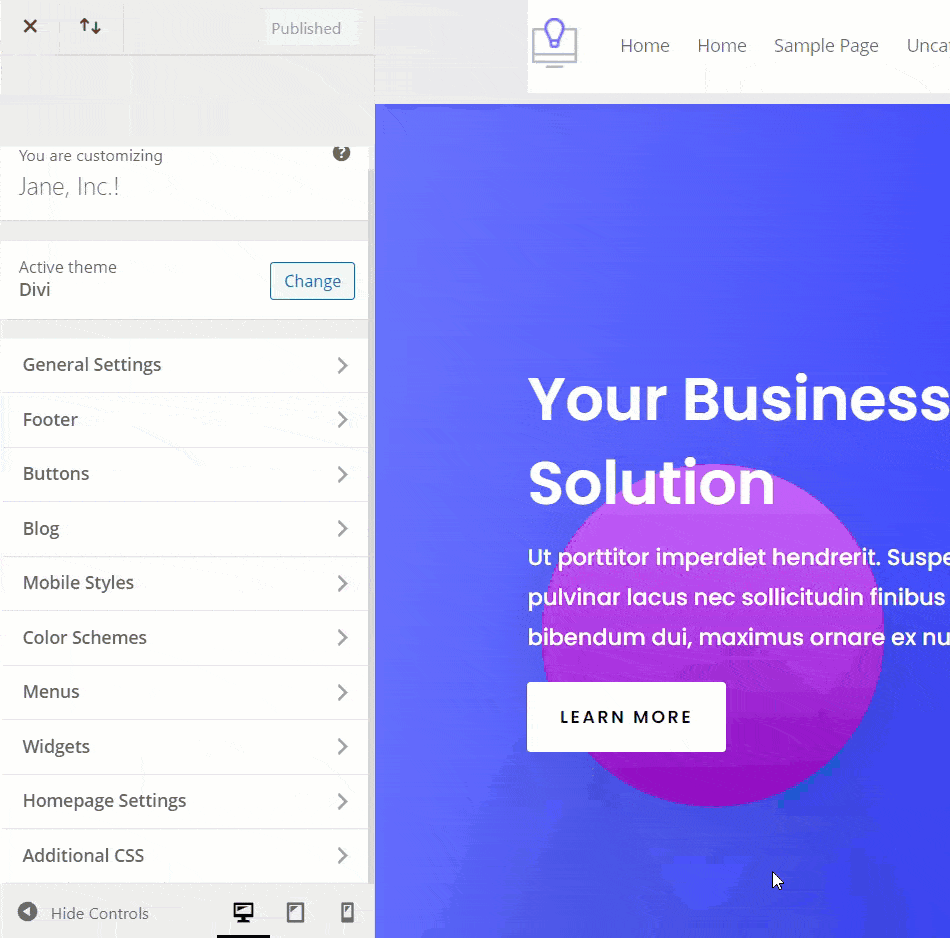
Finally, save the changes and that’s it! You’ve just made the Divi header fixed using the WordPress customizer.

Bonus: Make changes to your Divi menu
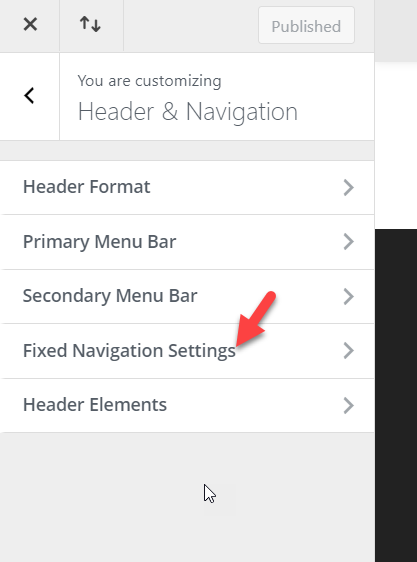
In this section, you’ll learn how to make changes to your Divi fixed menu options without any CSS coding. To do this, go to the WordPress customizer. Under the Header and Navigation settings, you will see a customization option called Fixed Navigation Settings.
Open it and you will see the dedicated customization options. 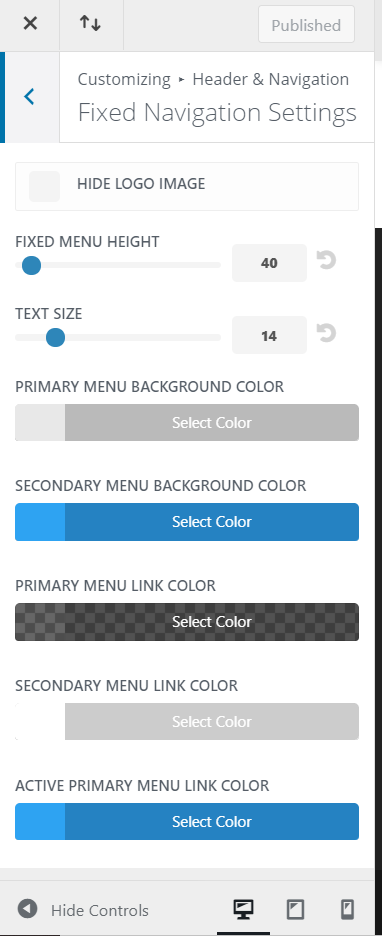 The main options you will see on this screen are:
- Hide logo image
- Fixed menu height
- Text size
- Menu background-color
- Menu link color
- And others
This way, whenever you need to make modifications to your sticky header, you can simply go to the WordPress customizer and change these things. And the best part is that you will be able to see every update in the live-preview section.
Conclusion
All in all, making your Divi header sticky will help you improve your site’s navigation and potentially improve your conversion rates. In this guide, we’ve shown you two different ways to do it:
- With the Divi Builder
- By coding
- Via Divi’s Theme Options
- Using the WordPress Customizer
Both methods are pretty effective so choose the one that best suits your skills and needs. If you want something quick, you can use the Divi Builder. This is an extraordinary WordPress plugin that will help you customize the Divi header in a couple of clicks. On the other hand, you can also use a bit of CSS code to make the header sticky using the Theme Options or the WordPress customizer. Even though it involves a bit of coding, this method is pretty simple and just requires adding a few lines of code to the Divi Builder.
Finally, if you liked this post, share it on social media and check out our blog section for more useful tutorials.
Do you know any other methods to make the Divi header fixed? We want to hear from you so let us know in the comments below!
