How to Autocomplete WooCommerce Orders: 2 Easy Ways!
One of the best ways to improve customer experience in your store is by instantly confirming their purchases. That way, they can access their products as soon as they complete their orders. So, in this post, we’ll show you different methods to autocomplete WooCommerce orders.
We have recently covered some of the advantages of optimizing your checkout process. On it, we briefly talked about how autocompleting orders allow users to access their products before the order is fully processed. This can have a great impact on both user experience and conversion rates.
So, let’s have a look at how to enable autocomplete WooCommerce orders for your website and make the most of it.
Why autocomplete WooCommerce orders?
Have you ever bought something online and had your order pending for hours or even days before it was confirmed? Not only does it affect customer experience but also conversion rates. If the user needs the product urgently, they may cancel the order before the payment is processed. That’s when autocomplete orders are handy.
By autocompleting orders in your WooCommerce store, you can process and finish the orders instantly. That way, shoppers don’t have to wait to get a confirmation for their purchase and can access their products in no time. Additionally, this allows users to access their products without you having to manually process and verify their orders/transactions.
This works exceptionally well when you’re selling virtual products or downloadable files. The idea behind it is that by allowing your customers to access your products without having to wait for the entire order to be processed, you speed up the checkout process and boost your sales.
By default, WooCommerce only allows users to access their virtual products after you verify their transactions and process their orders. This might take some time depending on how many orders you get and how many services and manpower you have dedicated to doing so. But, why make your customers wait? There’s a lot of competition out there so providing users with a great buying experience is the key to success.
To do that, letting your shoppers access their goods as quickly as possible is crucial. This is why you should consider autocompleting WooCommerce orders in your store. You can do so by using a plugin, or programmatically with a small PHP code snippet that you can add to your theme’s functions file.
Let’s have a look at both options.
How to autocomplete WooCommerce orders?
There are two main ways to autocomplete orders in WooCommerce:
- With a plugin
- Programmatically (via coding)
Both options are very effective so choose the one that best suits your skills and needs.
1) Autocomplete WooCommerce orders with a plugin
A convenient way to enable autocompletion of your WooCommerce orders is to use the autocomplete order plugins. There are many options out there but our favorite is the AutoComplete WooCommerce Orders plugin. This dedicated tool is a very secure and user-friendly means of completing your orders while still confirming the transactions on your accounts.
AutoComplete makes use of the integration between WooCommerce and payment services like PayPal to auto-complete orders for all your virtual and downloadable products while still confirming successful payments. The plugin uses PayPal Identity Tokens to ensure that you’re only autocompleting orders that have been paid. This ensures maximum security for both you and your customers.
On top of that, by using the integration with PayPal, this tool lets your shoppers buy items without having to fill in all their checkout details every time. So, let’s have a look at how you can enable autocomplete orders for your WooCommerce website using a plugin.
Installing and Setting up AutoComplete WooCommerce Orders
First, let’s start with the installation process. Go ahead and install the AutoComplete Orders plugin by going to your WP Admin Dashboard > Plugins > Add New. Then, use the search bar on the top right to search for AutoComplete WooCommerce Orders. Click Install on the plugin and then press Activate to finish the installation.
 Now, before we start, you need to set up the AutoComplete WooCommerce plugin using your PayPal token. This is a simple token that you can get from your PayPal account and use it to enable secure autocomplete orders. So, let’s see how to set up both PayPal and the plugin. Open your AutoComplete Orders setting by going to WooCommerce > Settings. Then, click AutoComplete orders.
Here, you’ll have three different modes to set for the plugin.
- Paid Orders of Virtual Products only
- All paid orders of any product
- Any order (paid or unpaid)
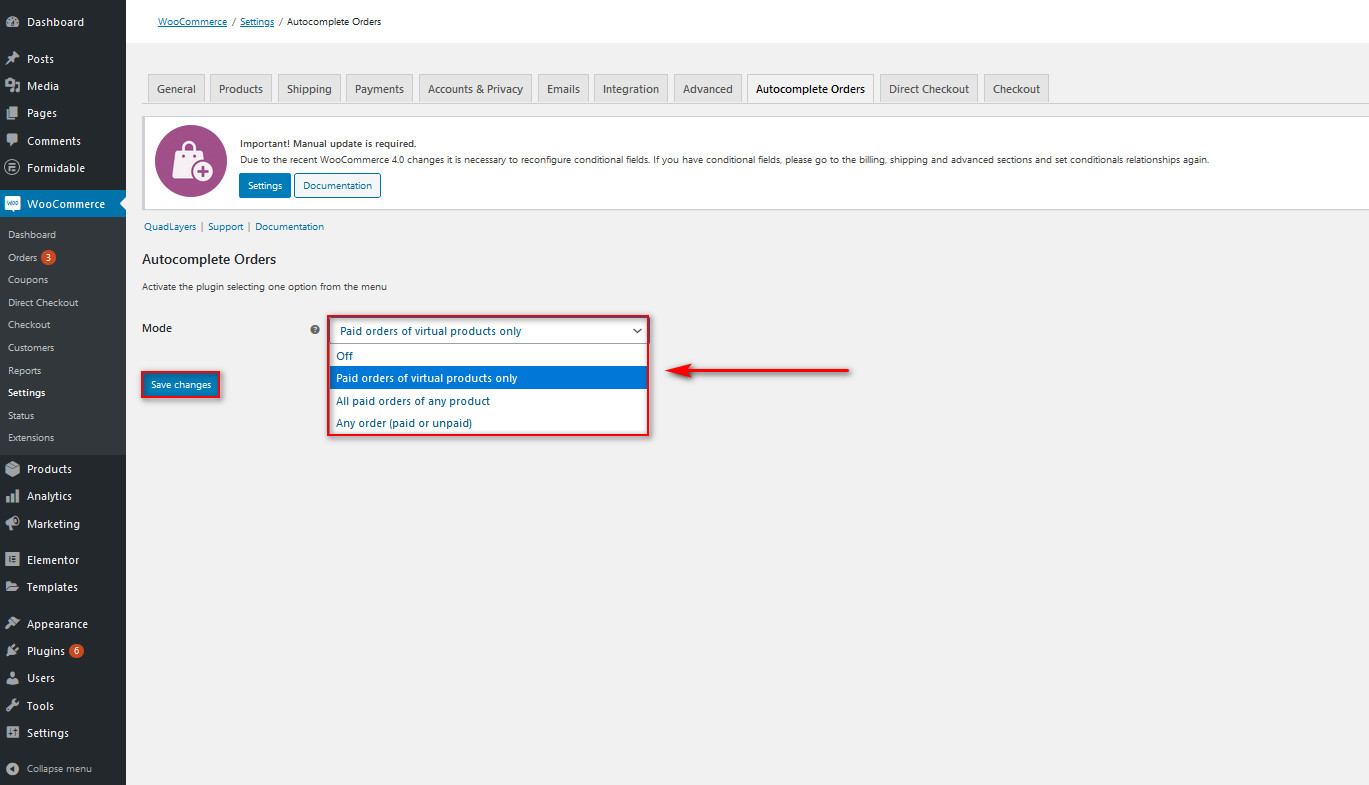 AutoComplete WooCommerce Orders will auto process your orders based on this mode setting so choose the appropriate option for your website. For example, if you enable the Paid Orders of Virtual products only option, the plugin will only auto-process orders for virtual products whose payments have been verified.
Setting up PayPal Data Token for Autocomplete Orders
Now, let’s see how you can enable payment verifications for the plugin using PayPal. To start using AutoComplete Orders, you need to get your PayPal Data Transfer token. By using this token, PayPal can easily identify when your users pay for your virtual products and thus verify it with the Autocomplete plugin. First, log in to your PayPal account.
Then, click on the Settings button to move to your PayPal account settings. 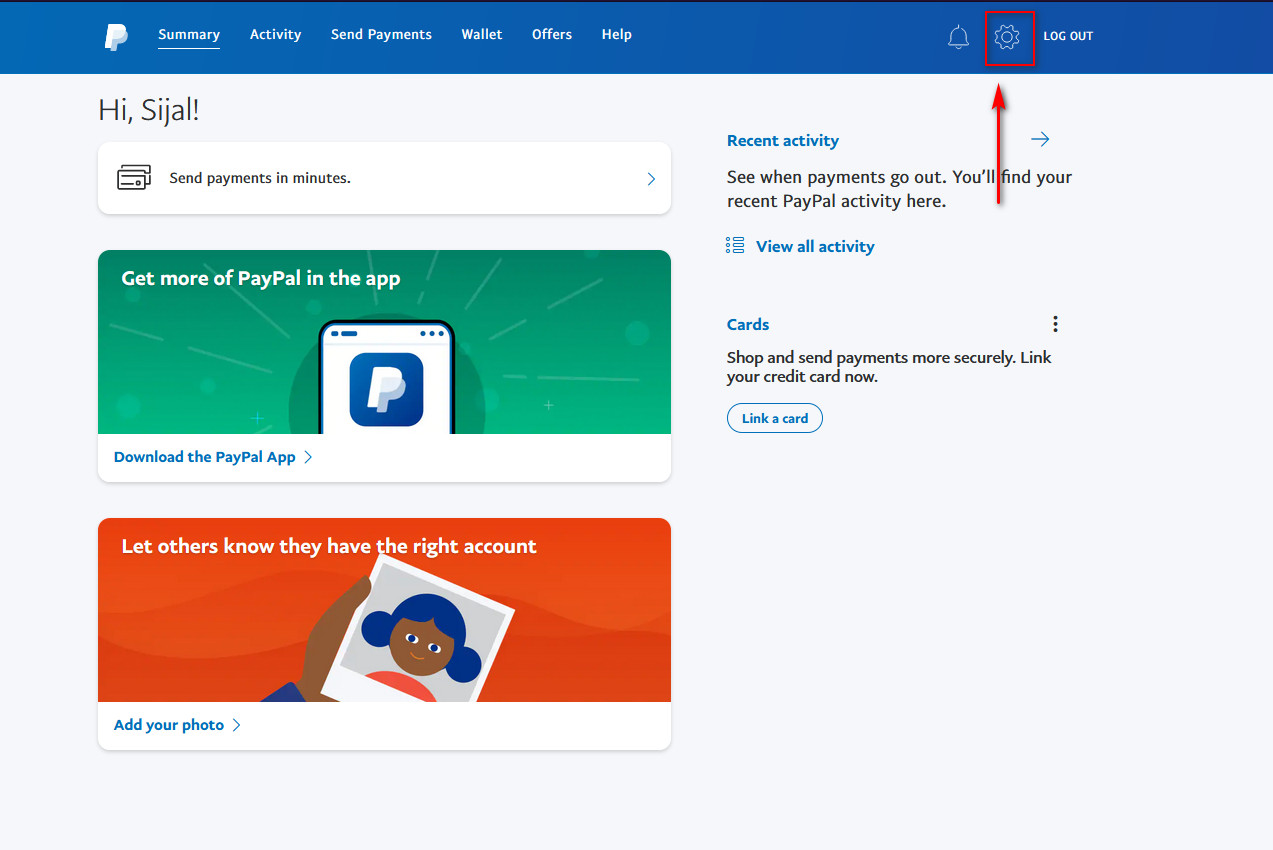 Click on the Sellers Tools tab and press Update next to Website preferences.
 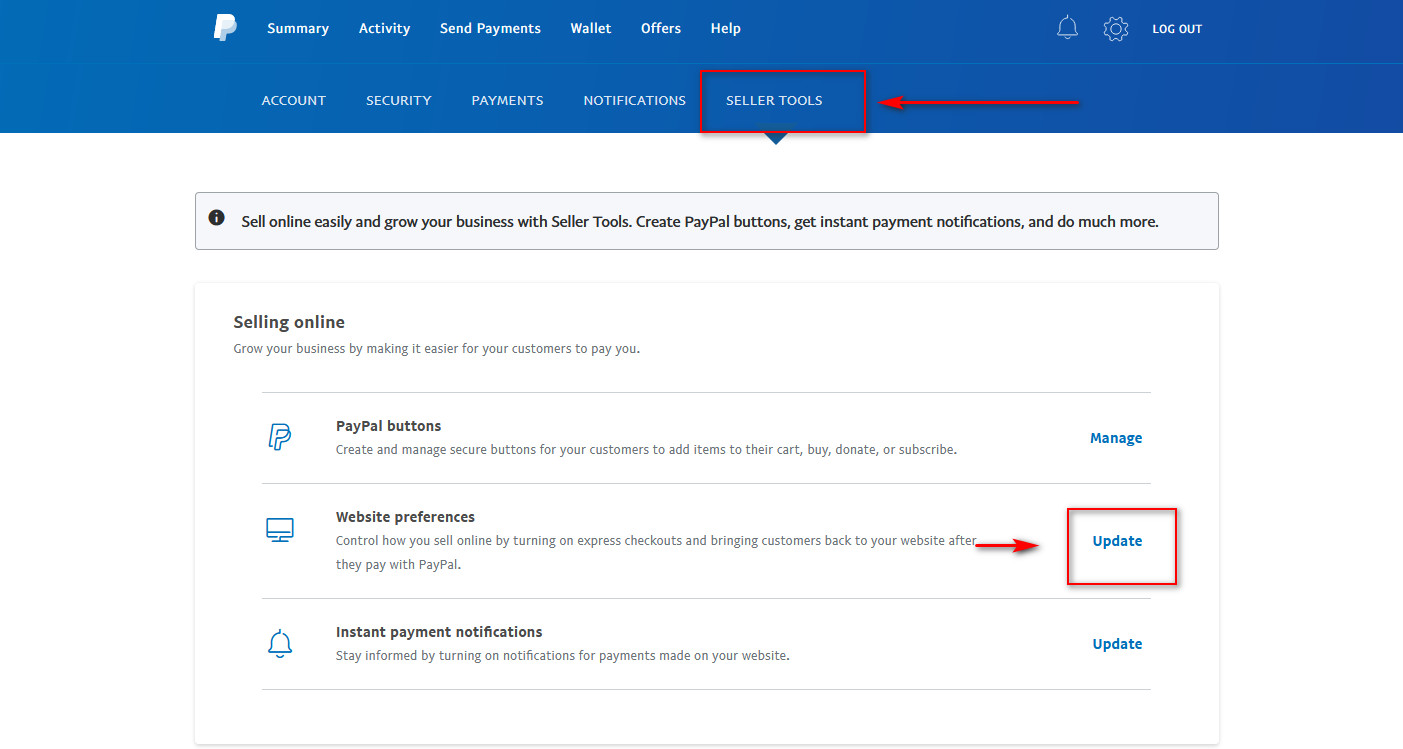 Now, move down to the Auto Return section. Enable the Auto Return Option and you will see a field to add your Return URL page. This is the page your users will be redirected to after they finish their checkout page so choose it smartly. It can be a simple thank you page, your shop page, or any other URL you want once their payments are verified.
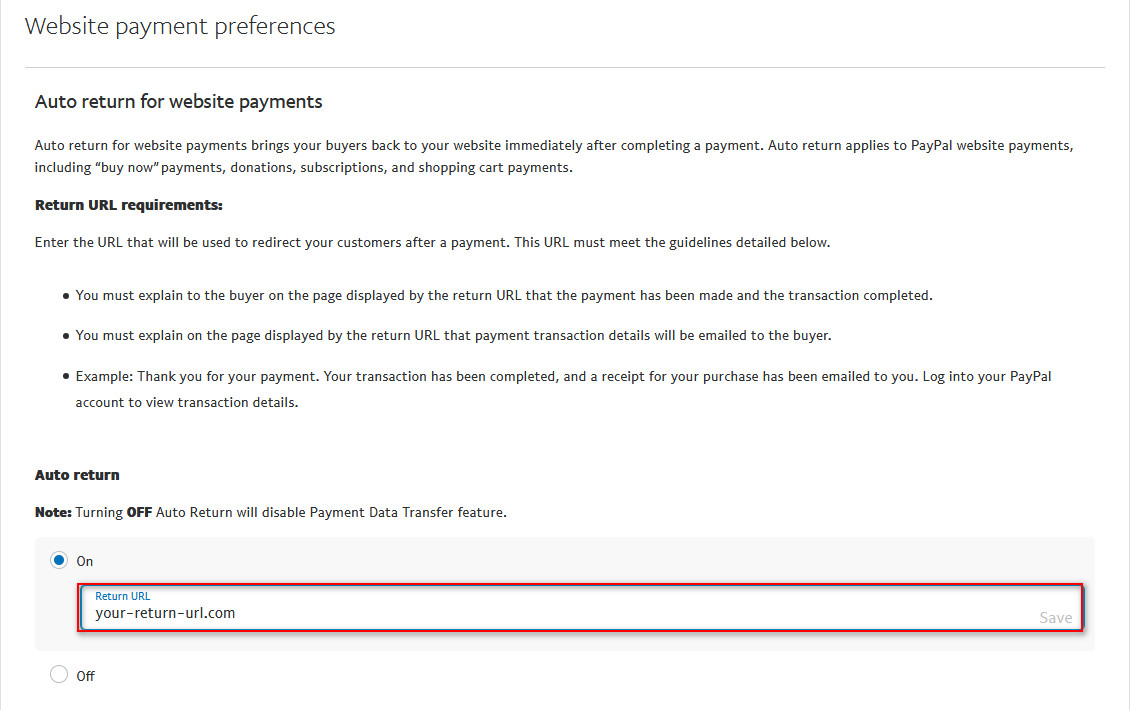
After adding the Return URL page, click Save. Now, you will be able to access your Paypal Data Transfer token by scrolling down below. Enable Payment Data Transfer and copy your Identity token. You will need this to integrate the service with your WooCommerce PayPal settings. 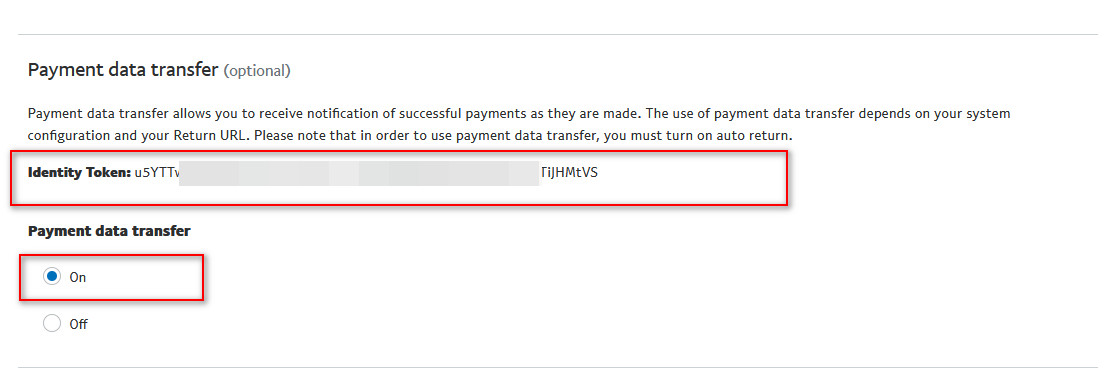
Setting up your PayPal Data Transfer Token
After that, open your WooCommerce PayPal settings by clicking on WooCommerce > Settings on your WP Admin Dashboard. 
Then, go to the Payments tab and click Manage next to PayPal. This will open your PayPal settings for WooCommerce. 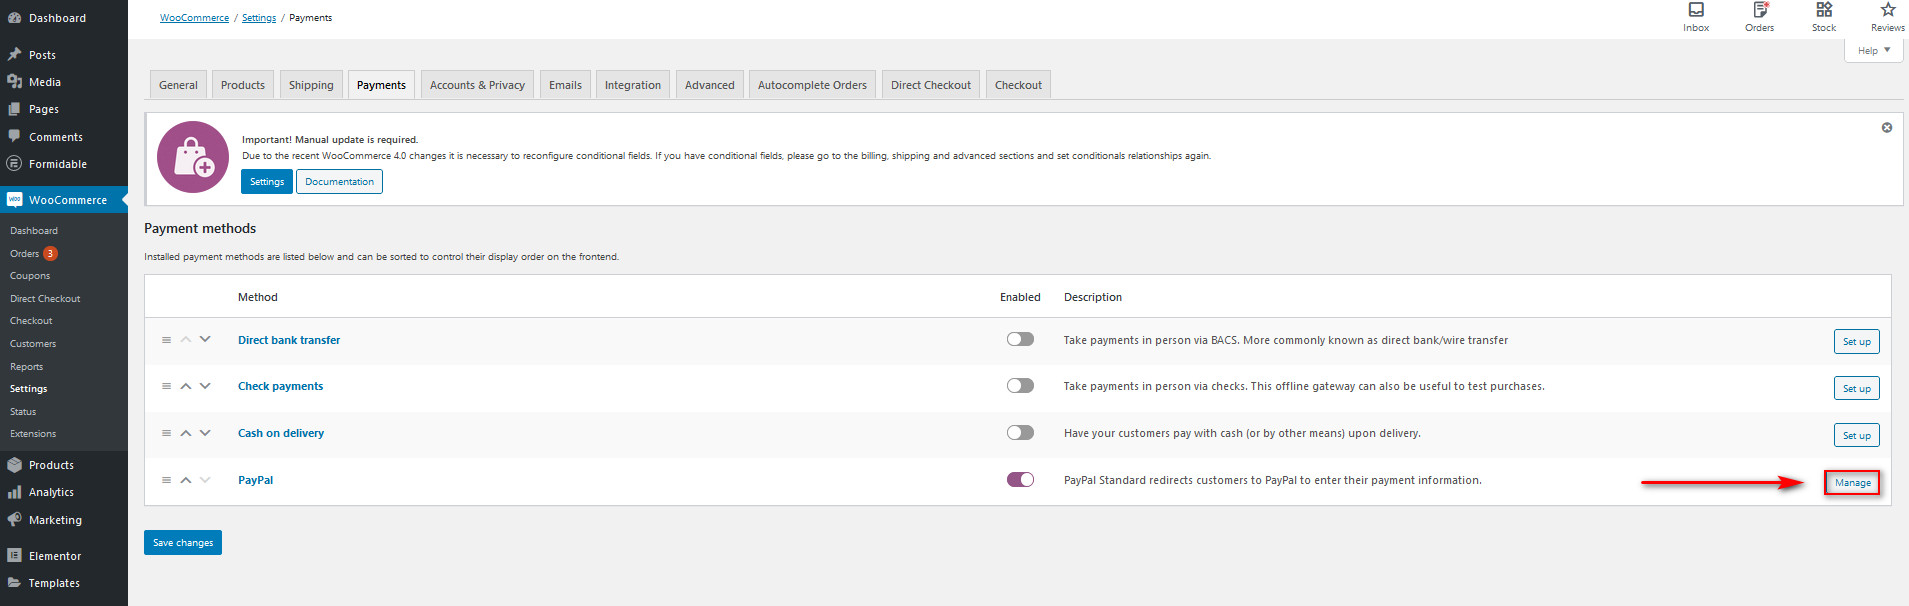
Scroll down to find the PayPal identity token field and paste the Identity token that you previously saved.
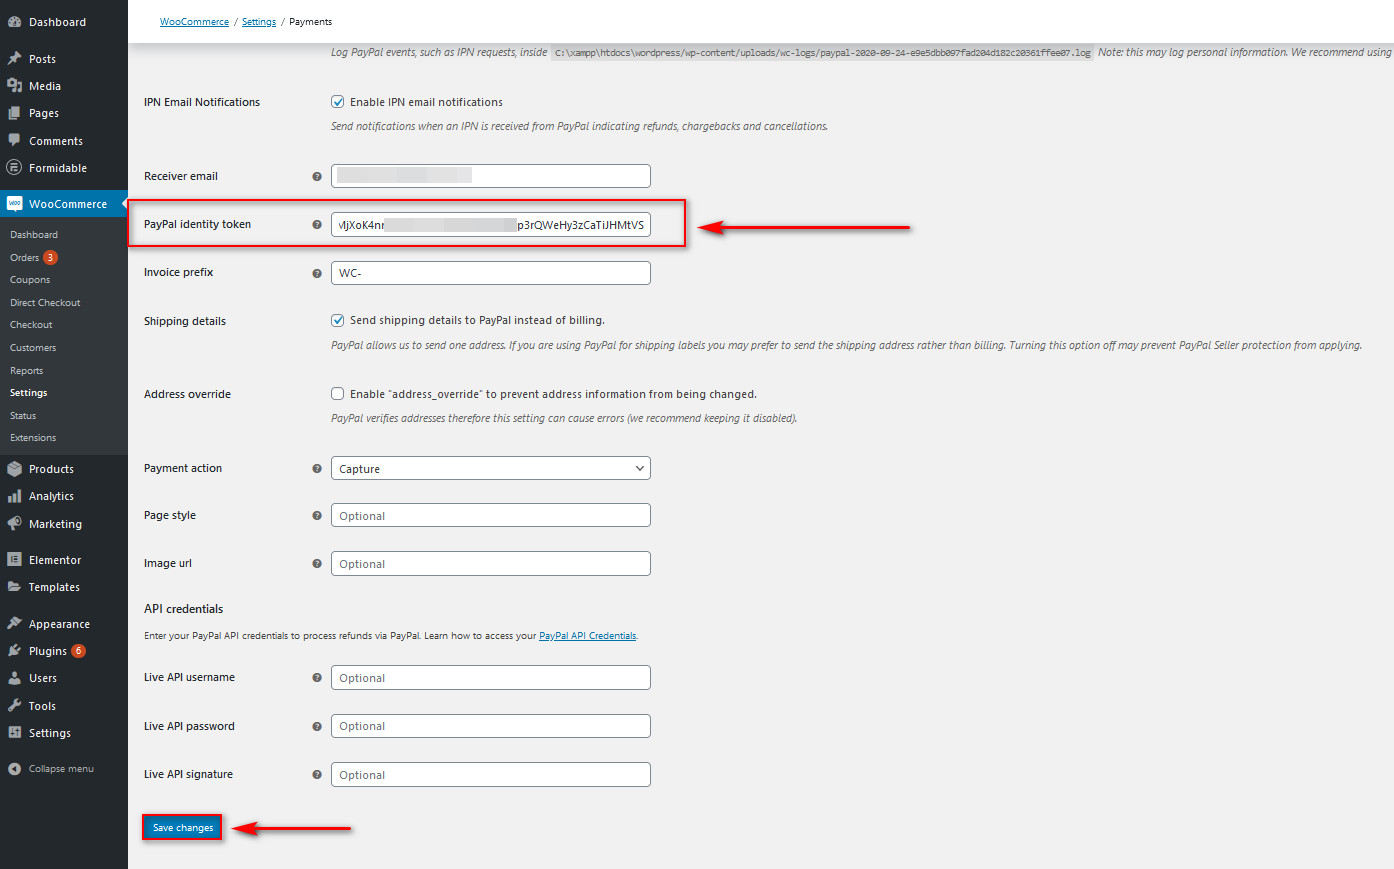 Then, set up the rest of your PayPal settings to provide your customers with a better checkout experience. You can learn more about how to do it here. Once you finish, click Save Changes and now your AutoComplete WooCommerce orders plugin should be ready to go. That’s it, now you will be able to autocomplete WooCommerce orders on your site!
But that’s just scratching the surface. This tool can do a lot more and help you automate some processes on your website. You can learn more about what Autocomplete Orders can do in the plugin’s documentation. Finally, here’s a preview of how the plugin works.
2) Autocomplete WooCommerce orders programmatically
Another alternative to enable autocompleting of orders on your WooCommerce store is to use PHP code snippets. This is the perfect alternative for those who have coding skills and don’t want to install any extra plugins on their site. With a code snippet, you can autocomplete orders for your paid products, virtual/downloadable products, or autocomplete any of your processing orders.
As we’re going to edit some core files before we start, we recommend you install a child theme. You can either create one or use a child theme plugin to do so.
So, to autocomplete WooCommerce orders programmatically, first, open your Theme editor by going to Appearance > Theme Editor on your WordPress dashboard. Then, use the Theme files sidebar on the far right and click on the Theme functions file.  This is your functions.php file and you can use it to add custom functions to your WordPress website. So, go ahead and paste the following PHP code to autocomplete orders on all your WooCommerce virtual products. You’ll find notes in the code that explain what each part of the code does.
<?php

add_filter( 'woocommerce_payment_complete_order_status', 'auto_complete_virtual_orders', 10, 3 );

function auto_complete_virtual_orders( $payment_complete_status, $order_id, $order ) {
$current_status = $order->get_status();
// We only want to update the status to 'completed' if it's coming from one of the following statuses:
$allowed_current_statuses = array( 'on-hold', 'pending', 'failed' );

if ( 'processing' === $payment_complete_status && in_array( $current_status, $allowed_current_statuses ) ) {

$order_items = $order->get_items();

// Create an array of products in the order
$order_products = array_filter( array_map( function( $item ) {
// Get associated product for each line item
return $item->get_product();
}, $order_items ), function( $product ) {
// Remove non-products
return !! $product;
} );

if ( count( $order_products > 0 ) ) {
// Check if each product is 'virtual'
$is_virtual_order = array_reduce( $order_products, function( $virtual_order_so_far, $product ) {
return $virtual_order_so_far && $product->is_virtual();
}, true );

if ( $is_virtual_order ) {
$payment_complete_status = 'completed';
}
}
}
return $payment_complete_status;
}
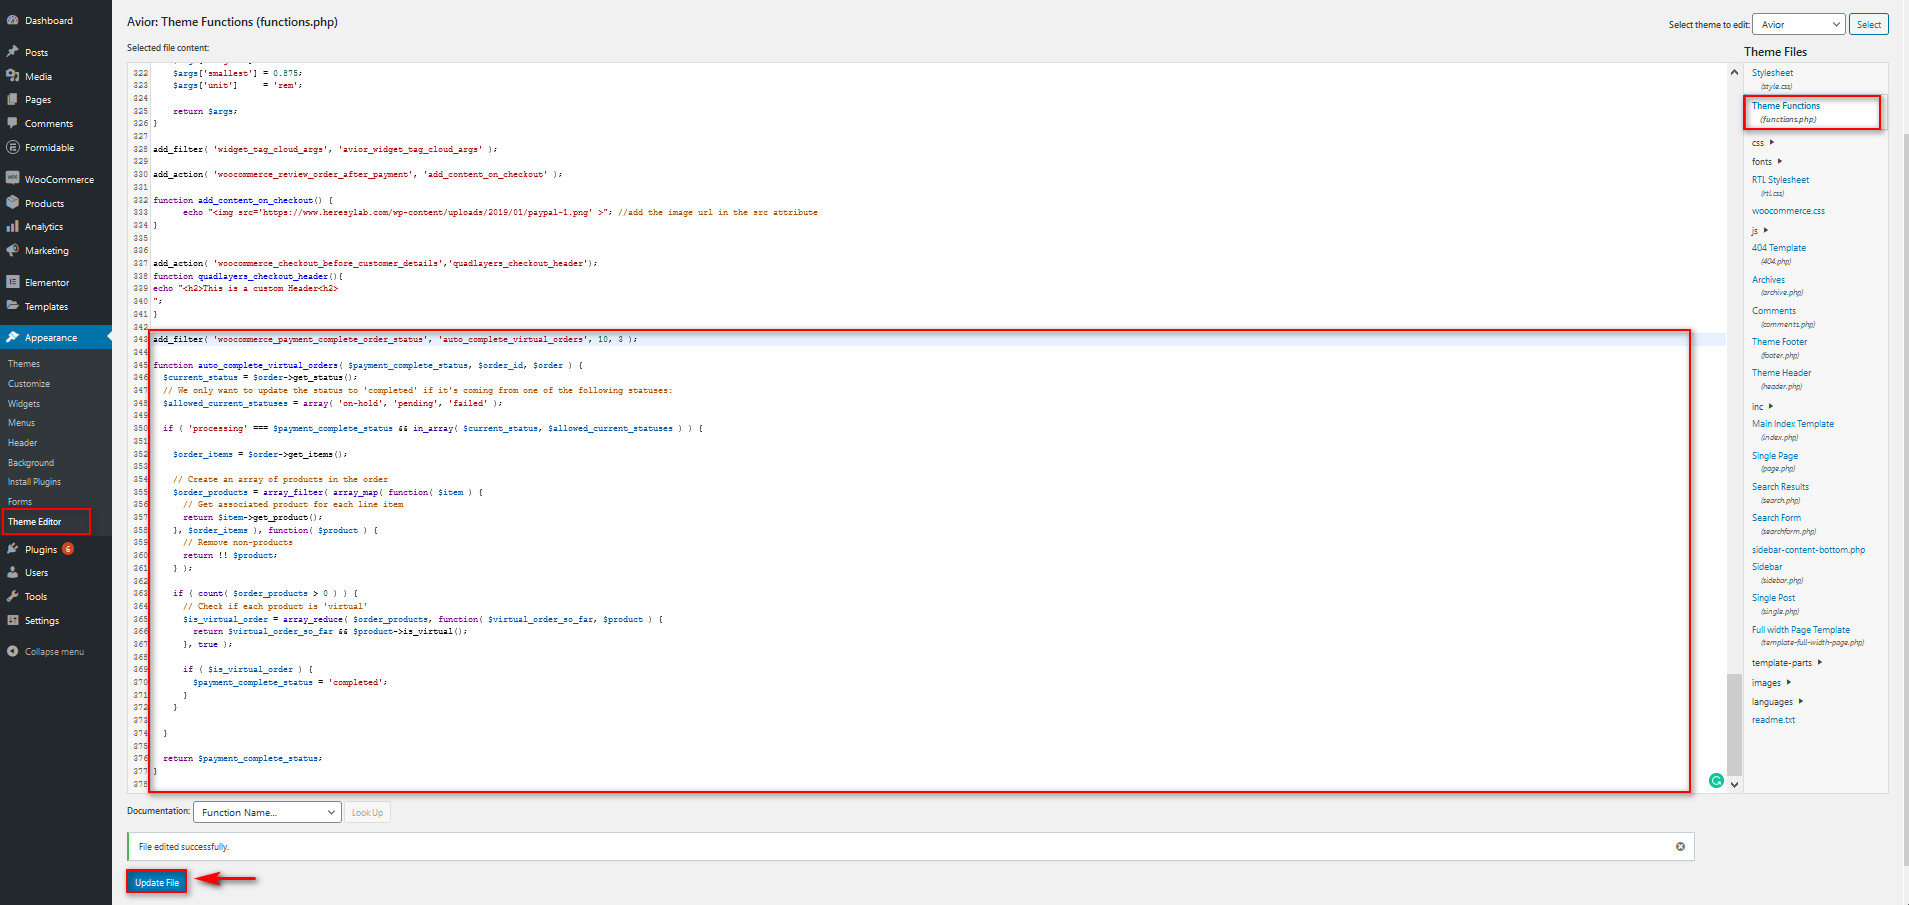
Then, click Update file and that’s it! You have enabled autocomplete WooCommerce orders programmatically. Now, every product that is set as a virtual product will have the autocomplete orders enabled.
How to set products to Downloadable and Virtual
Regardless of which method you use to autocomplete your orders, you should ensure that your WooCommerce products are correctly set as Virtual and Downloadable. You can do this by opening your WooCommerce product settings. To set your product as a virtual product, open your desired product using the Products list on your Dashboard Sidebar. Then, scroll down to the Product Data options and enable both Virtual and Downloadable options.
 Now, your products should be set as both Virtual and Downloadable.
For more information about how to add and edit products in WooCommerce, we recommend you have a look at this guide.
Conclusion
In conclusion, autocompleting orders in your store will help you provide a better customer experience and boost your sales. In this tutorial, we’ve seen two different ways to autocomplete WooCommerce orders:
- Using the Autocomplete WooCommerce Orders plugin
- Programmatically by customizing the functions.php file
Both methods will get the job done so choose the one that best suits your skills. If you’re a beginner, we highly recommend you use the plugin over the programming method. Autocomplete Orders is an excellent plugin that requires very little setup and comes with the added benefit of PayPal integration. On top of that, it’s very lightweight and 100% free so you don’t need to spend a cent.
On the other hand, if you have coding skills and have experience customizing your functions.php file, you can play around with the code and find a solution that fits your business needs. However, considering how well Autocomplete Orders work and the options it offers, we recommend having a look at the plugin before starting to code your solution.
Finally, if you want to learn more about making the payments on your website more secure and convenient, you can check out our guide on how to integrate WooCommerce with Stripe.
Have you enabled autocomplete orders in your store? Do you know any other methods that we should add to our tutorial? Let us know in the comments section below!

Hi, thank you so much for this post!!
In order to this code snippet to work does the product have to be virtual AND downloadable or could it be just virtual?
Thanks!
@jorge Hi there, Since the If conditional of the code only checks for Virtual orders, the product can be virtual for the code snippet to work. Cheers!
Will this set a subscription to completed as well?
Hello Stephan, we haven’t tested with subscriptions. Please let us know here if it works. Kind regards
Okay, but if the payment fails, the customer took the product, but I ran out of money.
Right?
Hey Orlando,
To make sure that your payment works well on your website, you can always test the orders in WooCommerce. 🙂
Hope it helps! Cheers!
Hello! Thanks very much for the snippet. It has been working well for a while…
However, unfortunately this line is causing an error now:
if ( count( $order_products > 0 ) ) {
Error (from debug log): PHP Fatal error: Uncaught TypeError: count(): Argument #1 ($value) must be of type Countable|array, bool given
Wondering if you have a solution?
Thank you!
Hi Laura,
If you got this conflict recently, it is because of some plugin/theme conflict. Please test the code on a local WordPress website and see how everything goes.