
How to Add WooCommerce Shipping Classes
Setting up your WooCommerce shipping options can be very important to ensure maximum profits for your business. With shipping classes, this becomes a much easier task, and you can manage the shipping prices of multiple items. So, we’ll be showing you how to add shipping classes to WooCommerce, along with adding shipping rates based on it in this article.
But before we move on to the process of adding the shipping classes, let’s go through why should you consider adding them to your online store.
Why use Shipping Classes in WooCommerce?
A massive problem with WooCommerce shipping rates is that your shipping cost quickly differs based on the size and dimensions of the shipped items. Some items may be very lightweight, while others might be really heavy. For example, this can be very common if you might be selling furniture through your WooCommerce store.
This can fluctuate your shipping prices, and setting all your items to have the same shipping rates might not be profitable to you or your customers. Moreover, you might have more fragile items requiring more attention and specific steps for shipping. This also increases your shipping expenses, and you don’t want it to have the shipping rate as a simple chair.
So, we enable the use of WooCommerce Shipping classes. WooCommerce shipping classes let you group certain types of WooCommerce products in terms of your shipping rates. This way, you can set different rates depending on the package size and packaging required. For example, you can set your products to be in three different classes:
- Regular items.
- Heavy items.
- Fragile items.
Next, you can set up different rates for all these classes that reflect the correct expenses needed to ship them. This is a great way to adjust your store while setting up your shipping methods. Moreover, shipping classes work excellently if you’re trying to set up flat rate shipping for your WooCommerce store. So, if you’re using flat rate pricing, we’d also highly recommend using Shipping classes.
How to add WooCommerce Shipping Classes
Now, let’s look at the process of adding WooCommerce shipping classes. There are a number of basic steps that you must follow to add the shipping classes on your website. The first step is to add the shipping classes.
1. Create the Shipping Classes
First, open the WordPress Admin Dashboard and click on WooCommerce > Settings > Shipping > Shipping Classes.
After that, click on Add Shipping Class.

Now, you’ll be required to fill in the name, slug, and description of your shipping class. Fill in these three fields and then click on Save Shipping classes.

Let’s add three shipping classes for the three items mentioned above types. Just click on Add shipping class and then add in your new classes.
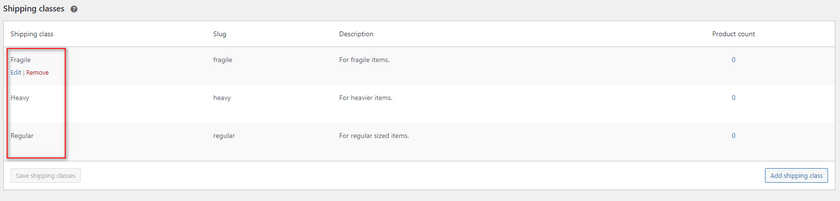
This should create your required shipping classes. Now, let’s assign them to your products.
2. Assign Shipping Classes to Products
The easiest way to add shipping classes to your products is by configuring your product’s data. You can further do so for each of the products individually as well as in bulk
2.1. Individual Products
Open up the Products page from your WordPress Admin Sidebar and click on edit under any of your products
Scroll down and click on the Shipping tab under Product data. Then, use the drop-down field to choose your correct shipping class.
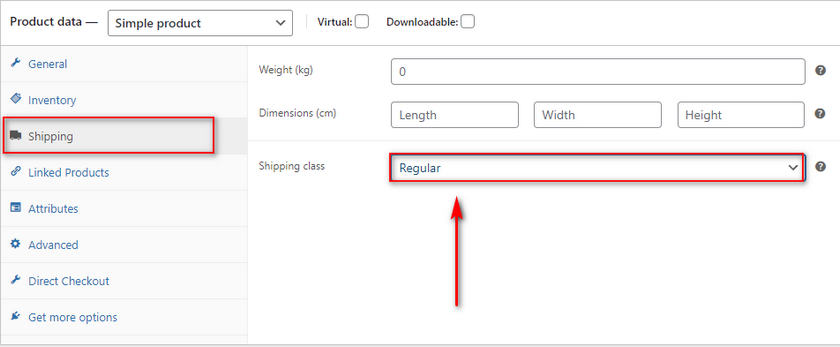
Now, just update the product to save your changes.
2.2. Bulk Products
You can add the WooCommerce shipping classes in bulk using Bulk actions as well if you have to edit more than one product at once. Simply open your Products page and tick/check in all the products you want to add to a shipping class. Then, click on Bulk actions and choose edit.
Following this, you should see your Product data fields on the right. Use the Shipping option to add a shipping class to all of the items you’ve selected. Click on Update when you’re done.
Once you’ve succeeded added your shipping classes to your required products, we’re ready to set shipping prices for all your classes.
3. Add Shipping Costs based on WooCommerce Shipping Classes
The next part of the guide involves adding specific shipping rates to each class. Then, your customer will be charged a certain amount depending on the item’s shipping class. So let’s look at the simplest method of adding it through flat rate shipping.
Before we start, be sure that you have set up your Shipping zones and the flat rate pricing inside them. If you’re looking for a guide to adding flat rate pricing, we recommend you check out our guide here.
Once you have your shipping zones set up, click on WooCommerce > Setting > Shipping > Shipping zones. Then, click on Edit under any of your zones to access the shipping rates in that region. Similarly, you also need to click on Edit for the flat rate pricing of the zone.
3.1. Flat Rate Shipping
You will see individual fields for each shipping class under the Shipping class costs section. All you need to do is fill in the specific flat rate pricing for each shipping class.
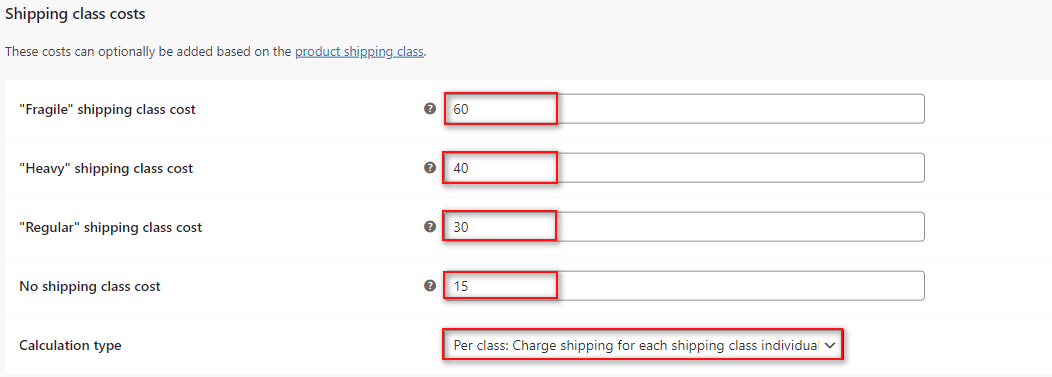
The No shipping class cost option will be used to add flat rate pricing if you haven’t assigned a class to an item. But if you set it to Per class, your shipping rates will be applied differently based on all the items in your order. For example, if you had an item each from your three different classes, WooCommerce will add a different shipping rate for each item.
However, if you set this option to Per order. WooCommerce will only apply the highest shipping rate from all your classes. In our case, it would be the fragile class. This option can be pretty handy, depending on your business.
We’d recommend using per class if you’d like your customers to pay individually for each item. However, if that is not the case and you only want your customers to pay a single rate for the whole order, per order should work much better. Once you’re done, click on Save Changes, and you should be done.
Now, you can see your prices reflect correctly on your cart or checkout page.
If we set our flat rate base rate to $20, then our shipping class should be added to the $20 to give the following results:
- Regular = 20+30
- Heavy= 20+40
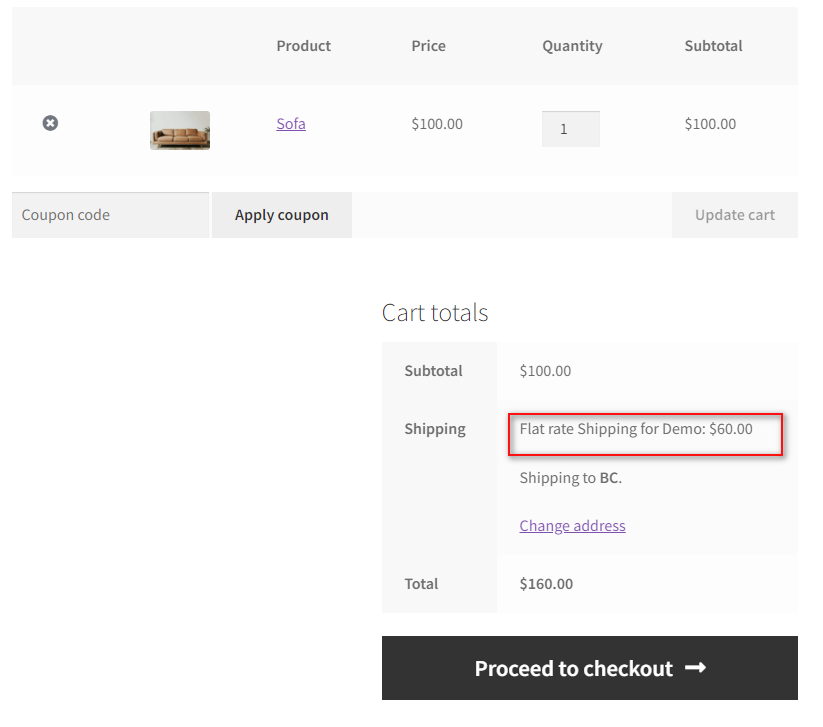
- Fragile= 20+60
For the regular items, we should see the following result:

Similarly, adding a heavy item will give us the following result:
And that is how you can add WooCommerce shipping classes and assign flat rate pricing to them. However, if you want to assign more flexible pricing to them, you’ll need to use a Woo Commerce shipping plugin to do so.
3.2. Add Shipping Rates using a Plugin
With a WooCommerce shipping plugin, you can set different rates and change your pricing based on your customers and their orders. Setting up shipping rules and even free shipping options becomes easy with these plugins. If you’re looking for a way to use your Shipping class with your WooCommerce shipping plugins, then we’ve got you covered too.
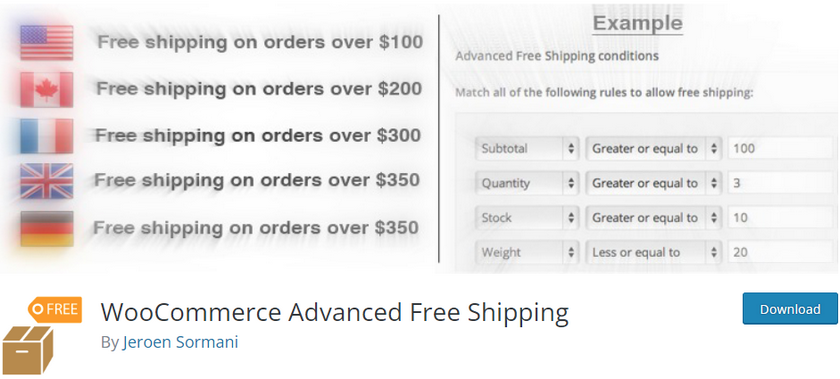
For our guide today, we’ll be using the WooCommerce Advanced Free Shipping, and we’ll be using the shipping class that we created earlier in this guide to set up free shipping conditions.
Similar steps should work for most other shipping plugins out there. Just a bit of reference from their documentation should be able to cover any differences. However, if you have any difficulty setting up your shipping classes with your plugin, let us know in the comment section, and we’ll do our best to help.
Moreover, If you’re looking for more WooCommerce shipping plugins, we’ve got you covered as well. Most of the plugins on this list should help you assign lucrative, flexible shipping prices to your shipping classes.
But for now, let’s start with the steps needed to install and activate the plugin.
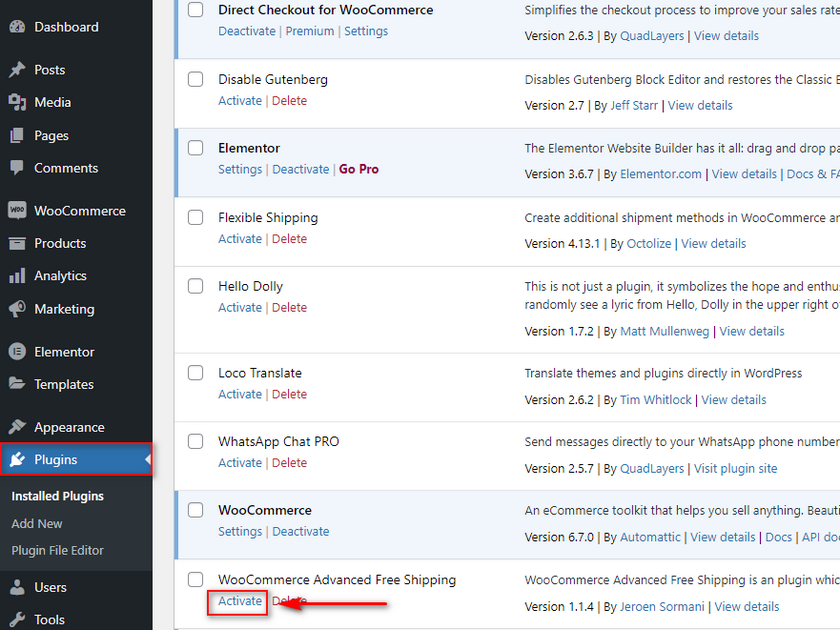
To start, open your WP Admin Dashboard and click on Plugins > Add New. Use the search bar on the top right to search for WooCommerce Advanced Free Shipping.
Then, click on Install Now on the plugin’s tab. Once the button changes to Activate, click on it to finish installing and activating the plugin.
However, you can also activate or deactivate the Flexible Shipping plugin manually. Just open the Plugins menu on your WP Admin sidebar and click on Activate or deactivate under the plugin.
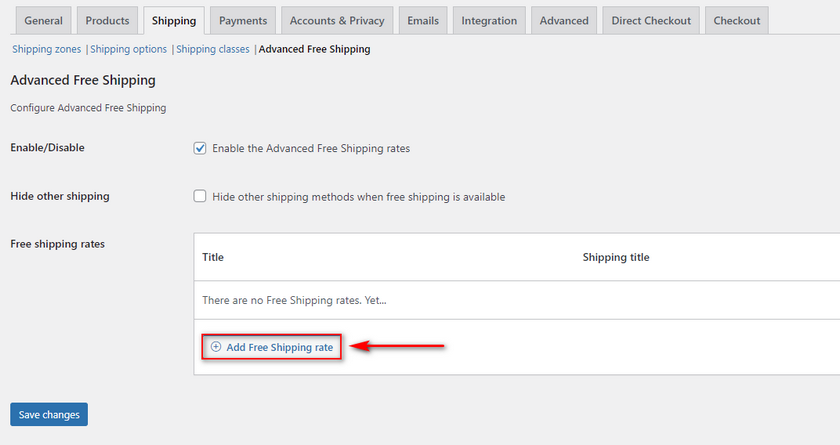
After it’s activated, open the plugin’s options by clicking on WooCommerce > Settings > Shipping > Advanced Free Shipping from your WordPress dashboard.
Under shipping rates, click on Add Free Shipping rate. Here, you’ll be able to set up your Free shipping method using various conditions.
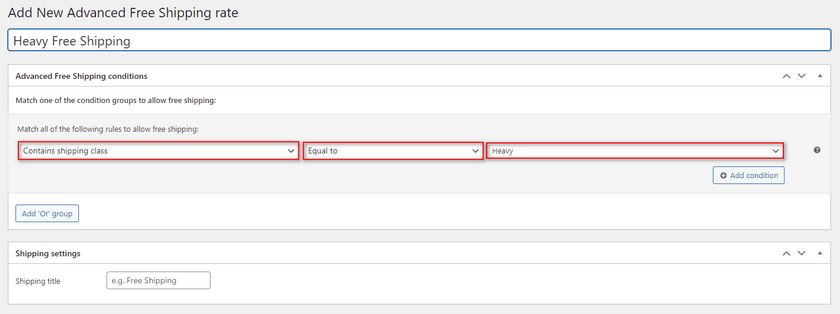
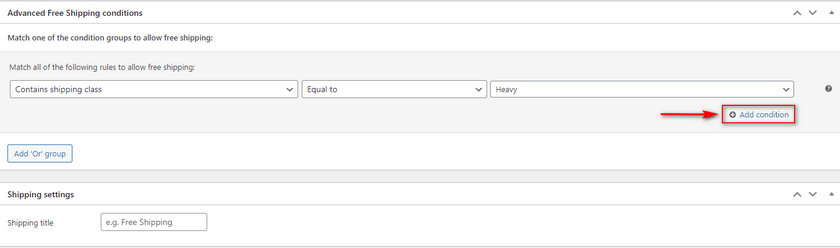
First, give a name to your free shipping method on the Title field. Then, use the Conditions tab to add a free shipping rule based on shipping class. For our demo, we’ll add free shipping rates to any heavy shipping class item.
Now, use the drop-down rule field to select Contains shipping class for the rule. Then, you can use the middle field to define the relation to the value. For now, we’ll leave it as Equal to. Use the right field value and choose Heavy.
We can further customize our free shipping rate by adding another condition. For this demo, we’ll be adding a minimum quantity of 3 as another condition. Click on the Add Condition button and add another condition similar to the above.
Use the rule field to select a quantity. Set the middle field as greater or equal to and the third value field as 3.
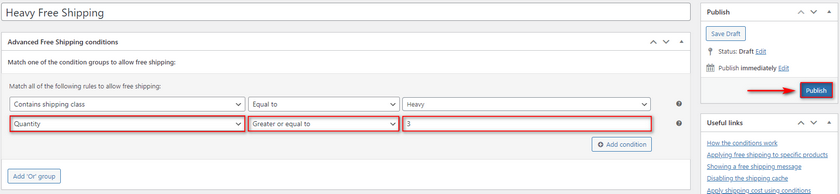
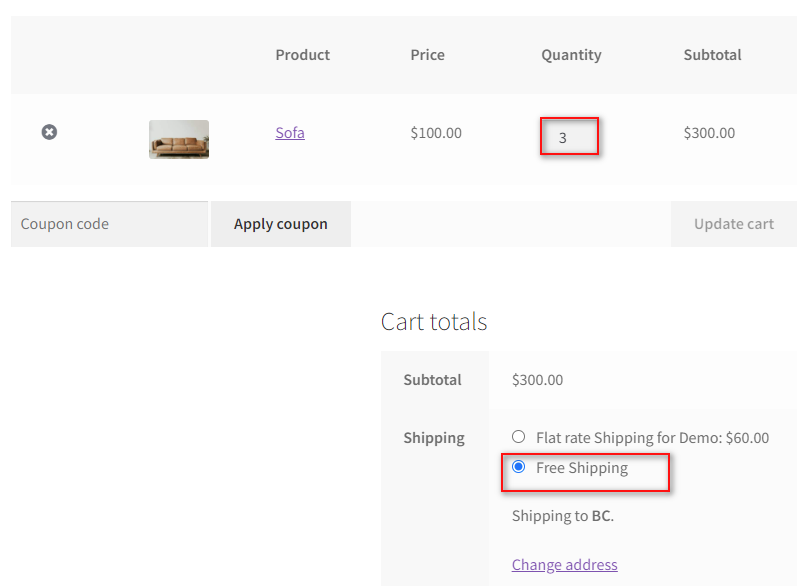
Once you’re done, click on Publish, and your new free shipping option should be updated. Now, if you add three heavy class items to your cart, you should see the new free shipping method.
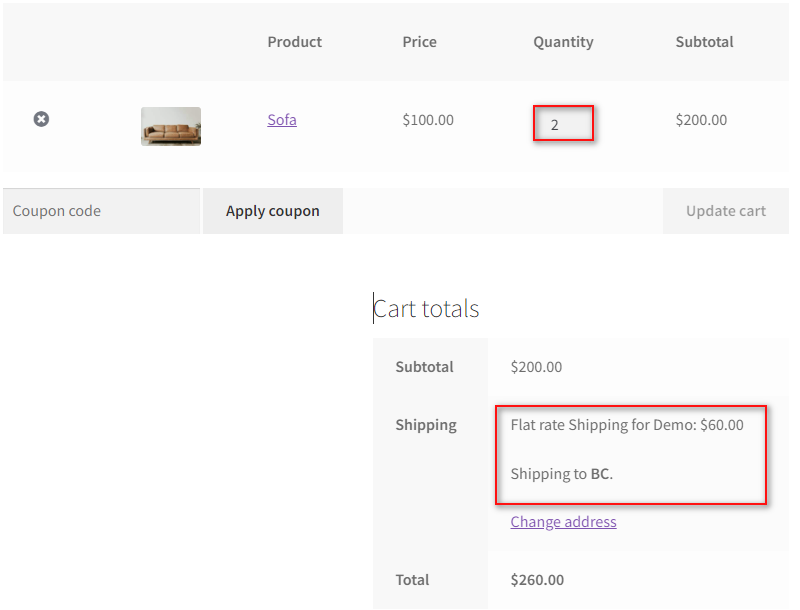
Alternatively, if we drop the quantity to 2, the free shipping option should be hidden:
Bonus: Add Shipping Fees to WooCommerce Checkout
You can also change your cart’s total pricing using your checkout fields in WooCommerce. This allows you to add specific shipping fees to your WooCommerce checkout itself.
For example, if you want your customers to opt into more expensive shipping, you can just add a premium shipping field to your checkout and apply a price value to the field itself. This is easily achievable using the WooCommerce Checkout Manager plugin.
If you want to learn more about how WooCommerce checkout manager works and how you can customize your checkout fields and add pricing to them, you can check out this article. Remember that you will need the pro version of WooCommerce Checkout Manager to add pricing to your fields.
Once you have the plugin activated and installed, we can move with the next step. If you need help in doing so, we highly recommend you go through this article first.
Now, open WooCommerce Checkout Manager by clicking on WooCommerce > Checkout.
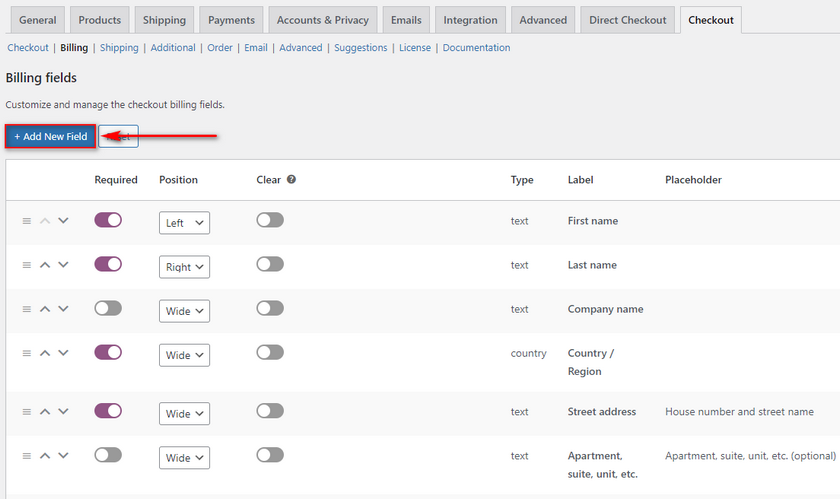
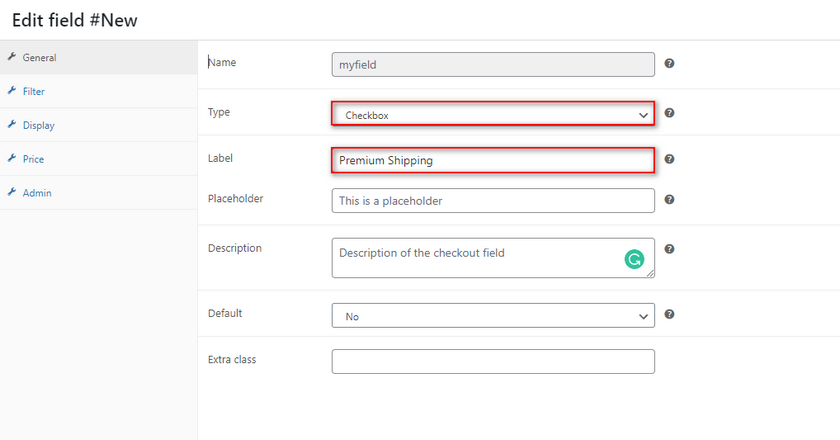
Click on the Billing tab to see all your billing fields. Then, click on Add New fields and give this field a new field type and a new name.
Use the Type field to change it to a checkbox field. For now, We’ll be naming it Premium shipping
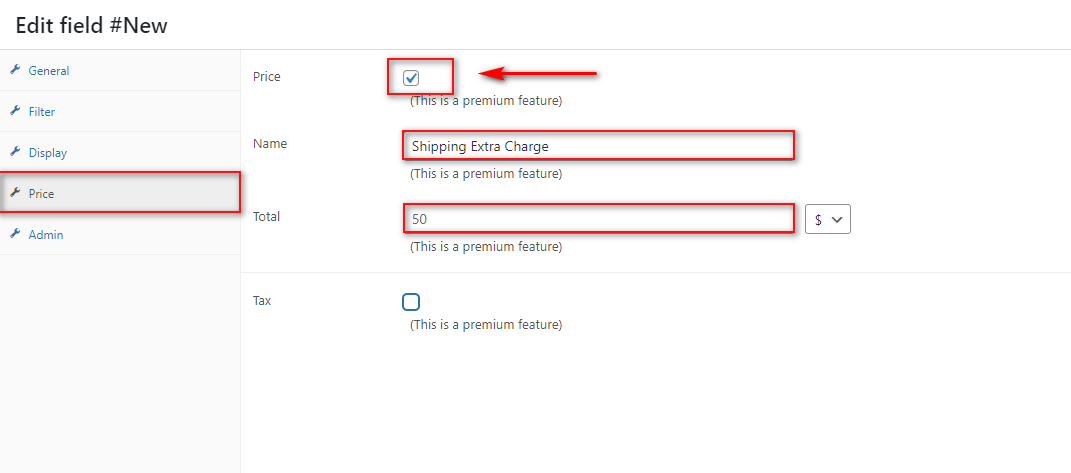
After that, click on the Price tab and check the Price checkbox to enable the feature. Then, use the Name field to show the field charge in your cart subtotals. Now, add a specific price to the Total field and click on Save.
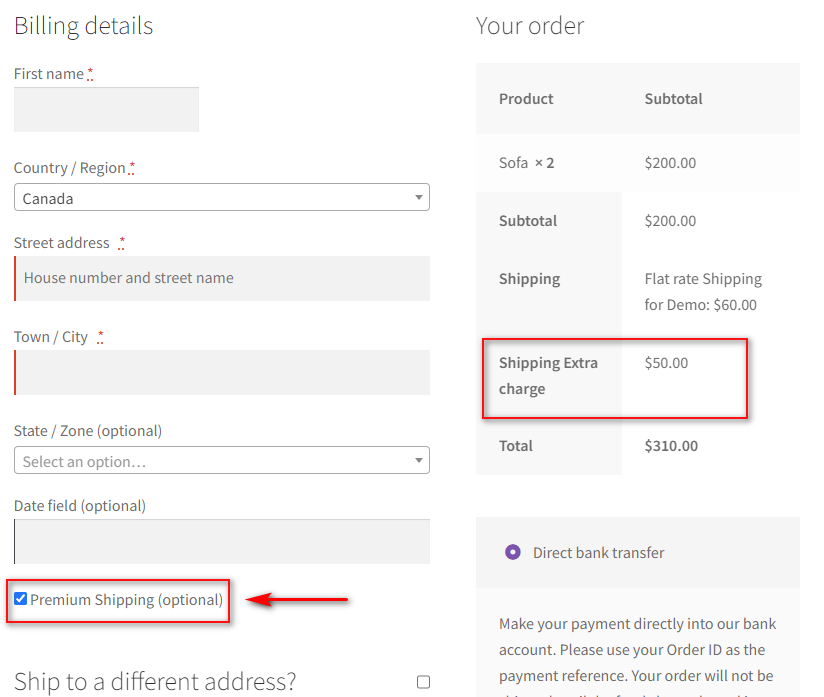
When you open your checkout page and click on the premium pricing field. You should see the new charge in your cart totals.
Additionally, if you want to learn more about adding shipping fees to WooCommerce checkout and even doing it through conditional fields, you can go through our guide here.
Conclusion
And that ends our guide on How to Add WooCommerce Shipping Classes. Let’s go through a quick summary of all the points we covered today:
- How to create and add WooCommerce shipping classes.
- Assign shipping classes to WooCommerce products individually.
- Assign shipping classes to WooCommerce products in bulk.
- Setting up flat rate pricing with WooCommerce shipping classes.
- Using WooCommerce shipping classes in shipping plugins
Remember that you can use shipping classes differently, and with additional plugins, you’re open to even more options. However, shipping classes aren’t necessarily the only answer to setting up your shipping issues. You can choose to add more flexible free shipping options and even weight-based shipping to provide even more benefits to your customers.
If you’re looking for additional means you can use to improve your customer retention and conversation rates, why not check out some of our other articles here:
