
How to Add a Top Bar in Storefront Theme
Running an online store is pretty simple with an all-in-one tool like WooCommerce. But if you need to increase your online store’s conversion rate and revenue, you should develop several strategies. Adding a top bar to your WooCommerce store is one of the simple things you can do to attract visitors to shop at your WooCommerce store. In this article, we will show you how to add a top bar in Storefront theme for WooCommerce.
But before we go into further details, let’s first better understand first what is the top bar and why should we add a top bar in WooCommerce. Let’s find that out.
Why Add the Top Bar in WooCommerce?
Adding a top bar in WooCommerce can contribute to better visibility and may help improve your conversion rates. When someone lands on your WooCommerce site, they will see the top bar first. Just like this:
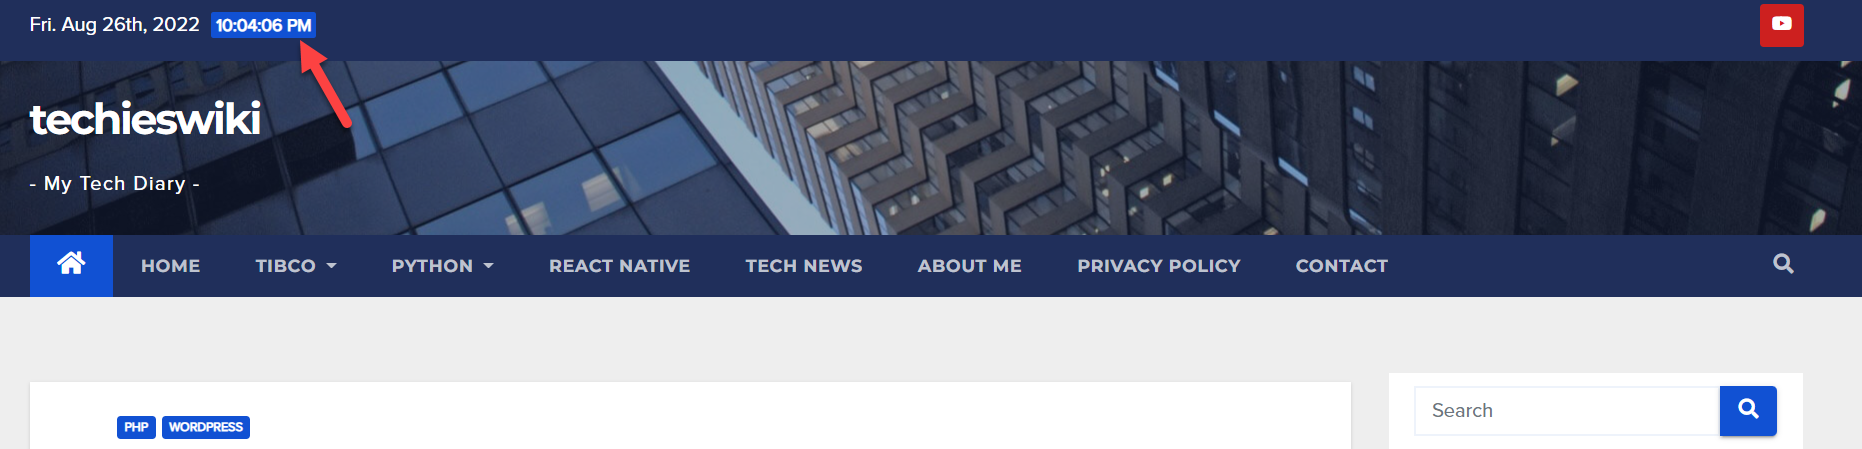
As you can see in the screenshot, that website mentioned the date and time inside their top bar. On top of that, they have also added a link to their YouTube on the right-hand side of the top bar. Similar to this, you can also add valuable widgets like a search bar, your essential page links, and so on.
Inside the top bar, you can link important pages like documentation, FAQ, product archives, etc. Also, you can add an account login form link also helps in most situations. So when a user land on your website, he will have everything in the top bar. You can also move a little further, adding a newsletter sign-up form with the help of HTML and CSS.
So, a top bar in WooCommerce is crucial, which is why most WordPress theme comes with a top bar. But they won’t always be visible, so you have to enable this manually in some cases.
However, that’s not the case with Storefront. Even though Storefront is a fantastic theme for creating WooCommerce stores, it still lacks this basic feature. But, there is no need to worry, you are not out of luck. Let’s see how we can add a top bar in Storefront theme.
How to Add Top Bar in Storefront Theme
This section will cover how to add a top bar in Storefront theme. If you do not have the Storefront WordPress theme installed on your site, go to your Admin Dashboard and navigate to Appearance > Themes. Now, install the theme from the WordPress repository.
Now, we have two ways to add a top bar in Storefront theme:
- Using Storefront Top Bar Plugin
- Programatically
Method 1: Add Top Bar Using Storefront Top Bar Plugin
If you are looking for a dedicated plugin for adding a top bar in the Storefront theme, Storefront Top Bar plugin has you covered. As usual, you have to install and activate the plugin on your site first.
After activation, you will see two new widget areas.
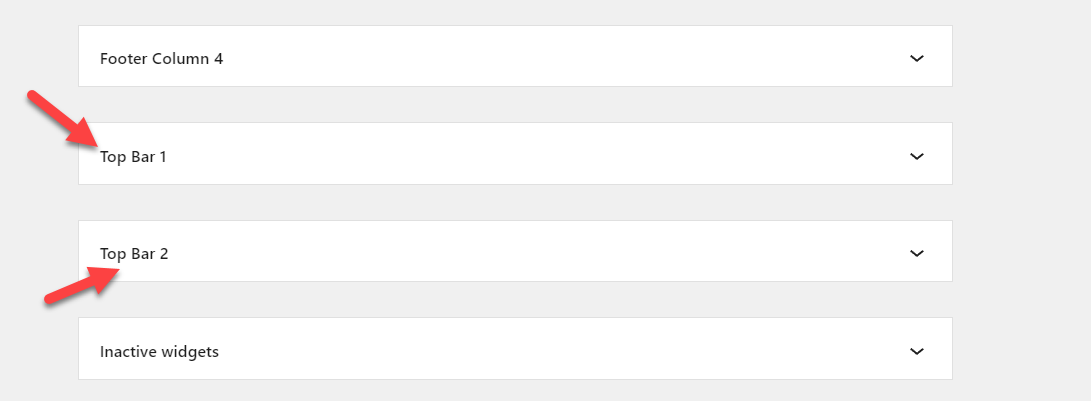
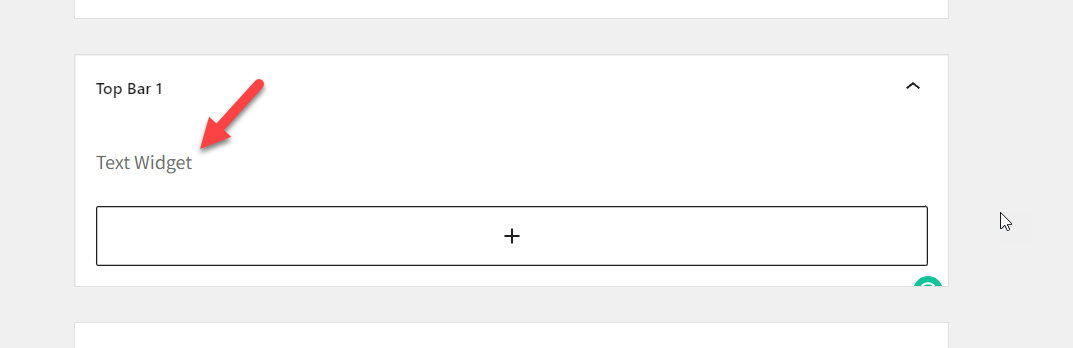
You can add widgets to those areas displayed at the top bar. For example, let’s add a text widget to the Top Bar 1 widget area.
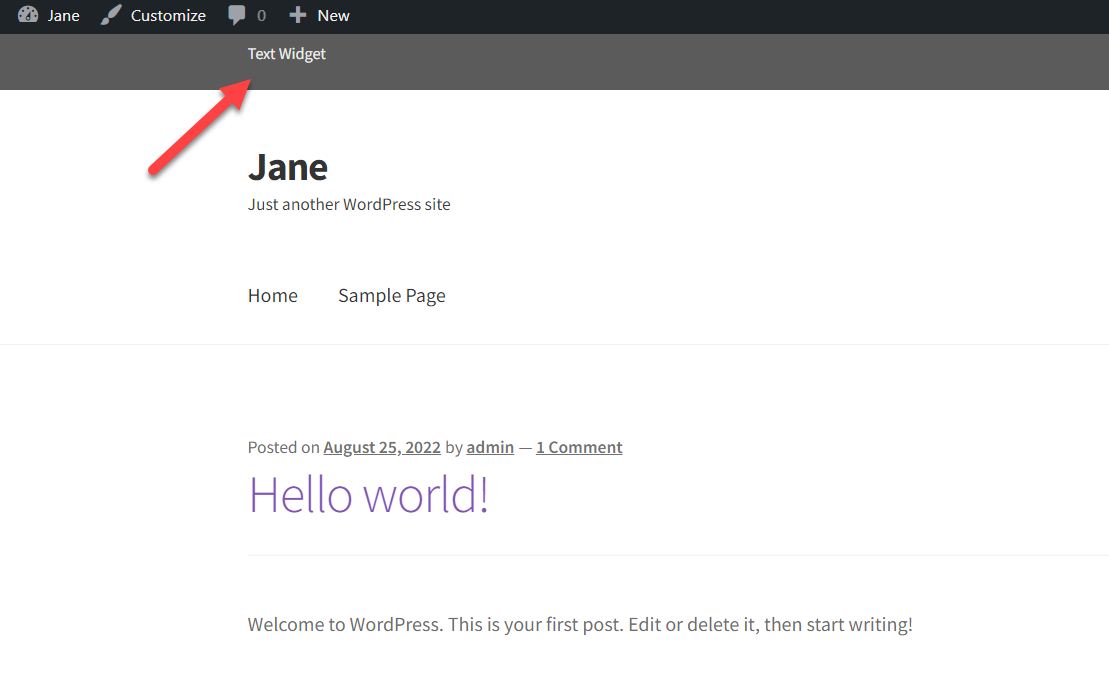
After updating the settings, check the website’s front end and you will see the text widget right there.
That was easy. Now, what if you would like to add a navigation menu to the top bar? Well, that’s possible too. All you need is a navigation menu with the navigation links. You can create one from the Menus section if you don’t have one.
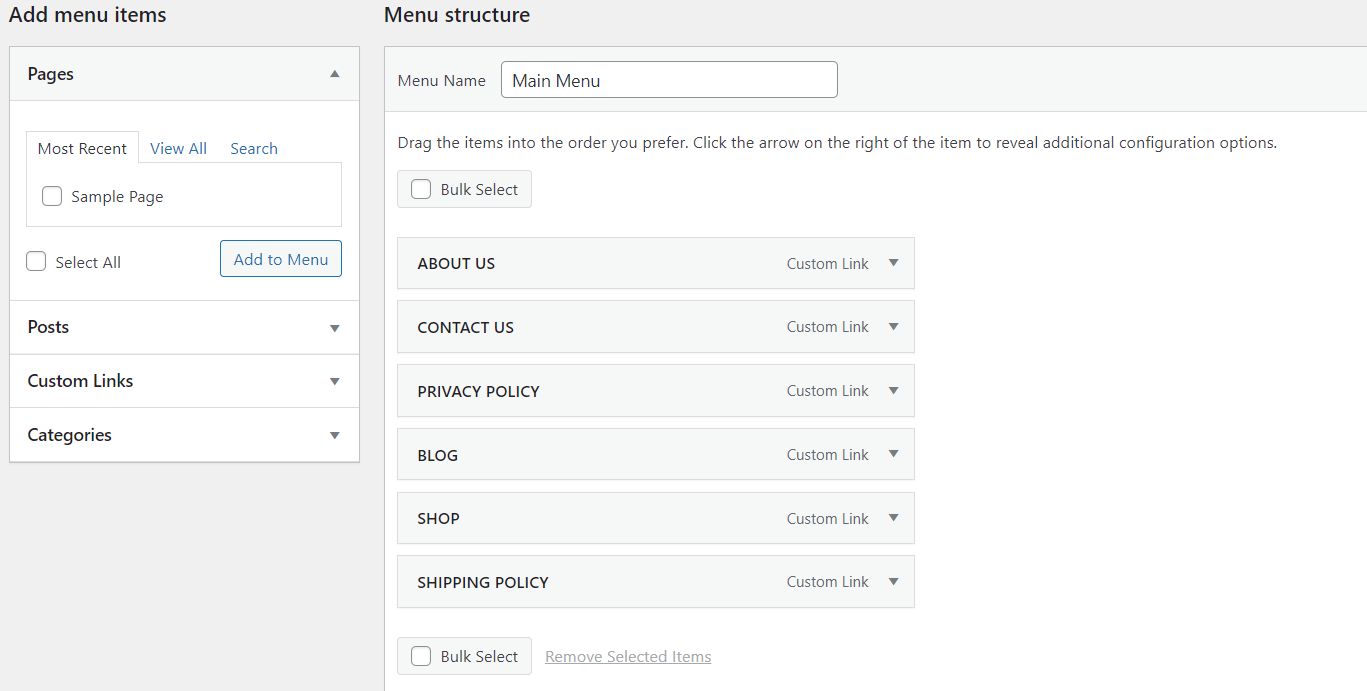
In our case, we have created a navigation menu but haven’t assigned any location for that menu. Therefore, after making a menu, go to the Top Bar 1 Widget Area and add the menu to it.
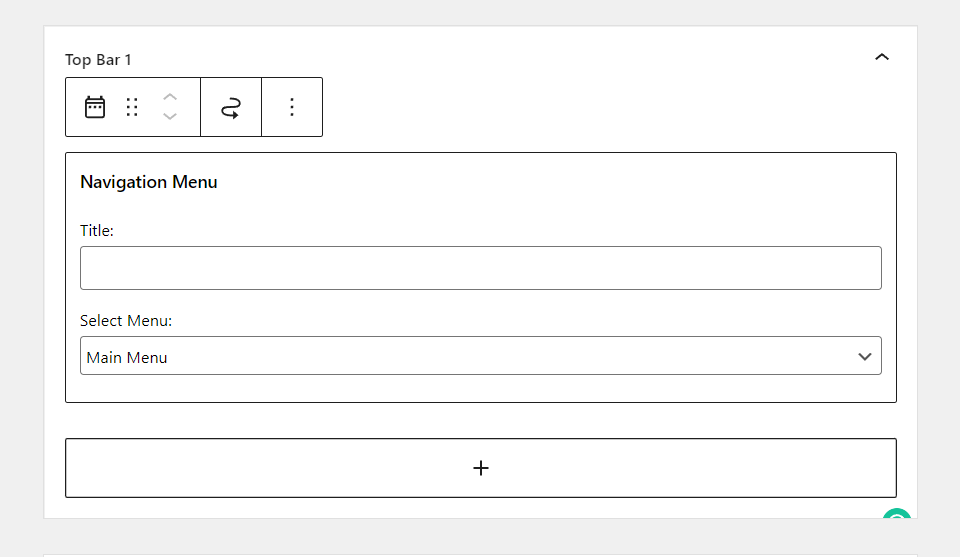
Save the options and check your website from the front end. You will see the navigation menu there.
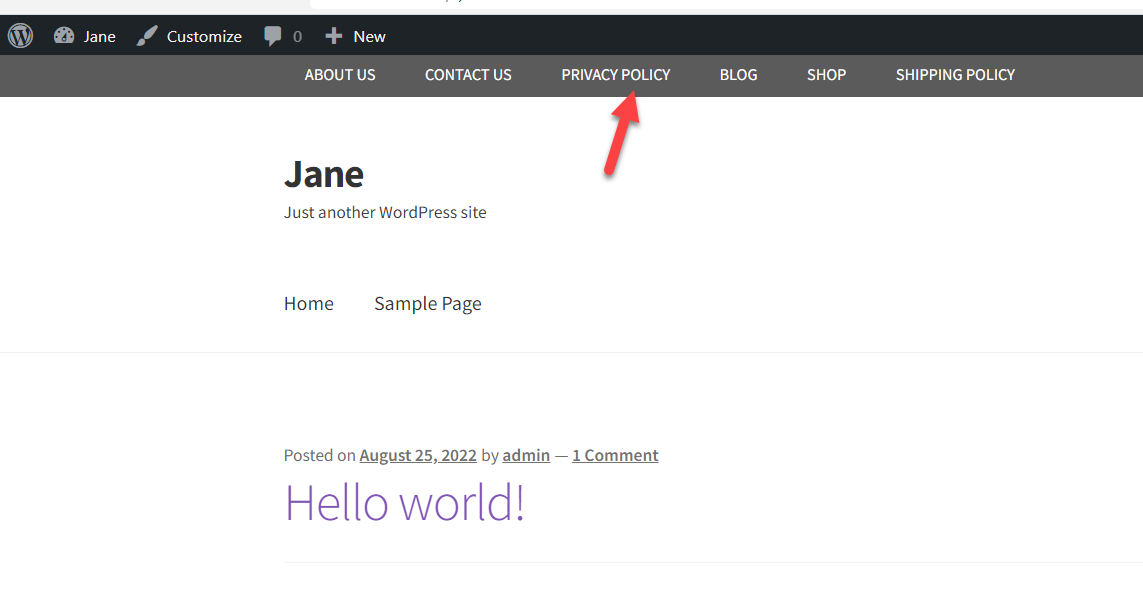
This way, you can add a navigation menu to the top bar of the Storefront theme. Similarly, y.ou can add links, buttons, search box, etc, with the plugin without the need for any code.
However, if you don’t want to use third-party plugins and feel comfortable with coding then we have the code snippets for you to add a top bar to your WooCommerce store with the Storefront theme.
Method 2: Add Top Bar in Storefront Using Custom Code Snippets
Before adding any code snippets, we highly recommend you create a full backup of your WordPress site and use a child theme to edit core WordPress files. If you don’t know how to create a child theme, follow our step-by-step tutorial or use a child theme plugin. Alternatively, you can use the Code Snippets plugin to add custom code snippets. With the Code Snippets plugin, you don’t need the child theme though. However, we always recommend having one for safety.
Using the Code Snippets Plugin
For the purpose of demonstration, we will be using the Code Snippets to add our custom codes snippets. First off, from your Admin Dashboard go to Plugins > Add New. Search for the Code Snippets plugin and install it on your site. Afterward, hit Activate to activate the plugin.
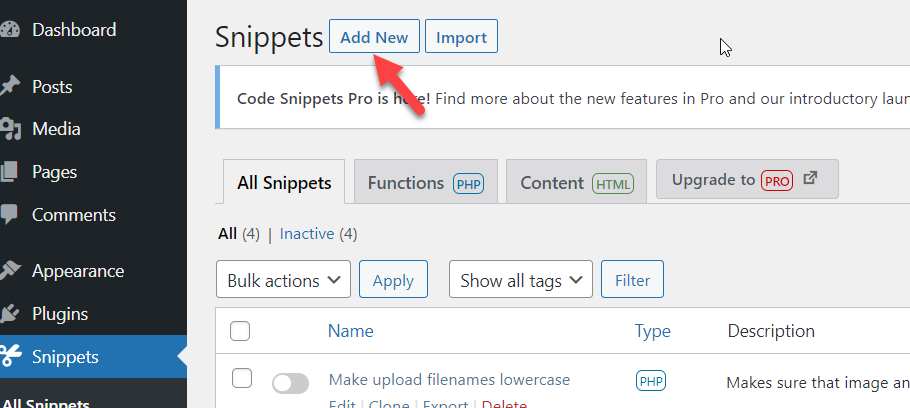
Once you have activated the plugin, you can create new snippets. Go to Code Snippets and click on Add new button. A new window will open up where you can add your custom code. Once you have added your code, save and activate it for it to work on your site.
Let’s have a look at the code snippet we will use to add a top bar to the WooCommerce store running the Storefront theme.
Code Snippet to Add the Top Bar
add_action( 'storefront_before_header', 'quadlayers_storefront_top_bar' );

function quadlayers_storefront_top_bar() {
?>
<div class="sf-top-bar">
<div class="col-full">
TEXT GOES HERE
</div>
</div>
<?php
}
Copy and paste the above code snippet inside the plugin’s editor. Give a title to your code snippet so you don’t forget to save the changes and activate the snippet.
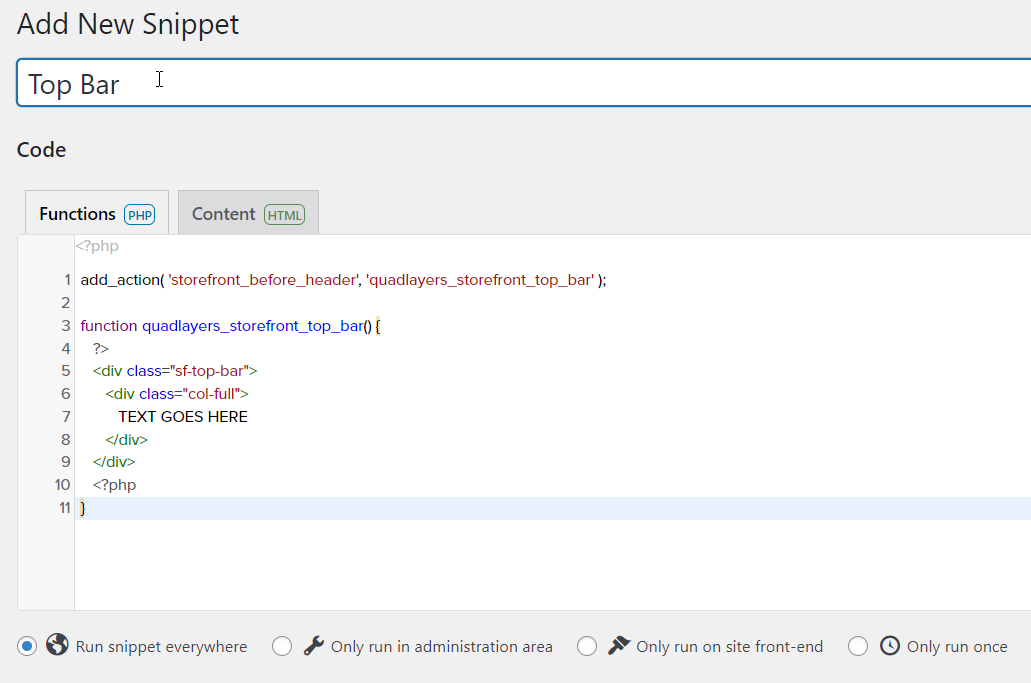
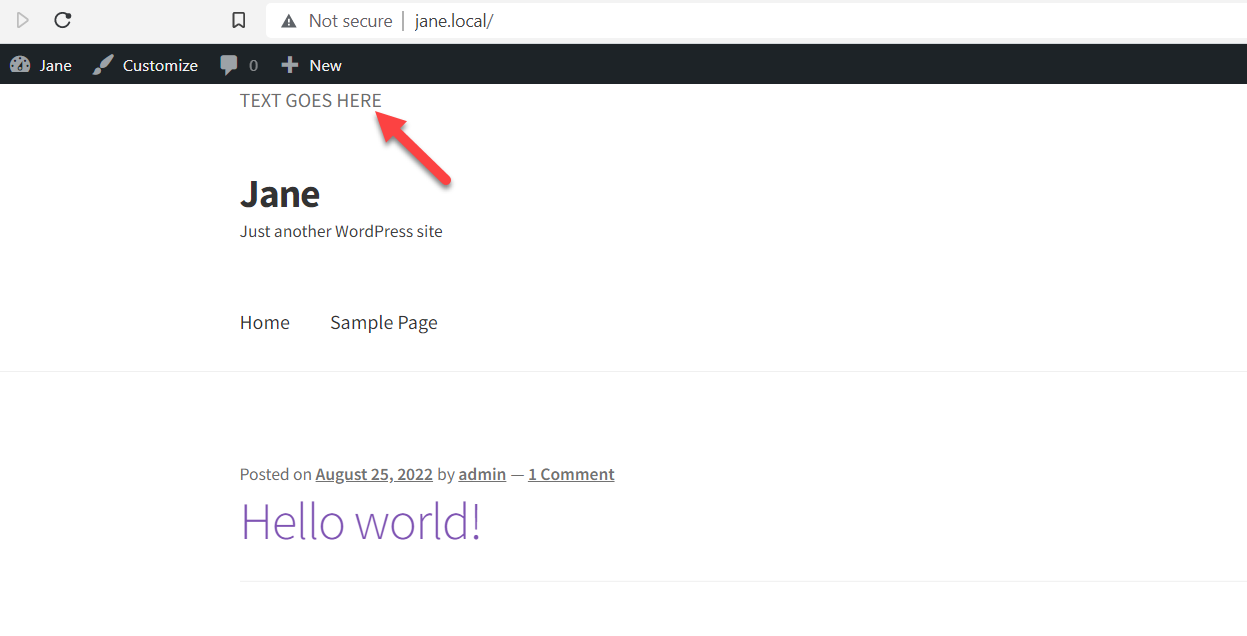
If you take a closer look at the code, we use quadlayers_storefront_top_bar as the function. In order to edit the content, just replace, the TEXT GOES HERE with anything you want and it will be added to the top bar of your WooCommerce store. Now go to the site’s front end after activating the snippet, and you will see the text on top of the site.
This way, you can add a text widget to the top bar in the Storefront theme. Similarly, you can add different sorts of content to the top bar in your WooCommerce store. Moving on, let’s have a look at how we can customize the look and feel of the top bar in Storefront theme.
How to Customize Top Bar in Storefront Theme
Once you have added a top bar to your WooCommerce store, it is time to customize the look and feel of it. Again, there is a plugin method and a manual method. If you plan to use a plugin for customizing your WordPress installation, you should check out CSS Hero. It is a premium plugin that can be very helpful for customizing your top bar in Storefront theme.
However, if you don’t want the plugin and know some CSS, you can modify the look of your top bar however you want.
Storefront Top Bar WordPress plugin which we have used above to add a top bar in Storefront theme comes with a custom CSS styling option. You can use this feature to add custom CSS styling from the plugin.
(Add Screenshot here)
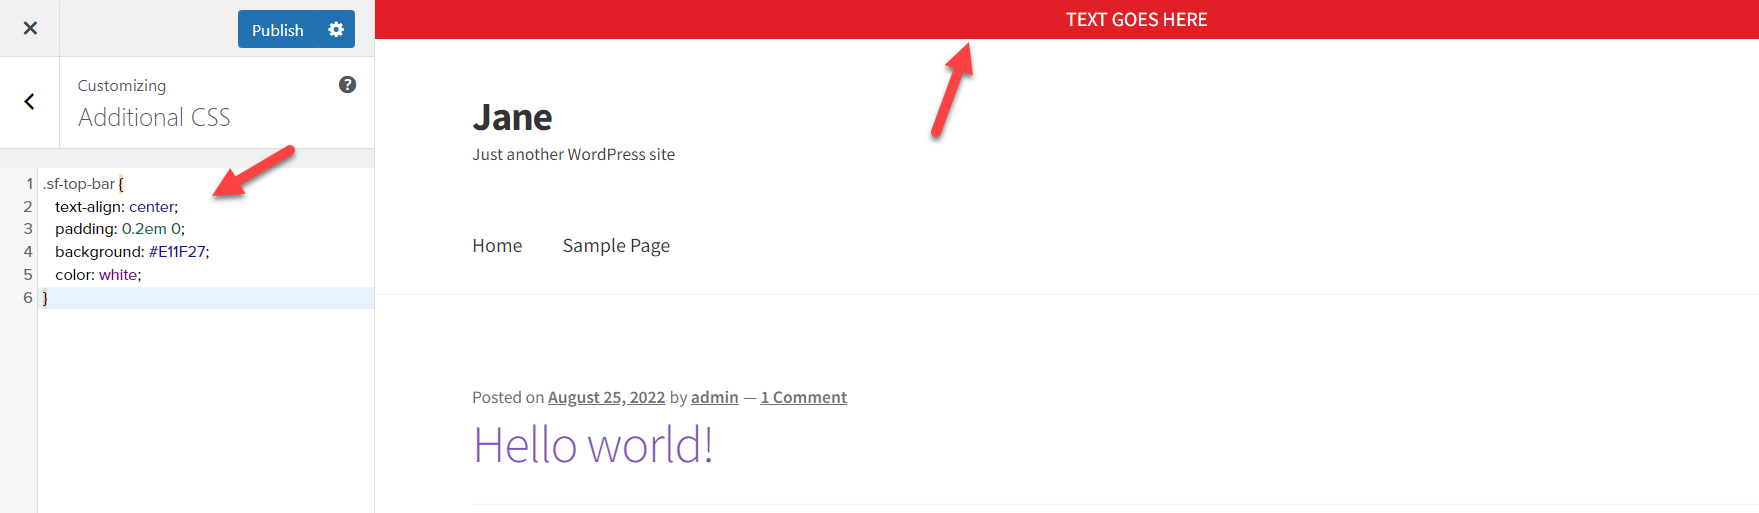
On the other hand, if you have used code snippets for adding the top bar in Storefront theme, you can use your CSS class to add custom styling. In our previous example with the code, we used sf-top-bar as the CSS class for the div tag. Now we can target that specific class to add custom styles, e.g.
.sf-top-bar {
text-align: center;
padding: 0.2em 0;
background: #E11F27;
color: white;
}
There is no limit to custom styling with CSS, so you can design the top bar however you like as long as you have the required CSS knowledge. To add custom CSS, go to Theme Customizer > Additional CSS. Here you can all your custom CSS code and you will see the changes in real-time.
Once you have done this, you are good to go. That’s how easy it is to customize your top bar in Storefront theme.
BONUS: How to Edit Header in WordPress
As we mentioned earlier, the website’s header would be the first thing a visitor sees when he lands on the homepage or your inner pages. So, adding valuable links to your header would be helpful. For example, you can the tracking code for Google Analytics or AdSense through the header. This section will show three methods you can use to modify the website’s header.
1) Using a Dedicated Plugin
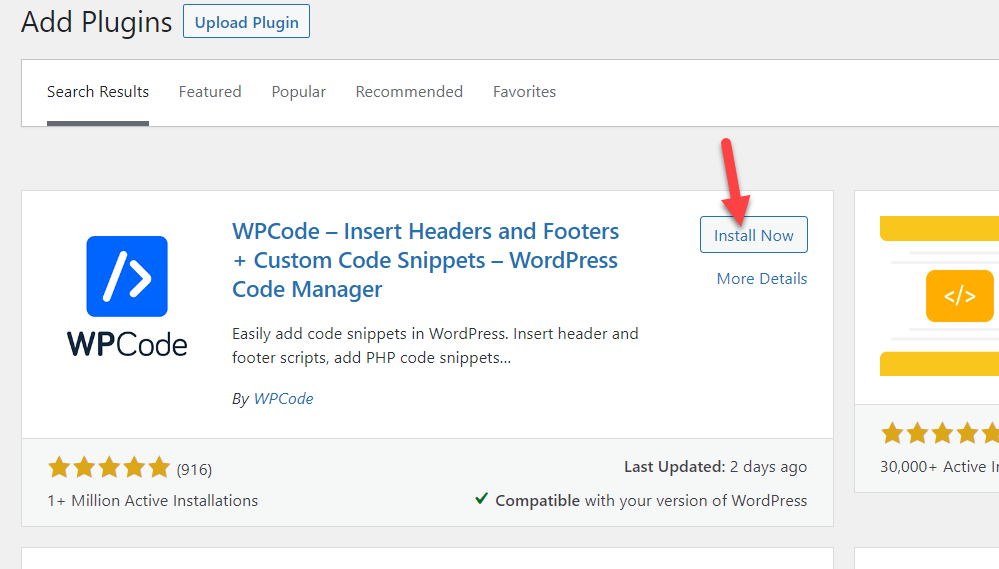
Using a dedicated plugin is the simplest way to edit the header in WordPress. In our experience, Insert Headers and Footers is one of the best WordPress plugins for the task.
The first thing you need to do is install the plugin on your WordPress site. Once the plugin is installed, hit the Activate button to activate the plugin on your website.
After you have activated the plugin, you will see the plugin settings on the left-pane in the Admin Dashboard. There, select the Header & Footer section.
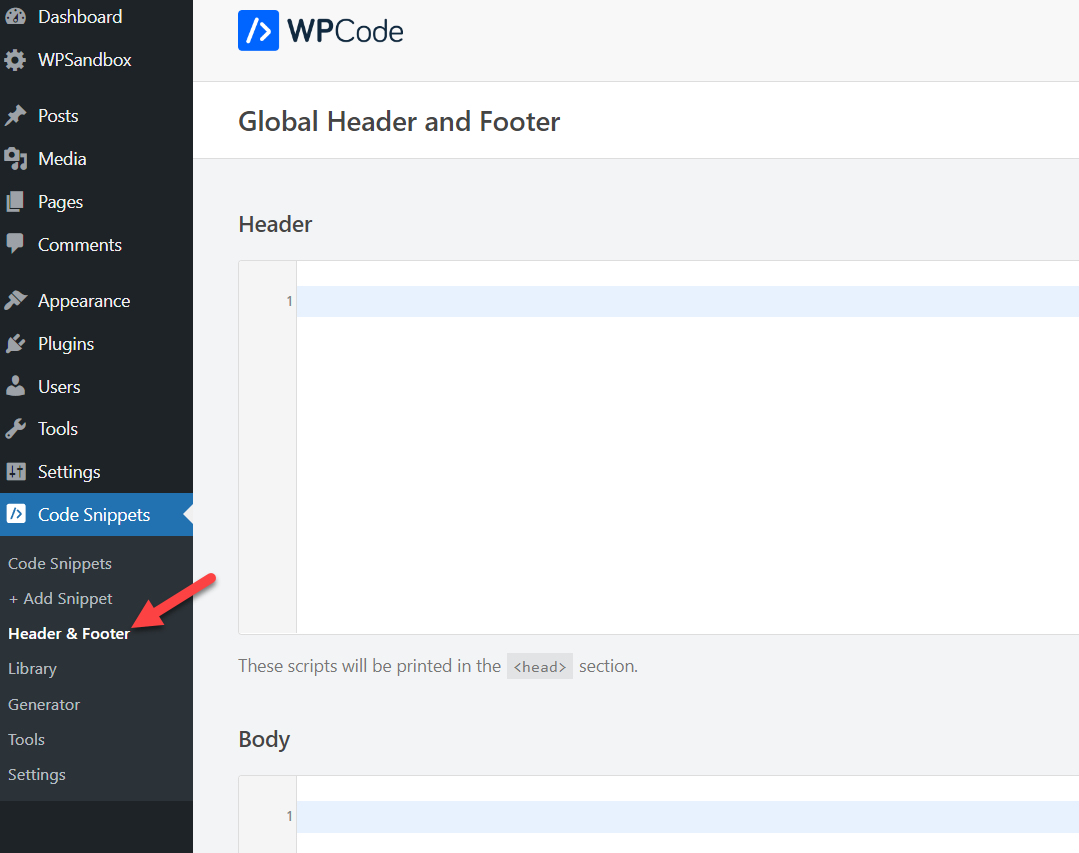
Add any HTML/CSS/JS code you need inside the Head section and save the settings. That’s it. Your header will be customized based on your edits specified in the code.
2) Editing Theme’s Header.PHP
If you are comfortable editing the theme files, you can edit the header.php file and modify it with your custom code. But before doing this, make sure you have created a child theme, else, you will lose all your modifications after a theme update.
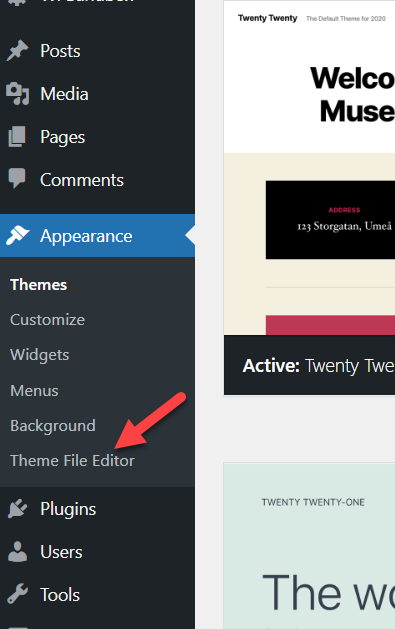
You can edit the theme’s header.php file with the theme editor or use an FTP client such as FileZilla. If you have access to the WordPress Admin Dashboard, it’s better to go for the theme editor. Go to Appearance > Theme Editor to open up your theme editor.
However, if you don’t have access to the WordPress backend, you can use the FileZilla tool to connect with your site and edit the header.php file. In our case, we do have access to the backend, so, we will go with the Theme Editor.
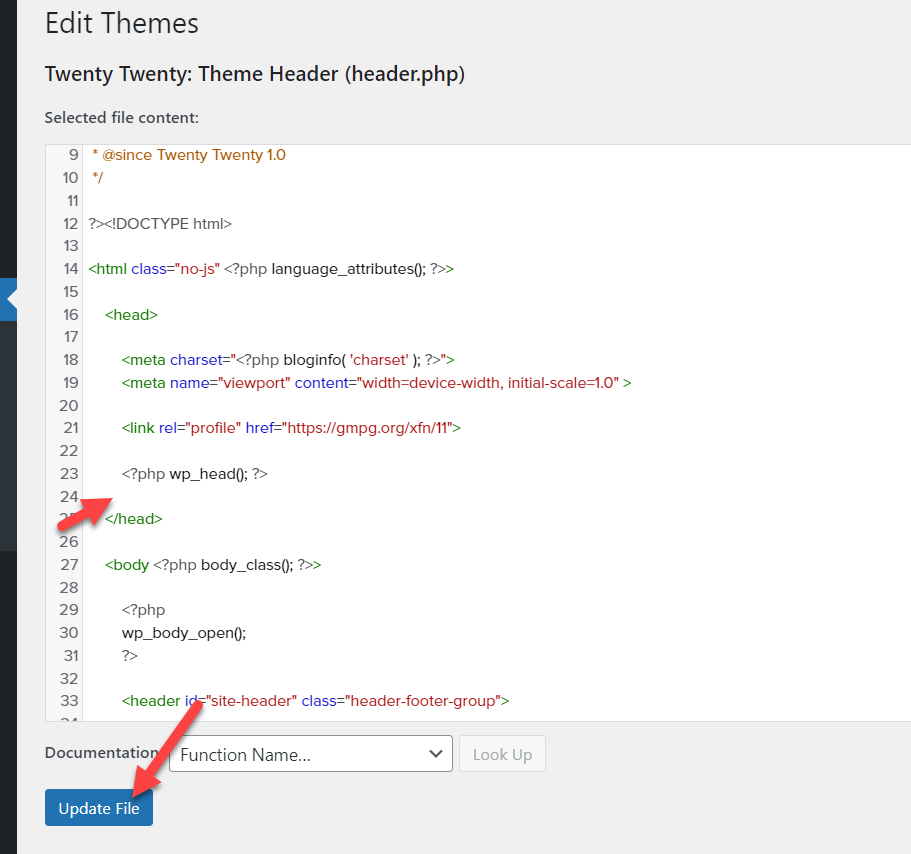
Once you have opened the Theme File Editor, check out the right-hand side. You will see all the available files in your theme’s folder. Select the header.php file from there.

Inside the header.php file, You can add anything you want before the closing of the head </head> section.
That’s it. This method is not that complicated. With a little HTML knowledge, you can easily customize your WordPress header.
However, that’s not all you can do to customize your header. For a more comprehensive guide, feel free to check our dedicated post on how to edit header in WordPress.
Conclusion
Storefront is a popular WordPress theme for WooCommerce stores. Thousands of people are using it to build fully functional online stores. Adding a top bar in Storefront theme will help you attract your visitors to your store by displaying special messages, adding social links, login controls, and more. Unfortunately, By default, the Storefront theme doesn’t have a top bar widget area. However, we can easily add the top bar in multiple ways.
In this article, we learned how to add a top bar in Storefront theme. We saw two methods to add the top bar; using the Storefront Top Bar plugin or adding custom code snippets. You can use the coding method if you are comfortable editing some PHP or CSS. On the other hand, if you need the most straightforward way to add a top bar to the Storefront theme, you should choose the plugin method.
Once we added a top bar to the theme, learned how to customize the top bar with some custom CSS styling. Lastly, we had a look at how to edit the header in a WordPress site.
We hope you have found this article helpful and enjoyed the read. Have you tried adding a top bar in your WooCommerce store running a Storefront theme? Which method are you going to use? Let us know in the comments!
If you found the content helpful, we have many other WordPress guides that you may be interested in. For instance, feel free to check out:
