
How to disable WooCommerce postal code validation
Do you want to remove the postal code field in your store? In this tutorial, we’ll show you how to disable the WooCommerce postal code validation to improve your checkout page and increase your conversion rates.
Why remove the WooCommerce postcode validation?
By default, postal code fields are required in WooCommerce so they include validation. However, sometimes those fields aren’t necessary and add friction to the checkout page. For example, many countries in Africa, Central America, and Oceania don’t have or don’t use zip codes. Additionally, if users type text in the zip code field, WooCommerce will show an error message and won’t let the shoppers complete the checkout.
Having an optimized and lean checkout page is key for any online store. You should remove any distractions to provide a faster and better purchasing experience for your customers. As a result, having unnecessary fields and error messages can affect your users’ shopping experience and conversion rates. So, in this guide, we’ll show you how to disable the WooCommerce postcode validation on the checkout page. 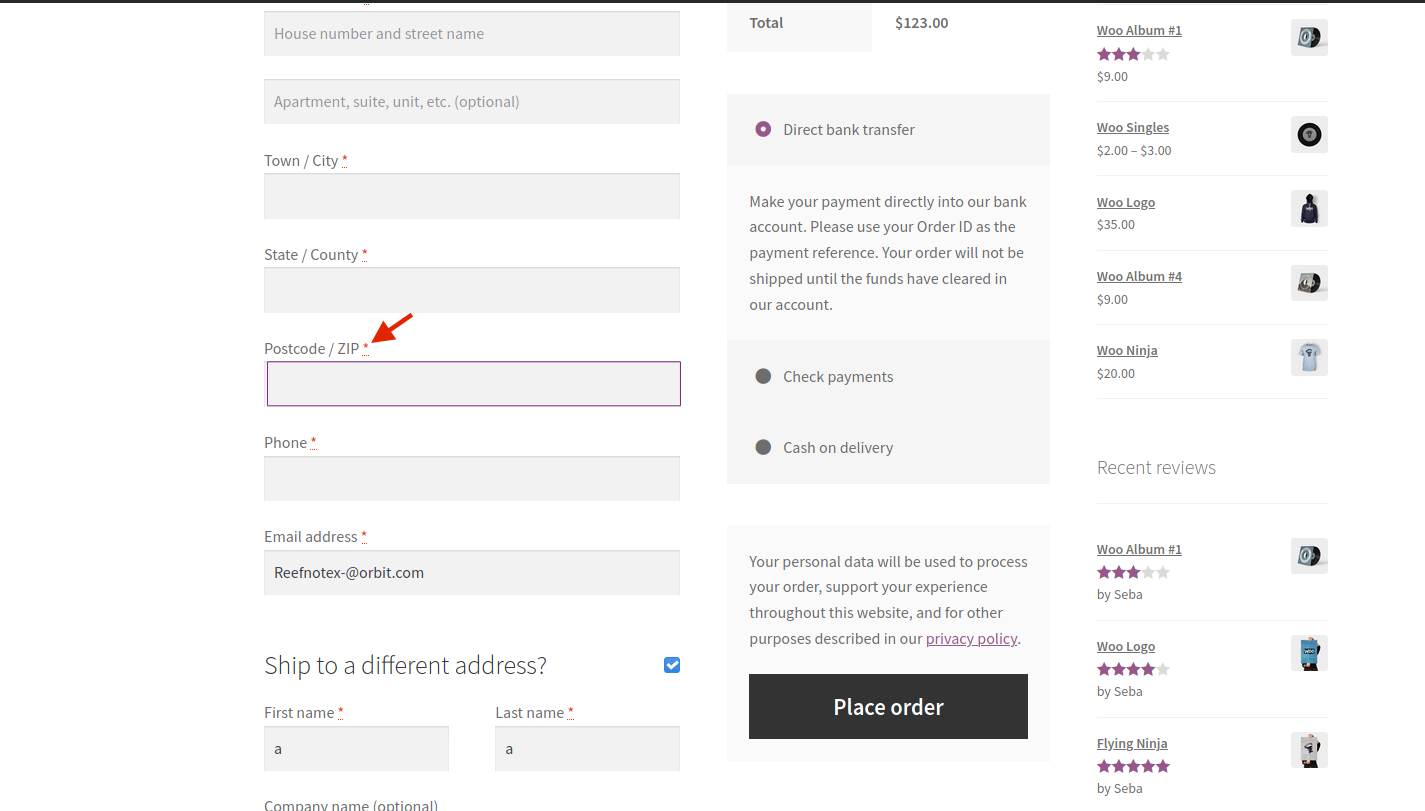
How to disable the WooCommerce postal code validation programmatically
As we’ll modify the functions.php file of your theme, before we start, we recommend you create a child theme. You can check our guide to create one or use any of these plugins. So, to remove the postcode validation in WooCommerce, first, go to a product page and add a product to the cart by clicking on the Add to cart button. Now, let’s have a look at how you can do the following:
- Remove the Zip/Postal code from the WooCommerce checkout page
- Make the Zip/Postcode field optional
- Remove the billing fields from the checkout
- Edit labels of the checkout page fields
1) Remove Postal code from the WooCommerce checkout page
One option to disable the zip code validation is to completely remove the postal code field from the WooCommerce checkout page. The easiest way to do this is by using WooCommerce hooks. So, to remove the zip field from the checkout page, simply copy and paste the following script at the end of the functions.php file of your child theme:
// Disable zip/postcode field
add_filter( 'woocommerce_checkout_fields' , 'QuadLayers_remove_billing_postcode_checkout' );
function QuadLayers_remove_billing_postcode_checkout( $fields ) {
unset($fields['billing']['billing_postcode']);
return $fields;
}
The woocommerce_checkout_fields hook is one of the WooCommerce core hooks you can use to customize the checkout page. With the PHP inbuilt function unset() you empty the field and send it back to WooCommerce with the return; in the following line. 
2) Make Zip/Postcode field optional
Another alternative to disable the postal code validation in the WooCommerce checkout page is to make the field option instead of mandatory. To do that, paste the following script at the end of the functions.php file:
// Make zip/postcode field optional
add_filter( 'woocommerce_default_address_fields' , 'QuadLayers_optional_postcode_checkout' );
function QuadLayers_optional_postcode_checkout( $p_fields ) {
$p_fields['postcode']['required'] = false;
return $p_fields;
}
Here, we are using a different hook ('woocommerce_default_address_fields'). In this case, you can use this hook to alter a billing field on the checkout page. Setting the postcode field to false will make it optional and remove the validation. 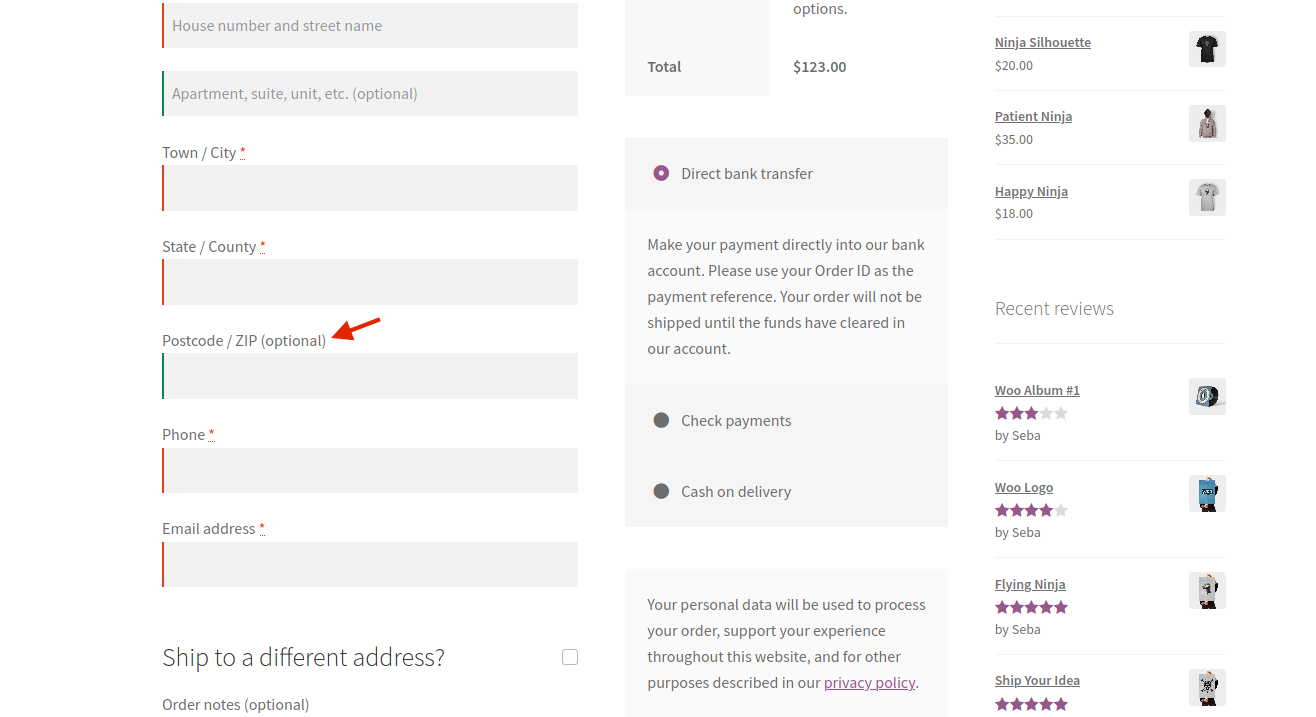
3) Remove the billing fields from the checkout
The Zip field is displayed in the billing form so another way to disable the validation is to customize the billing section and remove some fields from the checkout page. In the same way, you disabled the postal code field in point 1, you can do the same with any other fields. You can identify the postcode field in the code with these indexes: $fields['billing']['billing_postcode']).
Similarly, you can hide any other fields you want. You just need to know the right indexes for that specific field. These are some identifiers of the fields that you can usually remove to streamline the customers’ buying experience:
unset($fields['billing']['billing_company']);
unset($fields['billing']['billing_address_2']);
unset($fields['billing']['billing_city']);
unset($fields['billing']['billing_state']);
unset($fields['billing']['billing_phone']);
Each index that identifies a field has a self-explanatory name. Additionally, the ‘billing’ index tells you that the field is located within the billing form. So, for example, if you want to remove the company and address_2 fields, you need this code:
// Remove company and address_2 billing fields
add_filter( 'woocommerce_checkout_fields' , 'QuadLayers_remove_billing_fields' );
function QuadLayers_remove_billing_fields( $fields ) {
unset($fields['billing']['billing_company']);
unset($fields['billing']['billing_address_2']);
return $fields;
}
As you can see, you can use more than one index at the same time. To remove more fields, simply add them to the above function using the corresponding index. 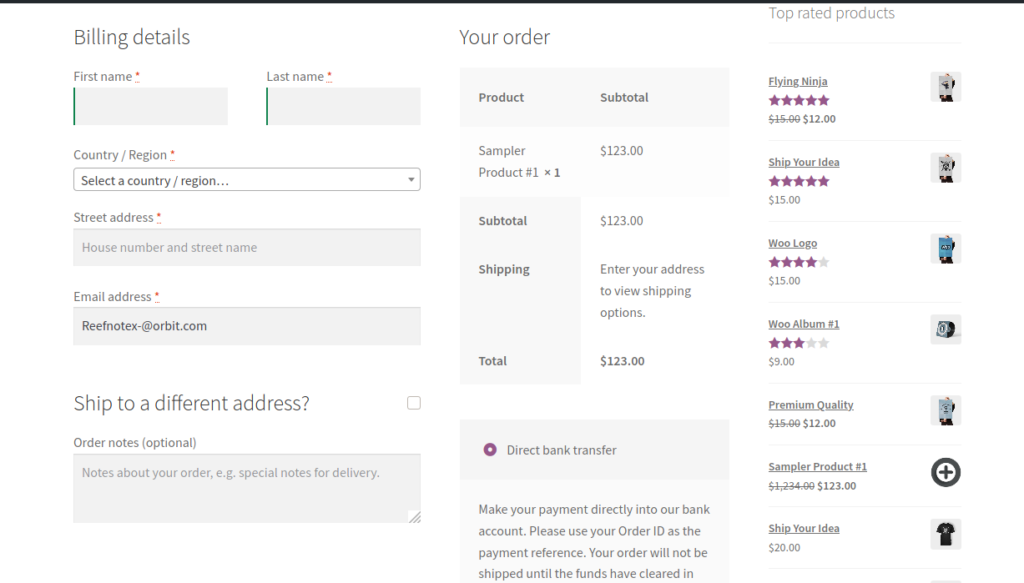
4) Edit labels of the WooCommerce checkout page fields
Now, let’s say you’ve decided to make the Zip/Postcode field optional but you want to change the label of that field (Zip/Postcode) to make it more clear for your users. With the following script, you can change the ‘Zip/Postcode’ label to whatever you want. For example, we’ve changed it for Area code:
/* WooCommerce: Change Billing strings  */
add_filter( 'gettext', 'QuadLayers_billing_field_strings', 20, 3 );

function QuadLayers_billing_field_strings( $translated_text, $text, $domain ) {
switch ( $translated_text ) {
    case 'Postcode / ZIP':
        $translated_text = __('Area code','woocommerce');
        break;
    }
return $translated_text;
}
The gettext hook is very useful and it’s usually used on translations. Even though this isn’t exactly a translation, this hook will be useful anyway. The above code changes the default WooCommerce label (Zip/Postcode) for the Area code string.
Take a look at the script above and see where these strings are in the code. If you want to translate more strings, just add your translations inside the switch statement as follows:
function QuadLayers_billing_field_strings( $translated_text, $text, $domain ) {
switch ( $translated_text ) {
    case 'Billing details' :
        $translated_text = __( 'Order information', 'woocommerce' );
        break;
    case 'Ship to a different address?':
        $translated_text = __('Send to other location please','woocommerce');
        break;
    case 'Company name':
        $translated_text = __('Company','woocommerce');
        break;
    case 'Postcode / ZIP':
        $translated_text = __('Area code','woocommerce');
        break;
    }
return $translated_text;
}
At this point, you should be able to remove and make optional some of the checkout fields and you have also learned how to translate a string using the gettext hook. In the following image, we’ve removed several fields, changed the name of the Zip/Postcode field for Area code, and made it optional. Additionally, we’ve edited the heading for the billing and Ship to a different address form. 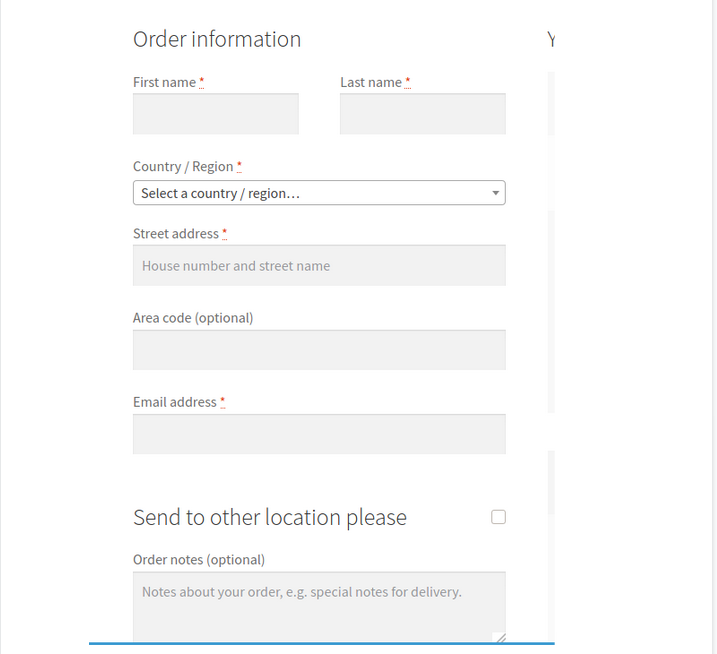
Remove WooCommerce postal code validation with plugins
If you don’t have coding skills or you don’t feel comfortable editing the functions.php file, we have a solution for you. You can remove the WooCommerce zip code validation with plugins. There are several tools out there but we’ll show you how to disable the postcode fields with two freemium plugins:
- Checkout Manager for WooCommerce
- WooCommerce Direct Checkout
1) Checkout Manager for WooCommerce
Checkout Manager is an excellent plugin to customize the checkout process and one of the best field editors out there. It allows you to add, edit, and delete fields on the checkout page. This way, you can customize the fields you want to display in the Billing, Shipping, and Additional fields sections.
To disable the WooCommerce postcode validation, first, you need to install and activate the plugin. You can download Checkout Manager for free from the WordPress repository or buy one of the premium plans that start at 19 USD (one-time payment).
Once you’ve activated Checkout Manager, it’s time to remove the fields you don’t want. So, in your WordPress admin go to WooCommerce > Checkout > Billing. There you will have the option to disable the postal code and other fields you don’t want to display in the billing section. 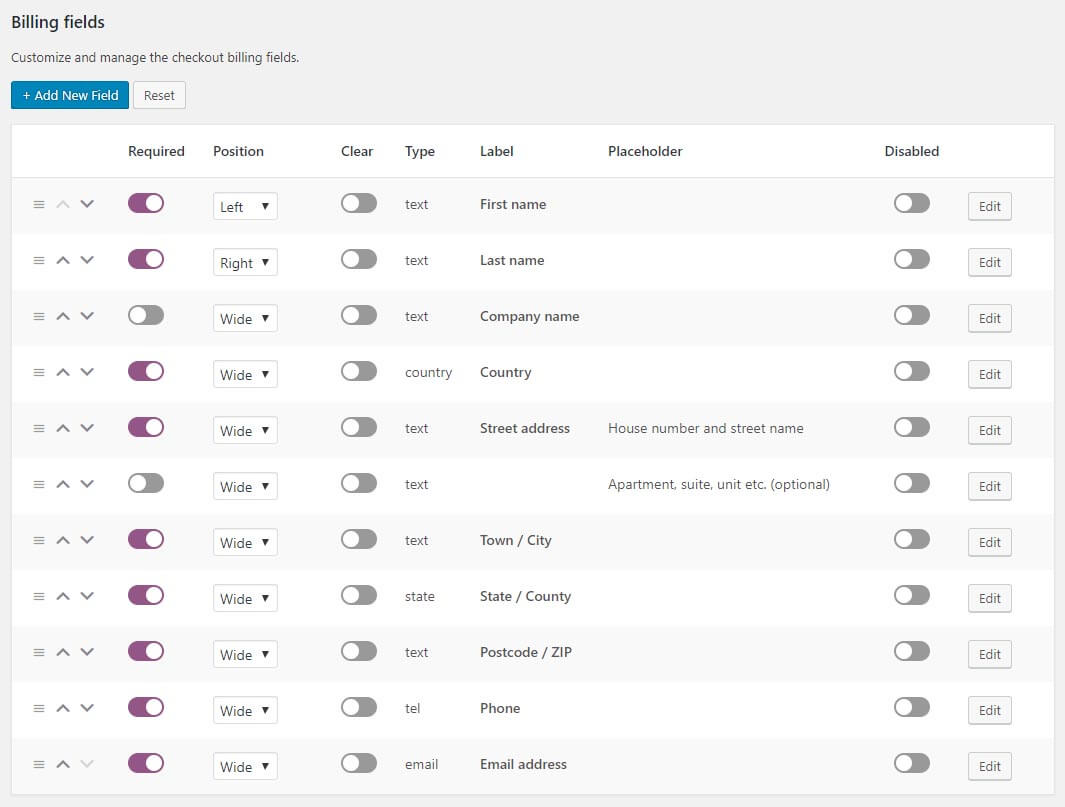 Then, you can go to the shipping section and repeat the process. This way, you can not only remove the zip field but also customize your whole checkout page. Checkout Manager has many other features that you can use to improve your checkout such as creating conditional fields or letting users upload files in the checkout.
For more information about how to use this plugin, you can check out the documentation page.
2) WooCommerce Direct Checkout
Another plugin that you can use to remove the postal code field is Direct Checkout. This is one of the best checkout plugins for WooCommerce and allows you to remove unnecessary fields to simplify the checkout page. And the best part is that it has a free version.
Before we start, you can either download the free version or purchase one of the premium plans that start at 20 USD (one-time payment).
After that, in your WordPress admin, go to WooCommerce > Direct Checkout > Checkout. There, go to the Remove checkout fields section and select the postcode and all the fields you don’t want to display on the checkout. Additionally, you’ll have other options to customize the checkout page. 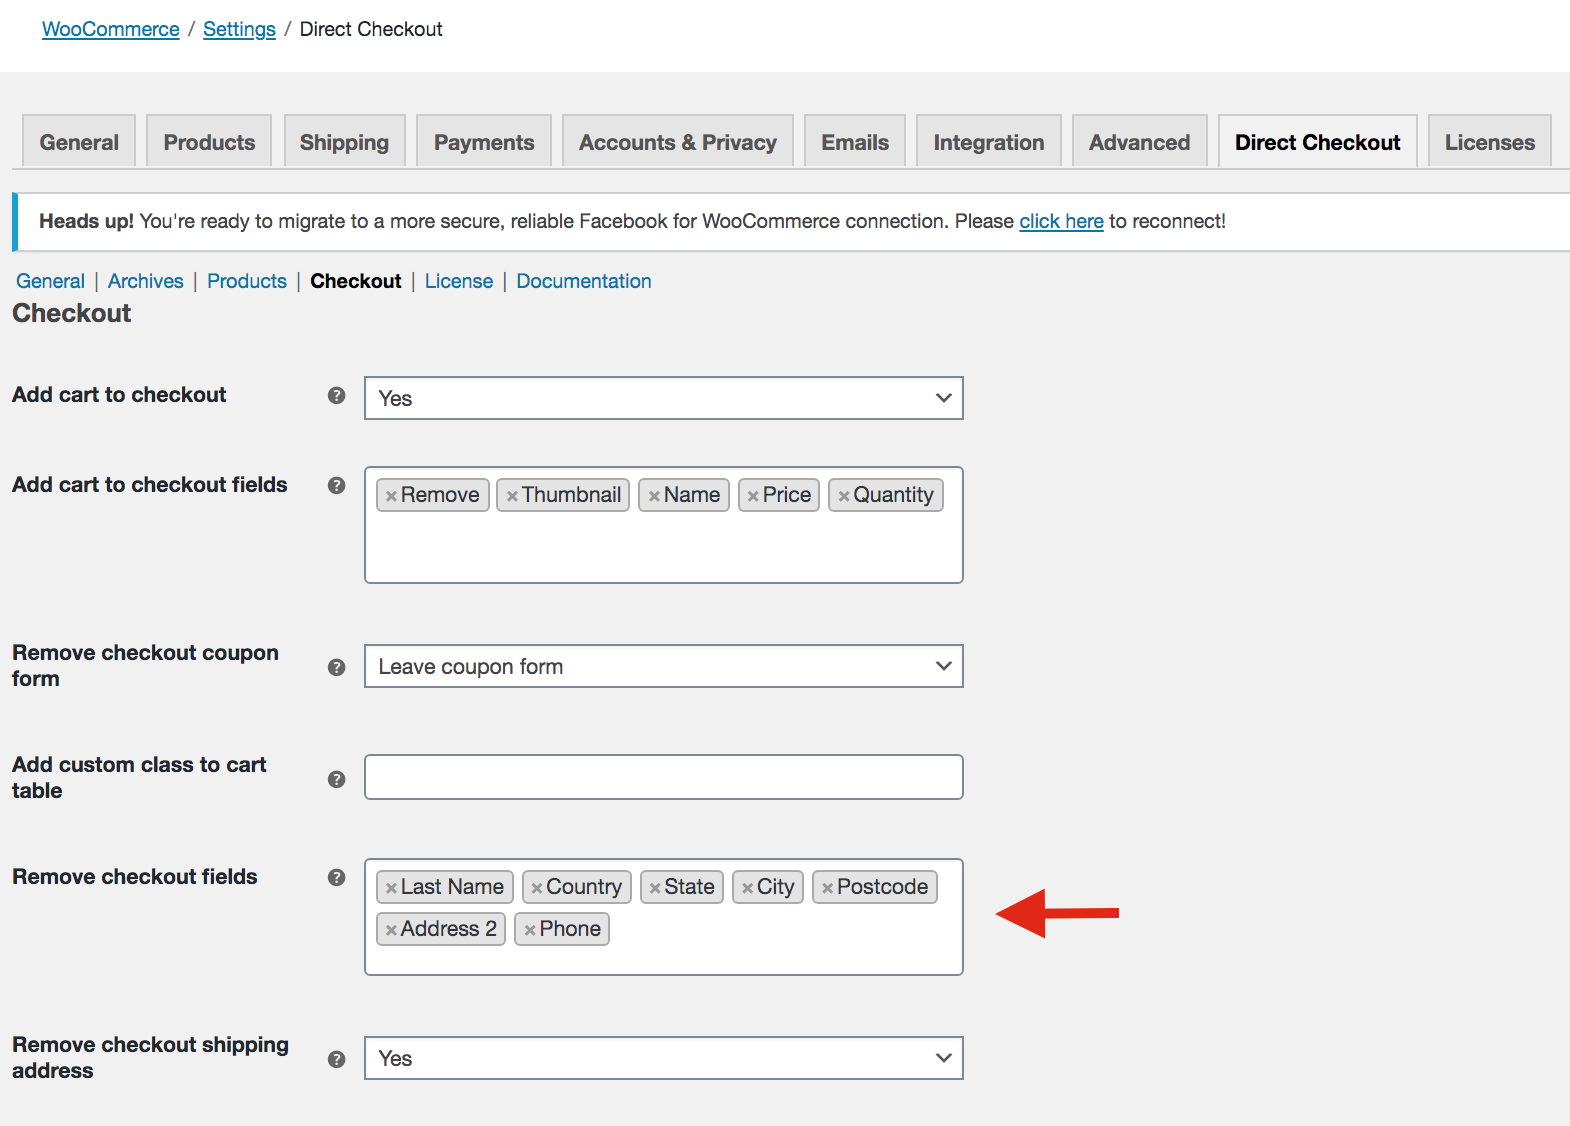
Direct Checkout is very easy to use so you won’t have any issues with it.
Conclusion
All in all, some fields on the checkout page aren’t necessary and add friction to the buying process so it’s better to remove them.
We’ve seen how to disable the WooCommerce postal code validation to improve users’ experience and increase your conversion rates. Additionally, you’ve learned to customize the checkout by making the zip field optional, removing billing fields from the checkout, and editing labels.
For those who don’t have coding skills, we’ve also seen how to remove the zip code and other fields from the checkout page with two plugins: Checkout Manager and Direct Checkout. These tools have free versions and are very easy to use so they’re a great alternative for those who don’t want to edit the functions.php file.
Finally, if you want to customize other parts of your store, we recommend you have a look at our guide to edit the shop page and boost your sales.
Have you deleted the postcode validation? Did you have any issues following this tutorial? Let us know in the comment section below!

Thank you. The remove postcode validation worked for me. Many thanks
thanks man its usefull
You’re welcome
I can’t thank you enough. What would I do without you? You’re wonderful.
Very detailed with steps explain, thank you!
Glad you found our article helpful, Charles.