
How to Change Proceed to Checkout Text in WooCommerce
Are you looking for an easy way to change the proceed to checkout text on your WooCommerce store? You’ve come to the right place. In this guide, we’ll show you different methods to do so.
Many site owners customize their shop page and product pages, edit their checkout pages and think that their whole site is optimized. However, there are many other details that you can change that will help you boost your conversion rates and improve your store. We’ve already seen how to change the Add-to-Cart message and today we’ll show you how to change the Proceed to Checkout text in WooCommerce.
Before jumping into the different methods to do so, let’s better understand what the Proceed to checkout text is and why you should customize it.
What is the Proceed to checkout text?
By default, the checkout button contains the text Proceed to Checkout:
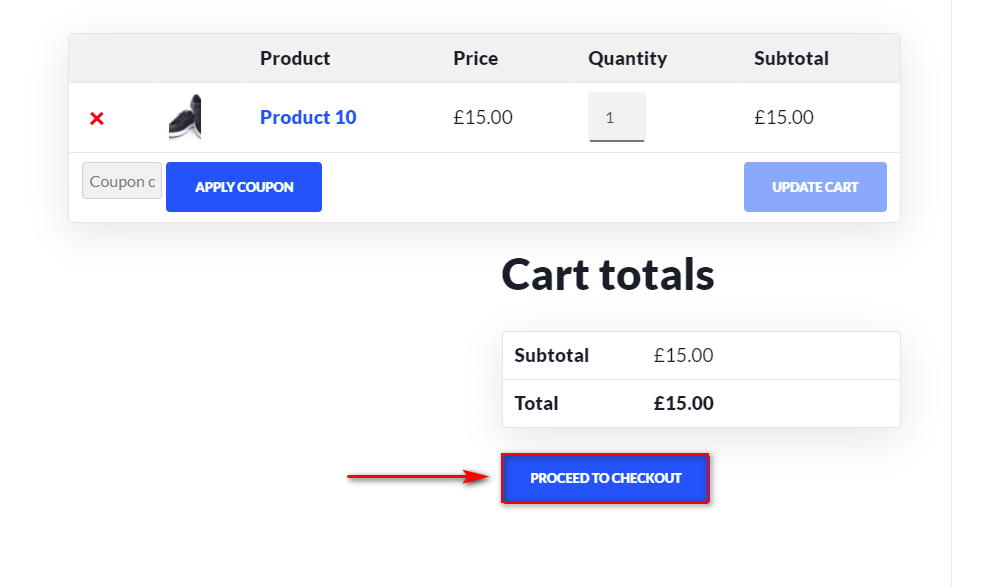
This text is set by default in WooCommerce’s template files and most store owners don’t take the time to change it. However, considering that this is a very important step to close the sale, you should optimize it as much as possible. The good news is that you can easily customize this text to make it more meaningful and better fit your shop design.
For example, you can change this text to “Join our service now!” or “Checkout here” for a simpler checkout flow. All the small steps you take to improve your checkout experience can add up to boost your website’s conversion rate.
Most store owners don’t take the time to customize the proceed to checkout text because it involves editing the WooCommerce template files. For some users, especially beginners, this seems difficult or risky. However, it doesn’t need to be. In the following section, we’ll show you different methods to change the Proceed to Checkout text with and without code, so you can follow the one that best suits your skills.
How to Change Proceed to Checkout Text in WooCommerce
There are two main methods to edit the Proceed to Checkout text:
- Programmatically
- With plugins
Let’s have a closer look at both of them.
1) How to Change Proceed To Checkout Text using a Theme Function
Let’s start with the programmatic method of customizing the checkout text in WooCommerce by adding a custom function to the functions.php file.
The process is quite simple and all you need to do is to paste a small code script to your functions.php file. Before starting, we recommend you backup your site and use a child theme. Apart from being safer, with a child theme, you ensure that if you update your theme, your customization won’t be overwritten by the new theme files. That’s why it’s always a good practice to install a child theme on your site.
Once you’ve done that, open your WP Admin Dashboard and head to Appearance > Theme editor. Then, click Theme Functions or functions.php on the theme files sidebar on the right.
Now, use the editor to paste in the following code snippet. The code will create a custom function that will change the text of the checkout. Simply change the Checkout-Text-Here part of the code to anything that you’d like.
function quadlayers_woocommerce_button_proceed_to_checkout() { ?>
<a href="<?php echo esc_url( wc_get_checkout_url() ); ?>" class="checkout-button button alt wc-forward">
<?php esc_html_e( 'Checkout-Text-Here', 'woocommerce' ); ?>
</a>
<?php
}
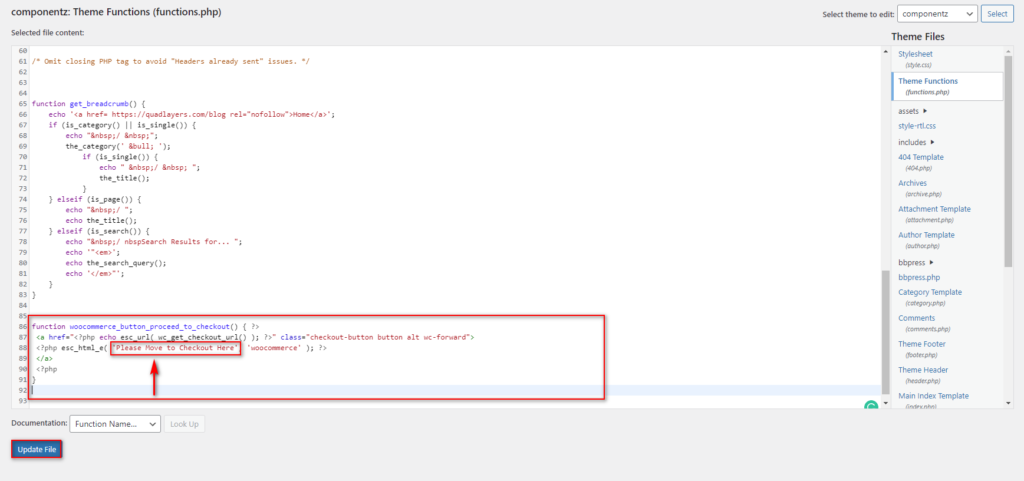
For example, in the following script, we’ll use the text “Please Move to Checkout Here”, so the script will be:
function quadlayers_woocommerce_button_proceed_to_checkout() { ?>
<a href="<?php echo esc_url( wc_get_checkout_url() ); ?>" class="checkout-button button alt wc-forward">
<?php esc_html_e( 'Please Move to Checkout Here', 'woocommerce' ); ?>
</a>
<?php
}
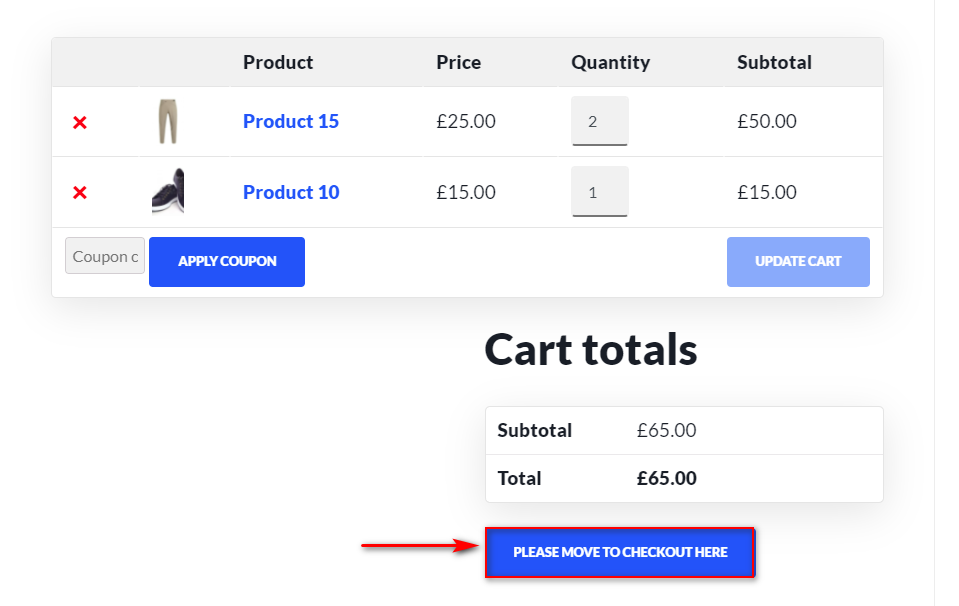
Adjust the code to add the text you want, paste it into the functions.php of your child theme, and then click Update File to finish the process.
The function simply replaces the text of the WooCommerce Proceed to Checkout button so it should work regardless of what theme you’re using or additional function scripts that you may have enabled.
However, if you still don’t feel comfortable editing core files, you can use a dedicated plugin instead.
2) How to Change Proceed to Checkout Text using Plugins
Another alternative to customize the Proceed to checkout text is to use a dedicated plugin. For this demonstration, we’ll use a simple tool called Change Proceed to Checkout Text that makes it super easy to edit the checkout text in a few clicks.
This is a free plugin, so it’s an excellent option for those who don’t want to use code to change the text or want to change the Proceed to Checkout text often for testing and customization purposes.
Installing and Activating The Plugin
To install the plugin, simply open your WP Admin Dashboard and go to Plugins > Add New. Use the search bar on the top right to search for Change Proceed to Checkout Text, click Install on the plugin’s tab and then press Activate.
Using the Plugin To Change Proceed To Checkout Text
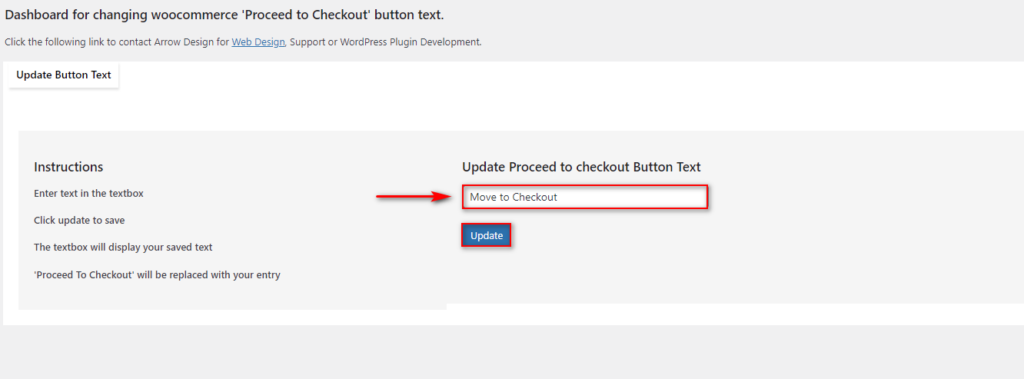
To use the plugin, go to Settings > Change Proceed to Checkout text.

To change the checkout text, all you have to do is type in the new checkout button text in the corresponding field. Let’s say we want to change the text to Move to Checkout. Then, press Update, and your change to the proceed to checkout text field will be saved.
Now check out the frontend and you will see the result as shown below:
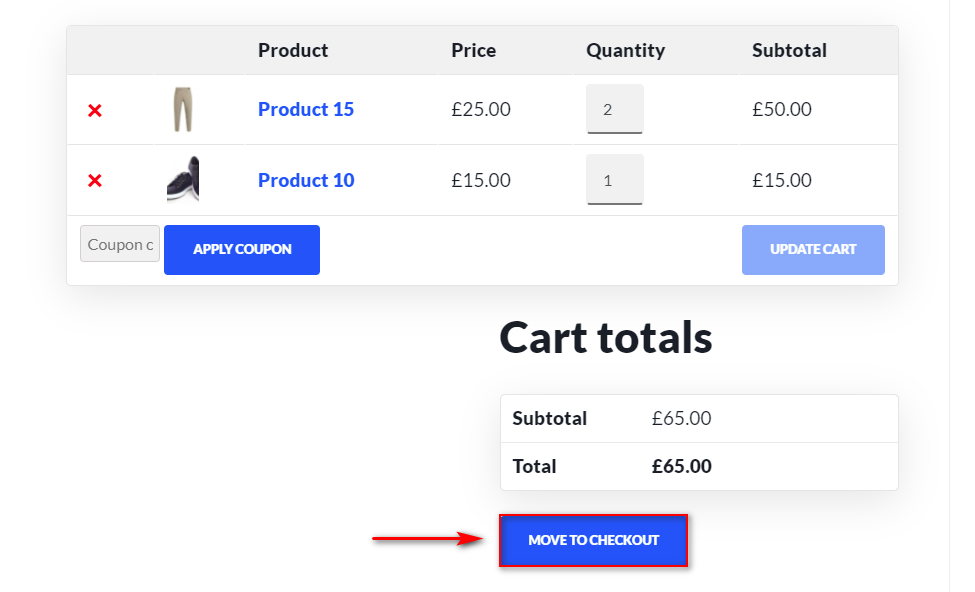
This way, you can easily try different texts and see which one has better conversion rates.
Bonus: How to Change the Added to Cart Message
Apart from customizing the Proceed to Checkout text, there’s a lot more than you can do to improve the checkout experience in your store. For example, another recommended practice is to edit the Add to Cart messages. The more steps you take to improve your checkout experience, the better results you will have, so it’s a good idea to leave nothing to chance.
Let’s have a look at how you can customize the “Added to Cart” message.
Adding a Simple Added to Cart Message and Customizing the Added to Cart Message
To replace your Added to Cart message with a simple custom text, you can add a code snippet to the functions.php file. To do that, head to Appearance > Theme Editor on your WordPress Dashboard. Then, open the functions.php file by clicking on the functions.php or Theme functions on the right sidebar.
Now, you can add the following script to the editor to customize the Added to Cart message inside the $message= ‘ ‘ section of the code. Int the following script, the message will say “Your product has been added to cart. Thank you for shopping with us!”.
add_filter( 'wc_add_to_cart_message_html', 'quadlayers_custom_add_to_cart_message' );
function quadlayers_custom_add_to_cart_message() {
$message = 'Your product has been added to cart. Thank you for shopping with us!' ;
return $message;
}
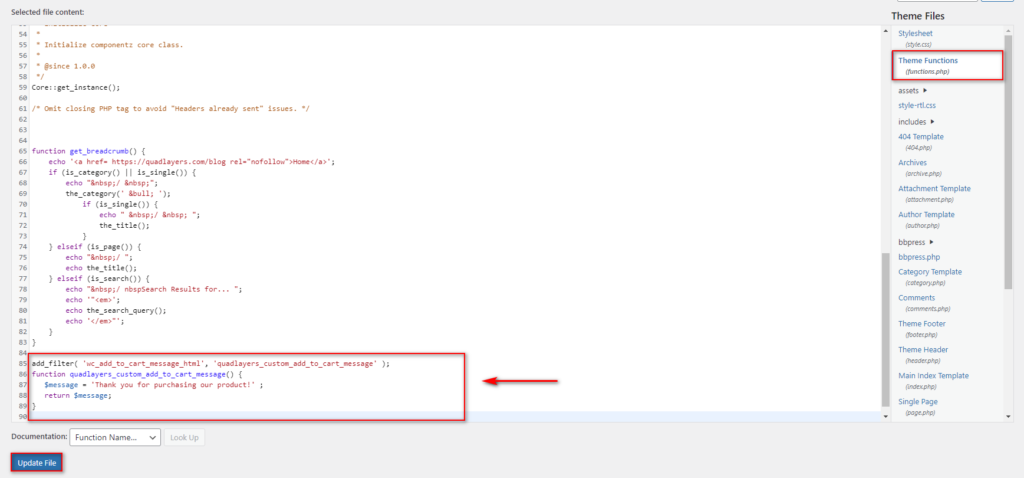
Let’s say you want to change it to something like “Thank you for purchasing our product”. In that case, you will use this script:
add_filter( 'wc_add_to_cart_message_html', 'quadlayers_custom_add_to_cart_message' );
function quadlayers_custom_add_to_cart_message() {
$message = 'Thank you for purchasing our product!' ;
return $message;
}
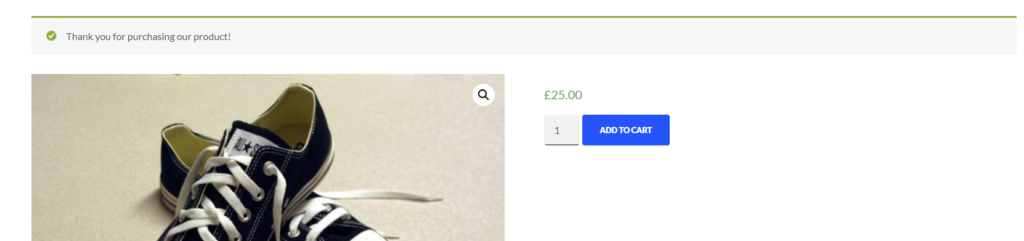
If you check the frontend, the message will look like this:
Customizing the Added to Cart Message
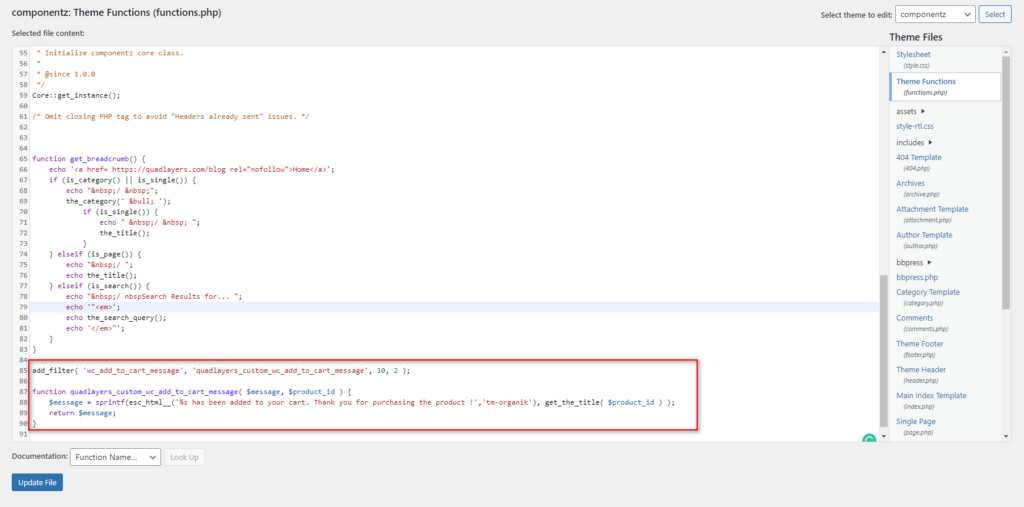
Alternatively, you can personalize the message and add the name of the product that your customer has added to the cart. To do that, use this script:
add_filter( 'wc_add_to_cart_message', 'quadlayers_custom_wc_add_to_cart_message', 10, 2 );
function quadlayers_custom_wc_add_to_cart_message( $message, $product_id ) {
$message = sprintf(esc_html__('%s has been added to your cart. Thank you for purchasing the product !','tm-organik'), get_the_title( $product_id ) );
return $message;
}
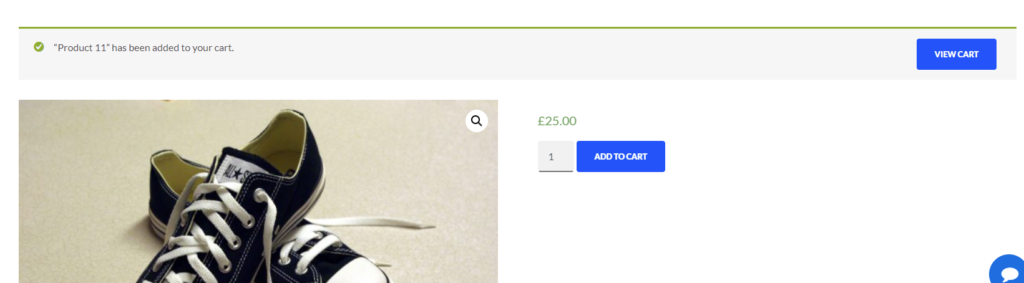
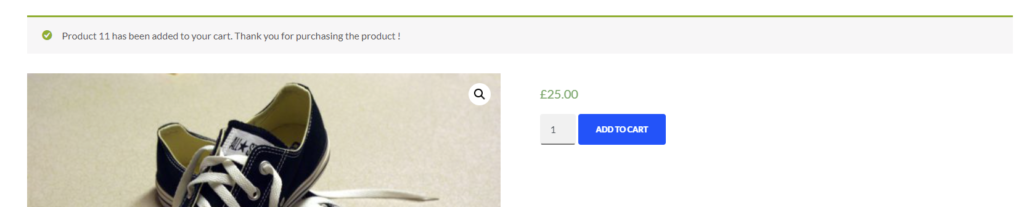
Press Update file, check out the frontend and you should see something like this:
This requires customizing the message in the $message statement. These are just a few examples but there’s a lot more you can do. To learn more about this, check out our guide about how to customize the Add to cart messages.
Alternatively, if you want to hide or remove the Add to the cart message, you can also do so by adding this code to your functions.php.
SImply paste in this script and Update the file and you should be done!
add_filter( 'wc_add_to_cart_message_html', '__return_null' );
Conclusion
In summary, the proceed to checkout text appears at a very important stage of the purchase process, so it’s always a good idea to customize it. Most store owners overlook this, so you can take advantage of this and stand out from your competitors.
In this guide, we’ve shown you two different methods to change the proceed to checkout text in WooCommerce:
- By using a custom WooCommerce hook and a function in your theme files
- By using a dedicated plugin
Both methods get the job done, so choose the most appropriate for you. If you have some coding skills, you can use the programmatic method. Using a simple script, you can customize the text in no time. On the other hand, if you’re a beginner and don’t feel comfortable editing theme files, we recommend you use a dedicated plugin. For this demo, we’ve used Change Proceed to Checkout Text, a free tool that allows you to edit and try different texts in a few clicks.
Which method have you tried? Do you know of any other that we should include? Let us know in the comments below!
Finally, if you want to learn more about how to customize other components of your online store, check out some other guides:

SO wrong, to even download a plugin for a small task like this
Hi Mika,
The snippet is working fine. If a user is uncomfortable with editing codes, he can use the plugin.
Not work for me in Hello child theme, Blocksy child theme, Oceanwp child theme…
Hi.
This could be a compatibility issue. You can contact the theme support for further assistance.