
How to Accept Donations in WooCommerce
Do you want to accept donations in WooCommerce and contribute to society through your store? Accepting donations to help the ones in need is very common in many business platforms nowadays. If you are willing to do so with the help of your online business, then this guide is for you.
Before we go through the actual tutorial, let’s take a look at why asking for donations on your website is a good idea.
Why ask for donations on your website?
There can be a lot of reasons to ask for donations depending on the situation, individuals, corporations, projects, and organizations. Similarly, there are also several ways to ask for a donation like door-to-door fundraising, event organization, crowdfunding campaign, street fundraising, online platform, and more. Most of these approaches require a lot of time and effort and might not be convenient for every type of charity.
However, the online platform is one of the best options to raise funds for any kind of donation. You can quickly add donation options on a website without any issues. Then, the website visitors just need to sign up for an account to make a donation.
Your own website is the best place to ask for a donation. You already have an audience where you can expand your reach and share your mission and saves a lot of time too. It is also very easy to set up a button on your website to invite visitors to make an online donation.
How to accept donations in WooCommerce?
The easiest way to accept donations in WooCommerce is by using a dedicated plugin. You can use codes to accept them too, but it will make it very complex.
On top of that, WordPress has a number of plugins to help you accept donations. So let’s see some of the best ones among them.
Potent Donations for WooCommerce
Potent Donations for WooCommerce helps you accept donations in WooCommerce. It allows you to process donations through any of the payment gateways that WooCommerce supports.
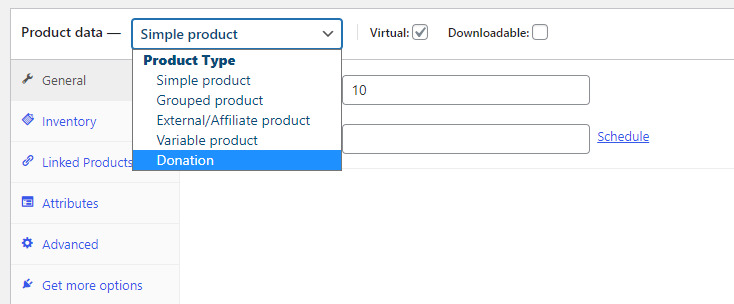
The plugin is free and quite simple. It adds a new product type “Donation” which you can select in the “Product Data” Box of the WooCommerce product editor. When the users select the donation product, they will be able to enter their own desired donation amount instead of choosing from a preset price.
Key Features:
- Set a default amount as well as the amount increment
- Access to hundreds of payment gateways through WooCommerce
- Supports personalized donations
- It is compatible with other WooCommerce plugins
Price:
Potent Donation is a free plugin that is available on the WordPress repository.
WooCommerce Donation Plugin

WooCommerce Donation Plugin is a great option to accept donations in WooCommerce. Your customers can specify and donate the amount they want with the help of this plugin. However, you can also set a predefined amount for the donations if required.
Donations can be displayed as the regular WooCommerce product or on the cart page. Your users can find the “Add Donation” field and donate their contributions here. Also, if a customer wants to skip the cart page and go directly to the checkout, there will also be a link for donation on the checkout page.
Key Features
- Specify the amount by client
- Set predefined amount which cannot be changed
- Full reports of the donations
- Donation products can be added to non-taxable, non-shipping, and non-viewable items
Price
WooCommerce Donation is a premium plugin that can be purchased for 19 USD in CodeCanyon with 6 months of support and future updates.
Accept Donations in WooCommerce using Potent Donation Plugin
Now that we’ve had a look at some of the plugins, let’s see how to use them to accept donations on WooCommerce.
For this demonstration, we’ll use Potent Donations. It is a free plugin that is very easy to use and has adequate features to help you accept donations on your website. But if you prefer to use a different plugin, feel free to choose any of the donations plugins available on the market.
Note: Before we begin, please make sure that you have properly set up WooCommerce using one of the WooCommerce themes to ensure that the method works smoothly.
1. Install and Activate the Plugin
To install the plugin, go to Plugins > Add New from your WordPress admin dashboard and search for the “Potent Donations” in the search bar. Once you see the displayed result, click on Install Now.
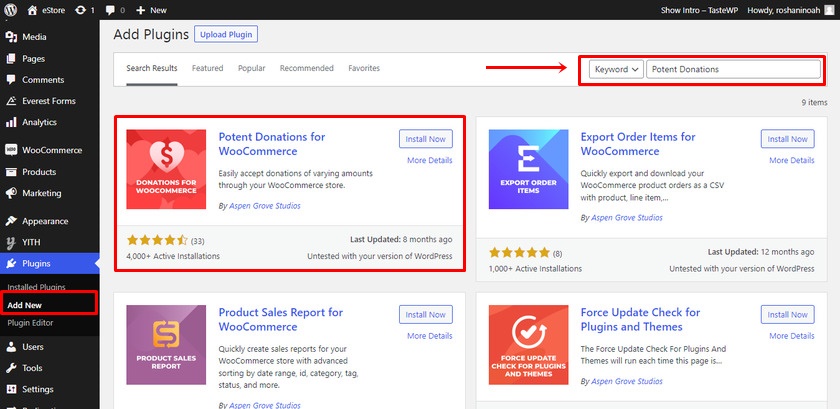
Now click on Activate button after the installation is complete.
If you use a premium plugin, you’ll have to upload and install it manually. Please have a look at our detailed guide to install a WordPress plugin manually for more information.
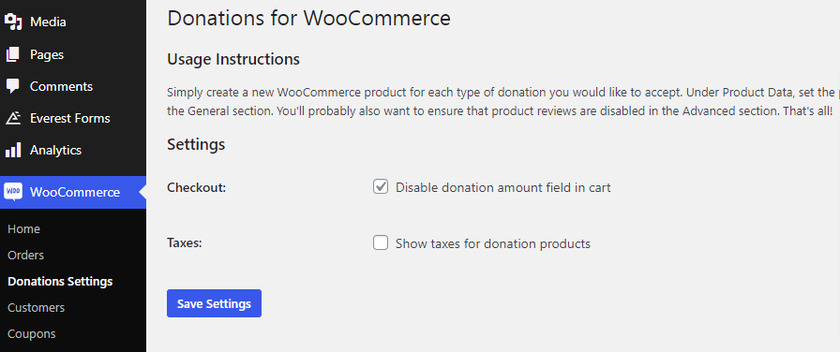
2. Configure settings to accept donations in WooCommerce
Once the plugin is activated, you can go ahead and configure the settings. To do so go to WooCommerce>Donations Settings from your WordPress dashboard.

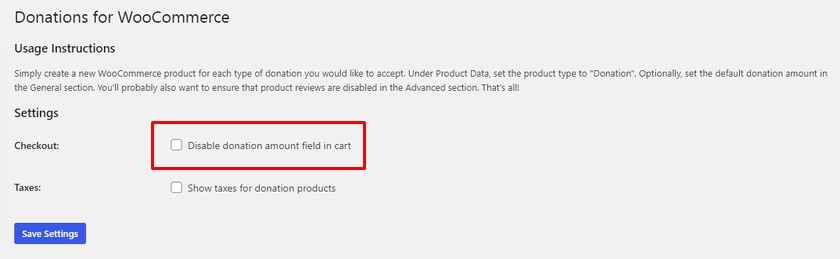
The donation settings page includes two options which are checkout and taxes.
Potent Donation displays the donated amount both on the product page as well as in the cart. Customers can specify the amount they want to donate in the amount field in the cart. But if you check the box and disable the donation amount field in the cart, then the amount cannot be changed by the customers.
You can also decide whether you want to display the taxes for the donation products or not from the settings page. If you want to show taxes for the donation products then check the box. Otherwise, leave it as it is.
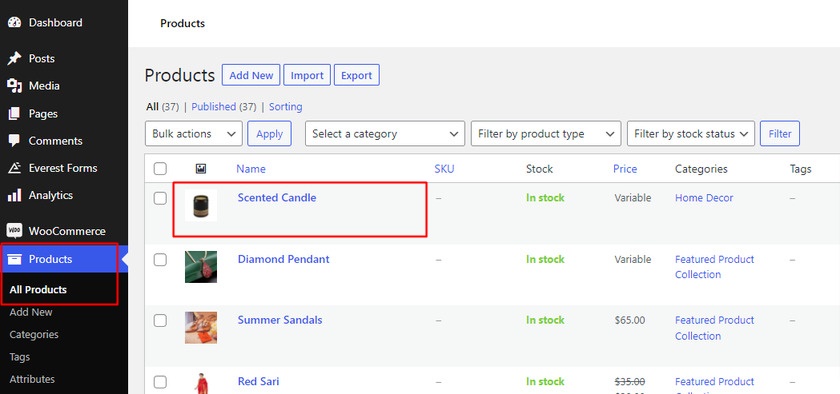
3. Add a donation amount to the product
Once you configured the settings to accept donations in WooCommerce, you can now add a donation button to a new or existing product. For that, go to Products > All products from your WordPress dashboard.
We’ll be adding the donation button to the existing products for this demonstration. So, all you have to do is click on the selected product.
But you can add a new donation product to your website for your next step. All you have to do is click on Add New. The process is very similar.
By default, a new product type option “Donation” is added as soon as you activate the plugin.
You can scroll down and click on the drop-down list of “Product Data”. Since we are adding a donation button to the product, select the “Donation” option.
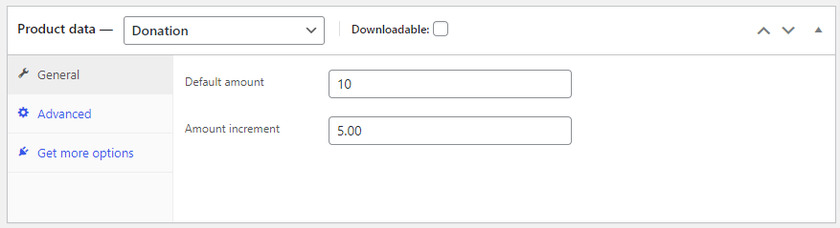
After that, you can set the default amount for the donation. For example, we have set the donation amount to $10.
Just below the default amount section, there is an “Amount Increment” option as well. Customers can change the default amount and set different amounts by simply using the up and down arrow in the amount field.
Here we have set $5 for the amount increment. That means whenever the customer clicks on the up arrow the default amount increases by $5 dollars.
After you have made all the necessary changes to the product, just Update it.
When you preview it, you will be able to see the donation button on the product page. The donations can also be incremented by using the arrows according to the specified price.

That’s it! This is how you accept donations in WooCommerce by creating a donation product.
Remove donation amount field in cart
In some cases, you may need to accept donations in WooCommerce by removing the donation amount in the cart. This is very common when items are sold or auctioned especially for a charitable cause. If you own a similar website and want a similar option, you can use this plugin as well.
Once again, go to the settings page of the plugin. As we saw earlier in the configuration section, we do have the option to enable or disable the amount field in the cart. It is basically the same thing.
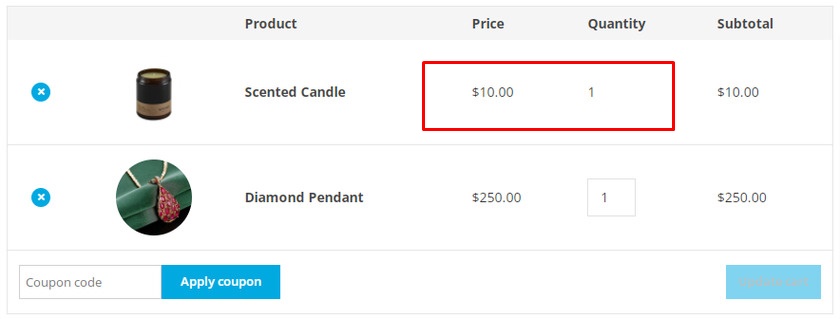
Just check the option to disable amount field in cart and save the settings.
When your users add the donation product to the cart, they won’t be able to change the prices of these products.
Accept Donations in WooCommerce with PayPal Donate Button
Adding a donation product is one of the most convenient ways to accept donations in WooCommerce. However, adding a PayPal donate button is also a very common approach to accept donations.
You can easily integrate WooCommerce with PayPal as a payment gateway for your online store. If you’ve already done it, you just have to install a dedicated WooCommerce donation plugin for PayPal. Then you can add a PayPal donation button in no time.
It can save you a lot of time rather than creating a donation product and adjusting its donation amount. Here, everything is handled by the default PayPal donate button.
1. Install PayPal Donations
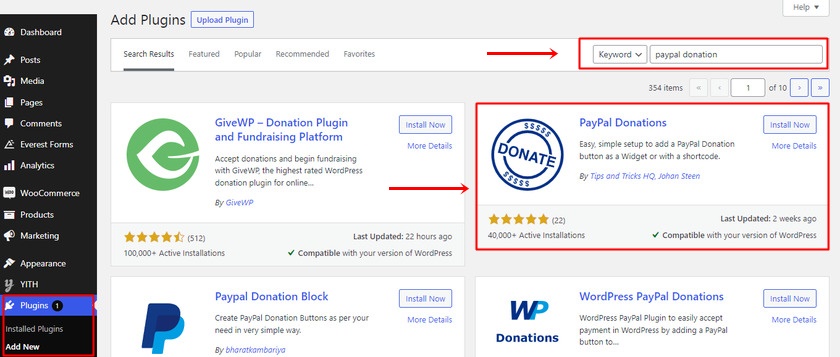
For the demonstration, we’ll be using a free “PayPal Donations” plugin. Let’s start by installing and activating the PayPal Donations plugin. Again, go to Plugins > Add New from your WordPress dashboard and search for the plugin.
Then, click on Install Now to install the plugin. Activate the plugin after the installation is complete.
2. Configure Settings for PayPal Donate Button
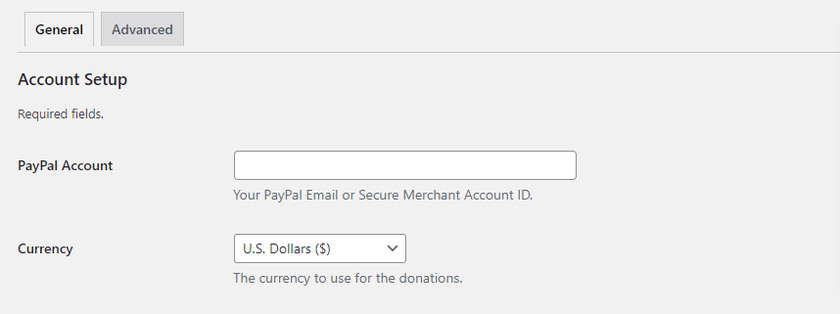
After activating it, we visit Settings > PayPal Donations to configure it.
To get started, navigate to the General menu and enter your PayPal registered email address or the merchant account ID. Then, add the currency that you want to use for the donation to complete the account setup.
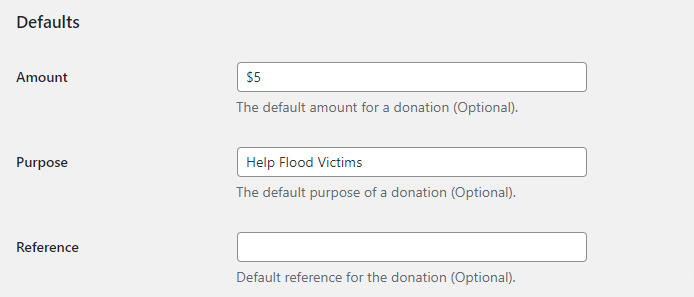
If you scroll further, you can add a fixed amount, the purpose of the donation, and a reference for the PayPal donations.
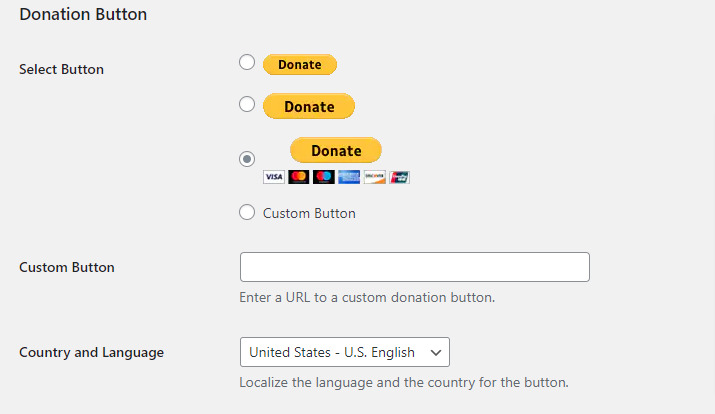
And lastly, you can select the button style that you want from PayPal. Similarly, you can also enter a URL if you want your own customized button image. Moreover, you can also set a specific country and language for the button.
Additionally, you can create a gratitude page or a thank you page for the donors in the Optional Settings. All you have to do is enter the page style from your PayPal account and the URL for the return page. The return page is redirected to the donator after the donation is complete.

Once you are done with the configuration, make sure to click on the Save Changes button.
3. Add the Button to the WooCommerce Store
After the configuration, now we can add the donate button anywhere on our site using the [paypal-donation]shortcode.
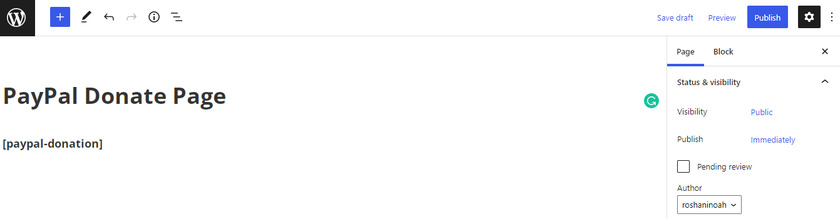
This is what the PayPal donation will look like on your front end.

On the other hand, we can add the PayPal donation button as a widget in any of the widget areas. For that go to Appearance > Widgets.
Here, you can find all the available widget areas and widgets. Simply click on the specific location where you want to place the PayPal donate button.
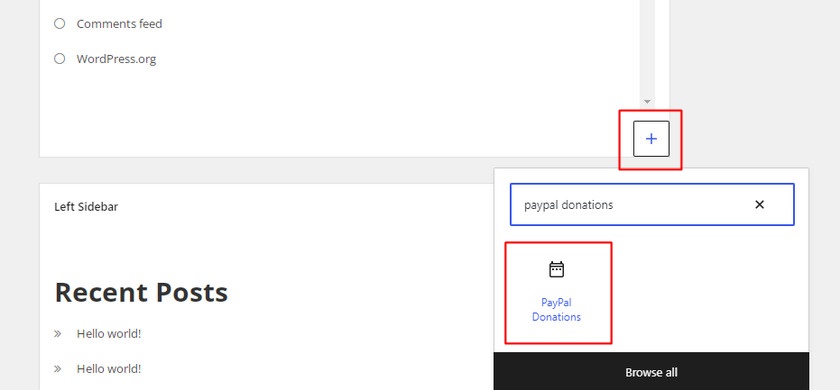
You can see an “Add Block “ section at the end of every widget and sidebar. Click on it and search for PayPal Donations to add the button. It will automatically be added to your desired site location.
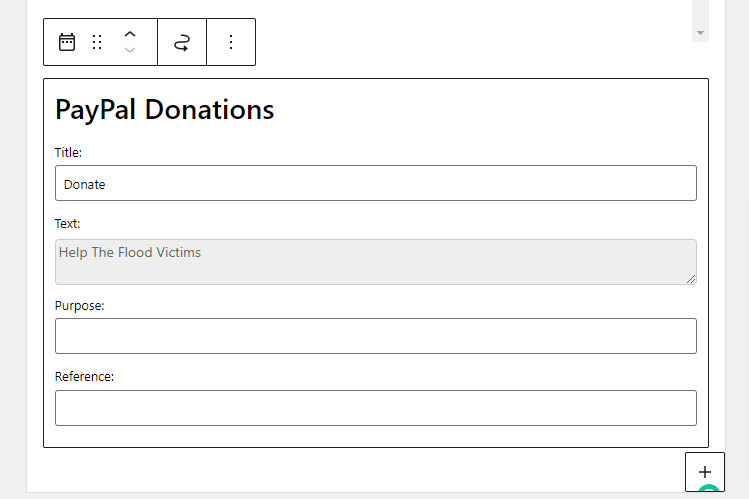
Now, you can edit the donate button block by adding a title along with a small description for it in the text box. You can also add the purpose of the donation and a reference in the block if needed. After filling in all the necessary details, click on the Update button.
When you preview your website, you will be able to see the donation button on the widget area. Therefore, you can now accept donations in WooCommerce using a PayPal donate button as well.

Bonus: How to Hide Price in WooCommerce
You already know how to accept donations in WooCommerce and hide the donation amount as well. Similarly, you might need to hide the prices of the products too in some cases. This can be very useful if your whole website is based on donation products too.
You can easily hide prices in WooCommerce by using code snippets. All you have to do is add the following scripts to the functions.php file of your theme.
Since we will be changing the core files of the theme, it’s best to create a child theme programmatically or by using one of the best child theme plugins. This will ensure that the changes are saved even if you update your WordPress theme. Similarly, we recommend you back up your website too since any unnecessary changes to these files may lead to further issues in your website.
Now, go to Appearance > Theme Editor from your WordPress dashboard and open the functions.php file.
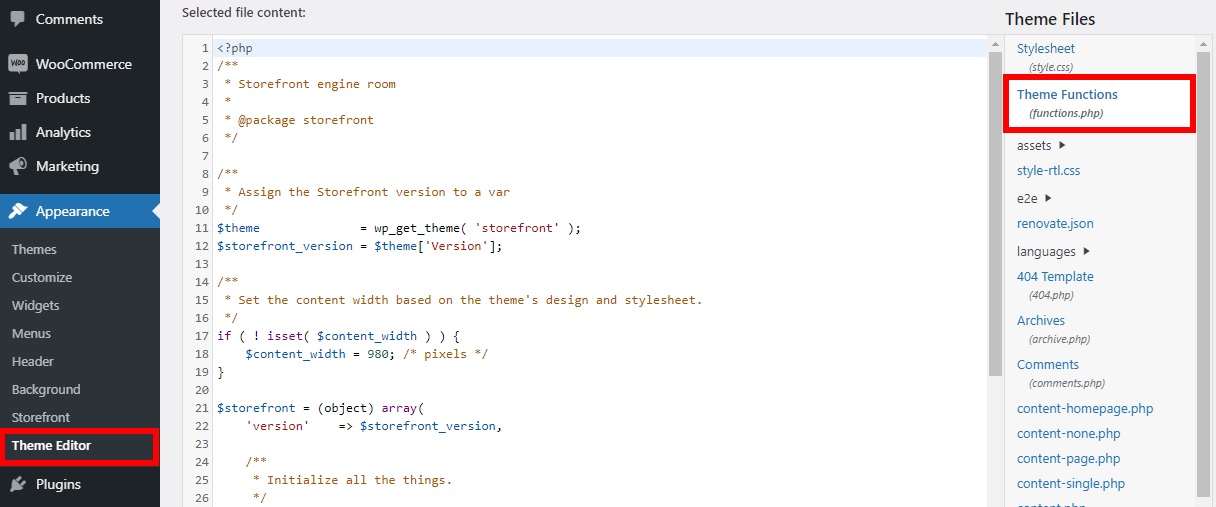
Then, add the following code to the editor and Update the file.
add_filter( ‘woocommerce_get_price_html’, ‘QuadLayers_remove_price’);
function QuadLayers_remove_price($price){
return ;
}
This code lets you hide the prices of all of your WooCoomerce products. But what if you want to hide the prices for visitors but make them visible for yourself. For that, you need to use the following code and add a conditional.
add_filter( 'woocommerce_get_price_html', 'QuadLayers_remove_price');
function QuadLayers_remove_price($price){
if ( is_admin() ) return $price;
return ;
}
The above code lets you see the prices but hide them from the users. Also, keep in mind that even though these snippets hide the prices from the product and cart pages. But They will be later displayed on the checkout page.
Additionally, if you want to completely hide a specific product rather than just price then you can do that straight from your Product page.
Go to the WordPress dashboard > Products. Now select the product you want to hide from the users. Thereafter, click on edit and change the visibility to Password Protected or Private instead of Public.
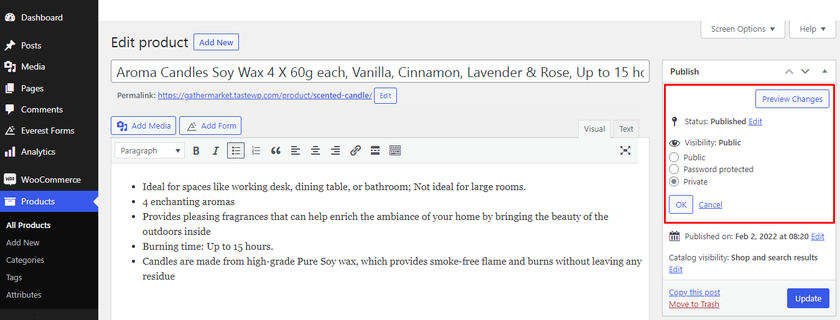
Lastly, click on Update to save the changes.
If you want to learn more about how to hide the prices on your online store, have a look at our thorough guide to hide prices in WooCommerce.
Conclusion
All in all, accepting donations in WooCommerce is a good idea for you, your customers as well as the motive of the cause too. In this guide, we saw how we can accept donations in WooCommerce by creating a full-fledged donation button effortlessly without costing a fortune.
Using a plugin is the most suitable approach to add a donation button without embedding codes. You can set the default amount or allow the customers to set the amount according to their will.
Accepting donations with the most popular payment service PayPal is also a piece of cake. Just use a dedicated plugin to add the donation button.
We hope this tutorial was very helpful for you. If so, then show us some love in the comment section below!
And if you want to customize your WooCommerce site to the next level then check out these resources:
