How to Customize WooCommerce Sidebar
An online store can profit significantly from tailoring the WooCommerce sidebar, improving the customer experience and overall performance. For all this to happen, you need to customize the WooCommerce sidebar of your website.
Each online store is distinct, with its branding and selection of products. Customizing the WooCommerce sidebar may make the purchasing experience more aesthetically pleasing for your business and more effective for showcasing your products.
A well-organized sidebar can make it easier for customers to find what they want. By arranging the sidebar, you can put product categories, filters, and other crucial components so buyers can navigate more easily.
Why Customizing WooCommerce Sidebar Is a Good Idea?
The sidebar is great for advertising ongoing specials, discounts, or offers. Personalizing it lets you draw attention to your campaigns by making eye-catching banners or highlighting particular products.
Depending on user behavior, preferences, or demographics, you may customize WooCommerce sidebar content with the right plugins and customization options. This focused strategy can make product recommendations more pertinent and boost conversion rates. So, continue reading to customize the WooCommerce sidebar.
How to Customize WooCommerce Sidebar?
You can customize the WooCommerce sidebar by changing the style, appearance, and content components to suit the requirements and branding of your store.
Depending on your WordPress theme and technical skill, the customization you can make may vary. Before customizing the WooCommerce sidebar, you should always make a website backup. This ensures you may return to the earlier configuration if something goes wrong during the customization process.
We will also discuss specific changes to the sidebar later in the article. Before moving to the article’s core, let’s see some notable things you should know before customizing.
Access the Sidebar Widgets
Log into your WordPress dashboard, then select Appearance » Widgets. There, you will see the widget options.
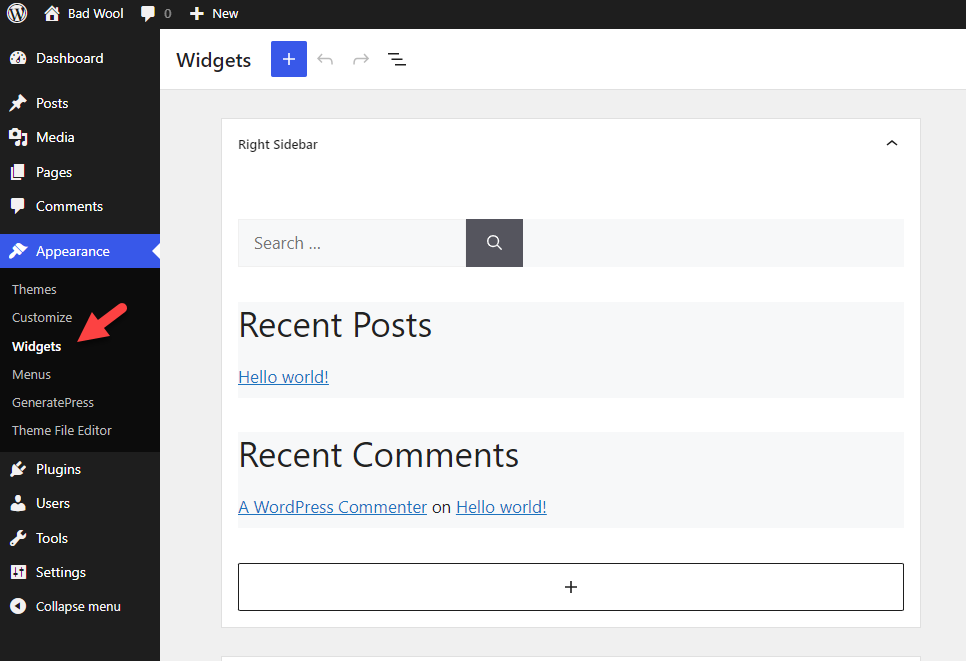
If the goal is to add minor changes to the website, you can use this option. You can click the + icon to add more widgets to the sidebar. Once you have modified the options, save the settings.
Choose a Compatible Theme
Ensure the WordPress theme supports and offers sufficient sidebar customization possibilities. While some themes could need custom coding, others also provide built-in specific customization options for the WooCommerce sidebar.
Add, Reorder, or Remove Widgets
Start by adding, rearranging, or removing the sidebar’s current widgets to suit your preferences. To remove widgets from the sidebar, drag them into the Inactive Widgets area.
Custom Styling
You might need to include unique CSS code to further alter the widgets’ appearance. This way, you can change the colors, fonts, spacing, and other visual components to coincide with your logo.
Code Customization
If you are proficient in web development and have technical expertise, you can alter the theme’s template files to change the sidebar. This strategy calls for caution, though, as any faults in the code could result in issues with your website.
Now, we will discuss how to customize the WooCommerce sidebar for a better user experience.
Best 10 WooCommerce Sidebar Customizations
1. Display Best-Selling Products
Have you ever walked into a store and taken anything from the rack next to the cash registers?
We all understand that those things only persuade us to purchase more, yet we continue to fall for the trick. In WooCommerce, you can do the same. You can use a plugin or custom code to show top-selling products in the WooCommerce sidebar.
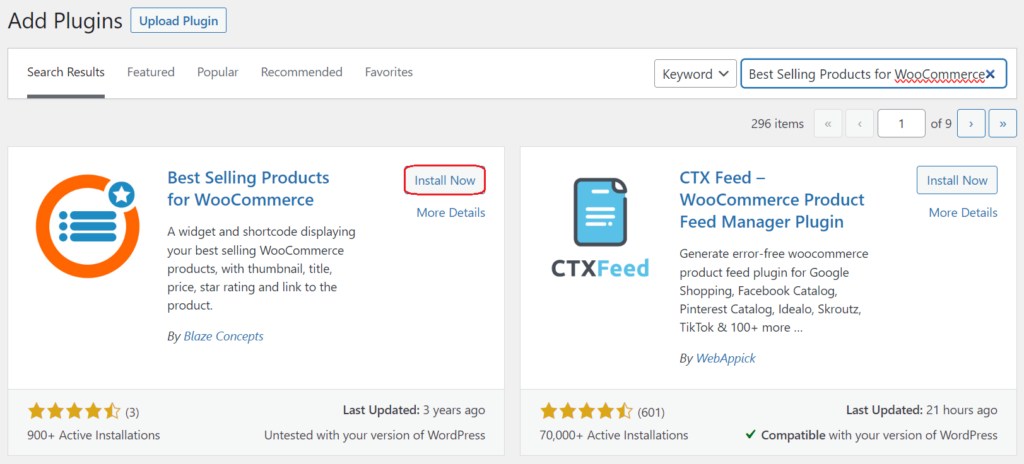
However, you may quickly display top-selling products in the sidebar with the help of several plugins available in the WordPress repository. One well-liked plugin is Best Selling Products for WooCommerce.
Here’s how you can use the plugin to customize the best-selling products.
Begin by navigating to your WordPress website and logging into your dashboard. Once inside, proceed to the Plugins section, and from there, choose the Add New option.
In the search bar provided, enter Best Selling Products for WooCommerce. Upon locating the plugin in the search results, click Install Now. After the installation, select Activate to get the plugin up and running.
There are no additional configuration options required. After activation, you can go to the widgets area and add the best-selling products widget.
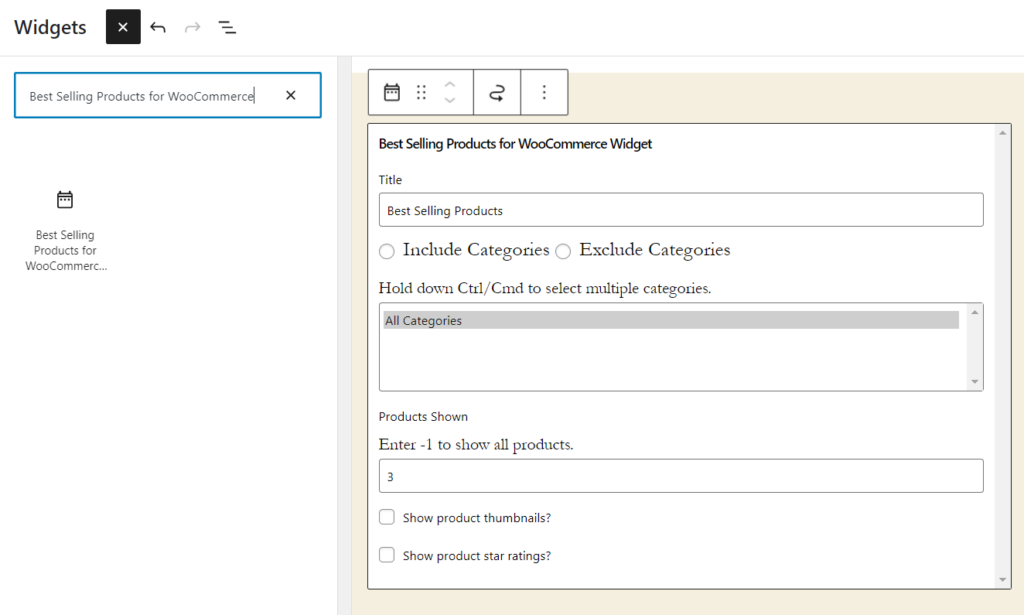
You can edit the
- Title of the widget
- Include/exclude specific categories
- Show product’s thumbnails
- Display star ratings
Via the widget options.
After making the changes, save the widget. From now on, you will see a list of best-selling products on the front end of the website.
2. Show a Newsletter Signup Form
If you want to add a newsletter signup form to your site’s sidebar, you can navigate to the Appearance tab on your dashboard and, from there, head over to the Widgets section.
Here, you’ll find the Custom HTML widget. Drag this widget to your preferred spot on the right-hand side of the WooCommerce sidebar, and you’re all set. The widget is now positioned and ready to display your custom HTML content.
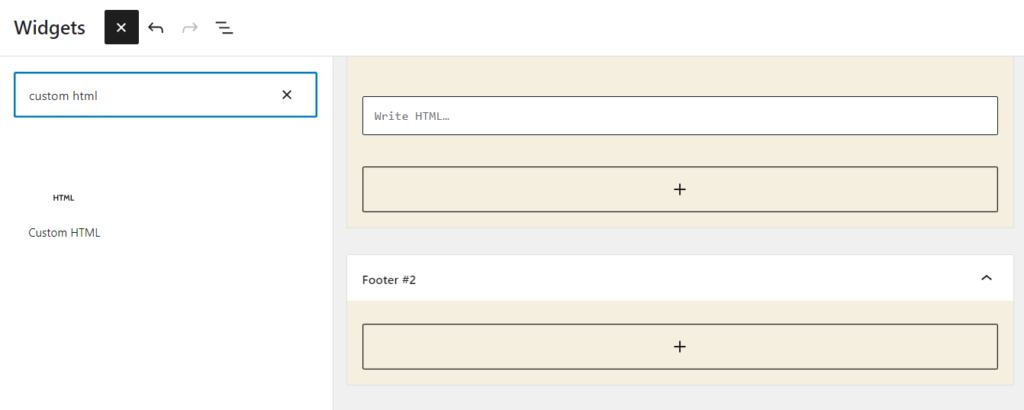
Create a newsletter subscription form at your email marketing service provider (like Mailchimp). They typically offer options to alter the form’s look and fields. After the form creation, you will see a custom HTML code.
Copy and paste the signup form’s HTML code in the Write HTML field of the Custom HTML widget in the WordPress dashboard. After saving the changes, the newsletter signup form should be visible in the WooCommerce sidebar.
You can also get a custom email opt-in plugin with a widget. This way, you do not need to deal with any HTML code. You can easily link the email service provider and add the opt-in form to the sidebar.
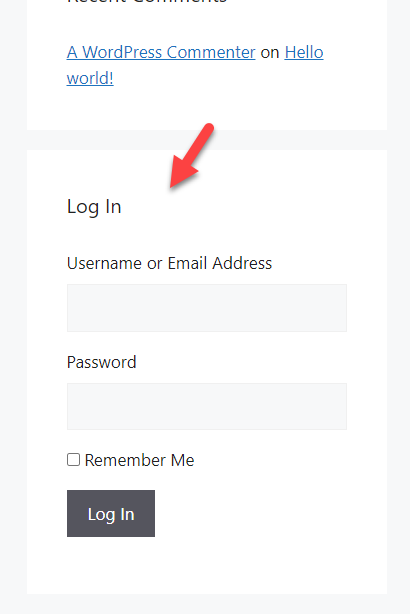
3. Add User Login Widget
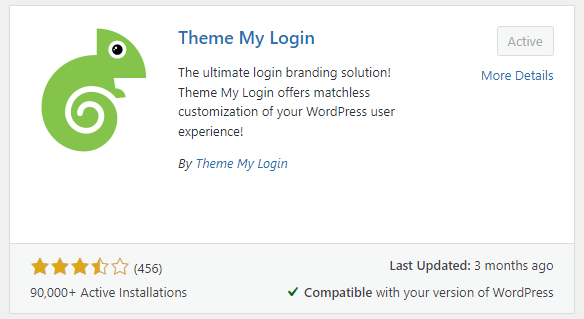
User login is another helpful thing you can provide your visitors. The Theme My Login plugin can add a user login widget to the WooCommerce sidebar. Here’s how to do it.
First of all, find Theme My Login and activate it.
On the left-hand side, you can see the plugin’s settings.
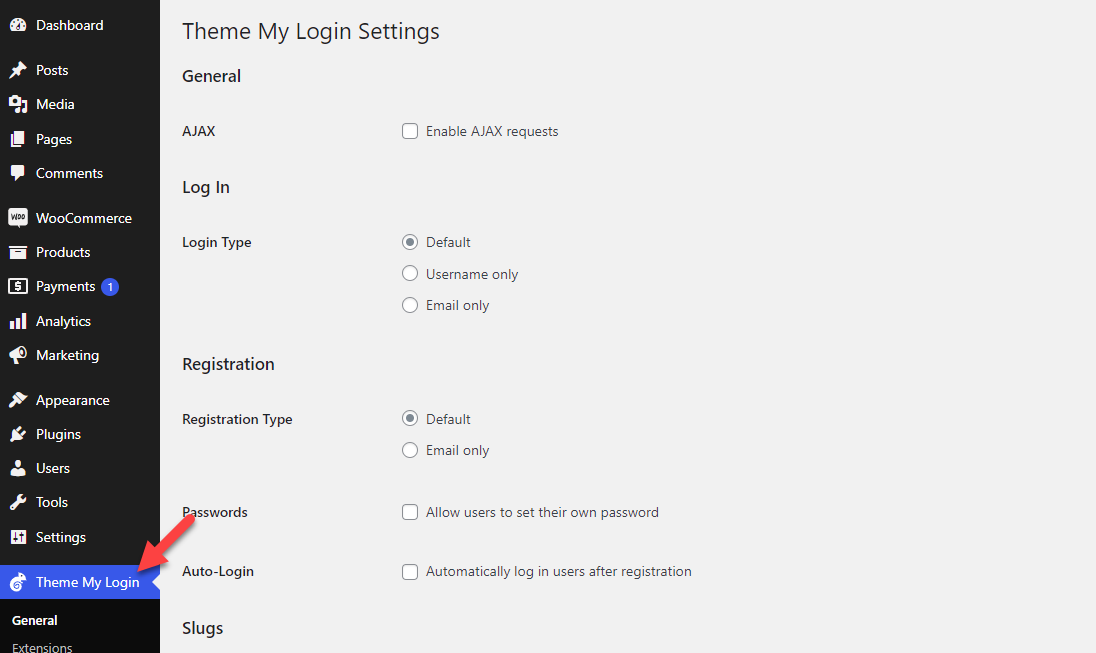
You will see several customization options like:
- General
- Log in
- Registration
- Slugs
And so on.
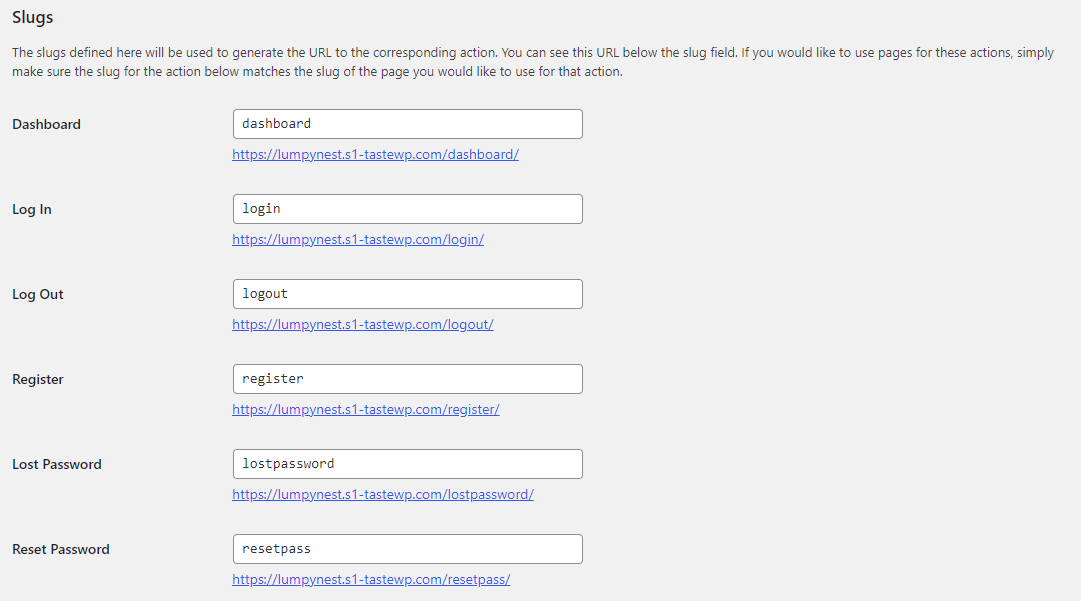
The main thing you need to check is the slugs. Here is how to configure the login, log-out, register, and forgot password URLs.
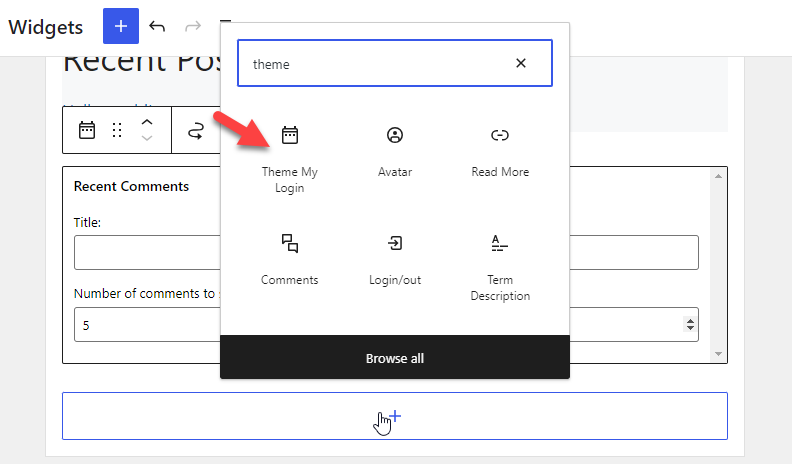
After customizing them, go to the widget’s settings. Now, you can add the theme my login widget to the sidebar.
After adding the widget, you will see multiple options for the form.
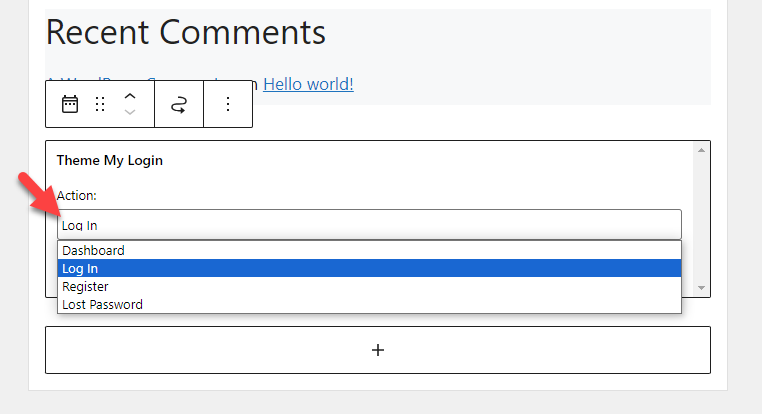
Pick one according to your preferences. In this case, we will display the login form on the sidebar. So, from the actions, we will choose the login option.
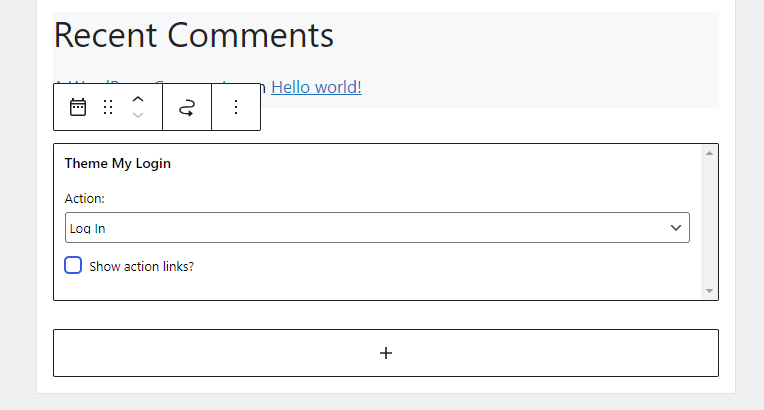
Now save the changes. After that, check the website from the front end. You will see the login option.
Once you are done, let’s move to the next section, where you will learn how to display customer reviews on the WooCommerce sidebar.
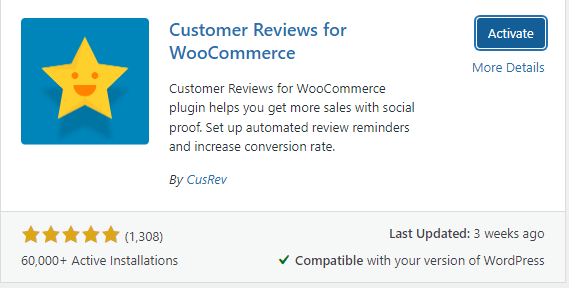
4. Customer Reviews
If you run an online store, showing customer reviews will help you gain more trust. By default, WooCommerce doesn’t come with this feature. You must use a dedicated plugin to display customer reviews on the sidebar.
In our case, we recommend using the Customer Reviews for WooCommerce plugin. As usual, install and activate the plugin on your store.
On the left-hand side, you will see the settings.
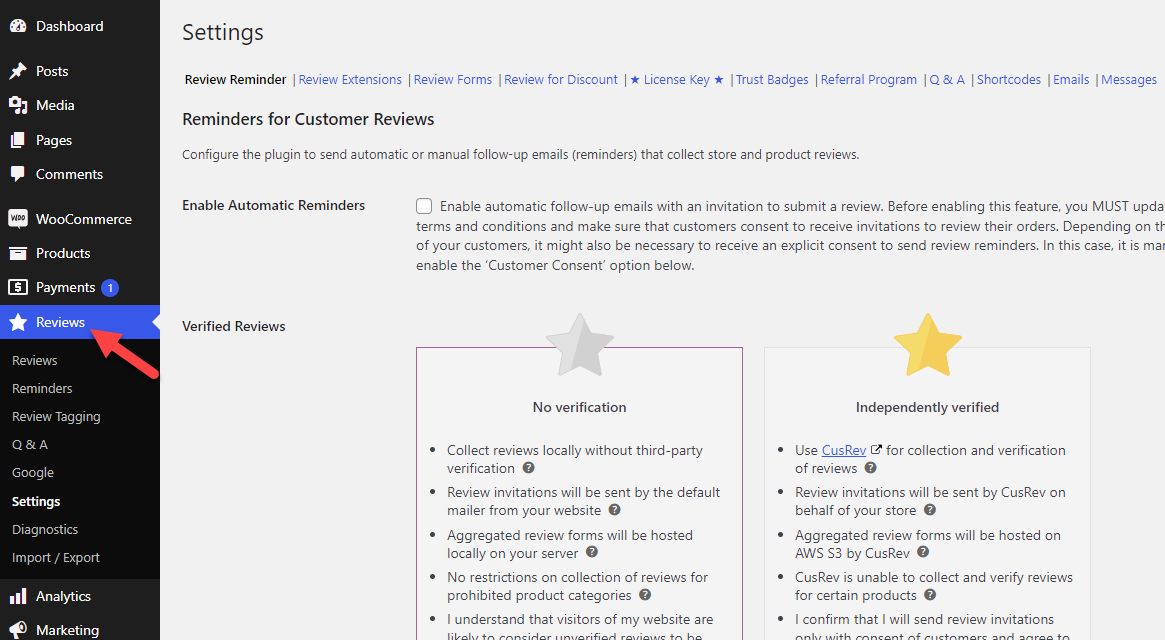
Configure the settings as you like. After that, go to the widgets section. There, you will see three custom widgets:
- Reviews by category
- Reviews by product
- Review slider

As you can expect, if you need to pull reviews from a specific category, the first option is ideal. On the other hand, to fetch reviews of a particular product, use the second option. Finally, use the slider option to display the reviews in a slider.
Once you have selected an option, you can customize it further and save every change.
That’s it!
This is how you can display customer reviews on your WooCommerce sidebar. Next, let’s see how to display social media handles on your WooCommerce sidebar.
5. Social Media Handles
These days, most online businesses have their own social media handles. Follow this method to display your Facebook, Twitter, and Pinterest pages on the sidebar. In this case, we will use a plugin called Simple Social Icons.
Please install and activate it on your website.
![]()
There are no dedicated settings available for the plugin. You can go to the widgets area and customize it. To do it, go to the widgets area and search for Simple Social icons.
![]()
After finding it, add it to the website.
![]()
Now, you can start customizing it. The main customization options are:
- Title
- Design
- Color
And so on.
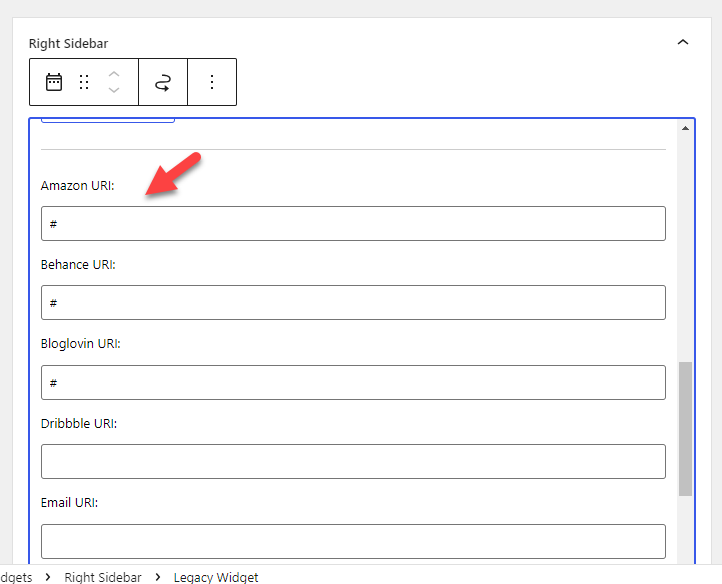
Once you have completed that part, you can add your social media URLs here:
After that, save the settings and check the website from the front end.
![]()
That’s it!
6. Call to Action Button
If you need to get targeted traffic to a landing page, adding CTA (Call to Action) buttons would be ideal.
In the field, you can enter the HTML code. After entering it, save the changes, and you will see a CTA button on the front end of the website.
7. Limited Time Deals
If you need to attract more customers and potential buyers, you should create discount offers. Studies show that more people complete purchases when a discount or free shipping is available. Hence, if you have any limited-time deals, displaying them on your WooCommerce sidebar is a great idea.
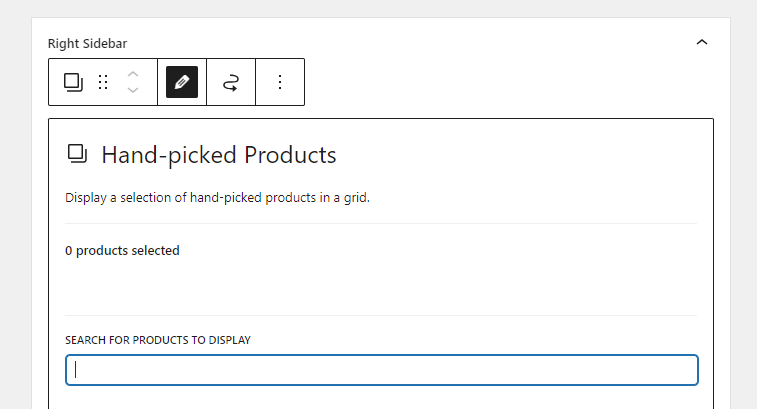
If you have a deal campaign for a whole WooCommerce category, you can choose the widget called Products by Category.
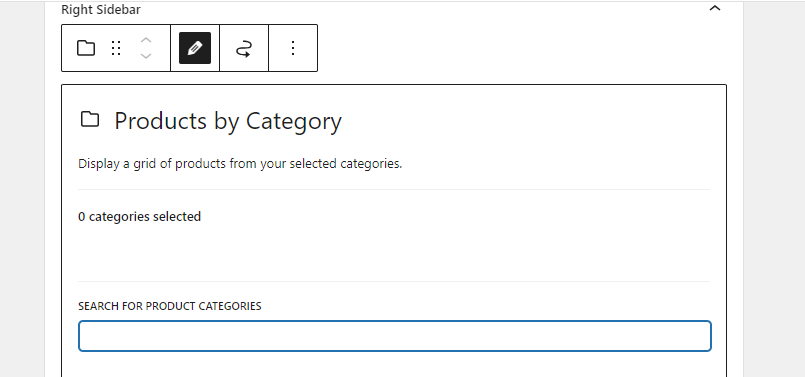
Search for the product category you need to display. On the other hand, if you are running this deal for only specific products, use the Hand Picked Products widget.
Here, you can search for specific products and display them.
That’s it.
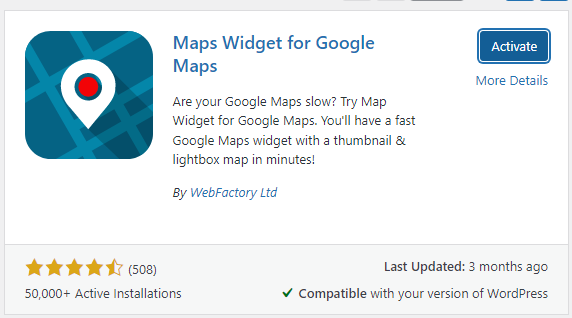
8. Google Maps
You should add a location map on your sidebar if you have a store in any physical location. You can complete the job with the Maps Widget for the Google Maps plugin.
This section will show you how to use the plugin to add a map to your WooCommerce sidebar. The first thing you should do is install and activate the plugin on your website.
You need to add an API key to start using the plugin. After verifying the API key, you can go to the widgets, add the Maps Widget for Google Maps, and start customizing it.
You can see multiple customization options, such as:
- Map size
- Map type
- Color scheme
- Zoom level
- Pin type
- Pin color
- Language
And so on. After adding the map to your sidebar, you can save the changes. The free version of the plugin comes with limited features. If you need more advanced features, you should get the premium version.
9. Search Widget
If you have a lot of products in your online store, you should add a search feature. WordPress has this feature, so you do not need extra plugins.
Go to the widgets option to add a search widget to your WooCommerce sidebar.
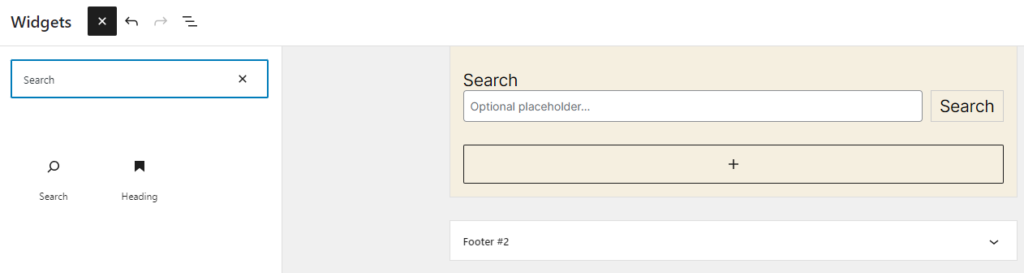
You can add a placeholder too (optional). After adding it, you can save the changes. You can always use WordPress search plugins like SearchWP to enhance the features.
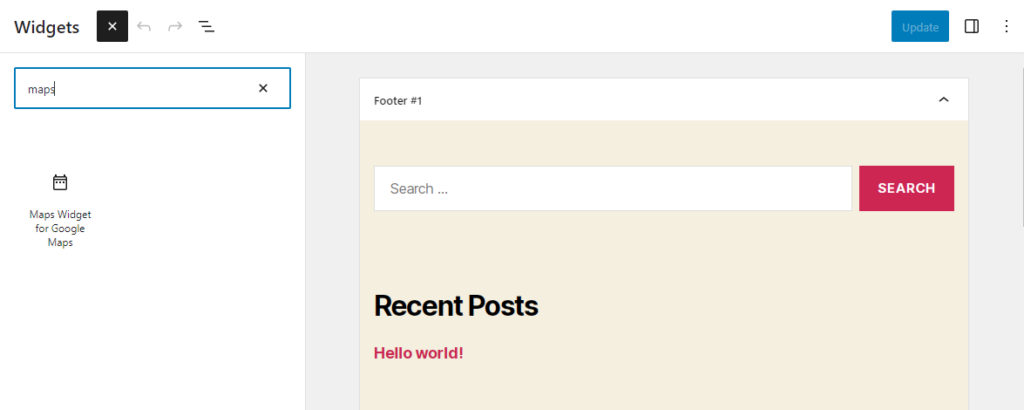
10. Latest Blog Posts
If you have an active blog, displaying the recent blog posts on the sidebar is a great idea. Without using any third-party plugin, you can achieve this. Here’s how you can display the latest blog posts on the sidebar.
First, look for the recent posts widget and add it to the sidebar.
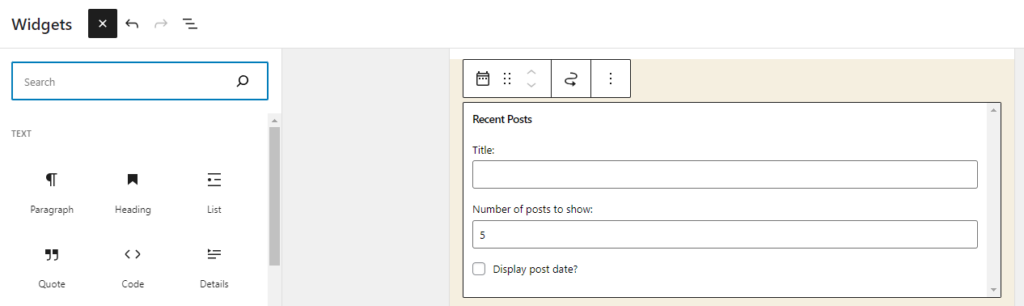
You can give any widget title you need. After that, choose how many posts you need to show. You can also display the published date along with the post title.
Save the changes, and you are ready to go.
BONUS: Best WooCommerce Sidebar Plugins
In this section, we will show you two of the popular WooCommerce sidebar plugins you can use:
- WP Sticky Sidebar
- Custom Sidebars
Both plugins have different features. Let’s see what makes them unique.
WP Sticky Sidebar
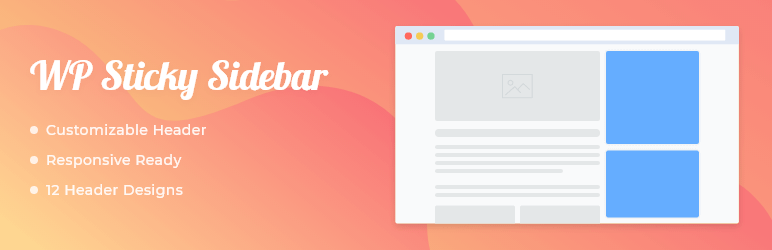
Check the WP Sticky Sidebar on your website or WooCommerce store if you need a sticky Sidebar. It is one of the lightweight plugins available to make sticky sidebars on WordPress. The plugin comes with minimal configuration options. So, you do not need to be a tech-savvy person to customize it.
You can also disable the floating sidebar on mobiles or desktops. So you have total control of the options.
Custom Sidebars
Use Custom Sidebars, a versatile widget area manager, to control and replace your website’s sidebars and other widget areas.
You can create personalized sidebar setups and decide which widgets appear on each page or article of your website. With just a few clicks, you can use this plugin to create your custom sidebars quickly, customize them by including widgets, and replace the standard sidebars on any posts or pages you like.
You can check out this article if you need to learn more about WordPress sidebar plugins.
Conclusion
Creating an online store is simple. You can make any store with a robust CMS like WordPress and a plugin like WooCommerce. But since this is a customer-centric business, you must optimize it. So many methods are available to optimize an online store’s conversion rate.
Some of the best ones are setting up upselling, running discount campaigns, offering free shipping, etc. But have you ever tried to customize the WooCommerce sidebar to improve the conversion rates and user experience?
In this article, we have shown you ten ways to customize the WooCommerce sidebar. The significant modifications you can make are displaying blog posts, search widgets, social media icons, customer reviews, trending products, etc. Most of these methods are beginner-friendly, and you do not need to use custom codes.
Which modifications are you going to try?
Let us know in the comments.
Here are a few related articles you might love:
- Best WordPress Sidebar Plugins (Free and Premium)
- How to Create a Custom Sidebar in WooCommerce
- WooCommerce Sidebar Not Showing Up: How to Fix It
