
How to Set up a Helpdesk in WordPress
Are your customers having issues related to your products or services? If so, you can set up a helpdesk in WordPress to resolve the issue on time.
In this article, we’ll show you the easy-to-follow steps to set up a helpdesk for your clients and customer. But before we go through the process, let’s have a brief look at why it is important to have a helpdesk on your WordPress website.
Why Add a Helpdesk in WordPress?
No matter what type of online business you have, there’s no better way to keep your customers happy than by offering a strong customer support system on your website. One of the best ways to provide customer support is having a helpdesk on a website.
The helpdesk is the perfect solution to solve the doubts or problems of customers related to specific resources. Even though many companies use support channels like chatboxes and FAQs, helpdesks are a more direct and efficient service. They resolve any concerns of your website visitors in the shortest possible time.
And if you have a WordPress-powered website, implementing a helpdesk can be quite easy. Compared to other helpdesk software and tools, you can use helpdesk plugins that are budget-friendly. Similarly, plugins are lightweight so they won’t affect the performance of your website.
How to Set up a Helpdesk in WordPress?
The best way to set up a helpdesk in WordPress is by using a plugin. Plugins increase the overall functionality of the website and it’s the same with the helpdesk as well. They are developed with specific features that are essential for operating a helpdesk properly on your website.
There are a number of plugins available to set up a helpdesk in WordPress. Let’s take a look at the most popular ones:
Awesome Support – WordPress HelpDesk & Support Plugin
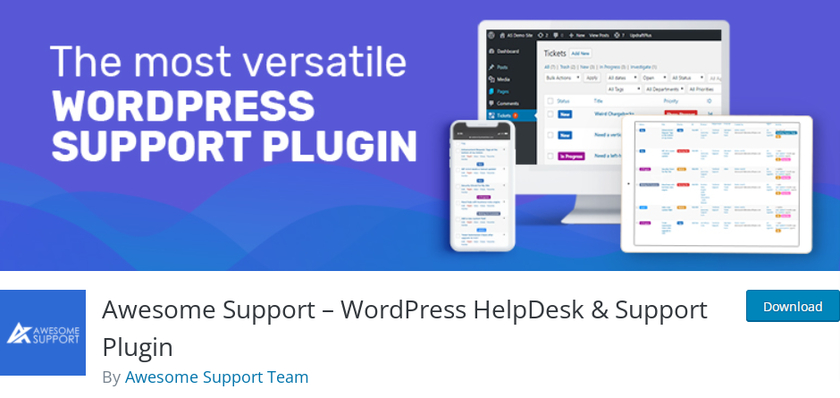
Awesome Support is one of the best plugins to set up a helpdesk in WordPress. You can easily create a customer support system that allows users to create a ticket from the front end. This plugin is packed with more features compared to some of the premium support ticket systems out there.
In addition, users can not only submit the ticket but attach files of various file types. You’ll be able to easily manage tickets on your backend, and your users will be able to use a handy front-end message thread to communicate with you.
Key Features:
- Unlimited Tickets even in the free version
- Control the file size of attachments
- Can be integrated with Zapier
- WooCommerce products can be synchronized
Pricing:
Awesome Support is a freemium plugin. You can get the free version from the official WordPress repository. The premium version starts at 149 USD per year of updates and support.
SupportCandy – Helpdesk & Support Ticket System
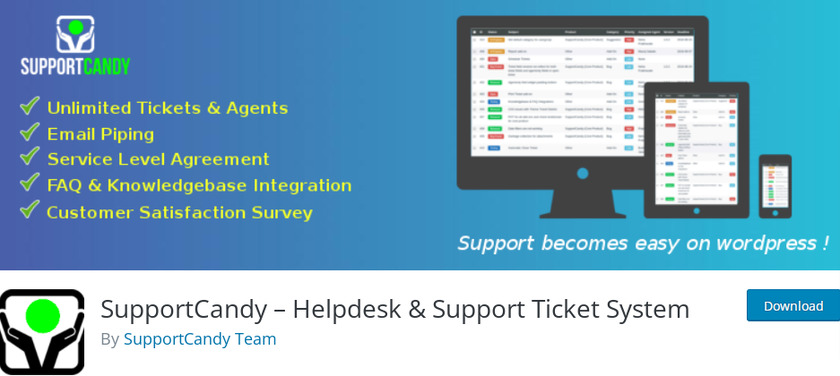
SupportCandy is another easy-to-use helpdesk ticket system that comes with a free version and a premium version. This plugin allows for a full frontend and backend interface for agents and gives your visitors the ability to create guest tickets in case they don’t want to register a new account.
The plugin also comes with the Ajax functionality, a responsive design that will make it work well on any screen size, a customizable ticket form, customizable email notifications, and much more. If you opt for the premium version you’ll have the ability to export your tickets to CSV format. Not only that, but you can also access the full graphical report of the ticket.
Key Features:
- Submit tickets without login or register
- Create an additional field in the ticket form
- Compatible with WPML plugin
- Customize email notifications
Pricing:
SupportCandy is a freemium plugin. You can get the free version from the official WordPress repository. The premium version starts at 49.99 USD per year with a single site license.
Now, let’s use the plugin to set up a helpdesk in WordPress. For this tutorial, we will be using the “Awesome Support” plugin since it is versatile and offers many support features. To begin, the first step is to install and activate the plugin.
But before that, we strongly suggest you set up WooCommerce without skipping any steps and always use a compatible WooCommerce theme to ensure no conflicts while following this guide.
Step 1: Install and Activate the Awesome Support Plugin
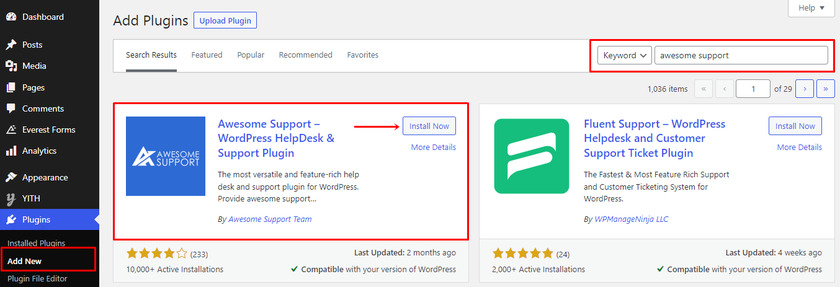
To install the plugin, go to your WordPress dashboard and click on the Plugins > Add New.
This redirects you to the plugin page where you can find a list of recommended plugins. On the right-hand side, you can see a search bar. Now type ‘awesome support’ in the search field.
Once the plugin appears in the displayed result, click on the Install Now button. It only takes a few seconds to install the plugin. Make sure to Activate the plugin after the installation is complete.
And there you have successfully downloaded the free version of the plugin. However, if you want to download the premium version of this plugin then you can go to the official plugin page. If you’re not sure how to install the premium version of this plugin, then check out our article on how to install the plugin manually.
Step 2: Set up the Plugin
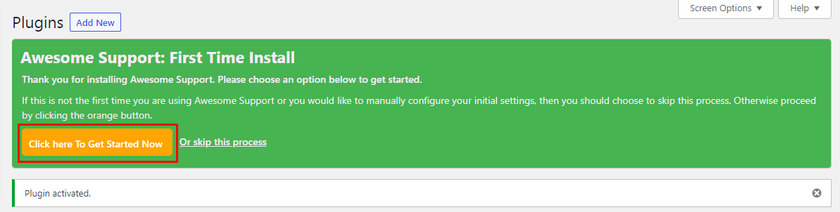
As soon as the plugin is activated, you can see a message displayed on the top with options to set up the plugin.
Click on the “Click here To Get Started Now” button if this is your first time using the plugin or you haven’t set up the plugin yet.
Upon clicking the button you’ll be redirected to a setup wizard for the helpdesk on your WordPress website.
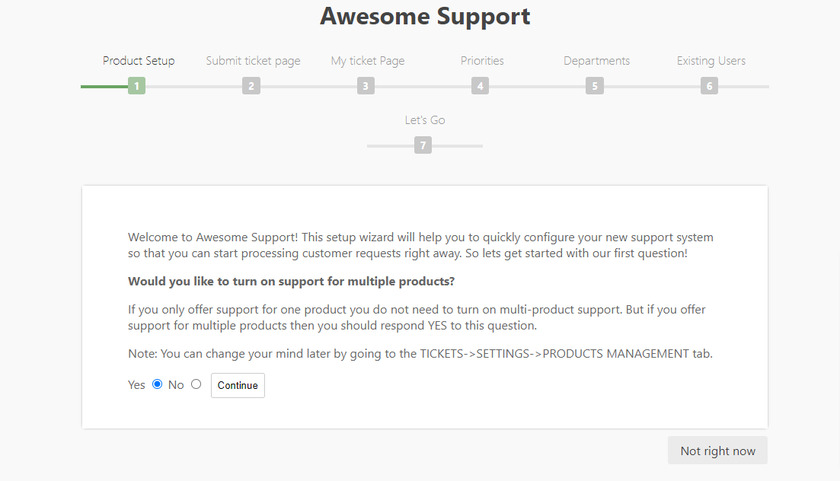
The first thing you’ll see on the wizard is the product setup option where you can choose to turn on the support for multiple products. Instead of multiple products, if you just sell a single product then select the No option. Although, you can change the settings later from the product management tab if you want to add it to multiple products in the future.
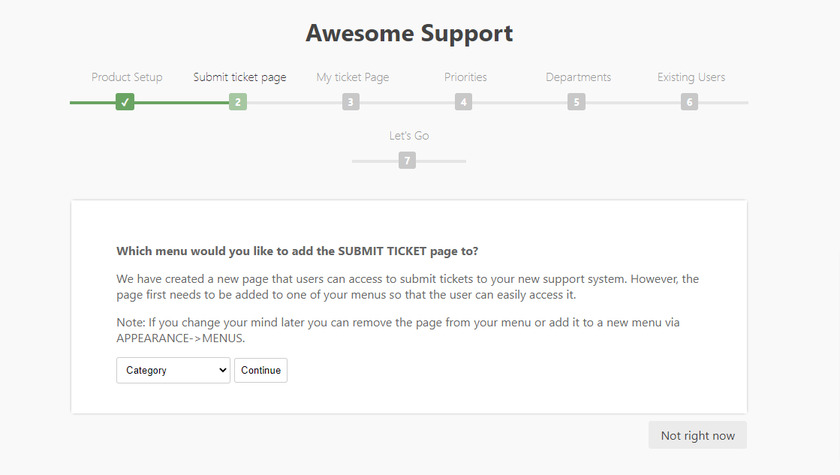
Next, you can choose a page from which your customers can submit tickets. This plugin also creates a new page to submit a ticket. But to set up the plugin, you have to select one of the existing pages from your WordPress website.
You can find a dropdown menu where you can find the pages of your website. Here we have selected a category. Then click on the Continue button.
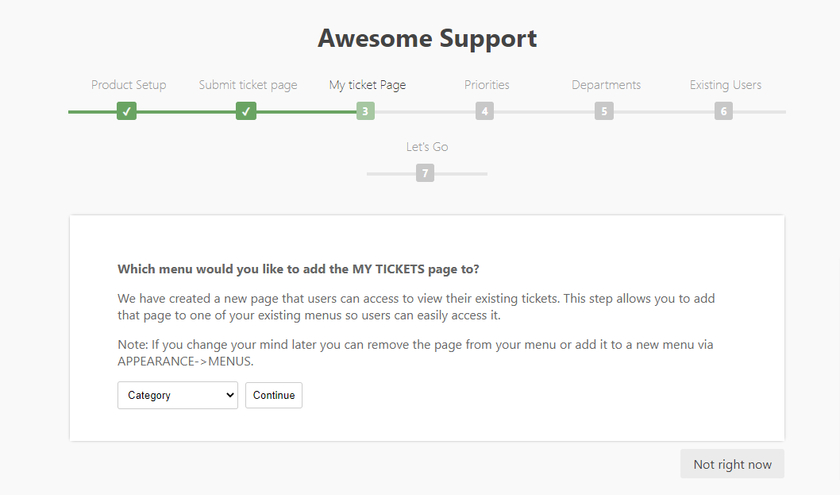
Thereafter, you can see the My ticket Page option in the setup wizard. This option is the same as the previous one where you can display open tickets for your customers. You can select the desired location from the dropdown menu.
Then again, click on the Continue button.
The next option is to specify priorities for your tickets. This option helps you to deal with those tickets at first that have higher priorities.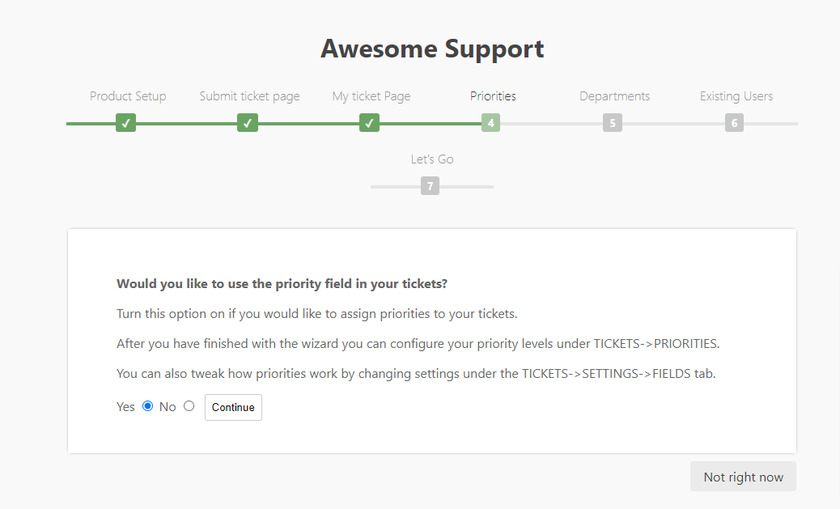
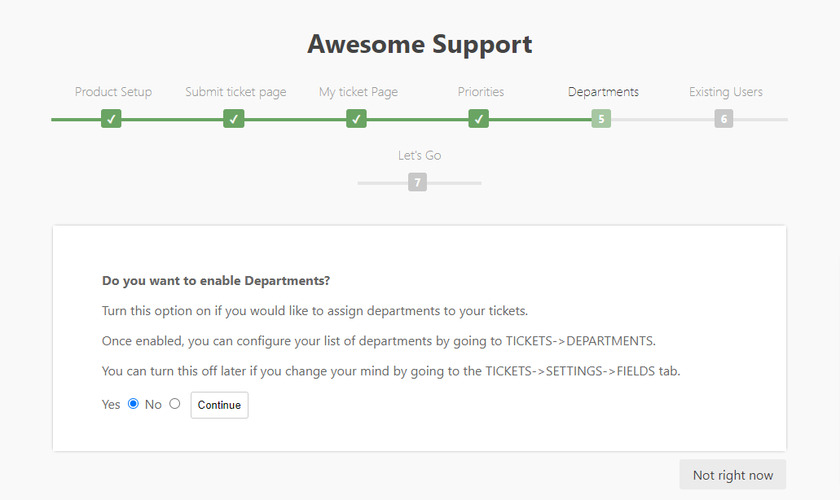
Now in the next step, you can enable or disable tickets if you have multiple support departments. Enabling or turning on this option will allow you to assign tickets based on the support department.
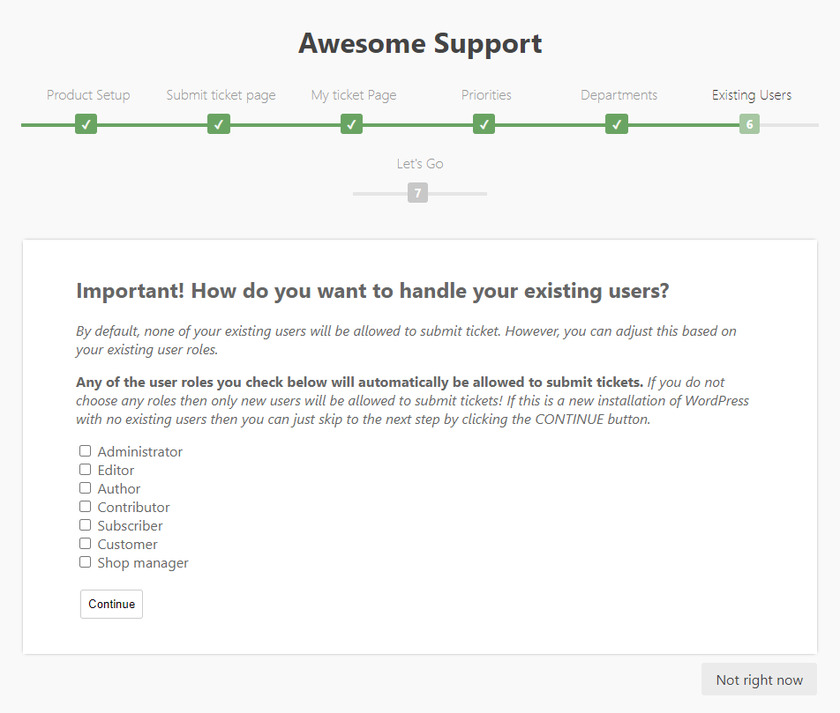
Finally, you’ll get the option to select the user roles who can submit the ticket because by default none of the existing users are allowed to do so. You can choose any of the user roles, if not then only new visitors to your website will be allowed to submit tickets. Click on the Continue button after selecting the user roles.
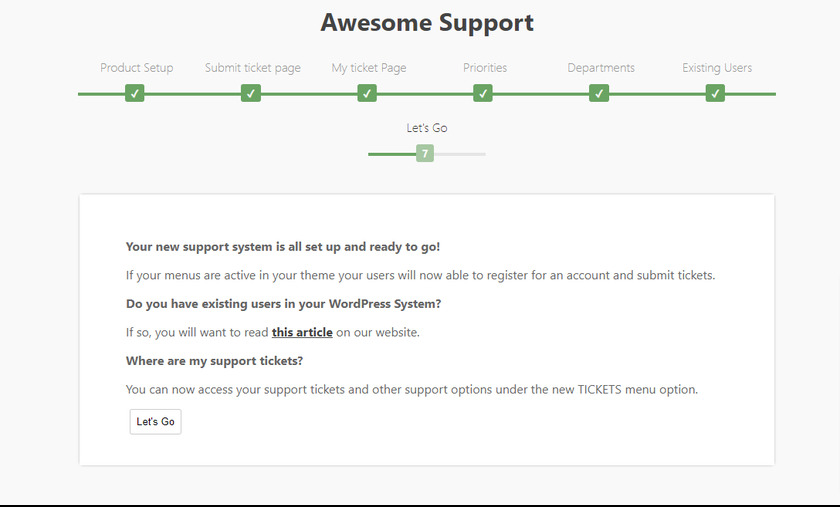
After setting up the plugin you can test to see how does the ticket works. For that, you can click the Let’s Go button and this will lead you to the main dashboard.
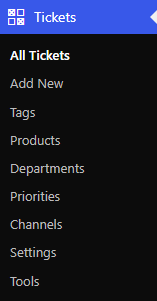
You can see a new menu named Tickets in your WordPress dashboard where you can access and manage your support tickets.
Step 3: Test the Helpdesk from the frontend
Once you have set up the plugin, you need to test it out to see how the helpdesk works. For that, you can log out from your WordPress website and register as a test user.
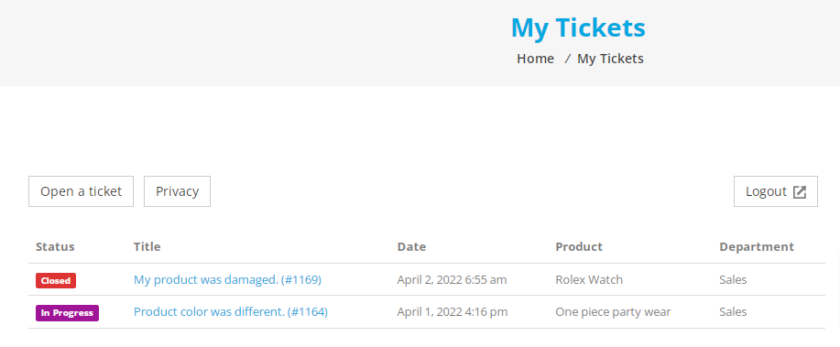
After logging into your website, you can see a new page My Tickets. Upon clicking on that, you’ll find a link that says “Submit Ticket”. This link leads to a page where customers can fill up the subject, and description in the given field, select the department and products, and even add attachments with various file types.
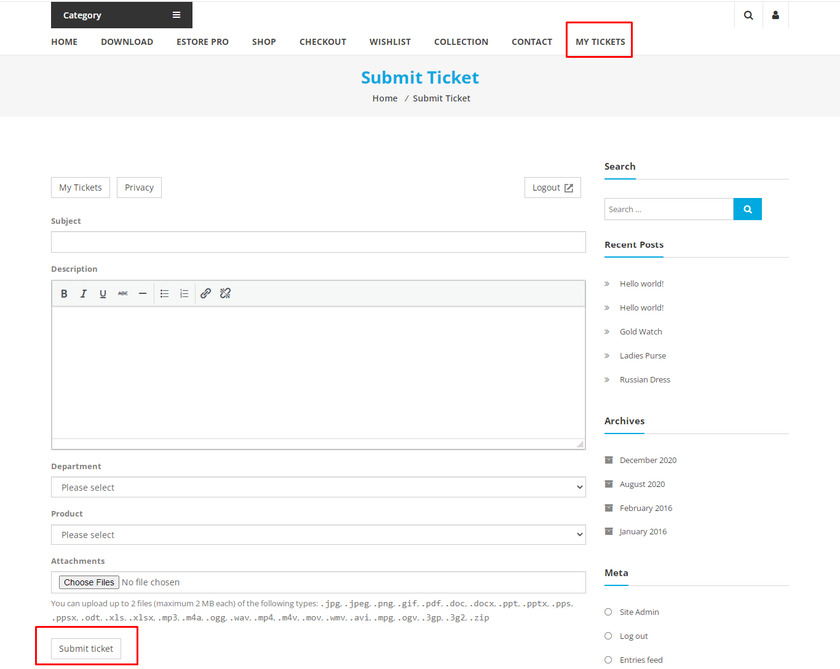
After you’re done, click on Submit Ticket. Similarly, your customers can check the status of tickets by navigating to the My Ticket page.
Step 4: Reply to the Tickets
Now, you need to reply to the tickets after you have set up the helpdesk on your WordPress website too. To solve the issues of your customers, you can reply to them from your WordPress admin area.
Simply go to the Tickets > All Tickets. You’ll see a list of tickets along with their status.
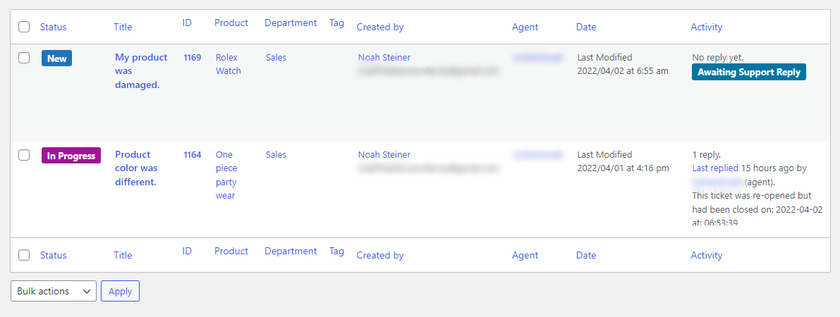
Click on any tickets that you want to reply to and click on the Reply button.

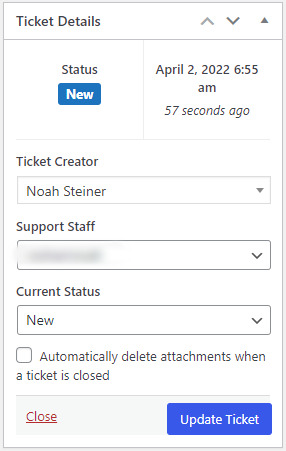
If the problem has been resolved, then you can click on the Close from the Ticket Details on the right-hand side of the Edit Ticket page.
You can also change the status of the ticket, and see information about the support agent in the ticket details section.
In the end, this is how the customers can preview the message sent by the support department.
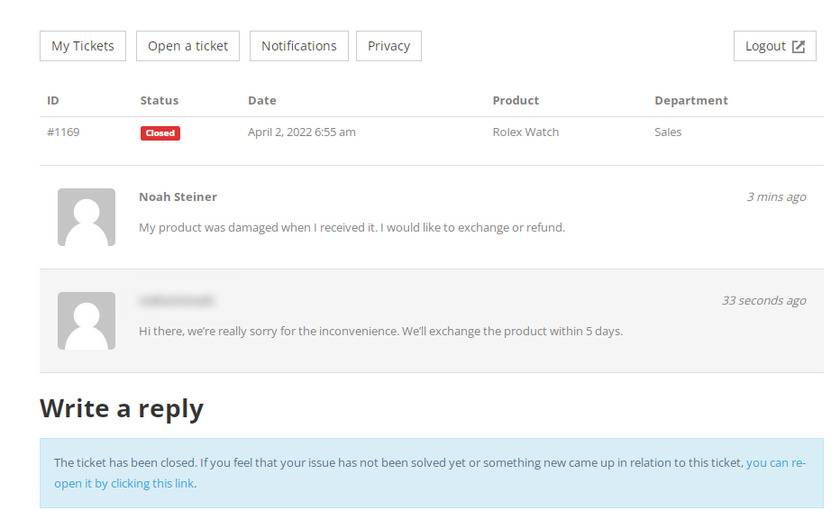
Not only that, users can view the status of their tickets through the My Tickets page.
That’s it! This is how you set up a helpdesk in WordPress.
Bonus: Add Telegram Chat to WordPress
We have already presented you with one of the efficient ways to set up a helpdesk in WordPress. However, if you want to communicate with your customers in a more easy, quicker, and more convenient way then you can do that by adding a Telegram chat button to your WordPress website.
That’s why as a bonus, we’ve provided this guide on how to add Telegram chat to WordPress.
You can easily do so by using a simple plugin, QuadLayers Telegram Chat. It is a freemium plugin with which you can link your Telegram account with WordPress with just a few clicks.
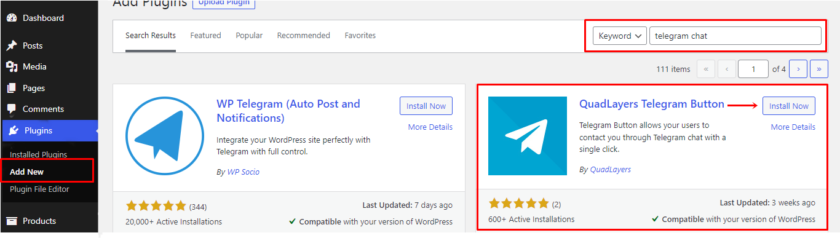
Like any other plugin, first of all, we’ll install and activate the plugin to use it. So, let’s go to Plugins > Add New from your WordPress dashboard. Search for “Telegram Button or Telegram Chat” in the search field. Once the result is displayed, click on the Install Now button and activate the plugin.
Now, as soon as the plugin is installed and activated, the Telegram chatbox will be added to your website.

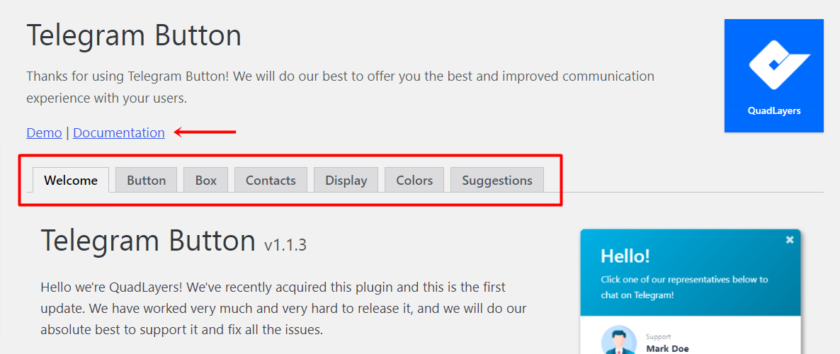
You can customize the button from the plugin settings. For that, go to your WordPress dashboard and click on Telegram Button.
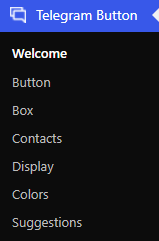
Here, you’ll be able to see a welcome page along with various tabs to customize the Telegram chat. They can be used to customize the Telegram button, chatbox, contacts, display, and colors. If you need any more information about the plugin, the documentation of the plugin is also provided on the same page.
Now all you need to do is link your Telegram account. If you have already installed the Telegram app on your phone then you can synchronize it with your desktop.
But if you don’t have a Telegram account and are not sure about how to create one then we would like you to check out this article.

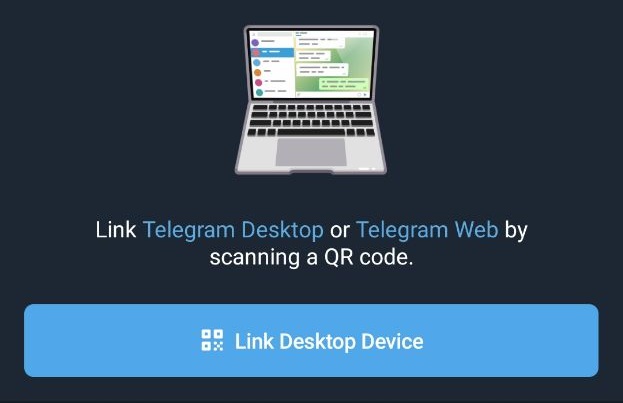
For that go to Settings > Devices of Telegram app from your phone. Then you can see a blue button to link your device to the desktop.
You can either scan the QR code from your phone or you can log in to your Telegram account from your number.
A code will be sent to your telegram account, you can use that code to log in from your desktop.
That’s it! By following these simple steps you can add Telegram chat to your WordPress site.
Conclusion
This is our tutorial to set up a helpdesk in WordPress. It is a most essential feature to have on your website if you want to solve the issues of your customers instantly and make your user happy.
To summarize, we have shown you the step-by-step process to set up a helpdesk in WordPress using a plugin. You can use the free version of the plugins if the features offered in the free version are enough for you. However, you can always opt for premium features for additional features.
Additionally, we have also discussed the steps required to add telegram chat to your WordPress website. This can also be to your advantage to manage your team as well as handle the queries of the users from the same place.
If you want to integrate some more similar services to WordPress, you can have a look at our guides to add WhatsApp chat and Facebook Messenger chat to WordPress or even just move WhatsApp chats to Telegram.
We hope this article helped you learn how to set up a helpdesk for your WordPress website now. Let us know about your experience in the comment section.
While you’re here, you might also want to check out these resources:
- How to Compress Images in WordPress (With and Without Plugins)
- Best Plugins to Redirect a WordPress Page
- How to Create a Custom WordPress Plugin
These posts will help take your WordPress website to the next level.
