
How to Add Product Image to WooCommerce Checkout
Do you want to add a product image to WooCommerce checkout in a bid to improve your customer’s shopping experience? We got you covered. In this article, we will show you how to add a product image to WooCommerce checkout.
But, before we dive into that, it is important to have a clear understanding of why we need to add product images to the WooCommerce checkout page. It’s also essential to know its benefits and how it impacts sales? So, let’s find that out first.
Why should you Add a Product Image to the Checkout?
Your Checkout page is on the most crucial pages of your WooCommerce store. It is where the user finalizes their purchase and confirms their order. Therefore, your checkout page must be optimized for a better user experience and be easy to follow.
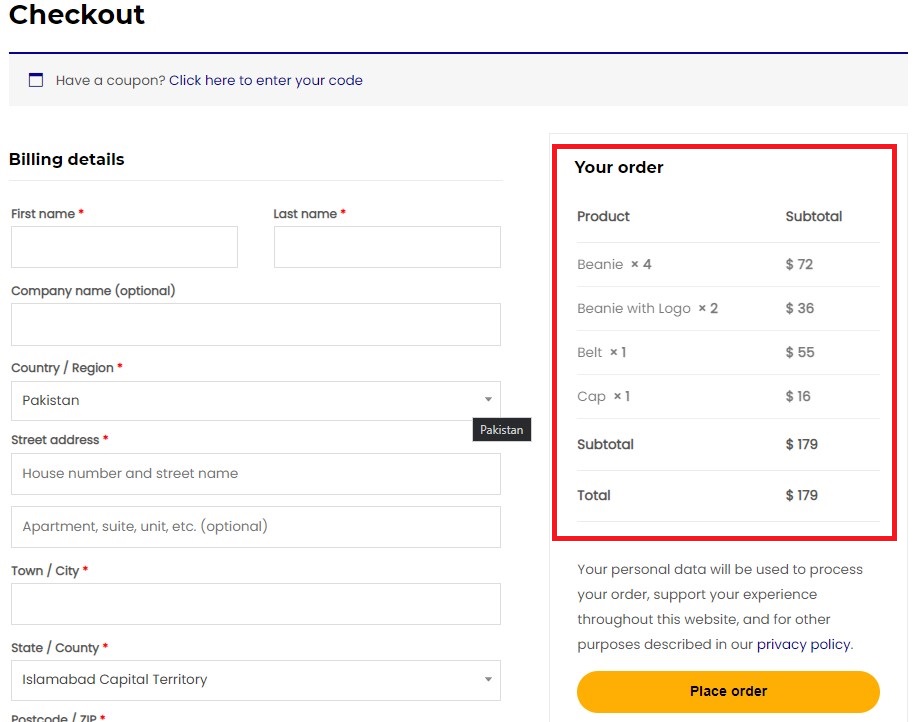
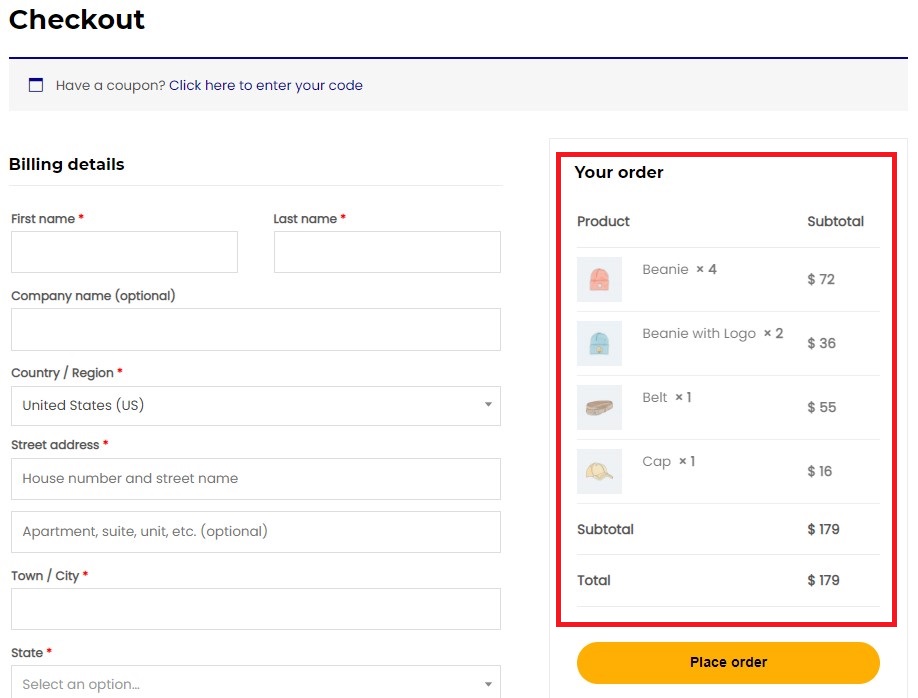
Looking at the default checkout page, you will quickly notice that it is not optimized for user experience. For instance, the order section in the checkout only shows the product titles without the images. This makes it hard for the customer to verify if they have gotten the right products.
By nature, we humans are better with visuals compared to plain text. It is much easier for us to recognize an image than reading plain text. By adding product images in addition to titles, you can make it much easier for your customers to recognize the products and assure that they got the right products at checkout.
Whereas, without the product image, they will either have to remember the exact titles of the products or go back to the shop and check again to verify if they have the right products at checkout. Clearly, this isn’t a sign of a good user experience. It’s making the customer take extra few steps.
Our goal is to reduce the number of steps and make the purchase process simpler and faster for the customer. Remember, a better user experience results in a satisfied customer and hence, better sales. So, let’s move on now and see how we can add a product image to WooCommerce checkout.
How to add product image to WooCommerce checkout
In order to add a product image to the WooCommerce checkout, we will use custom code snippets. Don’t worry, you don’t need to have any coding experience to do this part. It is pretty simple and straightforward. Just follow along, and you will see how simple it really is.
Adding Code Snippets
Before we go to the code snippets, we highly recommend you create a full backup of your site and use a child theme to edit the functions.php file. For reference, check out our guide on how to create a child theme or use any of these child theme plugins.
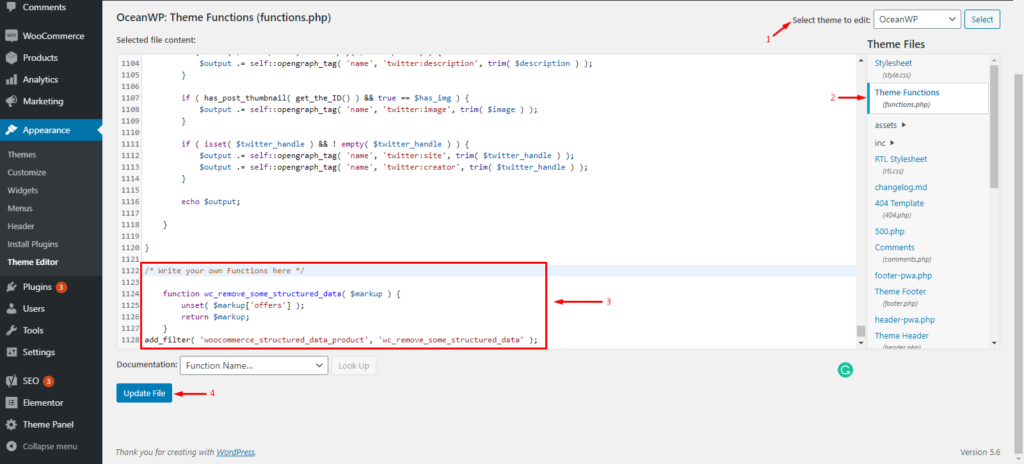
Once your child theme is set up, navigate to WP Admin Dashboard > Appearance > Theme Editor. Select your child theme and go to the functions.php file. Here, you can add your custom code snippets at the end of the file and update them afterward for the changes to take effect.
Alternatively, the Code Snippets plugin can also be used in case you are not comfortable with the idea of modifying the core WordPress files. You can install the plugin from the WordPress repository.
Once the plugin is installed and activated, go to the plugin settings from your WordPress dashboard and click on Add New Snippet. With this plugin, you can add as many snippets as you want.
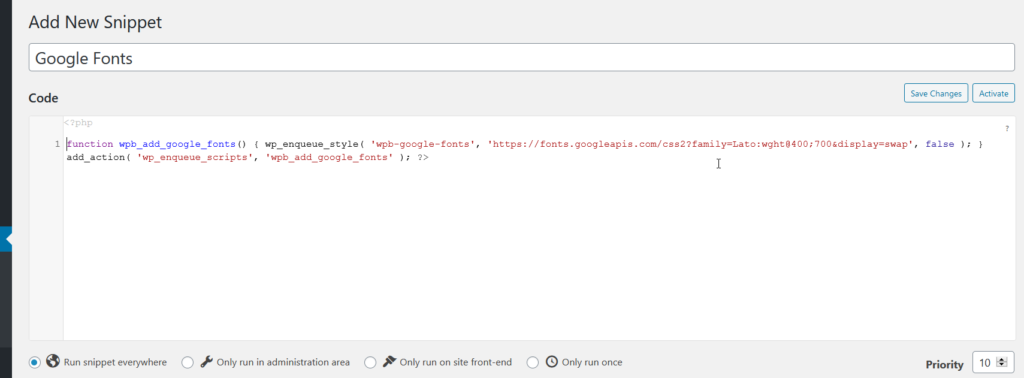
With the Code Snippets plugin, you don’t need a child theme since the plugin takes care of the code snippets on its own. However, we always recommend having one in case something goes wrong.
Now we know how to add code snippets to your site, let’s see the code snippets to add a product image to WooCommerce checkout.
Snippets to Add Product Image to WooCommerce Checkout
We have two custom snippets here for you. The first one displays the product image in line with the product title. Whereas the second one shows the image and title on separate lines. Let’s see the two of them in action.
Add Product Image to Checkout in Inline Style
Use the following code snippet to add the product image to the checkout page in inline style.
add_filter( 'woocommerce_cart_item_name', 'quadlayers_product_image_checkout', 9999, 3 );
function 'quadlayers_product_image_checkout' ( $name, $cart_item, $cart_item_key ) {
    if ( ! is_checkout() )
        {return $name;}
    $product = $cart_item['data'];
    $thumbnail = $product->get_image( array( '50', '50' ), array( 'class' => 'alignleft' ) );
    /*Above you can change the thumbnail size by changing array values e.g. array(‘100’, ‘100’) and also change alignment to alignright*/
    return $thumbnail . $name;
}
It gets updated in the frontend as soon as you or your customer previews the checkout page.
Add Product Image and Titles on Separate Lines
Similarly, you can use the following code snippet to display the product image and title on separate lines. This can be great if product titles are long and there isn’t enough space to fit both image and title on one line.
add_filter( 'woocommerce_cart_item_name', 'quadlayers_product_image_checkout', 9999, 3 );
function quadlayers_product_image_checkout( $name, $cart_item, $cart_item_key ) {
    if ( ! is_checkout() )
        {return $name;}
    $_product = apply_filters( 'woocommerce_cart_item_product', $cart_item['data'], $cart_item, $cart_item_key );
    $thumbnail = $_product->get_image();
    $image = '<div class="quadlayers_product_image_checkout" style="width: 50px; height: 50px; display: inline-block; vertical-align: middle;">'
                . $thumbnail .
            '</div>';
    /* Above you can change width, height, and alignment of the image to however you want*/
    return $image . $name;
}
The product image and the titles will be displayed in separate lines after you refresh the checkout page.
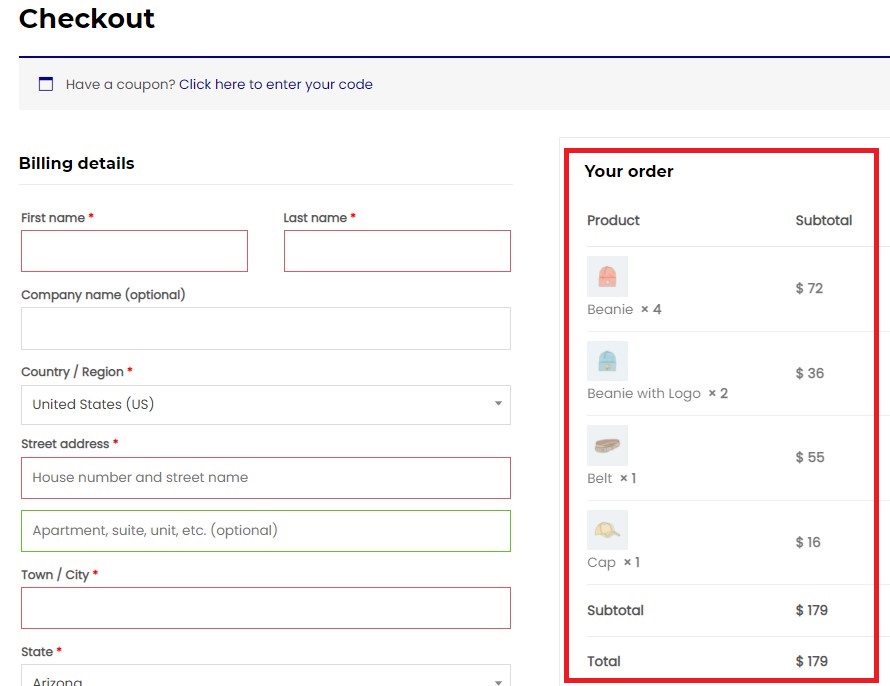
That’s it! Congratulations! You have now successfully added product images to WooCommerce checkout. However, there is something more. Once the customer clicks on the Place Order button, they are taken to the Order-Pay or the Order Details page, where they need to make the payments.
Let’s see how the Order-Pay page looks like, by default, and how we can improve that too.
Snippet to Add Product Image to WooCommerce Oder-Pay Page
Coming to the Order-Pay page, this is where your customers make their payments. The Order-Pay page displays all the order details, including the product’s title, quantity, price, and total order price. Here is how the page looks like by default.
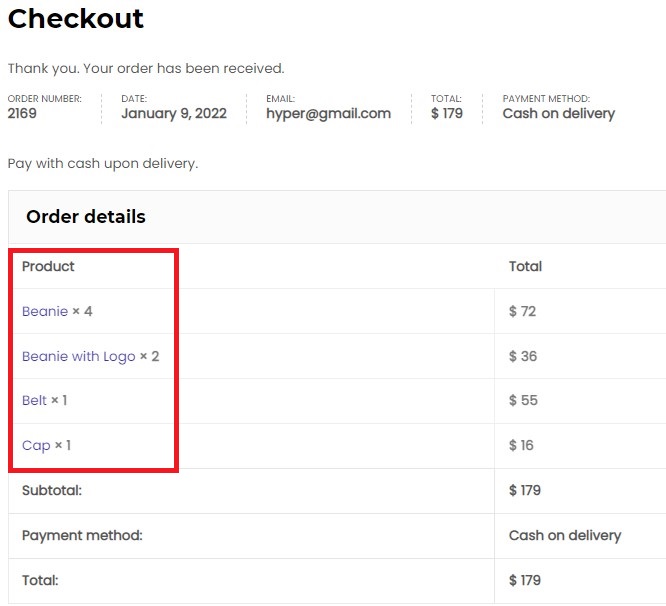
As you can see, just like the default Checkout page, product images are not displayed here as well. So, let’s fix that. Our aim is to add product images to the Order-Pay page.
To add product images to the Order-Pay page, you can use the following code snippet. Just add it to your site using your preferred method, as explained earlier.
add_filter( 'woocommerce_order_item_name', 'quadlayers_product_image_orderpay', 9999, 3 );
function quadlayers_product_image_orderpay( $name, $item, $extra ) {
    if ( ! is_checkout() )
        {return $name;}
    $product_id = $item->get_product_id();
    $_product = wc_get_product( $product_id );
    $thumbnail = $_product->get_image();
    $image = '<div class="quadlayers_product_image_orderpay" style="width: 50px; height: 50px; display: inline-block; vertical-align: middle;">'
                . $thumbnail .
            '</div>';
    /* Above you can change image width, height, and alignment of the image to however you want*/
    return $image . $name;
}
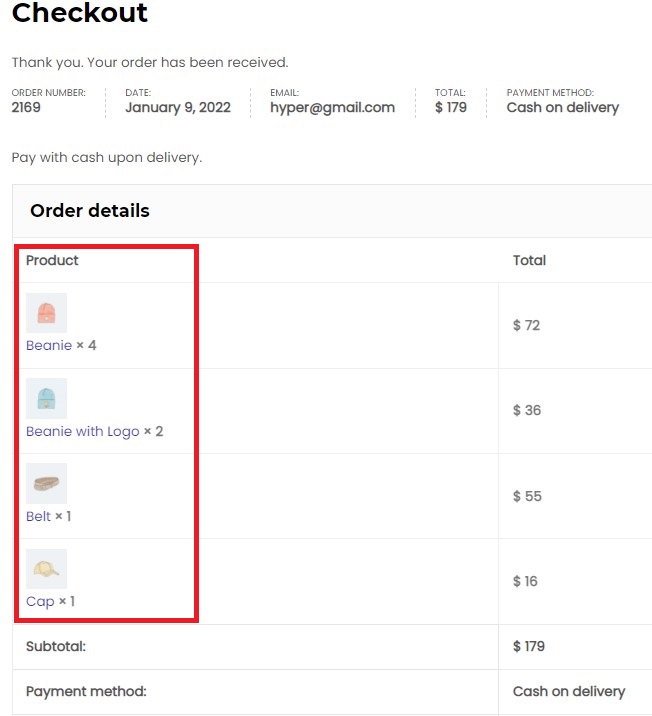
Bravo! You can now successfully add a product image to the WooCommerce Checkout and Order-Pay pages. Your customers will surely be delighted with the improved user experience.
So far, we have seen how to add a product image to WooCommerce Checkout and Order-Pay pages. Let’s see a few other ways to customize the checkout page to make it more user-friendly. Let’s dive into that.
Bonus: Customize Checkout Page using Checkout Manager Plugin
The easiest way to customize your WooCommerce checkout page is via third-party plugins. For demonstration purposes, we will use the Checkout Manager for the WooCommerce plugin developed by QuadLayers. It is one of the best plugins to customize your Checkout page with over 90,000 active installations.
Checkout Manager for WooCommerce is a feature-rich plugin that allows you to manage all your checkout fields so you can customize them as per your requirement. Follow our product page to check out all the valuable functionalities this tool offers.
Let’s see now how the plugin allows us to customize the WooCommerce checkout page.
Installing the Checkout Manager for WooCommerce Plugin
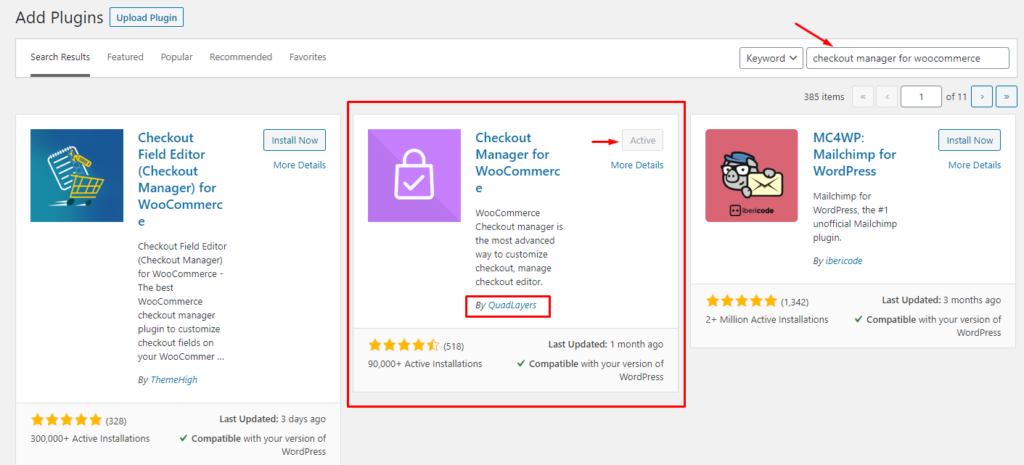
First off, you need to install and activate the plugin. Just go to your WordPress Admin Dashboard and navigate to Plugins > Add new. Search for the Checkout Manager for the WooCommerce plugin by QuadLayers and click the Install Now button. Once the plugin is installed, hit Activate. This will activate the plugin on your site.
So, the plugin is now installed and ready to use. let’s move on to customizing our checkout page using the Checkout Manager plugin. If you want the premium version, you can add it to your website too. But you will have to install the plugin manually into your WooCommerce website.
Add, Edit, and Delete Checkout Fields
Once you have the plugin active on your site, just go to the WordPress Admin Dashboard and navigate to WooCommerce > Checkout. There you will find all the settings for the Checkout Manager.
Under the Checkout tab, you will have different menus for different sections of the Checkout page. You can manage fields for shipping, billing, order, and email. Moreover, you can add your own custom fields as well. Within each menu, you will find the relevant fields which you can manage as per your requirements.

Each field has multiple parameters which control the way a particular field behaves. By modifying these parameters, you can alter their behavior and thus gain greater control over your Checkout page. Let’s have a look at the different field parameters and see what they do.
- Reposition: Moving a field, up or down, is made possible with the up and down arrows. Just click on one, and the field will move one step up or down, respectively. Alternatively, you can click and drag the three horizontal lines to reposition a field to your desired position.
- Required: Turning on the required parameter makes a field mandatory. Your customers will not be able to skip a field marked required.
- Position: The position parameter basically allows you to align a field as per your wish. You can choose to align a field left or right or make it full width.
- Clear: Turning on the clear parameter will restrict any other field in line with this particular field.
- Disable: As the name suggests, disable parameter, when switched on, disables a field so that it does not appear in the checkout.
- Edit and Delete: You can edit or delete a field using the respective button. It is worth noting that the delete button appears only for custom fields. You cannot delete the default fields but only disable them
So, that was all about managing your fields by tweaking field parameters. Next, we will see how to add a custom upload field to the WooCommerce Checkout.
Add Custom Upload Field in WooCommerce Checkout
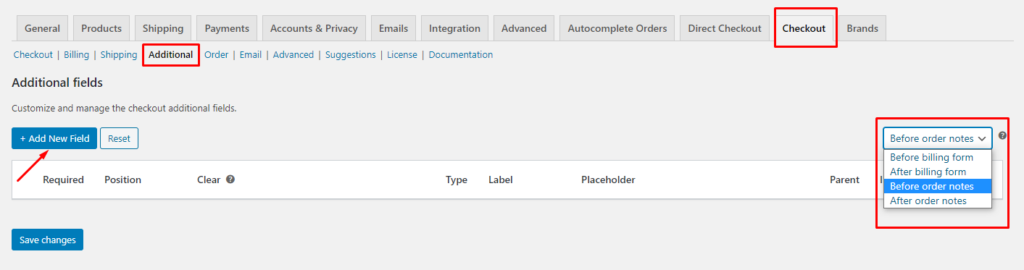
Go to your WordPress Admin Dashboard and navigate to WooCommerce > Checkout. Under the Checkout tab, open the Additional Fields menu.
NOTE: Adding custom fields is not just limited to additional fields. You can add custom fields to other sections of the Checkout page like Billing, Shipping, etc. Just navigate to the respective menu within the Checkout tab to add new fields to your desired area.
Once inside the Additional Fields menu, click on the Add New Field button to create a new field. Besides, you can adjust the position of the additional fields section from the drop-down menu on the right corner. You can place them either before or after the billing forms or the order notes.
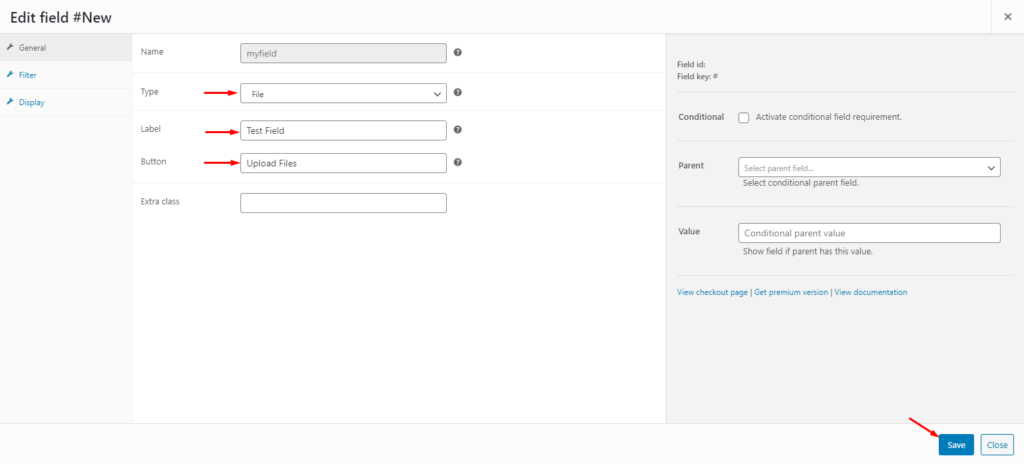
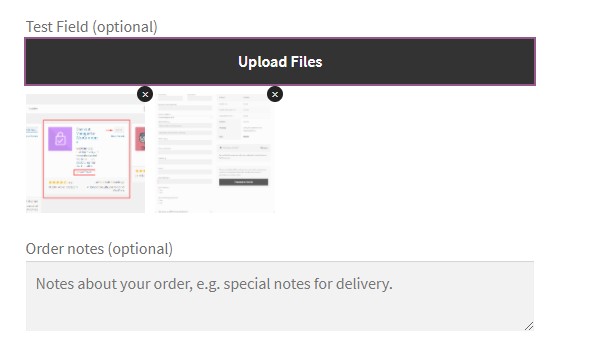
It will take you to a new page with a form to create a new field. Since we are interested in adding an upload files button, set the Type as File, and give it a label and button text. Hit save to save your new field.
That’s all! It’s as simple as that. You can now navigate to your Checkout page to verify the changes. There you will see your File Upload button in action.
Just like that, there are multiple ways to customize your Checkout Page. For a complete tutorial, check out our full guide on how to customize the WooCommerce Checkout page.
Conclusion
All in all, your checkout is one of the most crucial steps in your customer’s purchase process. By this time, the customer has already decided to finalize their purchase. Therefore, you don’t want anything going bad here to screw up an otherwise good sale. That’s why you need to optimize your checkout page for a better user experience. So that your customer is more likely to finalize their purchase and place their order.
The default checkout page is quite basic and not optimized for user experience. For instance, it only displays product titles and not their images. From the customer’s point of view, title only is not enough to verify if they got the right items at checkout. Having the product image displayed on the WooCommerce checkout can come in very handy here as it will confirm the end-user that they have got the right product at checkout.
In this article, we have seen how to add a product image to WooCommerce checkout using custom code snippets. We have seen two options to display product images, in line and on separate lines on the Checkout page. Moreover, we have also seen how we can add product images to the WooCommerce Order-Pay page using custom code. Additionally, we saw different ways to customize the Checkout page using the Checkout Manager for WooCommerce plugin.
If you found this guide helpful, here are some more articles that might interest you:
- How to Compress Images in WordPress (With and Without Plugins)
- Best Plugins to Add ALT Tags to Images (Free and Paid)
- How to Fix WooCommerce Image Size Issues
Have you ever tried adding product images to WooCommerce checkout? What solution worked for you? How much difference do you think it makes? Let us know in the comments below.

Thank you very much for your help
I was able to display the product image in the checkout section
Can you help me how can I add a product attribute to this section?
Help us if you can
Hello Hamed
Unfortunately is not possible to add product attributes to the checkout section with WooCommerce Checkout Manager
You can search in the WooCommerce action & filters hook documentation to see if you can find a hook that suit your needs
https://woocommerce.com/document/introduction-to-hooks-actions-and-filters/
Have anyone have problems in Checkout using this snippet with LiteSpeed cache?
Hello, the first snippet do not work for me on several sites (themes: Hello, OceanWP, Blocksy…) with or without Elementor.